2003 BMW 760LI SEDAN spare wheel
[x] Cancel search: spare wheelPage 103 of 229
At a glance
Controls
Driving tips
Communications
Navigation
Entertainment
Mobility
Reference
101
The symbol will appear in yellow in the
Check Control and a message will appear.
You will also see the same message
>in the event of a system fault
>if a wheel is mounted without the
appropriate TPM electronics
>if, in addition to the spare tire, addi-
tional wheels with TPM electronics are
on board.
Please refer to the additional information
supplied in the Control Display, and have
the system inspected at your BMW center.
Self-leveling suspension*
In the event of malfunction
A Check Control message
appearing together with this symbol
indicates a malfunction in the self-
leveling suspension. Please take note of
the additional information in the Control
Display.
Stop and inspect the vehicle. If the rear of
the vehicle is visibly lower than the front,
possibly accompanied by a tilt noticeable
when you compare the left rear with the
right rear, you should respond by immedi-
ately proceeding to the nearest BMW
center. Drive with appropriate caution in
the meantime. The vehicle has reduced
ground clearance and driving comfort may
be noticeably reduced. Even if the attitude
of the vehicle is normal, you should consult
the nearest BMW center if the warning
lamp indicates a system fault.
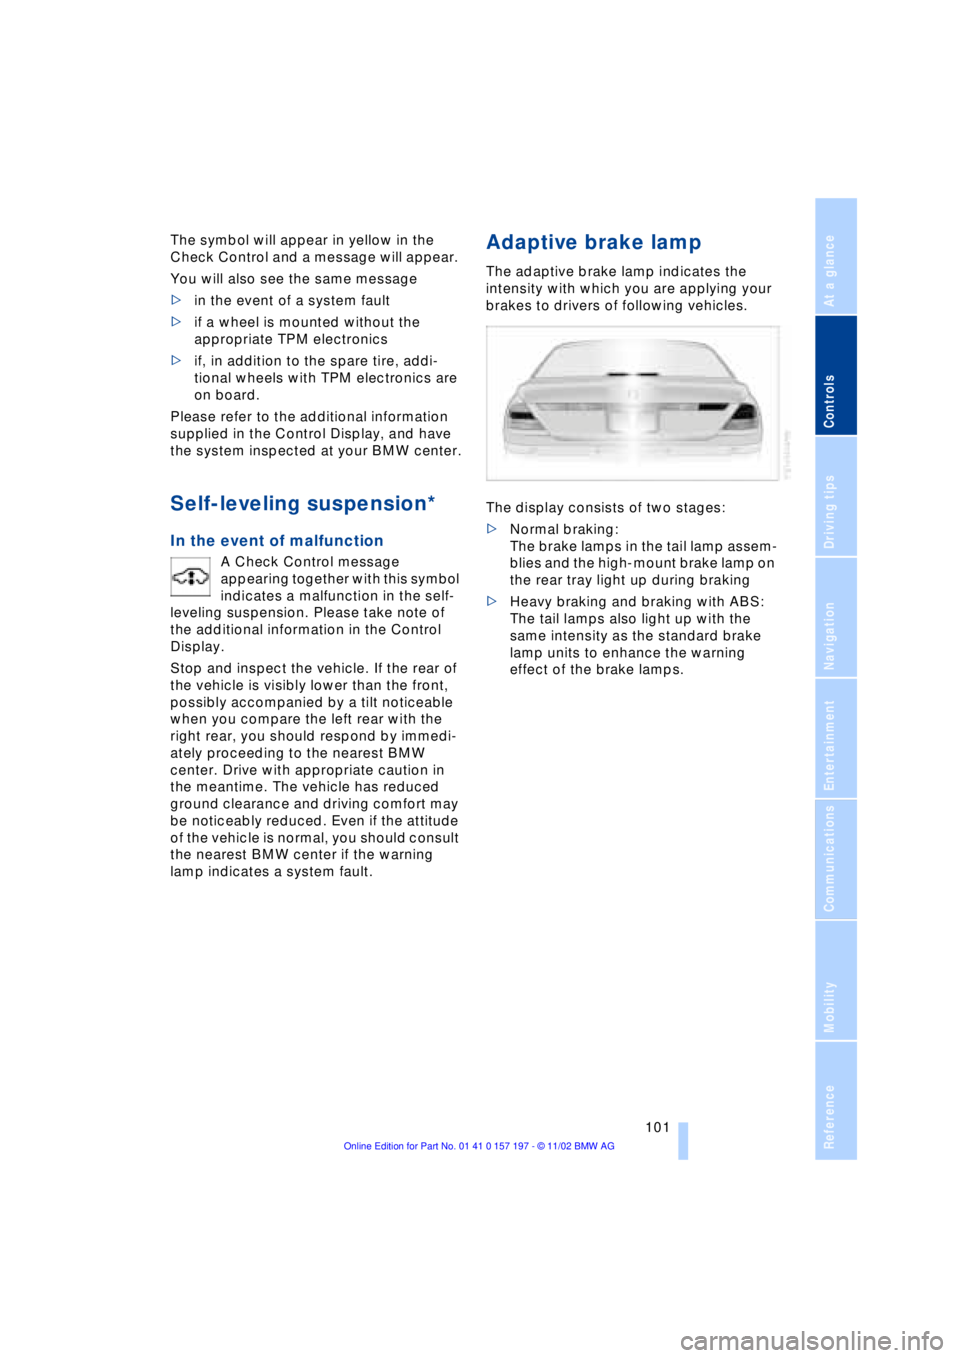
Adaptive brake lamp
The adaptive brake lamp indicates the
intensity with which you are applying your
brakes to drivers of following vehicles.
The display consists of two stages:
>Normal braking:
The brake lamps in the tail lamp assem-
blies and the high-mount brake lamp on
the rear tray light up during braking
>Heavy braking and braking with ABS:
The tail lamps also light up with the
same intensity as the standard brake
lamp units to enhance the warning
effect of the brake lamps.
Page 186 of 229
Wheels and tires
184
Wheels and tires
Tire inflation pressure
Information for your safety
The factory-mounted tires have been spe-
cially selected to provide optimal perfor-
mance when installed on your vehicle; if
properly cared for they will furnish a combi-
nation of tremendous safety and excellent
ride comfort.
It is not merely the tire's service life, but
also driving comfort and Ð above all else Ð
driving safety that depend on the condition
of the tires and the maintenance of the spe-
cified tire pressure.
Incorrect inflation pressure is a frequent
cause of tire damage. Tire inflation pres-
sures also have a substantial effect on your
BMW's handling response.
Check tire inflation pressures regu-
larly Ð at least every two weeks and
before beginning a longer trip. If you fail to
observe this precaution you may be driving
on tires with incorrect tire pressures, a con-
dition that can not only compromise your
vehicle's stability, but also lead to tire
damage and the risk of an accident.
Remember to check the inflation pressure
in your spare tire. Inflate the spare to the
highest pressure specified for any tire on
the vehicle.<
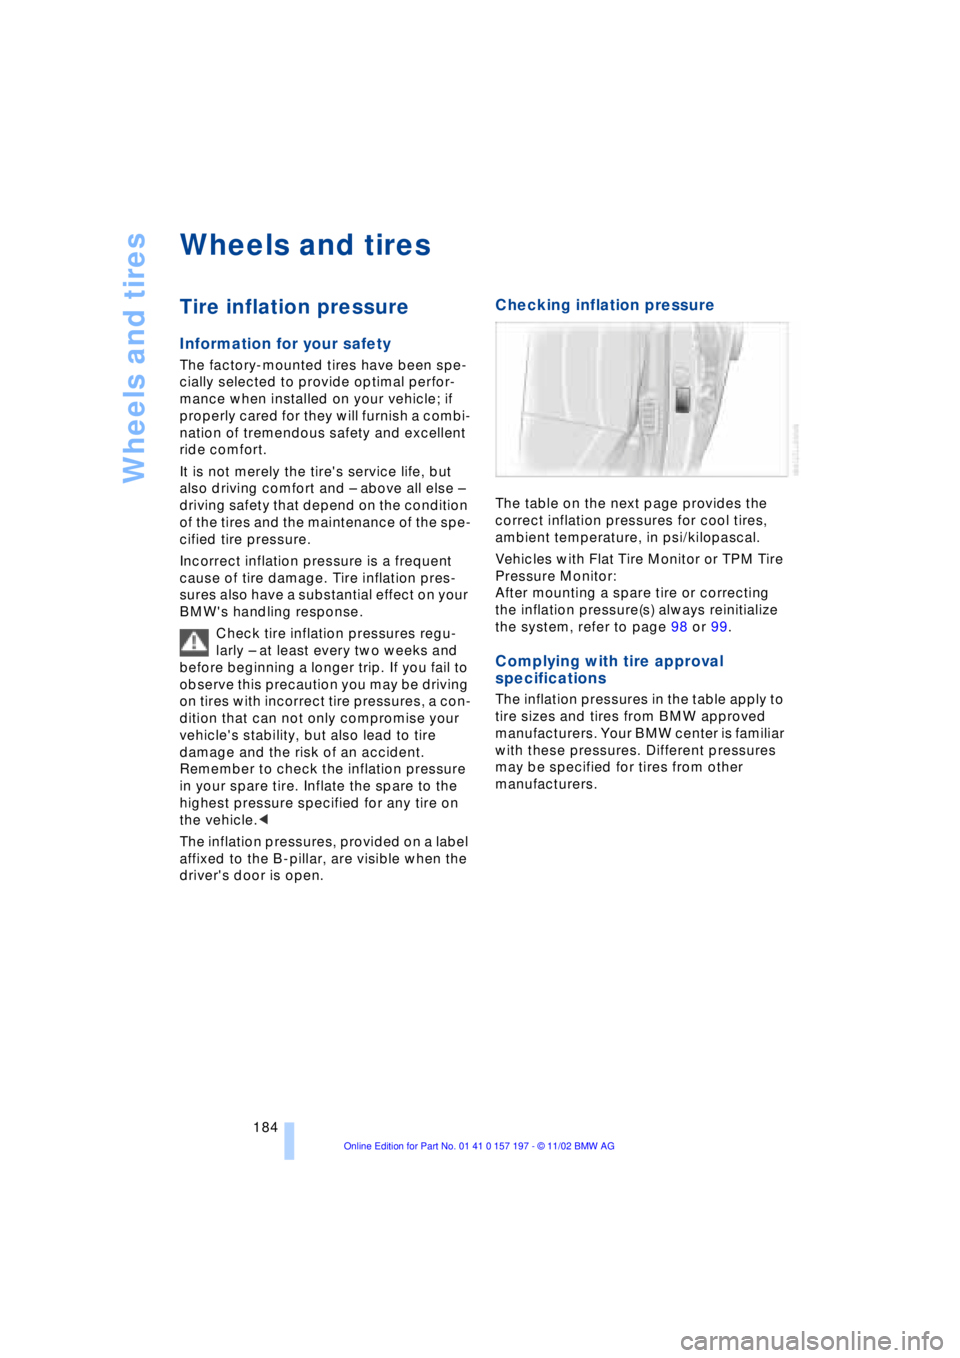
The inflation pressures, provided on a label
affixed to the B-pillar, are visible when the
driver's door is open.
Checking inflation pressure
The table on the next page provides the
correct inflation pressures for cool tires,
ambient temperature, in psi/kilopascal.
Vehicles with Flat Tire Monitor or TPM Tire
Pressure Monitor:
After mounting a spare tire or correcting
the inflation pressure(s) always reinitialize
the system, refer to page 98 or 99.
Complying with tire approval
specifications
The inflation pressures in the table apply to
tire sizes and tires from BMW approved
manufacturers. Your BMW center is familiar
with these pressures. Different pressures
may be specified for tires from other
manufacturers.
Page 189 of 229
At a glance
Controls
Driving tips
Communications
Navigation
Entertainment
Mobility
Reference
187
wear one and one-half Ð 1g Ð times as
well on the government course as a tire
graded 100. The relative performance of
tires depends upon the actual conditions of
their use, however, and may depart signifi-
cantly from the norm due to variations in
driving habits, service practices and differ-
ences in road characteristics and climate.
Traction
The traction grades, from highest to lowest,
are AA, A, B, and C.
Those grades represent the tire's ability to
stop on wet pavement as measured under
controlled conditions on specified govern-
ment test surfaces of asphalt and concrete.
A tire marked C may have poor traction
performance.
The traction grade assigned to this
tire is based on straight-ahead
braking traction tests, and does not include
acceleration, cornering, hydroplaning, or
peak traction characteristics.<
Temperature
The temperature grades are A Ð the
highest Ð, B, and C, representing the tire's
resistance to the generation of heat and its
ability to dissipate heat when tested under
controlled conditions on a specified indoor
laboratory test wheel.
Sustained high temperature can cause the
material of the tire to degenerate and
reduce tire life, and excessive temperature
can lead to sudden tire failure. The grade C
corresponds to a level of performance
which all passenger car tires must meet
under the Federal Motor Vehicle Safety
Standard No. 109. Grades B and A repre-
sent higher levels of performance on the
laboratory test wheel than the minimum
required by law.
The temperature grade for this tire is
established for a tire that is properly
inflated and not overloaded. Excessive
speed, underinflation, or excessive
loading, either separately or in combina-
tion, can cause heat buildup and possible
tire failure.<
Uniform Tire Quality Grading
Quality grades can be found where appli-
cable on the tire sidewall between tread
shoulder and maximum section width. For
example:
Treadwear 200 Traction AA
Temperature A
Do not use retreaded tires, since dri-
ving safety may be impaired. Possible
variations in the design and the age Ð which
could be substantial Ð of the carcasses can
lead to unusually rapid wear.<
Tire age
The tire's date of manufacture is indicated
on the sidewall:
DOT ... 3402 indicates that a tire was
manufactured in week 34 of the year 2002.
Regardless of mileage or wear, BMW
recommends that you replace all tires Ð
including the spare Ð after a maximum of
6 years, even though the tires may have a
theoretical service life of up to 10 years.
Wheel and tire
combinations
The right choice
Use only wheel and tire combinations
that BMW has approved for your par-
ticular vehicle. Variations in factors such as
manufacturing tolerances mean that even
wheels and tires with identical official size
ratings could actually have different dimen-
sions than the approved units Ð these diffe-
rences could lead to body contact, and
with it the risk of severe accidents. If non-
approved wheels and tires are used, BMW
cannot evaluate their suitability, and there-
fore cannot be held liable for driving
safety.<
BMW tests certain tire brands for each tire
size, classifies them as road-safe and
approves them. Consult your BMW center
for more information. Observe any country-
specific regulations, e.g. on making a cor-
responding entry in the vehicle documents.
Page 200 of 229
Replacing components
198 behind a guardrail.
If a warning triangle or portable hazard
warning lamp is required, set it up on the
roadside at an appropriate distance from
the rear of the vehicle. Comply with all
safety guidelines and regulations.
Change the wheel only on a level, firm sur-
face which is not slippery. The vehicle or
the jack could slip to the side if you attempt
to raise the vehicle on a soft or slippery sur-
face such as snow, ice, tiles, etc.
Position the jack on a firm support surface.
Do not use a wooden block or similar
object as a support base for the jack, as
this would prevent it from extending to its
full support height and reduce its load-
carrying capacity.
To avoid serious or fatal injury: never lie
under the vehicle, and never start the
engine while it is supported by the jack.<
What you will need
To avoid rattling noises, note the positions
of the tools before removing them, then
return them to their initial positions after
completing work.
>Lug wrench
Located beside the spare tire >Wheel chock
The chock is located next to the spare
tire, or behind the trim panel on the left
side of the luggage compartment on
vehicles equipped with a trailer cou-
pling.
Remove the floor mat and the cover
above the spare tire.
Unscrew the wingnut and remove the
wheel chock
>Vehicle jack
The jack is located behind the side trim
panel on the right side of the luggage
compartment.
Grasp the handle in the upper panel
and fold it down.
Undo the wingnut and remove the jack.
After use, screw the jack all the way
back down and snap the handle back
into place.
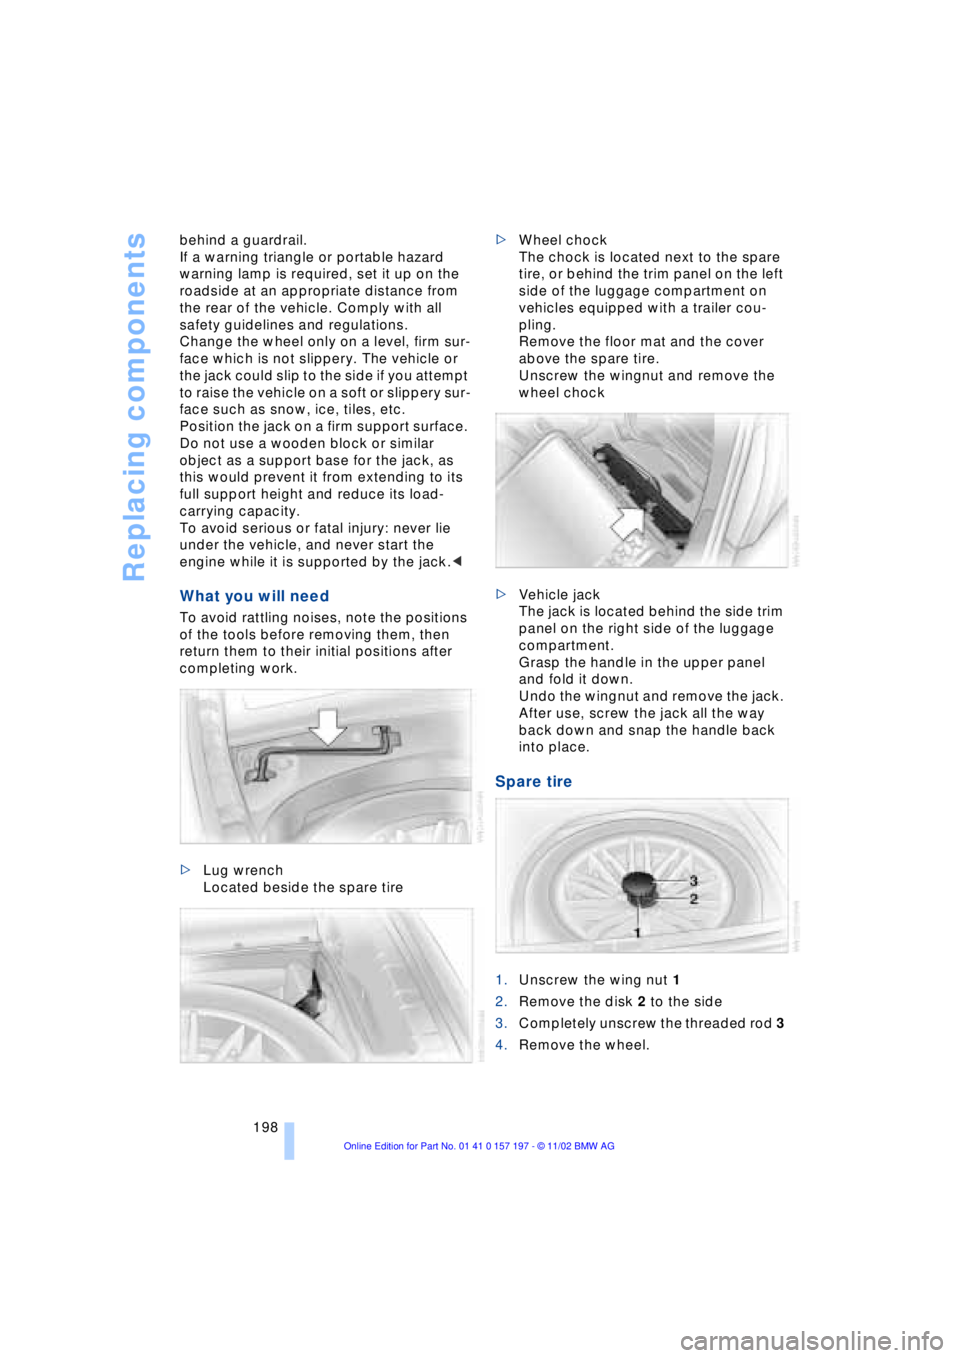
Spare tire
1.Unscrew the wing nut 1
2.Remove the disk 2 to the side
3.Completely unscrew the threaded rod 3
4.Remove the wheel.
Page 201 of 229
Overview
Controls
Driving tips
Communications
Navigation
Entertainment
Mobility
Reference
199
Procedure
1.Read carefully and comply with the
safety precautions on page 198
2.Secure the vehicle to prevent it from
rolling:
Place the wheel chock against the rear
surface of the front tire on the side
opposite the side being raised. If the
vehicle is parked on a downward slope,
place the wheel chock securely in front
of the tire. If the wheel must be changed
on a surface with a more severe slope,
take additional precautions to secure
the vehicle from rolling
3.Loosen the lug bolts 1/2 a turn
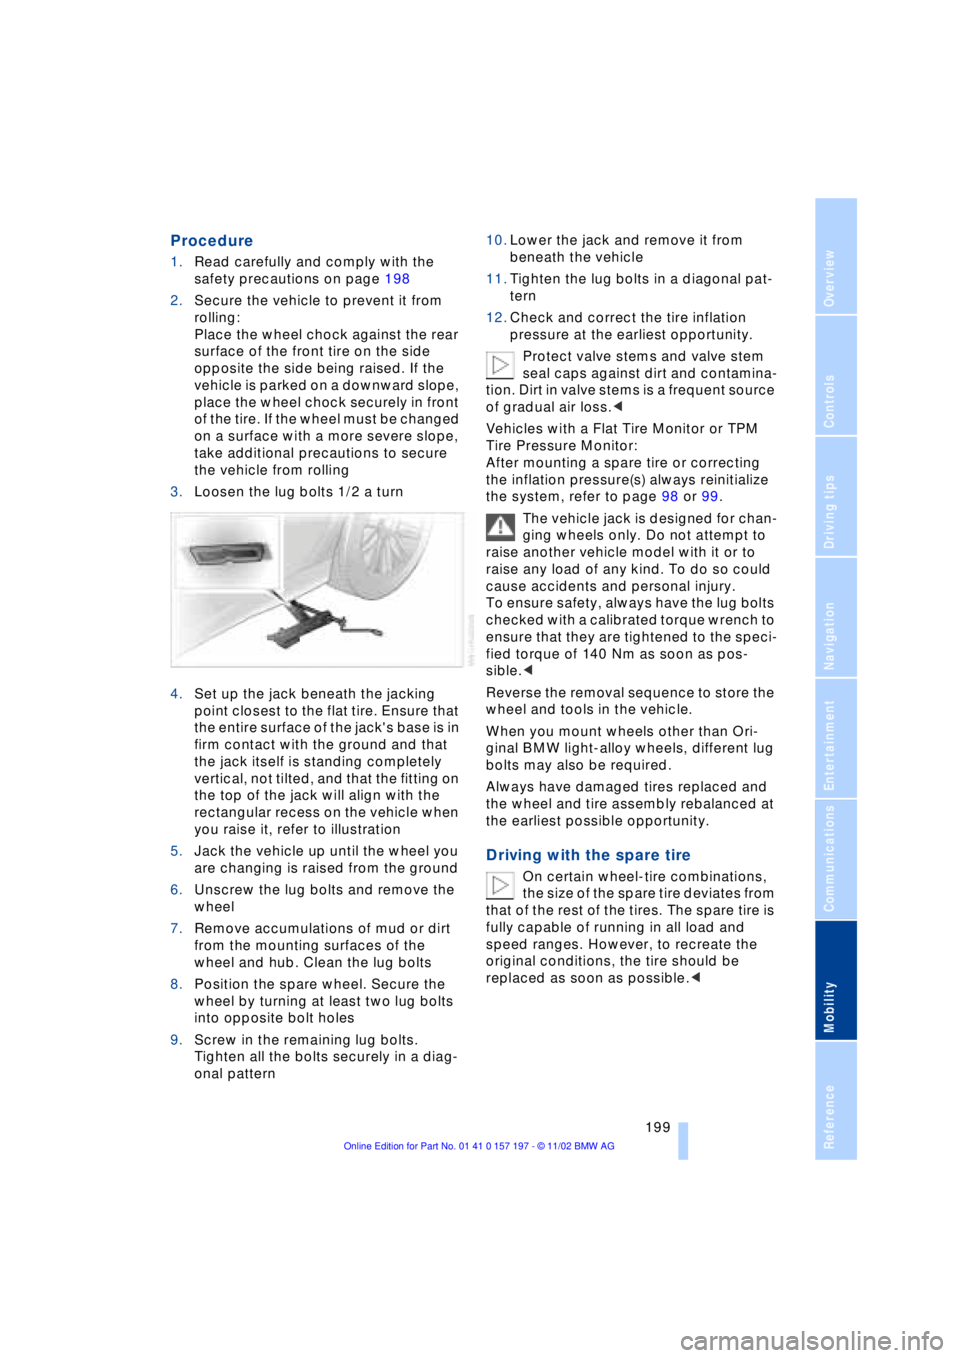
4.Set up the jack beneath the jacking
point closest to the flat tire. Ensure that
the entire surface of the jack's base is in
firm contact with the ground and that
the jack itself is standing completely
vertical, not tilted, and that the fitting on
the top of the jack will align with the
rectangular recess on the vehicle when
you raise it, refer to illustration
5.Jack the vehicle up until the wheel you
are changing is raised from the ground
6.Unscrew the lug bolts and remove the
wheel
7.Remove accumulations of mud or dirt
from the mounting surfaces of the
wheel and hub. Clean the lug bolts
8.Position the spare wheel. Secure the
wheel by turning at least two lug bolts
into opposite bolt holes
9.Screw in the remaining lug bolts.
Tighten all the bolts securely in a diag-
onal pattern 10.Lower the jack and remove it from
beneath the vehicle
11.Tighten the lug bolts in a diagonal pat-
tern
12.Check and correct the tire inflation
pressure at the earliest opportunity.
Protect valve stems and valve stem
seal caps against dirt and contamina-
tion. Dirt in valve stems is a frequent source
of gradual air loss.<
Vehicles with a Flat Tire Monitor or TPM
Tire Pressure Monitor:
After mounting a spare tire or correcting
the inflation pressure(s) always reinitialize
the system, refer to page 98 or 99.
The vehicle jack is designed for chan-
ging wheels only. Do not attempt to
raise another vehicle model with it or to
raise any load of any kind. To do so could
cause accidents and personal injury.
To ensure safety, always have the lug bolts
checked with a calibrated torque wrench to
ensure that they are tightened to the speci-
fied torque of 140 Nm as soon as pos-
sible.<
Reverse the removal sequence to store the
wheel and tools in the vehicle.
When you mount wheels other than Ori-
ginal BMW light-alloy wheels, different lug
bolts may also be required.
Always have damaged tires replaced and
the wheel and tire assembly rebalanced at
the earliest possible opportunity.
Driving with the spare tire
On certain wheel-tire combinations,
the size of the spare tire deviates from
that of the rest of the tires. The spare tire is
fully capable of running in all load and
speed ranges. However, to recreate the
original conditions, the tire should be
replaced as soon as possible.<
Page 214 of 229
Everything from A to Z
212
A
"ABC..." for
navigation 132, 133
ABS Antilock Braking
System 96
ACC, refer to Active cruise
control 75
"ACCEPT" for
navigation 136, 142
Accessories 8
Accessory position 61
Activated-charcoal
filter 111
Activation
Ð portable phone 174
Activation time 113
Active cruise control 75
Ð malfunctions 81
Active head restraints,
front 48
Active seat 52
Active seat ventilation 51
Adapter for spare key 34
Adaptive brake lamp 101
Adding washer fluid 73
"Address book" 140
Adjusting
Ð head restraints 47
Ð lumbar support 46
Ð seats 46
Ð shoulder support 46
Ð thigh support 46
Airbags 55
Air distribution 107, 109
Air outlet vents 105
Air pressure, refer to Tire
inflation pressure 184
Air supply 107
Ð rear air conditioner 111
AKI, refer to Fuel
specifications 183Alarm system 41
Ð avoiding unintentional
alarms 41
All-season tires 188
"AM..." 146, 149, 151
AM waveband 149
Anchorages 126
"ANGLE" in DVD mode 167
Antifreeze 191
Ð washer fluid 73
Antilock Braking System
ABS 96
Anti-theft system 35, 41
Approved gross vehicle
weight 210
Aquaplaning, refer to
Hydroplaning 124
Armrest, refer to Center
armrest 120
Arrival time 88
"Arrow display" for
navigation 138
"AS ADDRESS"
Ð current location 142
Ð destination
input 132, 134, 135
Ð destination list 136
Ð directory creation 140
Ð home address 141
Ð in address directory 141
Ð most recent
destinations 136
"AS DEST."
Ð destination
input 132, 134, 135
Ð directory creation 140
Ð home address 141
Ð most recent
destinations 136
Ð with address
directory 140Ashtray
Ð front 118
Ð rear 119
Assistance window
Ð Control Center 23
Ð help texts 23
Ð status lines 24
AUC Automatic
recirculated-air
control 107
"Audio" 146, 149
Audio 146
Ð adjusting the tone 147
Ð controls 146
Ð switching on/off 147
Ð volume 147
"AUDIO" in DVD mode 167
"AUTO", refer to Automatic
climate control 109
"AUTO" for audio
operation 151
Automatic
Ð air distribution 107
Ð cruise control 73
Ð headlamp control 102
Ð luggage compartment lid
control 36, 40
Ð steering wheel
adjustment 53
Automatic car wash, refer
to Care manual
Automatic climate
control 105
Ð rear air conditioner 111
Ð rear cooler 116
Ð settings 107
Ð settings in Control
Display 109
Automatic curb monitor 55
Automatic Hold
Ð parking 64
Ð parking brake 63
Everything from A to Z
Contents
Page 219 of 229
217
At a glance
Controls
Driving tips
Communications
Navigation
Entertainment
Mobility
Reference
Fuel tank capacity 182
"FULL MENU" 165, 166
"Full Release" 25
Fuses 201
G
Garage door opener, refer
to Integrated universal
remote control 114
Gasoline 183
General driving
instructions 124
Glasses compartment 118
Glove compartment 117
GPS, refer to Navigation
system 130
GPS navigation system
Ð selecting destination in
"Information" 135
Ground lamps 104
Guidance system
Ð interrupting 140
Ð starting 137
Ð terminating 140
H
Handbrake, refer to Parking
brake 62
Hand lamp 117
Hands-free
microphone 173
Hands-free system 173
Hazard warning flashers 16
Headlamp cleaning
system 73
Headlamp control,
automatic 102
Headlamp flasher 71
Headlamps
Ð automatic control 102
Ð cleaning 73
Ð high beams 103
Ð low beams 102
Headlamp washers 72
Head restraints 47
Ð front head restraints,
active 48
Ð rear head restraints 48
Heated seats 51Heated steering wheel 53
Heating and ventilation 105
Heating while stopped 108
Height 209
Height adjustment
Ð seats 46
Ð steering wheel 53
"Help" 19, 22
Help texts in Control
Display 23
High beams 103
Ð bulb replacement 196
Home address 141
Hood release 189
Horn 13
Hydraulic brake assistant,
refer to DBC 96
Hydroplaning 124, 186
I
Ice warning 82
idrive, refer to Control
Center 19
Ignition key 34
Ignition lock 61
"Indep. heater" 112
"Indep. ventil." 109, 112
Indicator lamps 15
"Individual" 110
Individual button
assignments on steering
wheel 53
Inflation pressure 184
Info Display 14
"Information" for
navigation 135, 136
Information on the
navigation system, refer
to Voice guidance for
navigation 139
Infrared windshield, refer to
Entry/pass tags 127
Instrument cluster, refer to
Info Display 14
Instrument illumination 103
Instrument panel 12, 16
Integrated universal remote
control 114
Interior lamps 103
Ð remote control 36Interior mirrors 52
Ð automatic dimming 52
Interior motion sensor 42
Interior protection
Ð deactivation 36, 42
Interior rearview mirror 52
Ð automatic dimming 52
Intermittent wipe 72
J
Jack 198
Joystick, refer to Control
Center 19
Jump-starting 202
K
Key Memory 60
Keys 34
Ð adapter for spare key 34
Kickdown 68
L
Lamps 102
Ð fog lamps 103
Ð high beams/standing
lamps 103
Ð interior lamps 103
Ð parking lamps/low
beams 102
Language control 18, 26
"Last" 176
"Last dest." 136
"Last exit" 139
Latch, refer to
LATCH child-restraint
system 59
LATCH child-restraint
system 59
LEDs light-emitting
diodes 104
"Left"
Ð for automatic climate
control 109
Ð for heated seats 51
Length 209
Level control system 101
License plate lamp,
bulb replacement 197
Page 223 of 229
221
At a glance
Controls
Driving tips
Communications
Navigation
Entertainment
Mobility
Reference
Route
Ð display 138
Ð list 139
Ð map cancellation 138
Ð map display 138
Ð selection 137
"Route guid." 137, 140
Route map 138
"Route selec." 137
Route selection 137
"RPA" 98
Run-flat tires 186, 200
S
S 154
Safety belts 50
Safety belt tensioners 50
Safety lock buttons 38
Safety precautions to
observe when using your
phone 170
Safety switch for rear
windows 43
"Save dest." 135
"SCAN"
Ð CD changer 157
Ð CD player 154
Ð radio 150
Scan
Ð CD changer 157
Ð CD player 154
Ð radio 150
Scan sampling
Ð CD changer 157
Ð CD player 154
Ð radio 150
Screen
Ð rear 24
Seat, mirror and steering
wheel memory 54
Seat heating 51
Seat memory 54
Seats
Ð adjusting 45
Ð sitting safely 45
"Seat temp." 51, 109
Seat ventilation, refer to
Active seat ventilation 51
SECAM during
TV operation 161Securing cargo, refer to
Cargo loading 126
Securing the load, ski
bag 121
Selecting new route with
navigation system 139
Selecting new scale for
navigation system
display 138
Selecting stored radio
stations 151
Selection options for
navigation 131
Selector lever, automatic
transmission 67
Self-defrosting mirrors 52
Self-leveling
suspension 101
"Service" 83, 193
Ð "Emissions inspection" 84
Ð "Spark plugs" 83
Ð Vehicle inspection 84
Service and Warranty
Information Booklet for
US models 193
Service brakes 125
Service Guide Booklet for
Canadian models 193
Service Interval
Display 83, 193
Service Requirement
Display, refer to Service
Interval Display 83, 193
"SET", refer to Setting
speed limit 89
Set time 113
"Set time 1" 113
"Set time 2" 113
"Settings" 19, 22, 25
Setting the brightness 92
Setting the speed limit 89
Setting time and date 91
Setting timer 113
Shifting, refer to Automatic
transmission with
Steptronic 69
Shiftlock 67
Short commands for voice
command system 29
Shortest distance 137
"Shortest route" 137Shoulder support 46
"Side" in sound system
operation 158
Side window blind, refer to
Sun blinds 115
Sitting safely 45
Ski bag 120
Sliding/tilt sunroof 43
Ð closing in the event of an
electrical defect 44
Ð convenience mode 37
Ð convenience operation 36
Snow chains 188, 188
Soft Close Automatic
Ð doors 38
Ð luggage compartment
lid 39
SOS call
Ð using SOS button 173
Sound system
Ð "MANUAL" selection
mode 151
Sound system adjustments
Ð "Balance" 148
Ð balance left/right 147
Ð "Bass" 148
Ð equalizer 147
Ð "Fader" 148
Ð fader front/rear 147
Ð "LOGIC7" 148
Ð LOGIC7 147
Ð midrange setting 148
Ð "RESET" 148
Ð speed-sensitive
volume 147
Ð "Speed Vol." 148
Ð "Treble" 148
Spare fuses 201
Spare key 34
Ð adapter 34
Spare tire 198
"Spark plugs" 83, 193
Specifications for engine
oil 191
Speed limit
Ð "Limit" 89
Speed limit selection,
revision 89
Speedometer 14
"Speed Vol." in audio
mode 148