2003 BMW 760LI SEDAN run flat
[x] Cancel search: run flatPage 100 of 229
Technology for comfort, convenience and safety
98
Flat Tire Monitor*
The concept
The Flat Tire Monitor keeps track of the
inflation pressures in your tires as you
drive. The system provides an alert when-
ever the inflation pressure drops signifi-
cantly below the specified pressure in one
or more tires.
In order for the Flat Tire Monitor to 'learn'
the correct tire inflation pressure, check the
inflation pressure in all tires against the
inflation pressure table on page 185 and
make corrections as necessary. Then pro-
ceed to initialize the system.
This symbol will appear in the
Check Control to inform you that
the inflation pressure of a tire has
fallen significantly. A text message appears
at the same time.
Please take note of the additional informa-
tion in the Control Display.
You can find more information on the
Check Control starting on page 85.
The Flat Tire Monitor cannot indicate
sudden severe tire damage caused
by outside factors and does not detect a
natural, even pressure drop in all four
tires.<
Initializing the system
1.Switch ignition on, do not start the
engine
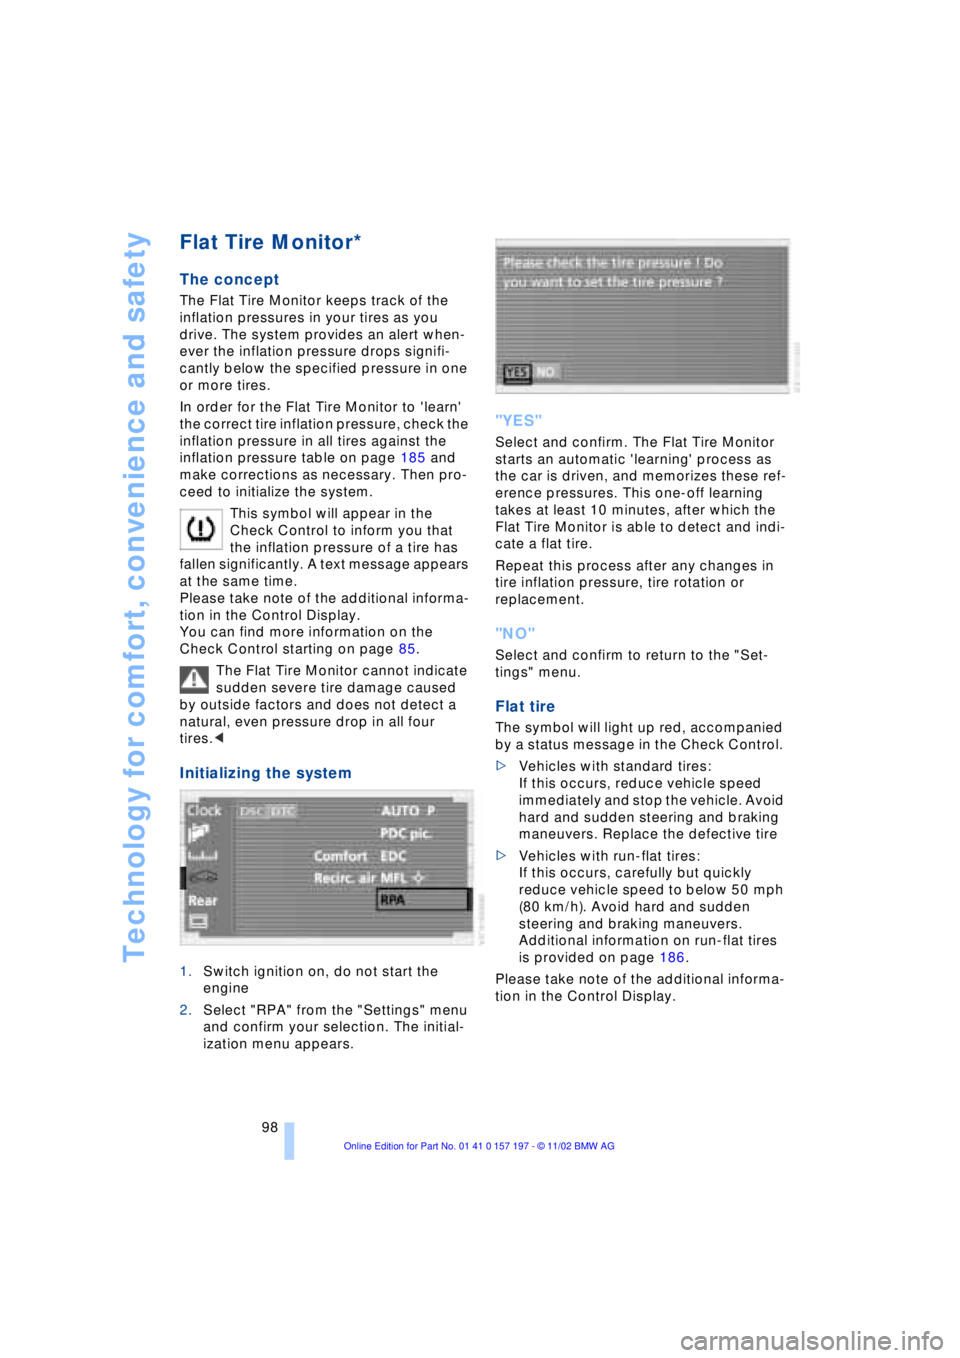
2.Select "RPA" from the "Settings" menu
and confirm your selection. The initial-
ization menu appears.
"YES"
Select and confirm. The Flat Tire Monitor
starts an automatic 'learning' process as
the car is driven, and memorizes these ref-
erence pressures. This one-off learning
takes at least 10 minutes, after which the
Flat Tire Monitor is able to detect and indi-
cate a flat tire.
Repeat this process after any changes in
tire inflation pressure, tire rotation or
replacement.
"NO"
Select and confirm to return to the "Set-
tings" menu.
Flat tire
The symbol will light up red, accompanied
by a status message in the Check Control.
>Vehicles with standard tires:
If this occurs, reduce vehicle speed
immediately and stop the vehicle. Avoid
hard and sudden steering and braking
maneuvers. Replace the defective tire
>Vehicles with run-flat tires:
If this occurs, carefully but quickly
reduce vehicle speed to below 50 mph
(80 km/h). Avoid hard and sudden
steering and braking maneuvers.
Additional information on run-flat tires
is provided on page 186.
Please take note of the additional informa-
tion in the Control Display.
Page 102 of 229
Technology for comfort, convenience and safety
100
Do not start the initialization
Select and confirm to return to the
"Settings" menu.
Status indicators in the Control
Display
The status of the system is indicated by the
color of the tires.
TPM takes into account that the tire pres-
sure changes during driving. A correction is
only required when the TPM requests that
the driver takes action by changing the
color.
Green
Tire inflation pressures correspond to the
initialized level.
Yellow
The inflation pressures in the tires have
fallen to below the specified level, which is
normal in every tire after a certain amount
of time.
This alerts you to have the tires inflated to
the specified pressures as soon as pos-
sible.
Red
Pressure loss in indicated tire.
If this occurs, reduce vehicle speed imme-
diately and stop the vehicle. Avoid hard
and sudden steering and braking maneu-
vers.
Black
The system is being initialized.
The system needs several minutes to com-
plete the initialization process, after which
it is ready to detect and report tire prob-
lems.
In the event of loss in tire pressure
If the indicator lamp symbol in the Check
Control lights up in yellow, and a message
also appears, this indicates that the infla-
tion pressures in the tires have fallen to
below the specified level, which is normal
in every tire after a certain amount of time. This alerts you to have the tires inflated to
the specified pressures as soon as pos-
sible.
Please take note of the additional informa-
tion in the Control Display.
If you are prompted to check the tire
pressure shortly after a correction has
been made, this indicates that the cor-
rected values were not accurate. Please
check the inflation pressure again and
make corrections according to the inflation
pressure table. Then reinitialize the
system.<
Flat tire
If you have a flat tire, the indicator lamp
symbol in the Check Control will light up in
red, and a message will appear. In addition,
a gong sounds.
>Vehicles with standard tires:
If this occurs, reduce vehicle speed
immediately and stop the vehicle. Avoid
hard and sudden steering and braking
maneuvers. Replace the defective tire
>Vehicles with run-flat tires:
If this occurs, carefully but quickly
reduce vehicle speed to below 50 mph
(80 km/h). Avoid hard and sudden
steering and braking maneuvers.
Additional information on run-flat tires
is provided on page 186.
The spare tire provided with your
vehicle is equipped with the elec-
tronics required to support TPM operation;
once the spare is installed, the pressure in
this tire will also be monitored following
system initialization.
Have the tires changed at your BMW
center.
Your BMW center has the information
needed for working with TPM and is
equipped with the necessary special
tools.<
System malfunctions
Other equipment operating on the same
radio frequency as TPM can generate inter-
ference signals that may prevent the
system from operating as intended.
Page 188 of 229
Wheels and tires
186
Tire condition
Tire tread Ð tire damage
Inspect your tires frequently for tread wear,
signs of damage and for foreign objects
lodged in the tread. Check the tread depth.
The tread depth should not drop below
0.12 in (3 mm), although, for example,
European legislation only specifies a
minimum tread depth of 0.06 in (1.6 mm).
At tread depths below 0.12 in (3 mm) there
is an increased risk of high-speed hydro-
planing, even when only small amounts of
water are present on the road surface.
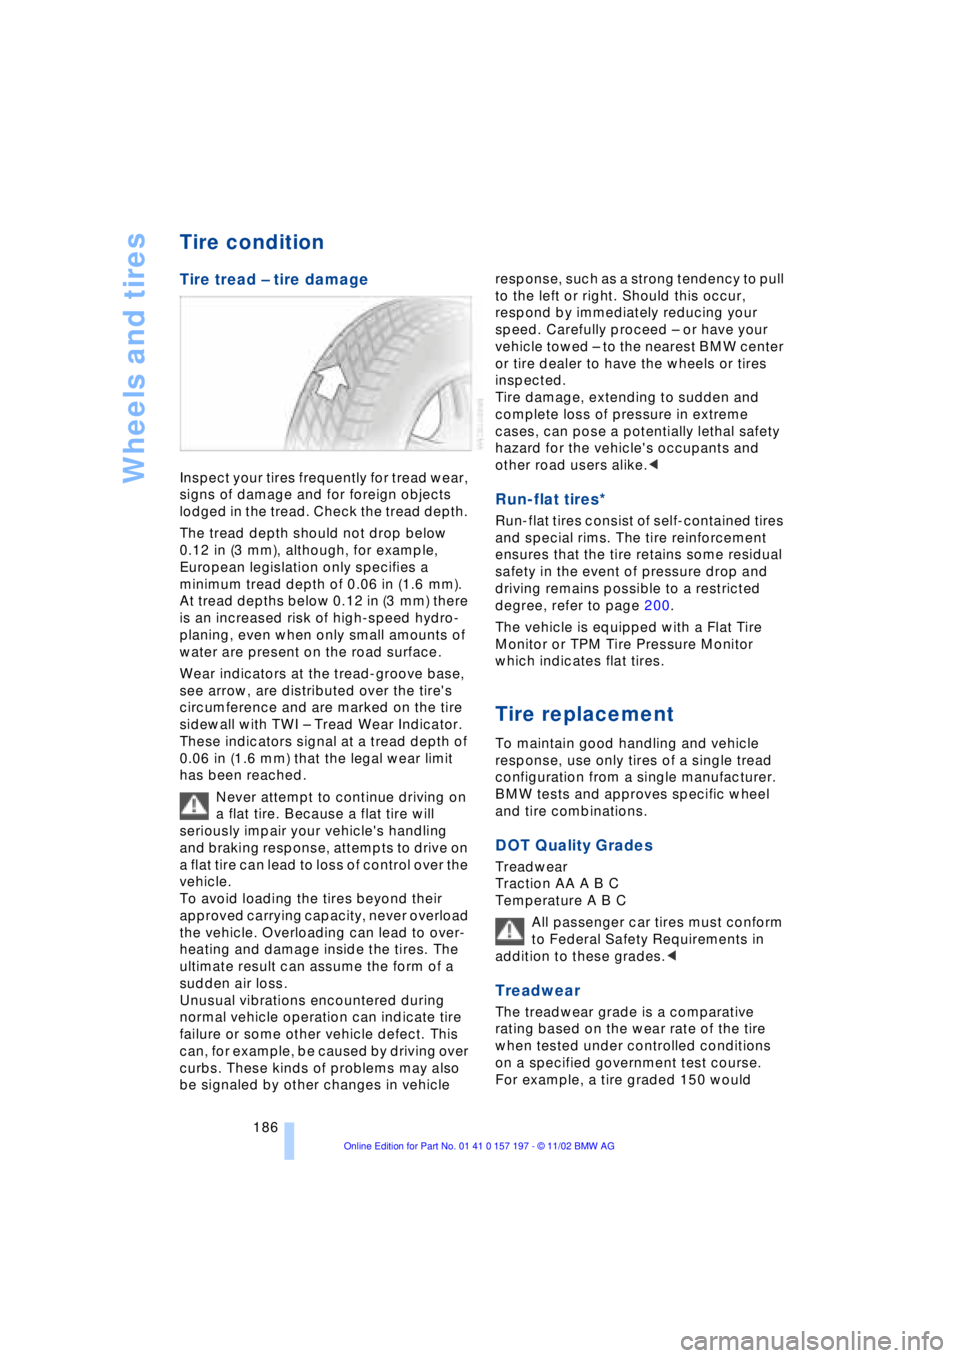
Wear indicators at the tread-groove base,
see arrow, are distributed over the tire's
circumference and are marked on the tire
sidewall with TWI Ð Tread Wear Indicator.
These indicators signal at a tread depth of
0.06 in (1.6 mm) that the legal wear limit
has been reached.
Never attempt to continue driving on
a flat tire. Because a flat tire will
seriously impair your vehicle's handling
and braking response, attempts to drive on
a flat tire can lead to loss of control over the
vehicle.
To avoid loading the tires beyond their
approved carrying capacity, never overload
the vehicle. Overloading can lead to over-
heating and damage inside the tires. The
ultimate result can assume the form of a
sudden air loss.
Unusual vibrations encountered during
normal vehicle operation can indicate tire
failure or some other vehicle defect. This
can, for example, be caused by driving over
curbs. These kinds of problems may also
be signaled by other changes in vehicle response, such as a strong tendency to pull
to the left or right. Should this occur,
respond by immediately reducing your
speed. Carefully proceed Ð or have your
vehicle towed Ð to the nearest BMW center
or tire dealer to have the wheels or tires
inspected.
Tire damage, extending to sudden and
complete loss of pressure in extreme
cases, can pose a potentially lethal safety
hazard for the vehicle's occupants and
other road users alike.<
Run-flat tires*
Run-flat tires consist of self-contained tires
and special rims. The tire reinforcement
ensures that the tire retains some residual
safety in the event of pressure drop and
driving remains possible to a restricted
degree, refer to page 200.
The vehicle is equipped with a Flat Tire
Monitor or TPM Tire Pressure Monitor
which indicates flat tires.
Tire replacement
To maintain good handling and vehicle
response, use only tires of a single tread
configuration from a single manufacturer.
BMW tests and approves specific wheel
and tire combinations.
DOT Quality Grades
Treadwear
Traction AA A B C
Temperature A B C
All passenger car tires must conform
to Federal Safety Requirements in
addition to these grades.<
Treadwear
The treadwear grade is a comparative
rating based on the wear rate of the tire
when tested under controlled conditions
on a specified government test course.
For example, a tire graded 150 would
Page 201 of 229
Overview
Controls
Driving tips
Communications
Navigation
Entertainment
Mobility
Reference
199
Procedure
1.Read carefully and comply with the
safety precautions on page 198
2.Secure the vehicle to prevent it from
rolling:
Place the wheel chock against the rear
surface of the front tire on the side
opposite the side being raised. If the
vehicle is parked on a downward slope,
place the wheel chock securely in front
of the tire. If the wheel must be changed
on a surface with a more severe slope,
take additional precautions to secure
the vehicle from rolling
3.Loosen the lug bolts 1/2 a turn
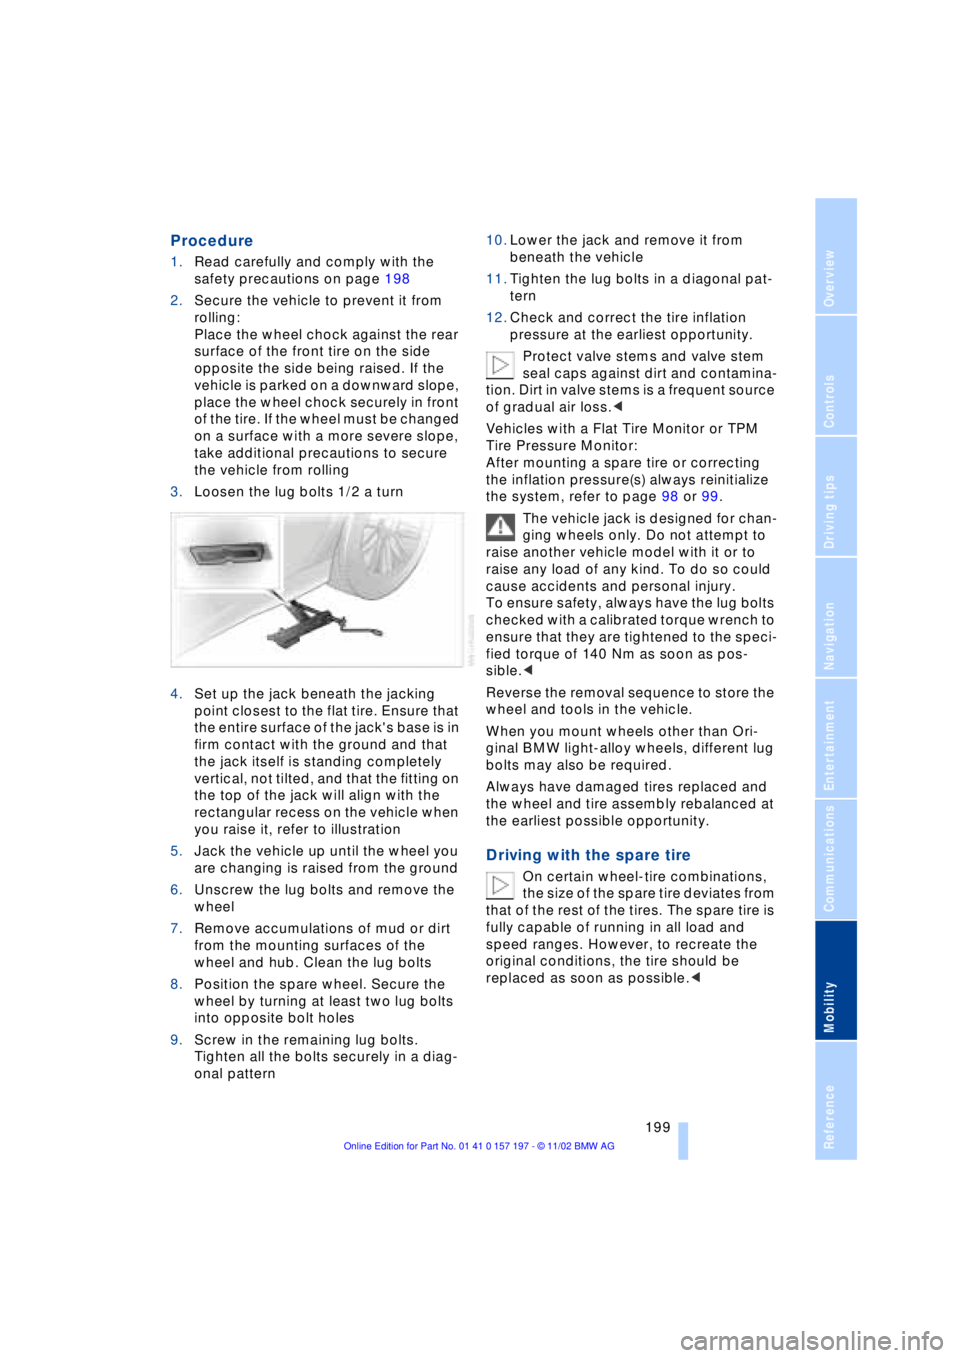
4.Set up the jack beneath the jacking
point closest to the flat tire. Ensure that
the entire surface of the jack's base is in
firm contact with the ground and that
the jack itself is standing completely
vertical, not tilted, and that the fitting on
the top of the jack will align with the
rectangular recess on the vehicle when
you raise it, refer to illustration
5.Jack the vehicle up until the wheel you
are changing is raised from the ground
6.Unscrew the lug bolts and remove the
wheel
7.Remove accumulations of mud or dirt
from the mounting surfaces of the
wheel and hub. Clean the lug bolts
8.Position the spare wheel. Secure the
wheel by turning at least two lug bolts
into opposite bolt holes
9.Screw in the remaining lug bolts.
Tighten all the bolts securely in a diag-
onal pattern 10.Lower the jack and remove it from
beneath the vehicle
11.Tighten the lug bolts in a diagonal pat-
tern
12.Check and correct the tire inflation
pressure at the earliest opportunity.
Protect valve stems and valve stem
seal caps against dirt and contamina-
tion. Dirt in valve stems is a frequent source
of gradual air loss.<
Vehicles with a Flat Tire Monitor or TPM
Tire Pressure Monitor:
After mounting a spare tire or correcting
the inflation pressure(s) always reinitialize
the system, refer to page 98 or 99.
The vehicle jack is designed for chan-
ging wheels only. Do not attempt to
raise another vehicle model with it or to
raise any load of any kind. To do so could
cause accidents and personal injury.
To ensure safety, always have the lug bolts
checked with a calibrated torque wrench to
ensure that they are tightened to the speci-
fied torque of 140 Nm as soon as pos-
sible.<
Reverse the removal sequence to store the
wheel and tools in the vehicle.
When you mount wheels other than Ori-
ginal BMW light-alloy wheels, different lug
bolts may also be required.
Always have damaged tires replaced and
the wheel and tire assembly rebalanced at
the earliest possible opportunity.
Driving with the spare tire
On certain wheel-tire combinations,
the size of the spare tire deviates from
that of the rest of the tires. The spare tire is
fully capable of running in all load and
speed ranges. However, to recreate the
original conditions, the tire should be
replaced as soon as possible.<
Page 202 of 229
Replacing components
200
Run-flat tires*
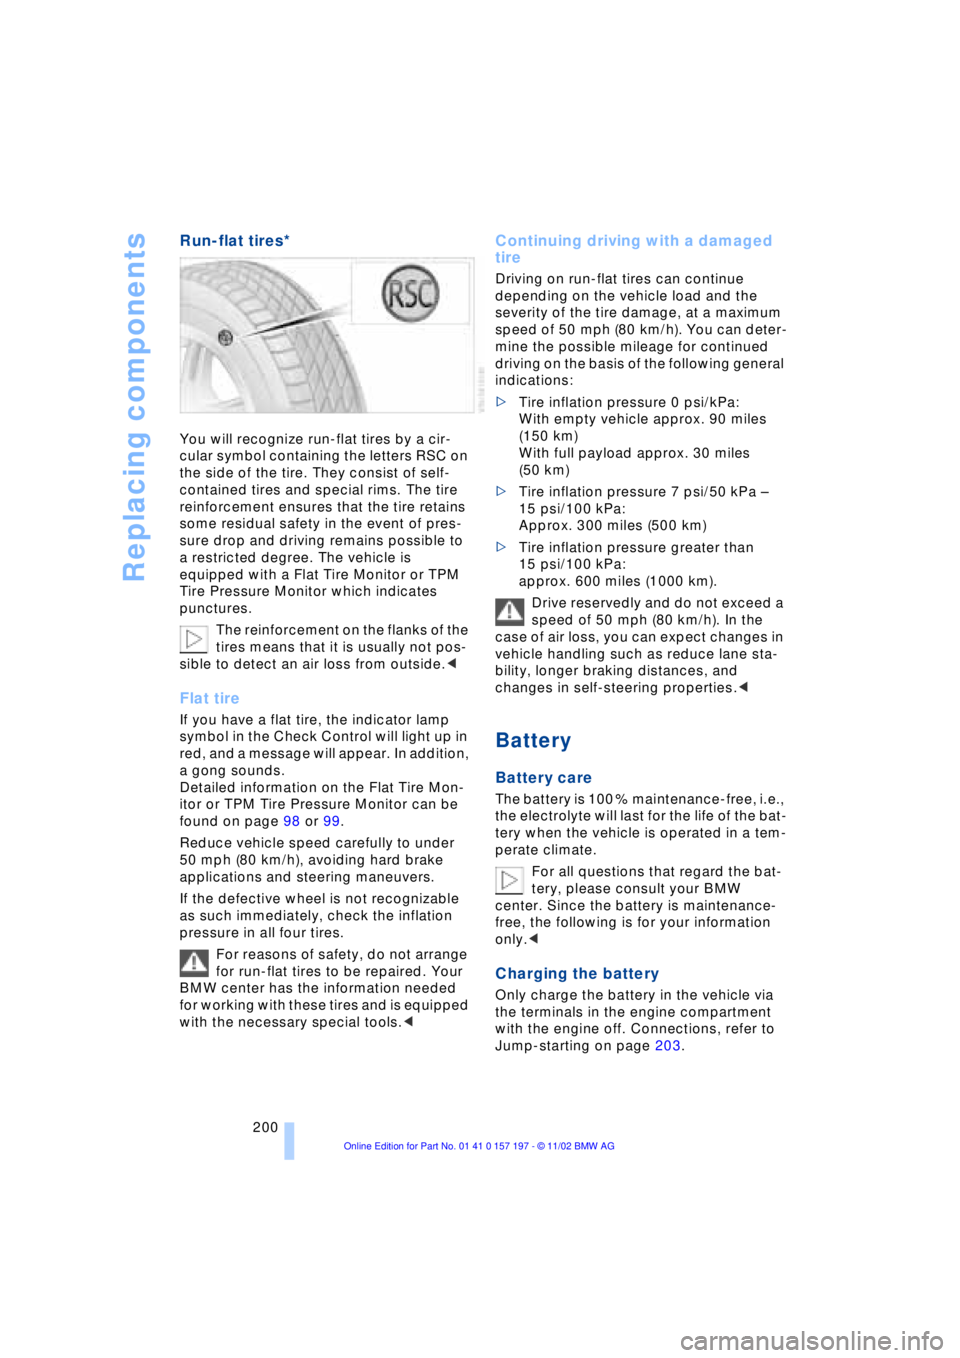
You will recognize run-flat tires by a cir-
cular symbol containing the letters RSC on
the side of the tire. They consist of self-
contained tires and special rims. The tire
reinforcement ensures that the tire retains
some residual safety in the event of pres-
sure drop and driving remains possible to
a restricted degree. The vehicle is
equipped with a Flat Tire Monitor or TPM
Tire Pressure Monitor which indicates
punctures.
The reinforcement on the flanks of the
tires means that it is usually not pos-
sible to detect an air loss from outside.<
Flat tire
If you have a flat tire, the indicator lamp
symbol in the Check Control will light up in
red, and a message will appear. In addition,
a gong sounds.
Detailed information on the Flat Tire Mon-
itor or TPM Tire Pressure Monitor can be
found on page 98 or 99.
Reduce vehicle speed carefully to under
50 mph (80 km/h), avoiding hard brake
applications and steering maneuvers.
If the defective wheel is not recognizable
as such immediately, check the inflation
pressure in all four tires.
For reasons of safety, do not arrange
for run-flat tires to be repaired. Your
BMW center has the information needed
for working with these tires and is equipped
with the necessary special tools.<
Continuing driving with a damaged
tire
Driving on run-flat tires can continue
depending on the vehicle load and the
severity of the tire damage, at a maximum
speed of 50 mph (80 km/h). You can deter-
mine the possible mileage for continued
driving on the basis of the following general
indications:
>Tire inflation pressure 0 psi/kPa:
With empty vehicle approx. 90 miles
(150 km)
With full payload approx. 30 miles
(50 km)
>Tire inflation pressure 7 psi/50 kPa Ð
15 psi/100 kPa:
Approx. 300 miles (500 km)
>Tire inflation pressure greater than
15 psi/100 kPa:
approx. 600 miles (1000 km).
Drive reservedly and do not exceed a
speed of 50 mph (80 km/h). In the
case of air loss, you can expect changes in
vehicle handling such as reduce lane sta-
bility, longer braking distances, and
changes in self-steering properties.<
Battery
Battery care
The battery is 100 % maintenance-free, i.e.,
the electrolyte will last for the life of the bat-
tery when the vehicle is operated in a tem-
perate climate.
For all questions that regard the bat-
tery, please consult your BMW
center. Since the battery is maintenance-
free, the following is for your information
only.<
Charging the battery
Only charge the battery in the vehicle via
the terminals in the engine compartment
with the engine off. Connections, refer to
Jump-starting on page 203.
Page 223 of 229
221
At a glance
Controls
Driving tips
Communications
Navigation
Entertainment
Mobility
Reference
Route
Ð display 138
Ð list 139
Ð map cancellation 138
Ð map display 138
Ð selection 137
"Route guid." 137, 140
Route map 138
"Route selec." 137
Route selection 137
"RPA" 98
Run-flat tires 186, 200
S
S 154
Safety belts 50
Safety belt tensioners 50
Safety lock buttons 38
Safety precautions to
observe when using your
phone 170
Safety switch for rear
windows 43
"Save dest." 135
"SCAN"
Ð CD changer 157
Ð CD player 154
Ð radio 150
Scan
Ð CD changer 157
Ð CD player 154
Ð radio 150
Scan sampling
Ð CD changer 157
Ð CD player 154
Ð radio 150
Screen
Ð rear 24
Seat, mirror and steering
wheel memory 54
Seat heating 51
Seat memory 54
Seats
Ð adjusting 45
Ð sitting safely 45
"Seat temp." 51, 109
Seat ventilation, refer to
Active seat ventilation 51
SECAM during
TV operation 161Securing cargo, refer to
Cargo loading 126
Securing the load, ski
bag 121
Selecting new route with
navigation system 139
Selecting new scale for
navigation system
display 138
Selecting stored radio
stations 151
Selection options for
navigation 131
Selector lever, automatic
transmission 67
Self-defrosting mirrors 52
Self-leveling
suspension 101
"Service" 83, 193
Ð "Emissions inspection" 84
Ð "Spark plugs" 83
Ð Vehicle inspection 84
Service and Warranty
Information Booklet for
US models 193
Service brakes 125
Service Guide Booklet for
Canadian models 193
Service Interval
Display 83, 193
Service Requirement
Display, refer to Service
Interval Display 83, 193
"SET", refer to Setting
speed limit 89
Set time 113
"Set time 1" 113
"Set time 2" 113
"Settings" 19, 22, 25
Setting the brightness 92
Setting the speed limit 89
Setting time and date 91
Setting timer 113
Shifting, refer to Automatic
transmission with
Steptronic 69
Shiftlock 67
Short commands for voice
command system 29
Shortest distance 137
"Shortest route" 137Shoulder support 46
"Side" in sound system
operation 158
Side window blind, refer to
Sun blinds 115
Sitting safely 45
Ski bag 120
Sliding/tilt sunroof 43
Ð closing in the event of an
electrical defect 44
Ð convenience mode 37
Ð convenience operation 36
Snow chains 188, 188
Soft Close Automatic
Ð doors 38
Ð luggage compartment
lid 39
SOS call
Ð using SOS button 173
Sound system
Ð "MANUAL" selection
mode 151
Sound system adjustments
Ð "Balance" 148
Ð balance left/right 147
Ð "Bass" 148
Ð equalizer 147
Ð "Fader" 148
Ð fader front/rear 147
Ð "LOGIC7" 148
Ð LOGIC7 147
Ð midrange setting 148
Ð "RESET" 148
Ð speed-sensitive
volume 147
Ð "Speed Vol." 148
Ð "Treble" 148
Spare fuses 201
Spare key 34
Ð adapter 34
Spare tire 198
"Spark plugs" 83, 193
Specifications for engine
oil 191
Speed limit
Ð "Limit" 89
Speed limit selection,
revision 89
Speedometer 14
"Speed Vol." in audio
mode 148