2003 BMW 760LI SEDAN radio controls
[x] Cancel search: radio controlsPage 6 of 229
Contents
Entertainment
146Controls
146Care instructions
147Switching on/off
147Using with ignition off
147Volume adjustment
147Tone control
Radio
149Starting
149Stopping
149Selecting frequency band
150Selecting a station
150Storing and retrieving a station
151Weather Band
CD Compact Disc
153Starting
153Stopping
154Searching for music tracks in the
Control Display
154Using the buttons to search for music
tracks
CD changer
156Starting
156Stopping
156Status displays
157Searching for music tracks in the
Control Display
157Using the buttons to search for music
tracks
Cassette
158Starting
158Stopping
158Selecting side A or B
158Switching "Booktape" on/off
158Noise suppression
159Searching for music tracks
TV
160Starting
160Stopping
160Storing programs
160Selecting programs
161Adjusting the picture
*
161Selecting standard
DVD changer
164Care instructions
164Starting
164Stopping
164Status displays
164DVD control
165Selecting a track
166Chapter search
166Adjusting picture
166Freezing frame
166Selecting picture format
166Selecting language, subtitles and
viewing angle
167Opening DVD-specific menu
Using the phone in your vehicle
170Safety notice
171Care instructions
171Controls
172Telephone keypad, folding
173Hands-free system
173Making an SOS call
174Telephoning with the
car phone
174Using the BMW portable phone
174Getting started
175Telephone directory
176Selecting a number from the Top 8 list
176Redialing
176Missed calls
BMW Assist
178Requirements
178Roadside Assistance of the BMW
Group
Refueling
182Fuel filler door
183Fuel specifications
Wheels and tires
184Tire inflation pressure
186Tire condition
186Tire replacement
187Wheel and tire combinations
Page 45 of 229
At a glance
Controls
Driving tips
Communications
Navigation
Entertainment
Mobility
Reference
43
When you close the windows they will
slow down as they approach the end
of their travel; this is to allow the safety fea-
ture to respond more precisely to any
obstructions encountered in this critical
range.<
Safety switch
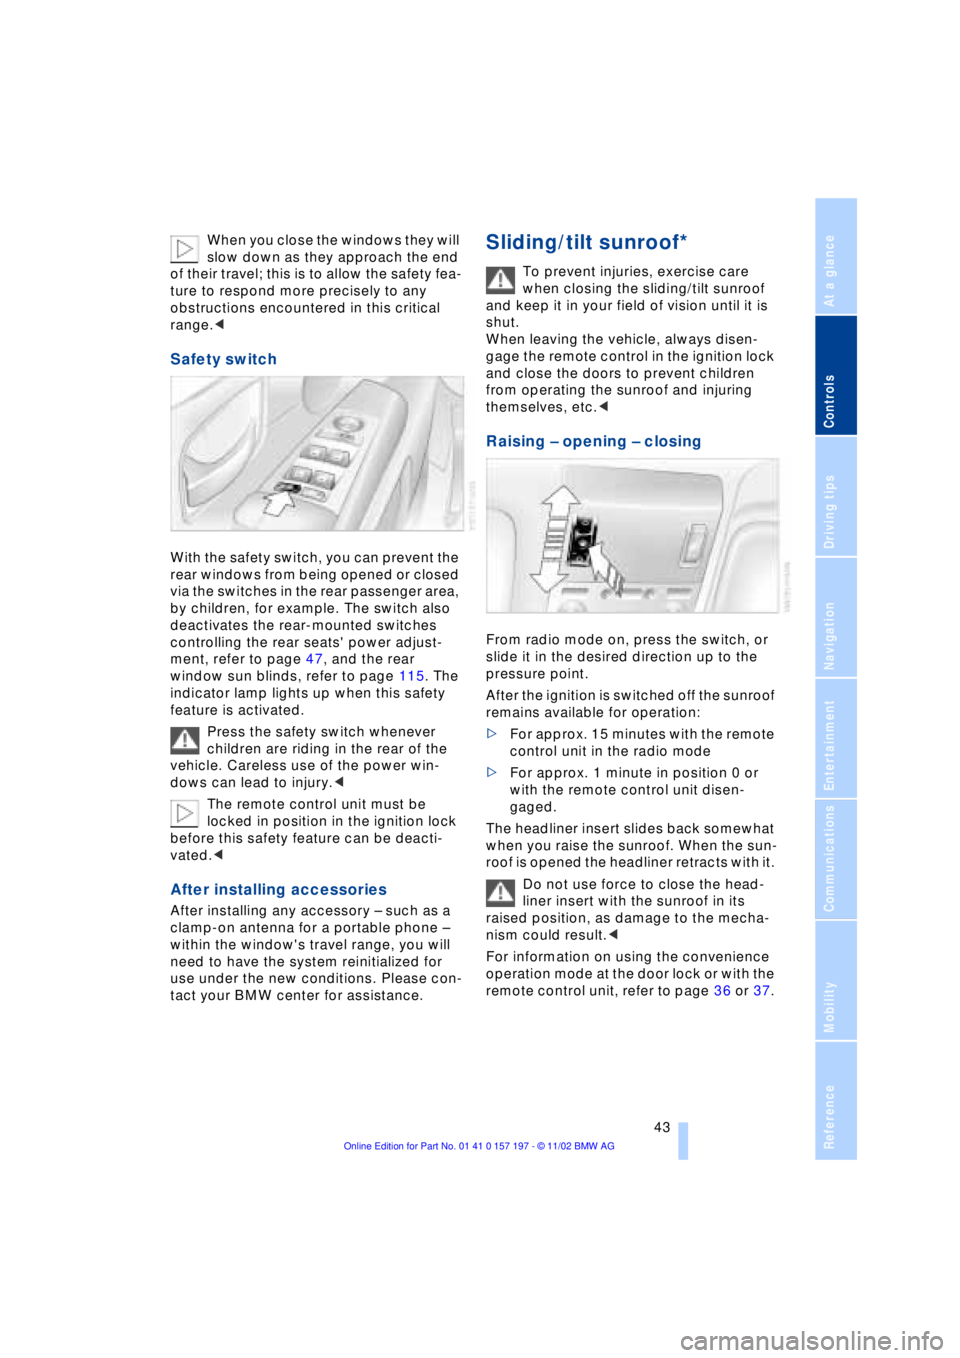
With the safety switch, you can prevent the
rear windows from being opened or closed
via the switches in the rear passenger area,
by children, for example. The switch also
deactivates the rear-mounted switches
controlling the rear seats' power adjust-
ment, refer to page 47, and the rear
window sun blinds, refer to page 115. The
indicator lamp lights up when this safety
feature is activated.
Press the safety switch whenever
children are riding in the rear of the
vehicle. Careless use of the power win-
dows can lead to injury.<
The remote control unit must be
locked in position in the ignition lock
before this safety feature can be deacti-
vated.<
After installing accessories
After installing any accessory Ð such as a
clamp-on antenna for a portable phone Ð
within the window's travel range, you will
need to have the system reinitialized for
use under the new conditions. Please con-
tact your BMW center for assistance.
Sliding/tilt sunroof*
To prevent injuries, exercise care
when closing the sliding/tilt sunroof
and keep it in your field of vision until it is
shut.
When leaving the vehicle, always disen-
gage the remote control in the ignition lock
and close the doors to prevent children
from operating the sunroof and injuring
themselves, etc.<
Raising Ð opening Ð closing
From radio mode on, press the switch, or
slide it in the desired direction up to the
pressure point.
After the ignition is switched off the sunroof
remains available for operation:
>For approx. 15 minutes with the remote
control unit in the radio mode
>For approx. 1 minute in position 0 or
with the remote control unit disen-
gaged.
The headliner insert slides back somewhat
when you raise the sunroof. When the sun-
roof is opened the headliner retracts with it.
Do not use force to close the head-
liner insert with the sunroof in its
raised position, as damage to the mecha-
nism could result.<
For information on using the convenience
operation mode at the door lock or with the
remote control unit, refer to page 36 or 37.
Page 63 of 229
At a glance
Controls
Driving tips
Communications
Navigation
Entertainment
Mobility
Reference
61
Driving
Ignition lock
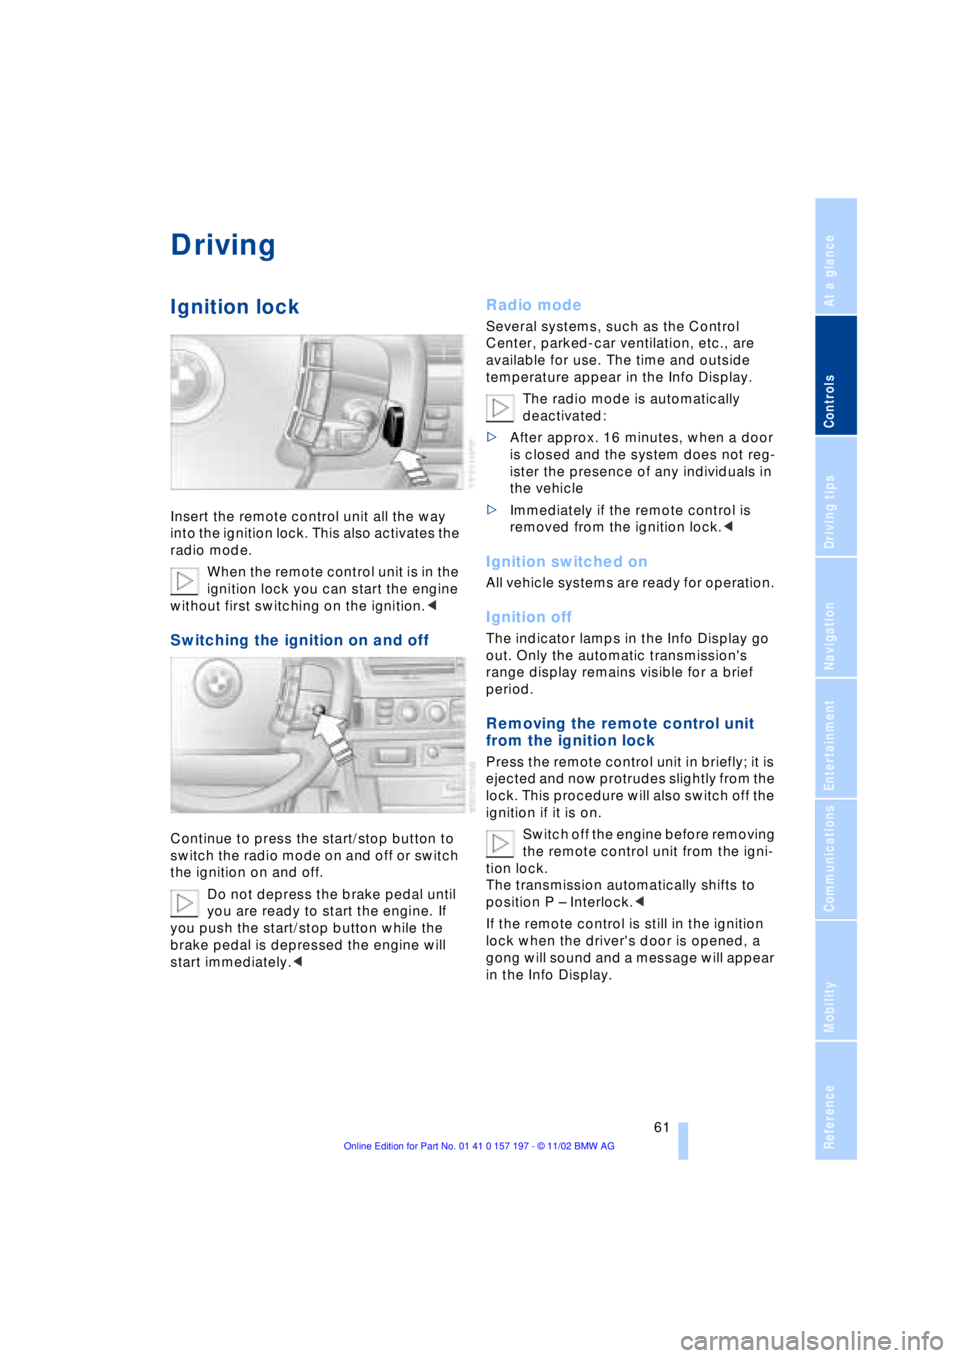
Insert the remote control unit all the way
into the ignition lock. This also activates the
radio mode.
When the remote control unit is in the
ignition lock you can start the engine
without first switching on the ignition.<
Switching the ignition on and off
Continue to press the start/stop button to
switch the radio mode on and off or switch
the ignition on and off.
Do not depress the brake pedal until
you are ready to start the engine. If
you push the start/stop button while the
brake pedal is depressed the engine will
start immediately.<
Radio mode
Several systems, such as the Control
Center, parked-car ventilation, etc., are
available for use. The time and outside
temperature appear in the Info Display.
The radio mode is automatically
deactivated:
>After approx. 16 minutes, when a door
is closed and the system does not reg-
ister the presence of any individuals in
the vehicle
>Immediately if the remote control is
removed from the ignition lock.<
Ignition switched on
All vehicle systems are ready for operation.
Ignition off
The indicator lamps in the Info Display go
out. Only the automatic transmission's
range display remains visible for a brief
period.
Removing the remote control unit
from the ignition lock
Press the remote control unit in briefly; it is
ejected and now protrudes slightly from the
lock. This procedure will also switch off the
ignition if it is on.
Switch off the engine before removing
the remote control unit from the igni-
tion lock.
The transmission automatically shifts to
position P Ð Interlock.<
If the remote control is still in the ignition
lock when the driver's door is opened, a
gong will sound and a message will appear
in the Info Display.
Page 75 of 229
At a glance
Controls
Driving tips
Communications
Navigation
Entertainment
Mobility
Reference
73
Selecting wiper fold-out position
Important for changing wiper blades, when
folding away from windshield to prevent
blades from sticking when ice forms, etc.
1.Switch off the engine and remove the
remote control unit from the ignition
lock
2.Press the wiper lever up and maintain
pressure for about 3 seconds until the
wipers are roughly vertical Ð this is the
fold-out position.
After folding the wipers back against the
windshield you will need to reactivate the
wiper system:
1.Insert the remote control unit to activate
the radio mode in the ignition lock
2.Apply brief upward pressure to the
wiper lever. The wipers return to their
retracted position and are ready for
normal operation.
To prevent damage to the wipers,
always fold them back against the
windshield before switching on either the
radio mode or the ignition.<
Washer fluid
Windshield and headlamp washer
system
Capacity: 6.3 US quarts (6 liters).
Fill with water and Ð if required Ð with a
washer antifreeze, according to manufac-
turer's recommendations.
We recommend that you mix the
washer fluid before adding it to the
reservoir.< Washer fluid antifreeze is flammable.
Always keep it well away from sparks
and open flames, and store it in tightly
closed containers well out of the reach of
children. Always observe the instructions
for use provided on the container.<
Programmable cruise
control
The concept
The programmable cruise control is avail-
able for use at speeds of approx. 20 mph
(30 km/h) and higher. The vehicle maintains
and stores the speed that you set using the
lever mounted on the steering column.
You can also use the multilevel preset
mode to store 6 desired speeds for later
selection with the lever on the steering
column, refer to page 75.
This feature assists you in quickly adapting
the vehicle speed to specific road condi-
tions, e.g. changes in speeds limits.
Do not use the cruise control when
driving on winding roads, in case of
heavy traffic or poor road conditions Ð
snow, rain, ice, loose road surface Ð that do
not permit a constant speed.<
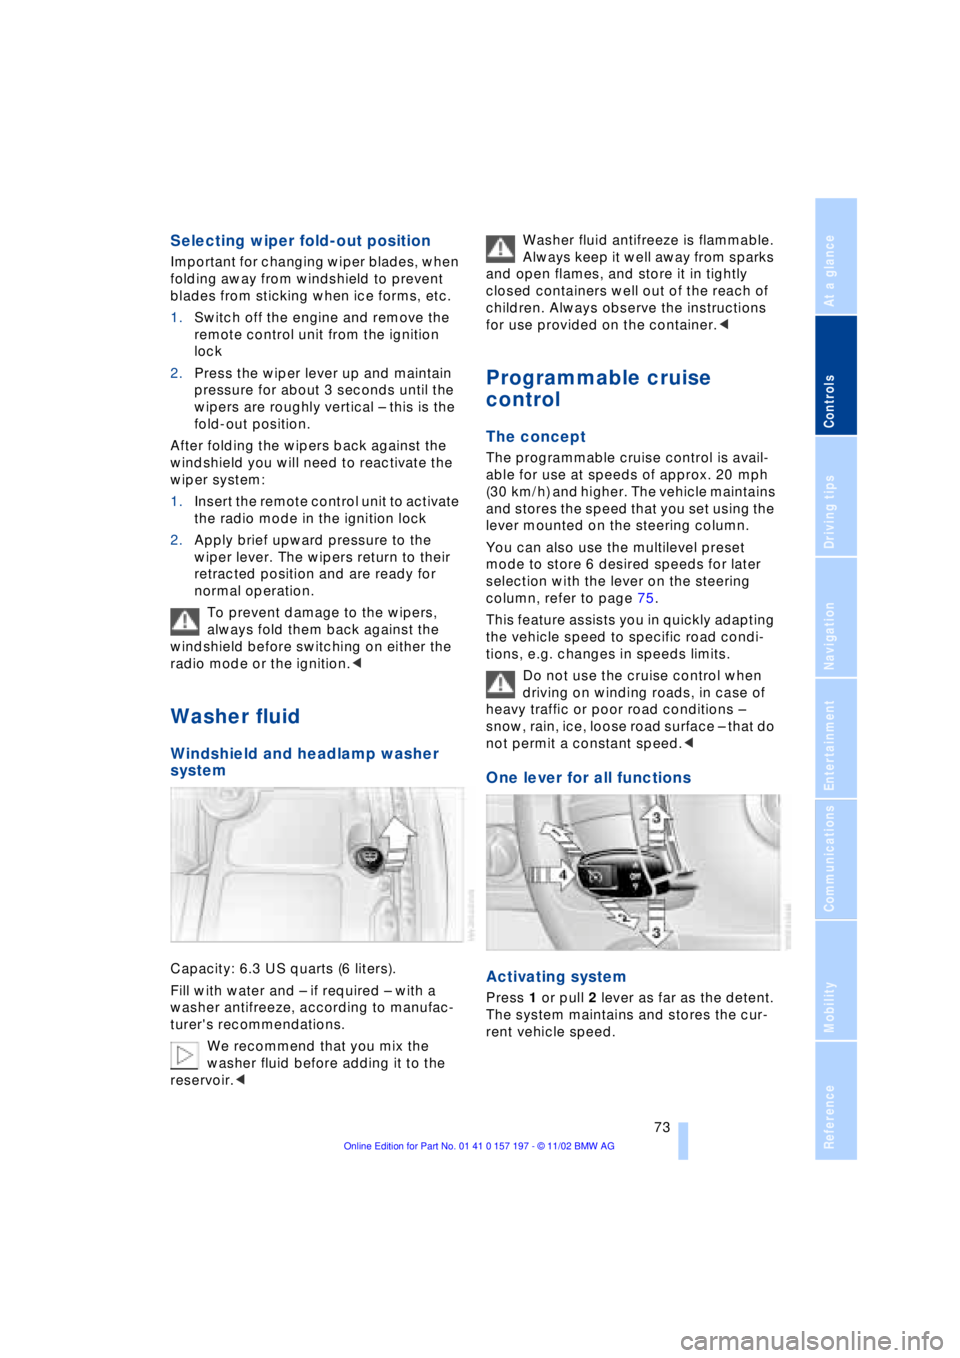
One lever for all functions
Activating system
Press 1 or pull 2 lever as far as the detent.
The system maintains and stores the cur-
rent vehicle speed.
Page 115 of 229
At a glance
Controls
Driving tips
Communications
Navigation
Entertainment
Mobility
Reference
113
Preselecting the switch-on time
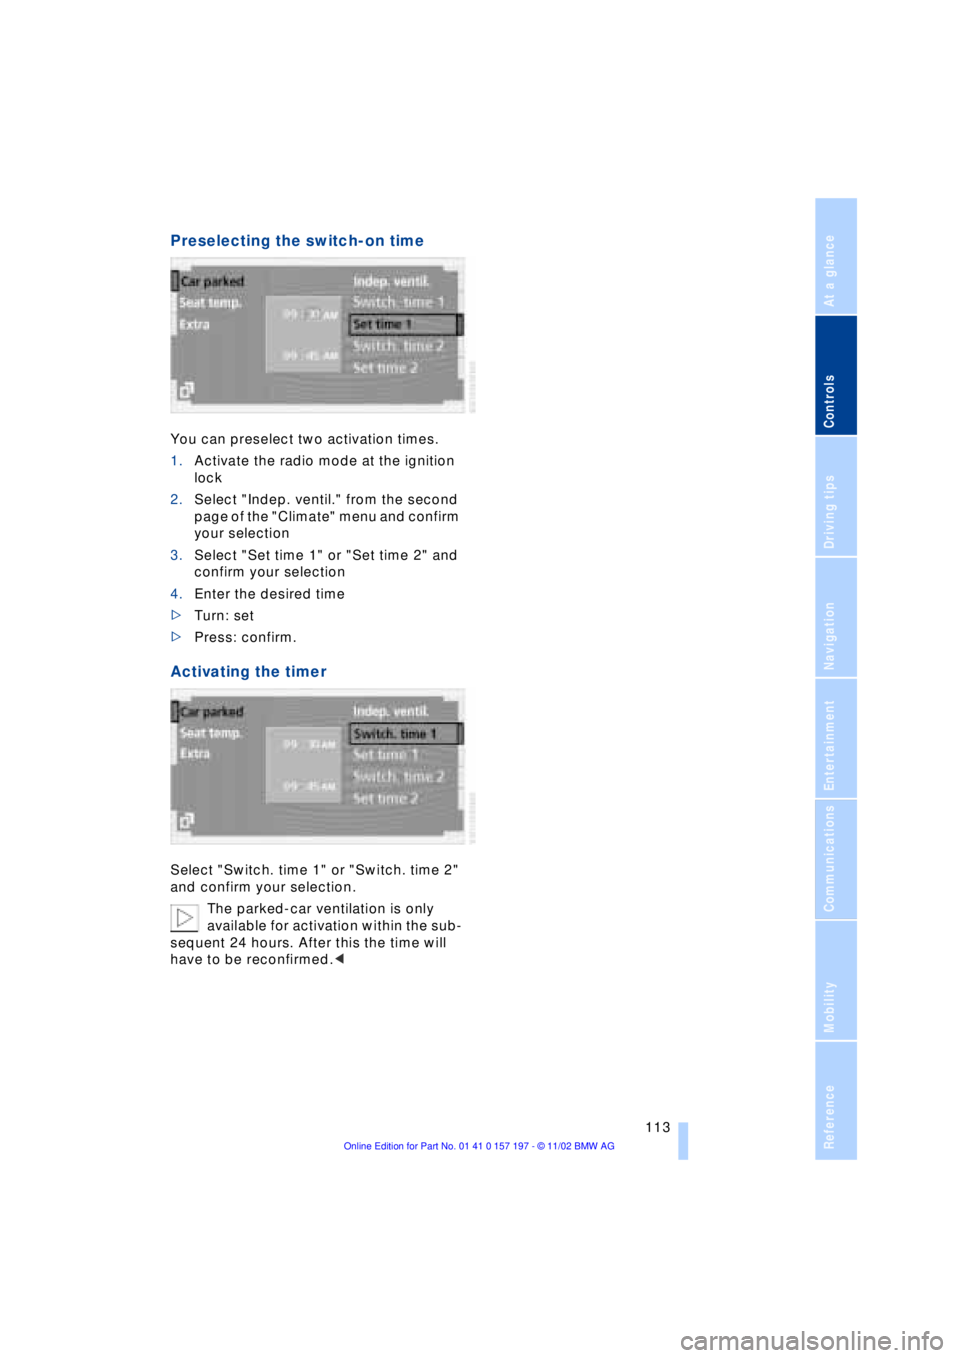
You can preselect two activation times.
1.Activate the radio mode at the ignition
lock
2.Select "Indep. ventil." from the second
page of the "Climate" menu and confirm
your selection
3.Select "Set time 1" or "Set time 2" and
confirm your selection
4.Enter the desired time
>Turn: set
>Press: confirm.
Activating the timer
Select "Switch. time 1" or "Switch. time 2"
and confirm your selection.
The parked-car ventilation is only
available for activation within the sub-
sequent 24 hours. After this the time will
have to be reconfirmed.<
Page 117 of 229
At a glance
Controls
Driving tips
Communications
Navigation
Entertainment
Mobility
Reference
115
The device can be operated as of ignition
on.
If the device can not be operated after
repeated programming, check
whether the original hand-held transmitter
uses an alternating-code system. To do so,
either read the instructions of the original
hand-held transmitter or press and hold
down the programmed memory key 1 of
the integrated universal remote control. If
the indicator lamp 2 on the integrated uni-
versal remote control flashes quickly for a
brief period and then remains lit up for
approx. two seconds, this indicates that
the original hand-held transmitter is
equipped with an alternating code. In the
case of an alternating-code system, pro-
gram the memory keys 1 as described at
the section on alternating-code transmit-
ters.<
Alternating-code transmitters
Consult the operating instructions of the
unit you wish to set when programming the
integrated universal remote control. Find
out about the possibility for synchroniza-
tion.
When programming hand-held transmitters
that employ an alternating code, please
observe the following supplementary
instructions:
Programming will be easier with the
aid of a second person.<
1.Park your vehicle within the range of the
remote-controlled device
2.Program the integrated universal
remote control as described at the sec-
tion on fixed code hand-held transmit-
ters.
3.Localize the key on the receiver of the
device you want to set up, e.g. on the
upper section of the motor
4.Press the key on the receiver of the
device you want to set up. After step 4,
approx. 30 seconds remain for step 5
5.Press the programmed memory key 1
on the integrated universal remote con-
trol three times. The corresponding memory key 1 is now
programmed with the signal of the original
hand-held transmitter.
If you have any additional questions,
please contact your BMW center.<
Clearing memory keys
Individual memory keys 1 can not be
cleared. However, you clear all three
memory keys 1 together as follows:
Press both outer keys 1 of the integrated
universal remote control for approx.
20 seconds, maintaining pressure until the
indicator lamp 2 starts to flash.
Sun blinds*
Rear window blind
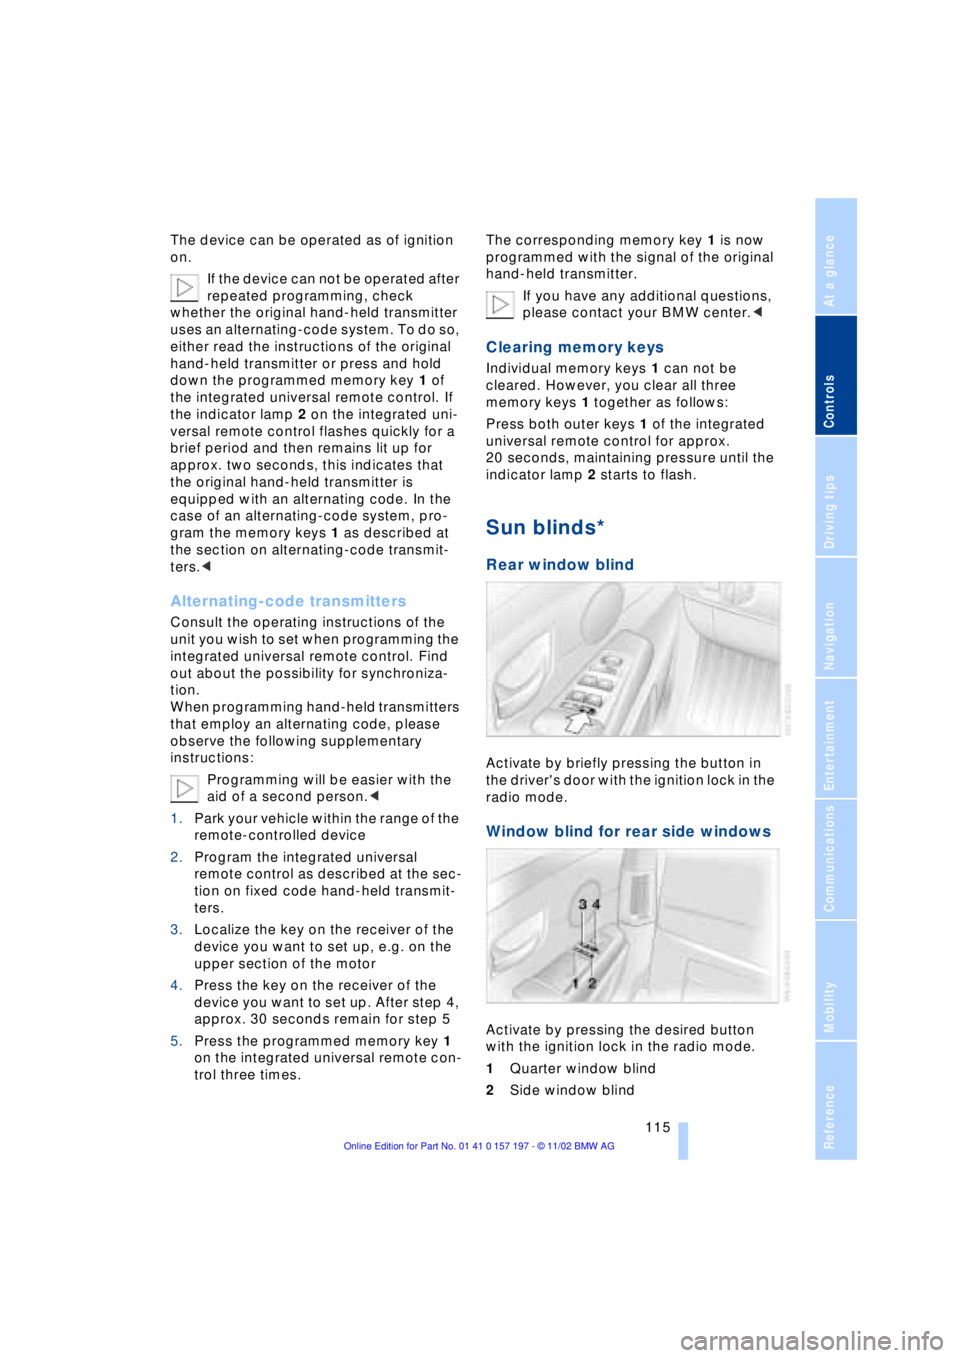
Activate by briefly pressing the button in
the driver's door with the ignition lock in the
radio mode.
Window blind for rear side windows
Activate by pressing the desired button
with the ignition lock in the radio mode.
1Quarter window blind
2Side window blind
Page 148 of 229
Entertainment
146
Entertainment
Controls
Operation using buttons
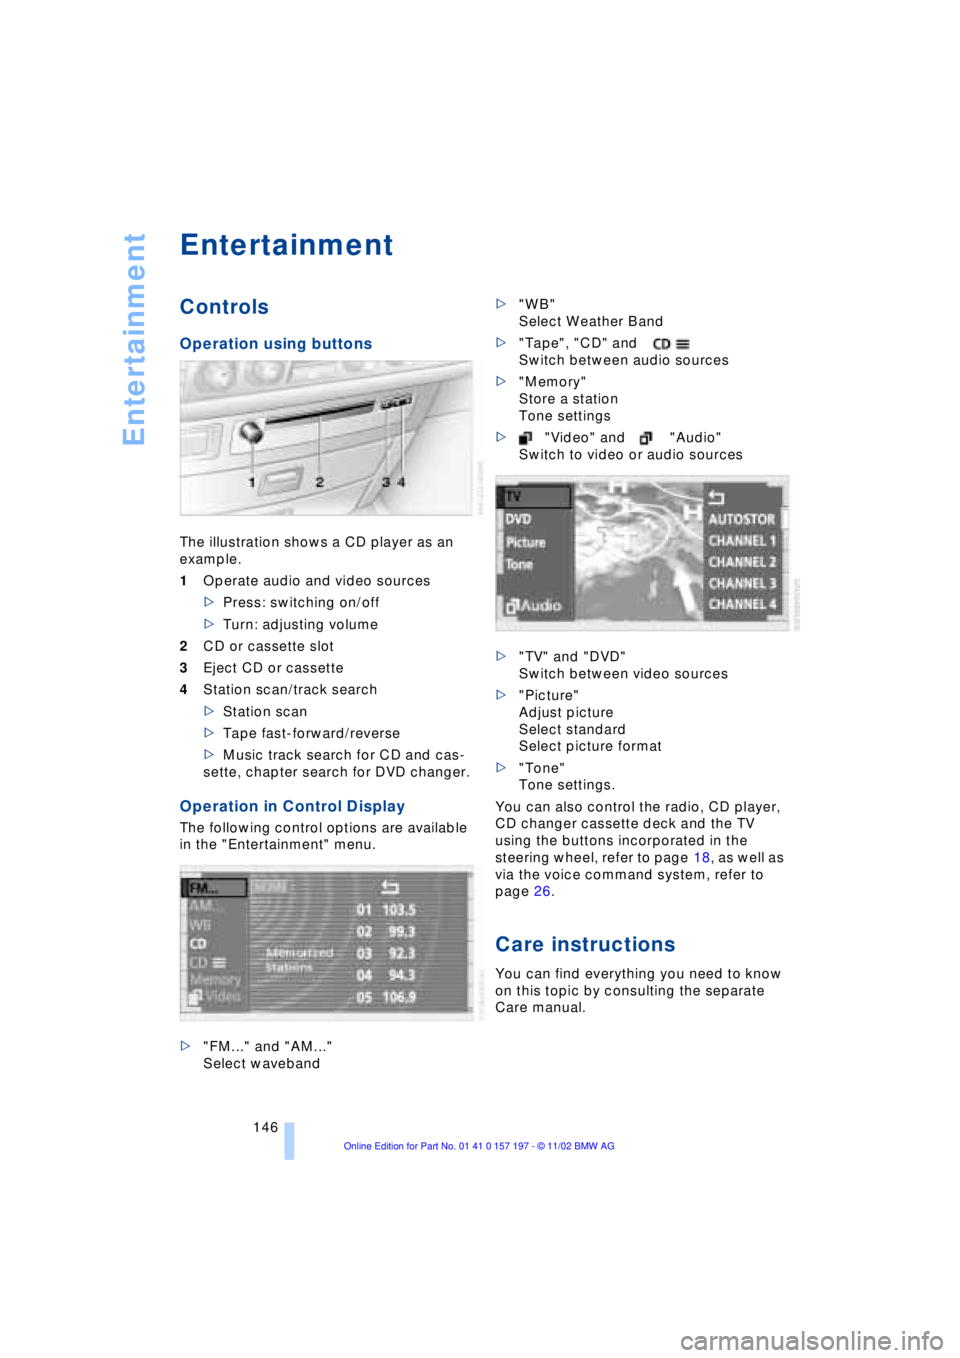
The illustration shows a CD player as an
example.
1Operate audio and video sources
>Press: switching on/off
>Turn: adjusting volume
2CD or cassette slot
3Eject CD or cassette
4Station scan/track search
>Station scan
>Tape fast-forward/reverse
>Music track search for CD and cas-
sette, chapter search for DVD changer.
Operation in Control Display
The following control options are available
in the "Entertainment" menu.
>"FM..." and "AM..."
Select waveband>"WB"
Select Weather Band
>"Tape", "CD" and
Switch between audio sources
>"Memory"
Store a station
Tone settings
>"Video" and "Audio"
Switch to video or audio sources
>"TV" and "DVD"
Switch between video sources
>"Picture"
Adjust picture
Select standard
Select picture format
>"Tone"
Tone settings.
You can also control the radio, CD player,
CD changer cassette deck and the TV
using the buttons incorporated in the
steering wheel, refer to page 18, as well as
via the voice command system, refer to
page 26.
Care instructions
You can find everything you need to know
on this topic by consulting the separate
Care manual.
Page 149 of 229
At a glance
Controls
Driving tips
Communications
Navigation
Entertainment
Mobility
Reference
147
Switching on/off
Press the knob.
The system returns to the most recently
selected audio or video source: radio, cas-
sette, CD, DVD or TV.
Using with ignition off
Switching the ignition off simultaneously
deactivates the sound system.
Switch on again as desired.
The audio and video functions remain
available for use for a period of approx.
20 minutes after you switch off the ignition.
To avoid discharging the battery you
should always switch off the sound
and video systems when leaving the
vehicle.<
Volume adjustment
Adjusting volume
Turn the knob to the desired volume level.The sound system automatically
reverts to its mute mode automati-
cally whenever you use your portable
phone.<
The system automatically selects
your individual volume setting each
time you unlock the vehicle using your per-
sonal remote control unit.<
Tone control
Playing audio recordings
You can choose from the following tone
settings:
>Treble:
To amplify or reduce high frequencies
>Bass:
To amplify or reduce low frequencies
>Right/left balance adjustment Ð
Balance:
Left or right, high/low volume
>Front-to-rear adjustment Ð Fader:
Front or rear, high/low volume
>Default settings Ð RESET:
This feature resets the tone settings to
their standard default settings
>Speed-sensitive volume adjustment Ð
Speed Vol.
>Spatial sound effect Professional
LOGIC7
*
>Equalizer*.
The speakers and headphones can
be adjusted separately. The tone set-
tings of the headphones are made in the
rear screen with the headphones con-
nected. Only treble, bass and balance can
be adjusted.<
The system automatically selects
your individual tone setting each time
you unlock the vehicle using your personal
remote control unit.< {Radio} or {Audio off}.