2003 BMW 760LI SEDAN climate control
[x] Cancel search: climate controlPage 5 of 229
At a glance
Operation
Driving tips
Communications
Navigation
Entertainment
Mobility
Reference
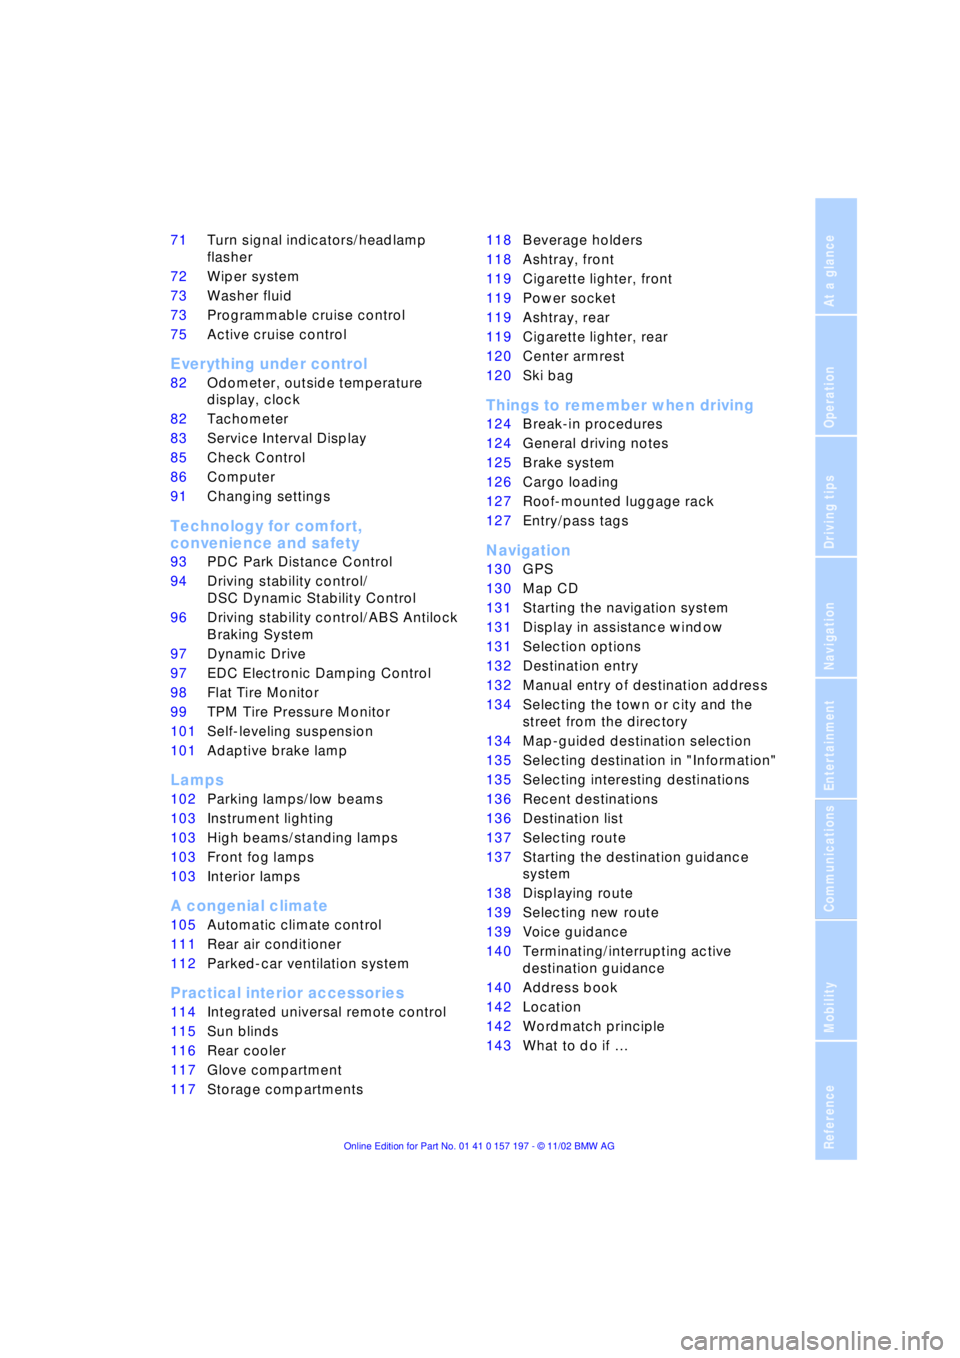
71Turn signal indicators/headlamp
flasher
72Wiper system
73Washer fluid
73Programmable cruise control
75Active cruise control
*
Everything under control
82Odometer, outside temperature
display, clock
82Tachometer
83Service Interval Display
85Check Control
86Computer
91Changing settings
Technology for comfort,
convenience and safety
93PDC Park Distance Control
*
94Driving stability control/
DSC Dynamic Stability Control
96Driving stability control/ABS Antilock
Braking System
97Dynamic Drive
97EDC Electronic Damping Control
*
98Flat Tire Monitor
*
99TPM Tire Pressure Monitor
*
101Self-leveling suspension
*
101Adaptive brake lamp
Lamps
102Parking lamps/low beams
103Instrument lighting
103High beams/standing lamps
103Front fog lamps
103Interior lamps
A congenial climate
105Automatic climate control
111Rear air conditioner
*
112Parked-car ventilation system
Practical interior accessories
114Integrated universal remote control
*
115Sun blinds
*
116Rear cooler
*
117Glove compartment
117Storage compartments118Beverage holders
118Ashtray, front
119Cigarette lighter, front
119Power socket
119Ashtray, rear
119Cigarette lighter, rear
120Center armrest
120Ski bag
*
Things to remember when driving
124Break-in procedures
124General driving notes
125Brake system
126Cargo loading
127Roof-mounted luggage rack
*
127Entry/pass tags
Navigation
130GPS
130Map CD
131Starting the navigation system
131Display in assistance window
*
131Selection options
132Destination entry
132Manual entry of destination address
134Selecting the town or city and the
street from the directory
134Map-guided destination selection
135Selecting destination in "Information"
135Selecting interesting destinations
136Recent destinations
136Destination list
137Selecting route
137Starting the destination guidance
system
138Displaying route
139Selecting new route
139Voice guidance
140Terminating/interrupting active
destination guidance
140Address book
142Location
142Wordmatch principle
143What to do if É
Page 19 of 229
At a glance
Controls
Driving tips
Communications
Navigation
Entertainment
Mobility
Reference
17
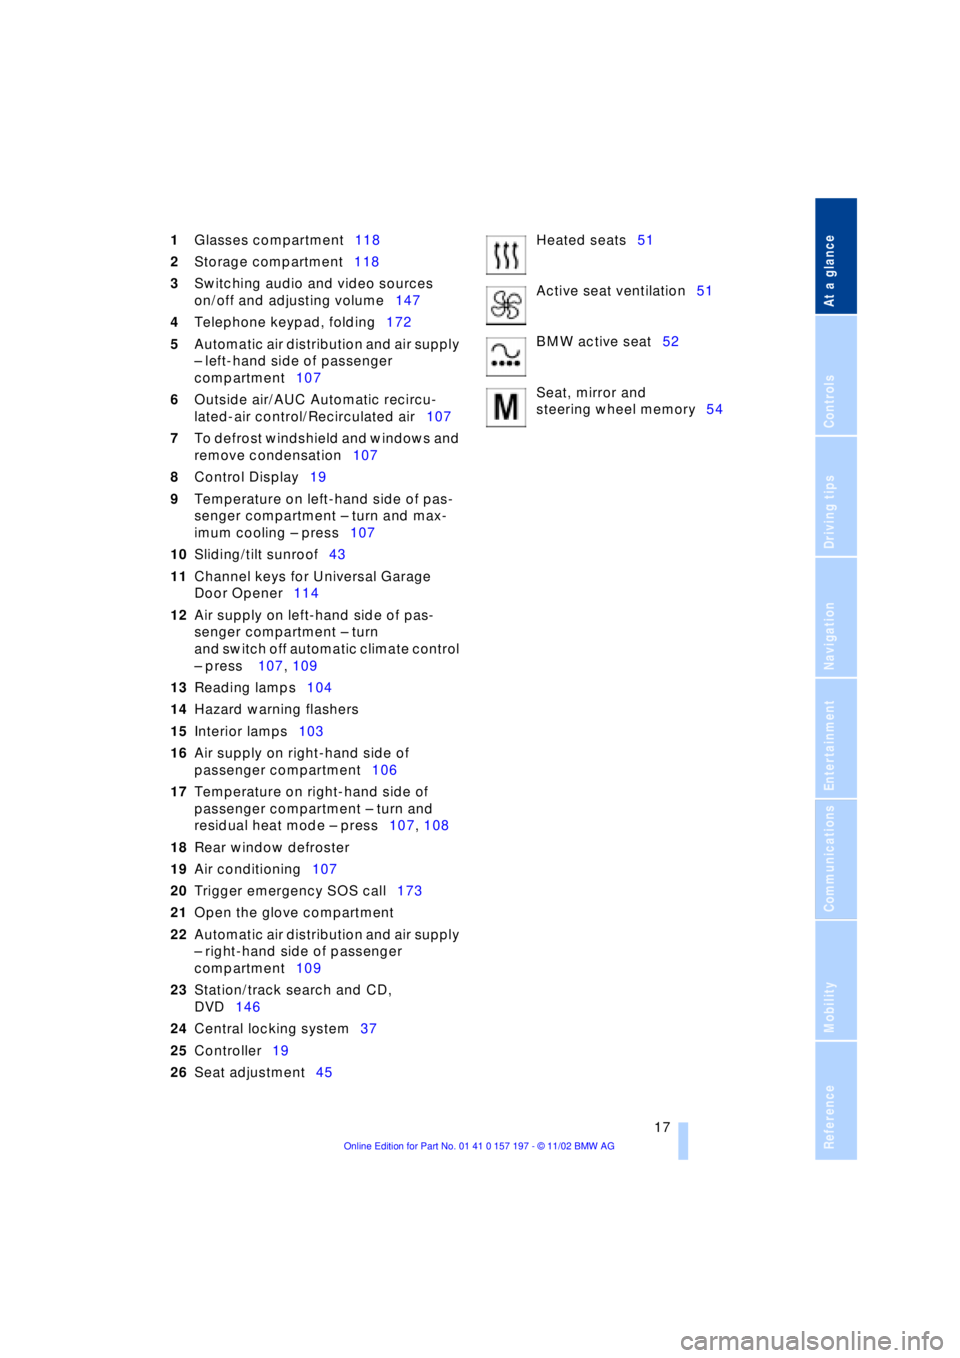
1Glasses compartment118
2Storage compartment118
3Switching audio and video sources
on/off and adjusting volume147
4Telephone keypad, folding172
5Automatic air distribution and air supply
Ð left-hand side of passenger
compartment107
6Outside air/AUC Automatic recircu-
lated-air control/Recirculated air107
7To defrost windshield and windows and
remove condensation107
8Control Display19
9Temperature on left-hand side of pas-
senger compartment Ð turn and max-
imum cooling Ð press107
10Sliding/tilt sunroof43
11Channel keys for Universal Garage
Door Opener114
12Air supply on left-hand side of pas-
senger compartment Ð turn
and switch off automatic climate control
Ð press 107, 109
13Reading lamps104
14Hazard warning flashers
15Interior lamps103
16Air supply on right-hand side of
passenger compartment106
17Temperature on right-hand side of
passenger compartment Ð turn and
residual heat mode Ð press107, 108
18Rear window defroster
19Air conditioning107
20Trigger emergency SOS call173
21Open the glove compartment
22Automatic air distribution and air supply
Ð right-hand side of passenger
compartment109
23Station/track search and CD,
DVD146
24Central locking system37
25Controller19
26Seat adjustment45Heated seats51
Active seat ventilation51
BMW active seat52
Seat, mirror and
steering wheel memory54
Page 22 of 229
Control Center
20
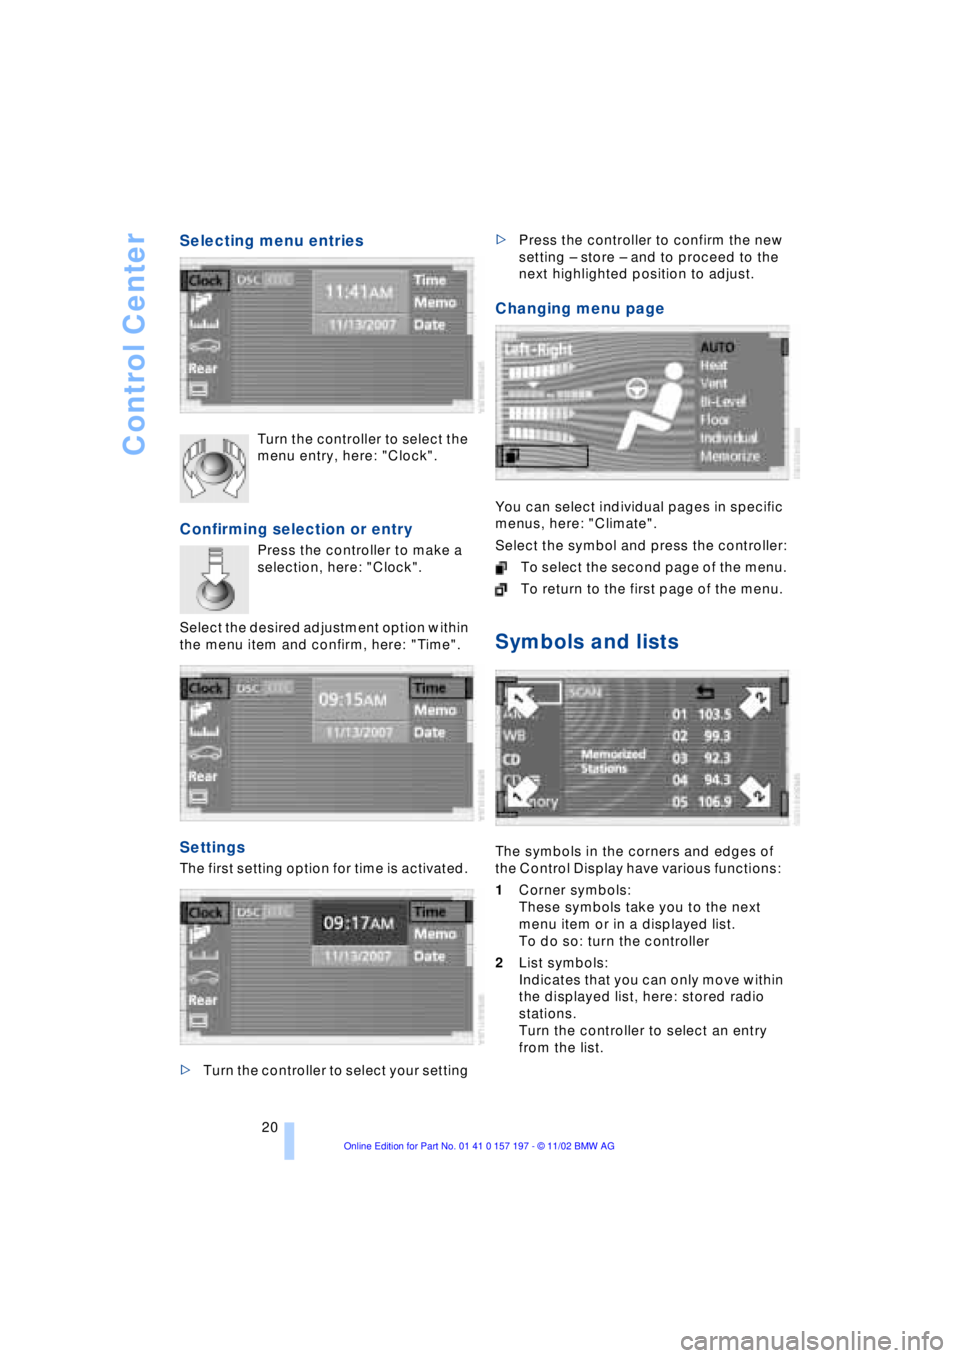
Selecting menu entries
Turn the controller to select the
menu entry, here: "Clock".
Confirming selection or entry
Press the controller to make a
selection, here: "Clock".
Select the desired adjustment option within
the menu item and confirm, here: "Time".
Settings
The first setting option for time is activated.
>Turn the controller to select your setting >Press the controller to confirm the new
setting Ð store Ð and to proceed to the
next highlighted position to adjust.
Changing menu page
You can select individual pages in specific
menus, here: "Climate".
Select the symbol and press the controller:
To select the second page of the menu.
To return to the first page of the menu.
Symbols and lists
The symbols in the corners and edges of
the Control Display have various functions:
1Corner symbols:
These symbols take you to the next
menu item or in a displayed list.
To do so: turn the controller
2List symbols:
Indicates that you can only move within
the displayed list, here: stored radio
stations.
Turn the controller to select an entry
from the list.
Page 25 of 229
At a glance
Controls
Driving tips
Communications
Navigation
Entertainment
Mobility
Reference
23
>Units of measure and display
format91
>Brightness92
>Lock Control Center in rear24
8Climate
>Automatic climate control105
>Heated seats51
>Parked-car ventilation system112
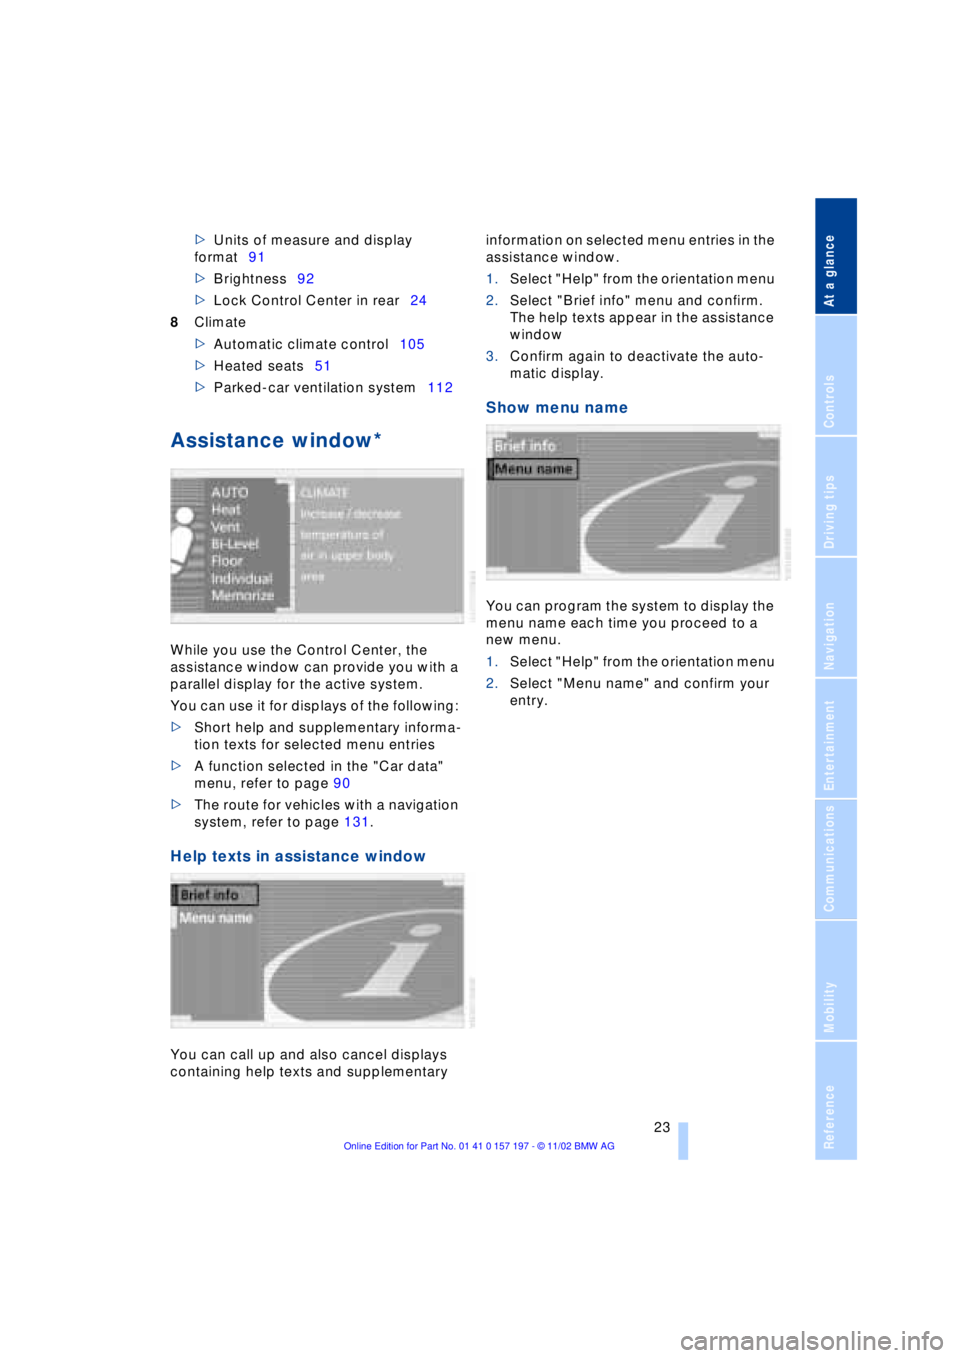
Assistance window*
While you use the Control Center, the
assistance window can provide you with a
parallel display for the active system.
You can use it for displays of the following:
>Short help and supplementary informa-
tion texts for selected menu entries
>A function selected in the "Car data"
menu, refer to page 90
>The route for vehicles with a navigation
system, refer to page 131.
Help texts in assistance window
You can call up and also cancel displays
containing help texts and supplementary information on selected menu entries in the
assistance window.
1.Select "Help" from the orientation menu
2.Select "Brief info" menu and confirm.
The help texts appear in the assistance
window
3.Confirm again to deactivate the auto-
matic display.
Show menu name
You can program the system to display the
menu name each time you proceed to a
new menu.
1.Select "Help" from the orientation menu
2.Select "Menu name" and confirm your
entry.
Page 42 of 229
Opening and closing
40 >Close all windows. Shut the sliding/tilt
sunroof
>Adjust the automatic climate control's
blower to supply a high rate of airflow,
refer to page 107.<
Automatic luggage compartment lid
operation*
Opening
The luggage compartment lid opens all the
way, when you
>press the button next to the steering
column
>press the button on the outside of the
luggage compartment lid, refer to
page 38
>press button 3on the remote
control unit, refer to page 36.
During opening the luggage compart-
ment lid pivots upward and to the
rear. Ensure that adequate clearance is
available before opening.<
Closing
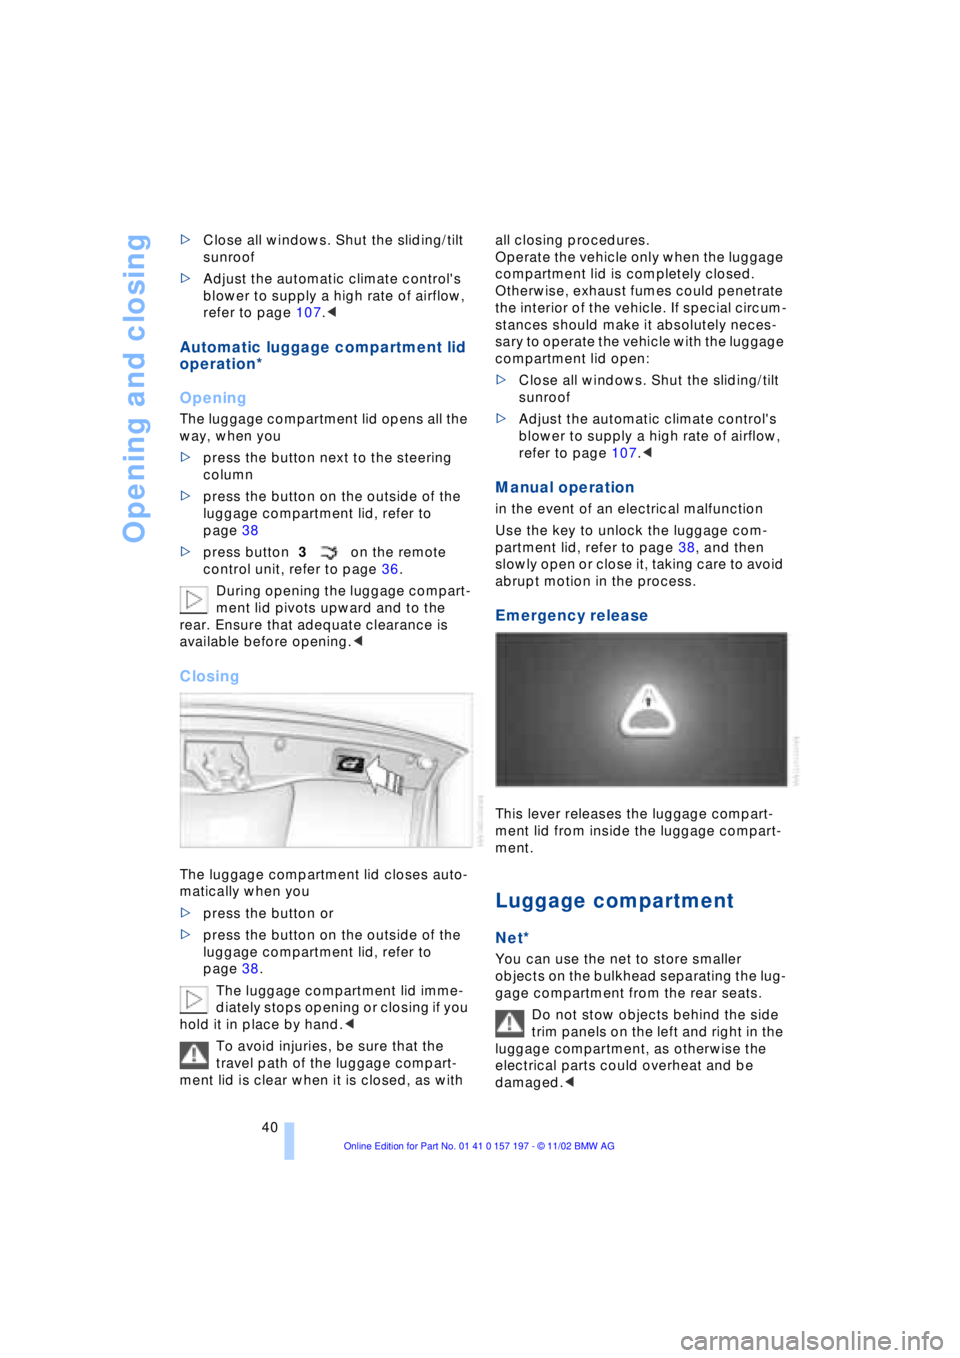
The luggage compartment lid closes auto-
matically when you
>press the button or
>press the button on the outside of the
luggage compartment lid, refer to
page 38.
The luggage compartment lid imme-
diately stops opening or closing if you
hold it in place by hand.<
To avoid injuries, be sure that the
travel path of the luggage compart-
ment lid is clear when it is closed, as with all closing procedures.
Operate the vehicle only when the luggage
compartment lid is completely closed.
Otherwise, exhaust fumes could penetrate
the interior of the vehicle. If special circum-
stances should make it absolutely neces-
sary to operate the vehicle with the luggage
compartment lid open:
>Close all windows. Shut the sliding/tilt
sunroof
>Adjust the automatic climate control's
blower to supply a high rate of airflow,
refer to page 107.<
Manual operation
in the event of an electrical malfunction
Use the key to unlock the luggage com-
partment lid, refer to page 38, and then
slowly open or close it, taking care to avoid
abrupt motion in the process.
Emergency release
This lever releases the luggage compart-
ment lid from inside the luggage compart-
ment.
Luggage compartment
Net*
You can use the net to store smaller
objects on the bulkhead separating the lug-
gage compartment from the rear seats.
Do not stow objects behind the side
trim panels on the left and right in the
luggage compartment, as otherwise the
electrical parts could overheat and be
damaged.<
Page 53 of 229
At a glance
Controls
Driving tips
Communications
Navigation
Entertainment
Mobility
Reference
51
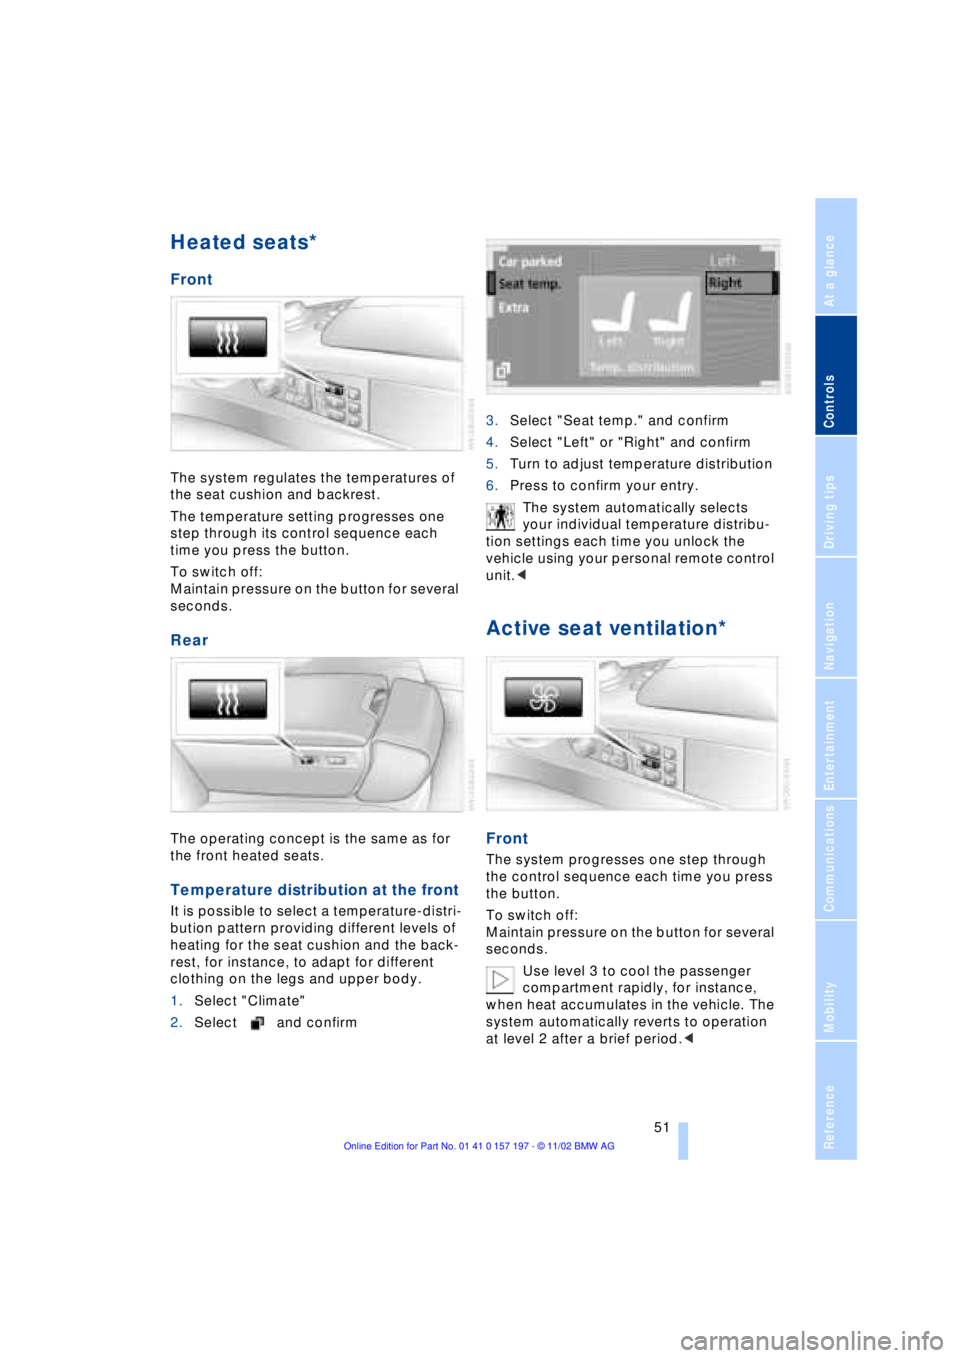
Heated seats*
Front
The system regulates the temperatures of
the seat cushion and backrest.
The temperature setting progresses one
step through its control sequence each
time you press the button.
To switch off:
Maintain pressure on the button for several
seconds.
Rear
The operating concept is the same as for
the front heated seats.
Temperature distribution at the front
It is possible to select a temperature-distri-
bution pattern providing different levels of
heating for the seat cushion and the back-
rest, for instance, to adapt for different
clothing on the legs and upper body.
1.Select "Climate"
2.Select and confirm3.Select "Seat temp." and confirm
4.Select "Left" or "Right" and confirm
5.Turn to adjust temperature distribution
6.Press to confirm your entry.
The system automatically selects
your individual temperature distribu-
tion settings each time you unlock the
vehicle using your personal remote control
unit.<
Active seat ventilation*
Front
The system progresses one step through
the control sequence each time you press
the button.
To switch off:
Maintain pressure on the button for several
seconds.
Use level 3 to cool the passenger
compartment rapidly, for instance,
when heat accumulates in the vehicle. The
system automatically reverts to operation
at level 2 after a brief period.<
Page 62 of 229
Adjustments
60
Vehicle Memory, Key
Memory
How the system functions
Doubtless you have often reflected on how
great it would be if you could configure
your vehicle's various adjustment settings
to meet your own personal requirements. In
developing your vehicle, BMW has incor-
porated a number of options for personal
adjustment which you can set in the Con-
trol Center. You can have these pro-
grammed at your BMW center.
The available configuration settings fall into
two categories, according to whether their
primary orientation is the vehicle Ð Vehicle
Memory Ð or the individual Ð Key Memory.
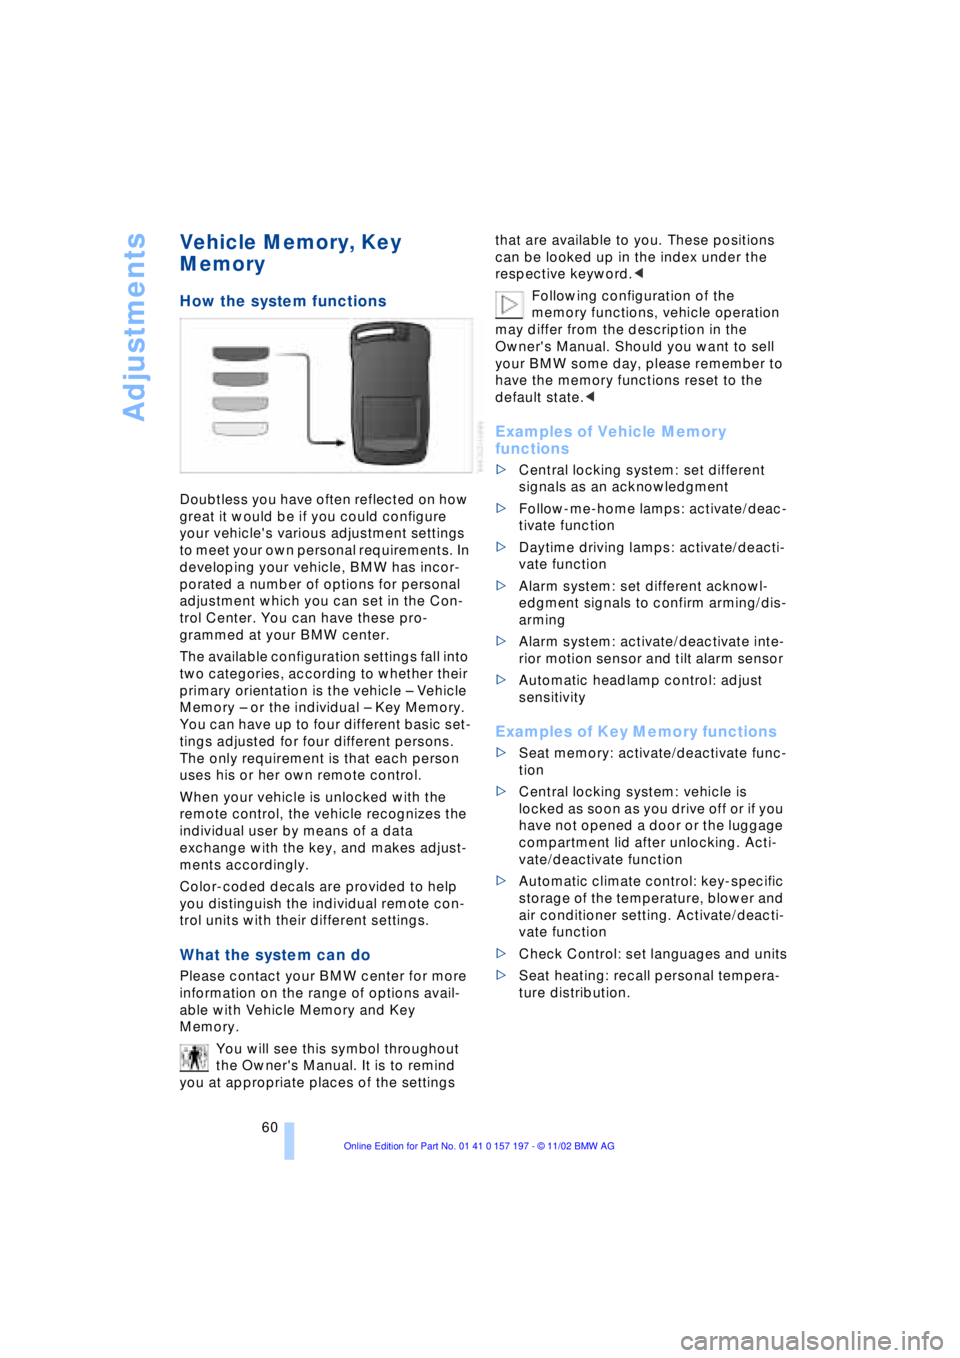
You can have up to four different basic set-
tings adjusted for four different persons.
The only requirement is that each person
uses his or her own remote control.
When your vehicle is unlocked with the
remote control, the vehicle recognizes the
individual user by means of a data
exchange with the key, and makes adjust-
ments accordingly.
Color-coded decals are provided to help
you distinguish the individual remote con-
trol units with their different settings.
What the system can do
Please contact your BMW center for more
information on the range of options avail-
able with Vehicle Memory and Key
Memory.
You will see this symbol throughout
the Owner's Manual. It is to remind
you at appropriate places of the settings that are available to you. These positions
can be looked up in the index under the
respective keyword.<
Following configuration of the
memory functions, vehicle operation
may differ from the description in the
Owner's Manual. Should you want to sell
your BMW some day, please remember to
have the memory functions reset to the
default state.<
Examples of Vehicle Memory
functions
>Central locking system: set different
signals as an acknowledgment
>Follow-me-home lamps: activate/deac-
tivate function
>Daytime driving lamps: activate/deacti-
vate function
>Alarm system: set different acknowl-
edgment signals to confirm arming/dis-
arming
>Alarm system: activate/deactivate inte-
rior motion sensor and tilt alarm sensor
>Automatic headlamp control: adjust
sensitivity
Examples of Key Memory functions
>Seat memory: activate/deactivate func-
tion
>Central locking system: vehicle is
locked as soon as you drive off or if you
have not opened a door or the luggage
compartment lid after unlocking. Acti-
vate/deactivate function
>Automatic climate control: key-specific
storage of the temperature, blower and
air conditioner setting. Activate/deacti-
vate function
>Check Control: set languages and units
>Seat heating: recall personal tempera-
ture distribution.
Page 107 of 229
At a glance
Controls
Driving tips
Communications
Navigation
Entertainment
Mobility
Reference
105
A congenial climate
Automatic climate control
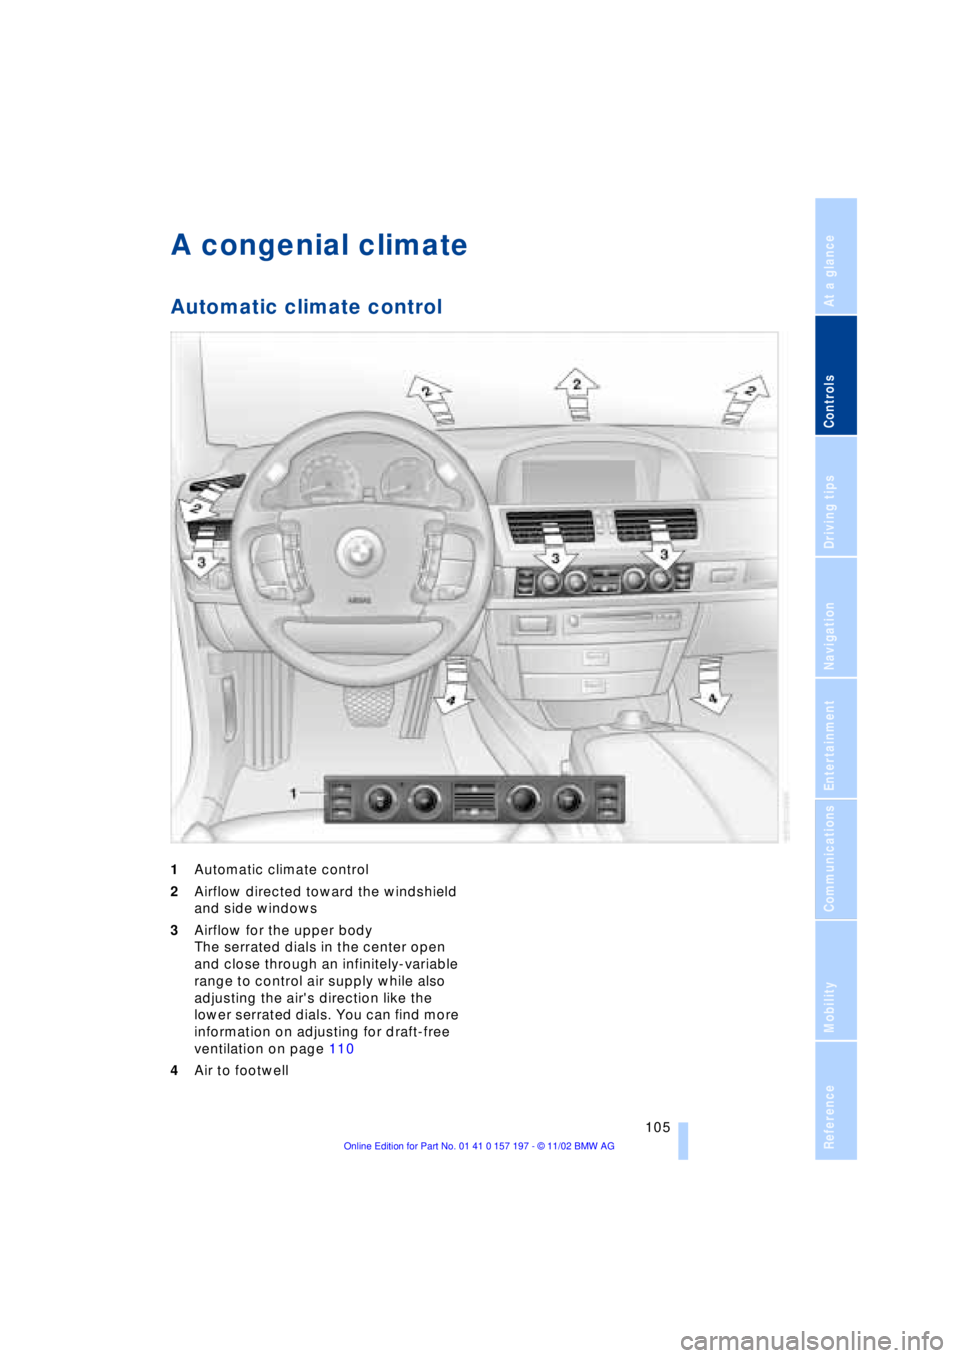
1Automatic climate control
2Airflow directed toward the windshield
and side windows
3Airflow for the upper body
The serrated dials in the center open
and close through an infinitely-variable
range to control air supply while also
adjusting the air's direction like the
lower serrated dials. You can find more
information on adjusting for draft-free
ventilation on page 110
4Air to footwell