2003 BMW 760LI SEDAN ignition
[x] Cancel search: ignitionPage 4 of 229
Contents
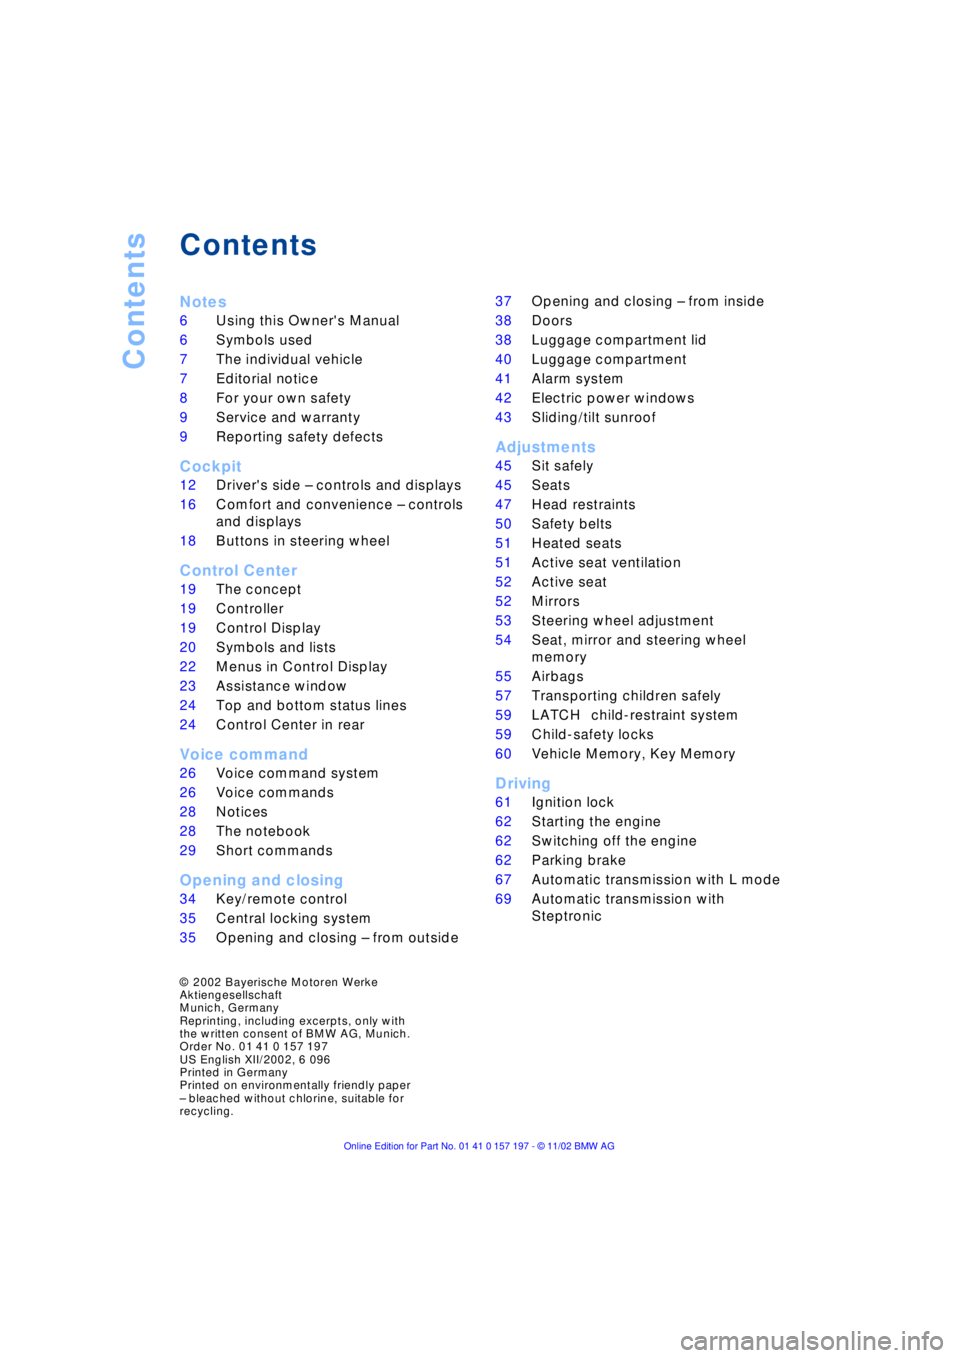
Contents
Notes
6Using this Owner's Manual
6Symbols used
7The individual vehicle
7Editorial notice
8For your own safety
9Service and warranty
9Reporting safety defects
Cockpit
12Driver's side Ð controls and displays
16Comfort and convenience Ð controls
and displays
18Buttons in steering wheel
Control Center
19The concept
19Controller
19Control Display
20Symbols and lists
22Menus in Control Display
23Assistance window
*
24Top and bottom status lines
24Control Center in rear
*
Voice command
26Voice command system
26Voice commands
28Notices
28The notebook
29Short commands
Opening and closing
34Key/remote control
35Central locking system
35Opening and closing Ð from outside 37Opening and closing Ð from inside
38Doors
38Luggage compartment lid
40Luggage compartment
41Alarm system
42Electric power windows
43Sliding/tilt sunroof
*
Adjustments
45Sit safely
45Seats
47Head restraints
50Safety belts
51Heated seats
*
51Active seat ventilation
*
52Active seat
*
52Mirrors
53Steering wheel adjustment
54Seat, mirror and steering wheel
memory
55Airbags
57Transporting children safely
59LATCH
*
child-restraint system
59Child-safety locks
60Vehicle Memory, Key Memory
Driving
61Ignition lock
62Starting the engine
62Switching off the engine
62Parking brake
67Automatic transmission with L mode
69Automatic transmission with
Steptronic
*
© 2002 Bayerische Motoren Werke
Aktiengesellschaft
Munich, Germany
Reprinting, including excerpts, only with
the written consent of BMW AG, Munich.
Order No. 01 41 0 157 197
US English XII/2002, 6 096
Printed in Germany
Printed on environmentally friendly paper
Ð bleached without chlorine, suitable for
recycling.
Page 6 of 229
Contents
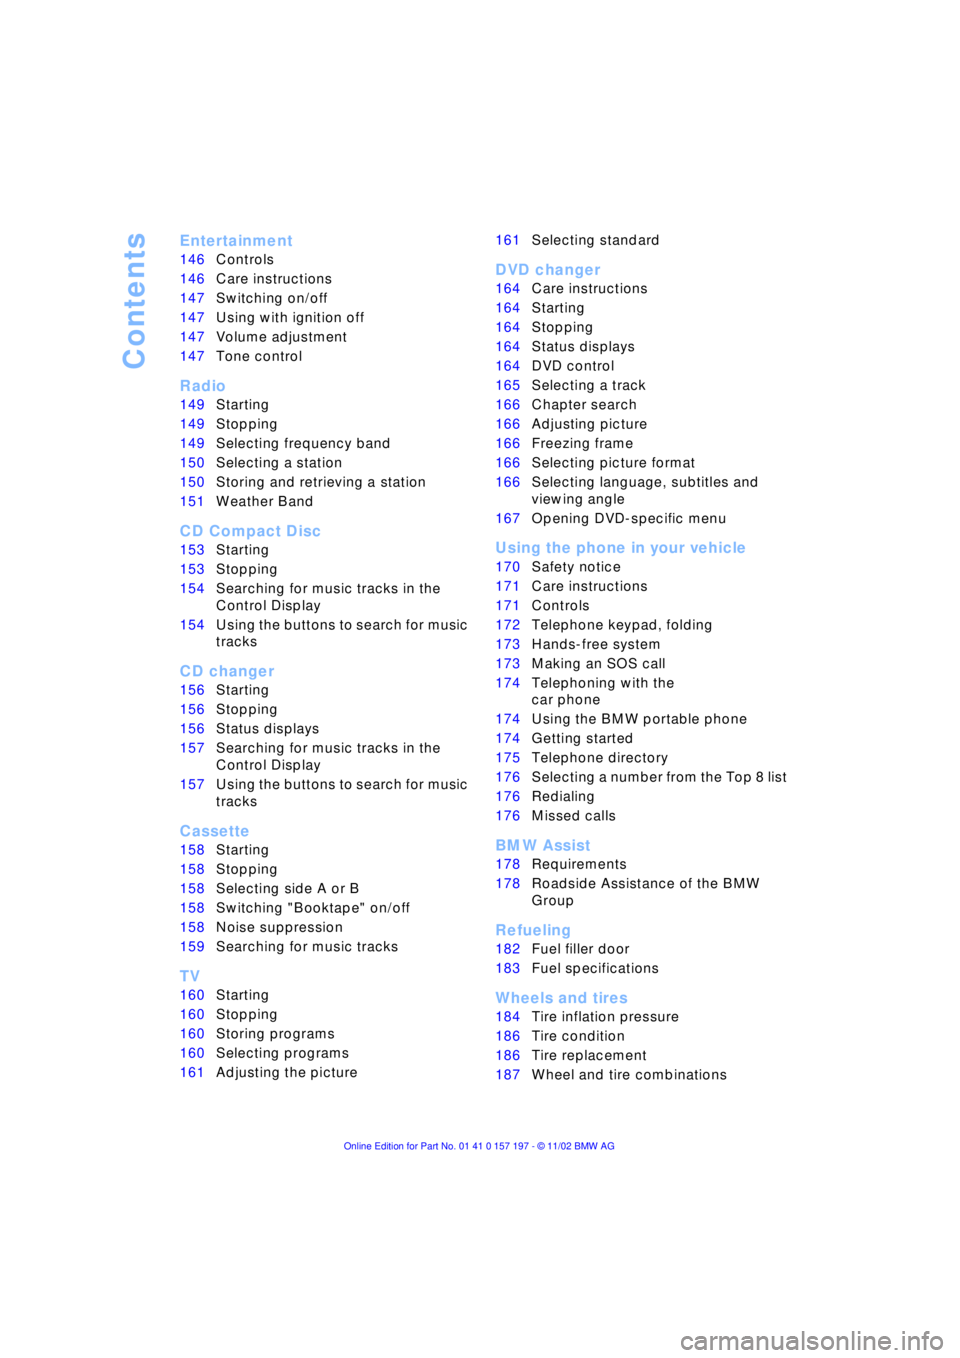
Entertainment
146Controls
146Care instructions
147Switching on/off
147Using with ignition off
147Volume adjustment
147Tone control
Radio
149Starting
149Stopping
149Selecting frequency band
150Selecting a station
150Storing and retrieving a station
151Weather Band
CD Compact Disc
153Starting
153Stopping
154Searching for music tracks in the
Control Display
154Using the buttons to search for music
tracks
CD changer
156Starting
156Stopping
156Status displays
157Searching for music tracks in the
Control Display
157Using the buttons to search for music
tracks
Cassette
158Starting
158Stopping
158Selecting side A or B
158Switching "Booktape" on/off
158Noise suppression
159Searching for music tracks
TV
160Starting
160Stopping
160Storing programs
160Selecting programs
161Adjusting the picture
*
161Selecting standard
DVD changer
164Care instructions
164Starting
164Stopping
164Status displays
164DVD control
165Selecting a track
166Chapter search
166Adjusting picture
166Freezing frame
166Selecting picture format
166Selecting language, subtitles and
viewing angle
167Opening DVD-specific menu
Using the phone in your vehicle
170Safety notice
171Care instructions
171Controls
172Telephone keypad, folding
173Hands-free system
173Making an SOS call
174Telephoning with the
car phone
174Using the BMW portable phone
174Getting started
175Telephone directory
176Selecting a number from the Top 8 list
176Redialing
176Missed calls
BMW Assist
178Requirements
178Roadside Assistance of the BMW
Group
Refueling
182Fuel filler door
183Fuel specifications
Wheels and tires
184Tire inflation pressure
186Tire condition
186Tire replacement
187Wheel and tire combinations
Page 15 of 229
At a glance
Controls
Driving tips
Communications
Navigation
Entertainment
Mobility
Reference
13
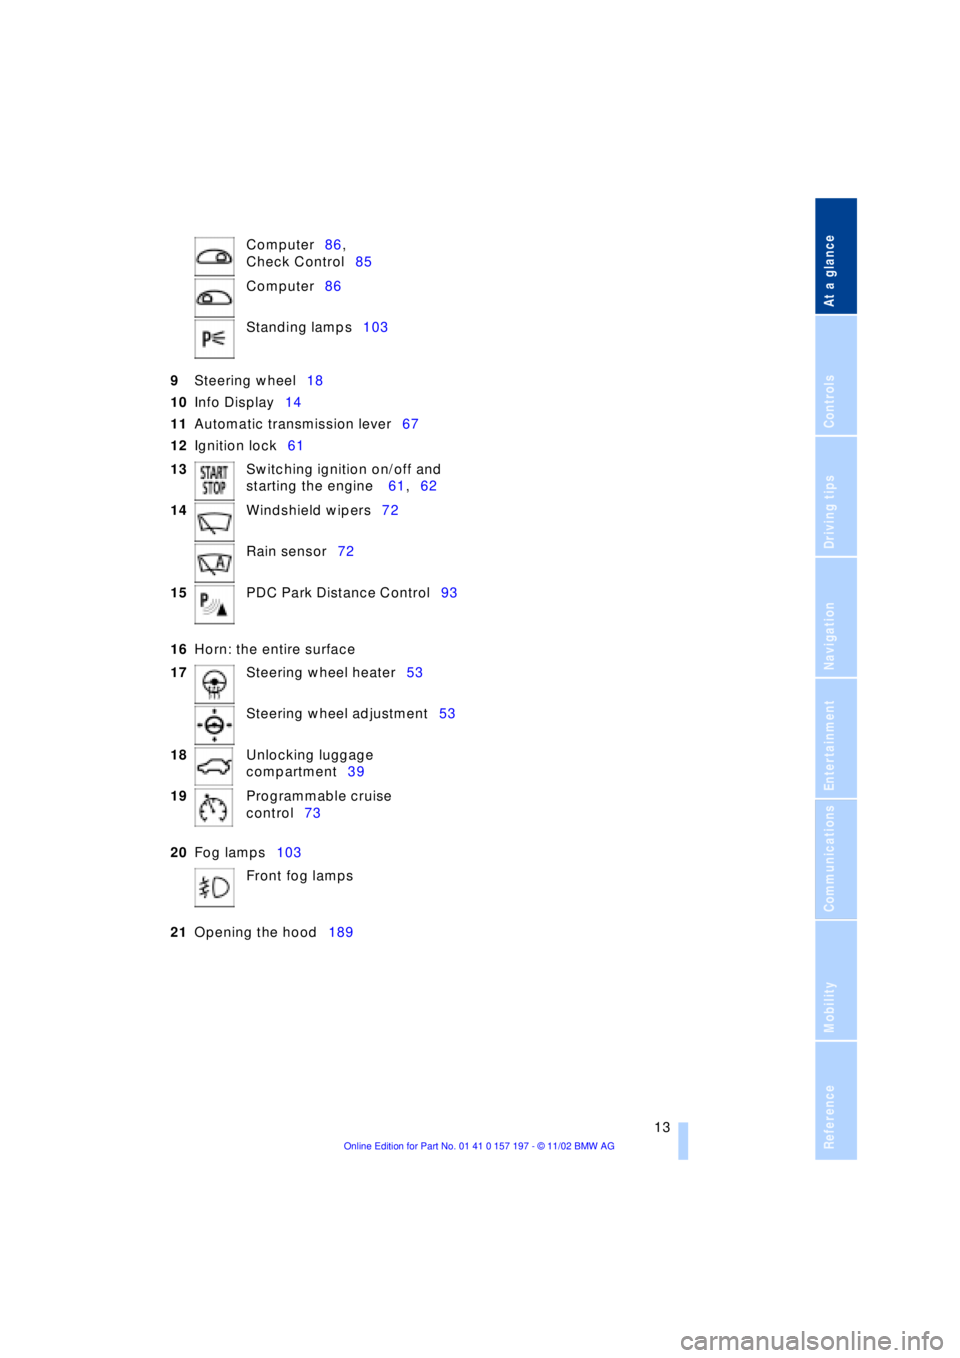
9Steering wheel18
10Info Display14
11Automatic transmission lever67
12Ignition lock61
16Horn: the entire surface
20Fog lamps103
21Opening the hood189 Computer86,
Check Control85
Computer86
Standing lamps103
13Switching ignition on/off and
starting the engine 61,62
14Windshield wipers72
Rain sensor72
15PDC Park Distance Control93
17Steering wheel heater53
Steering wheel adjustment53
18Unlocking luggage
compartment39
19Programmable cruise
control73
Front fog lamps
Page 17 of 229
At a glance
Controls
Driving tips
Communications
Navigation
Entertainment
Mobility
Reference
15
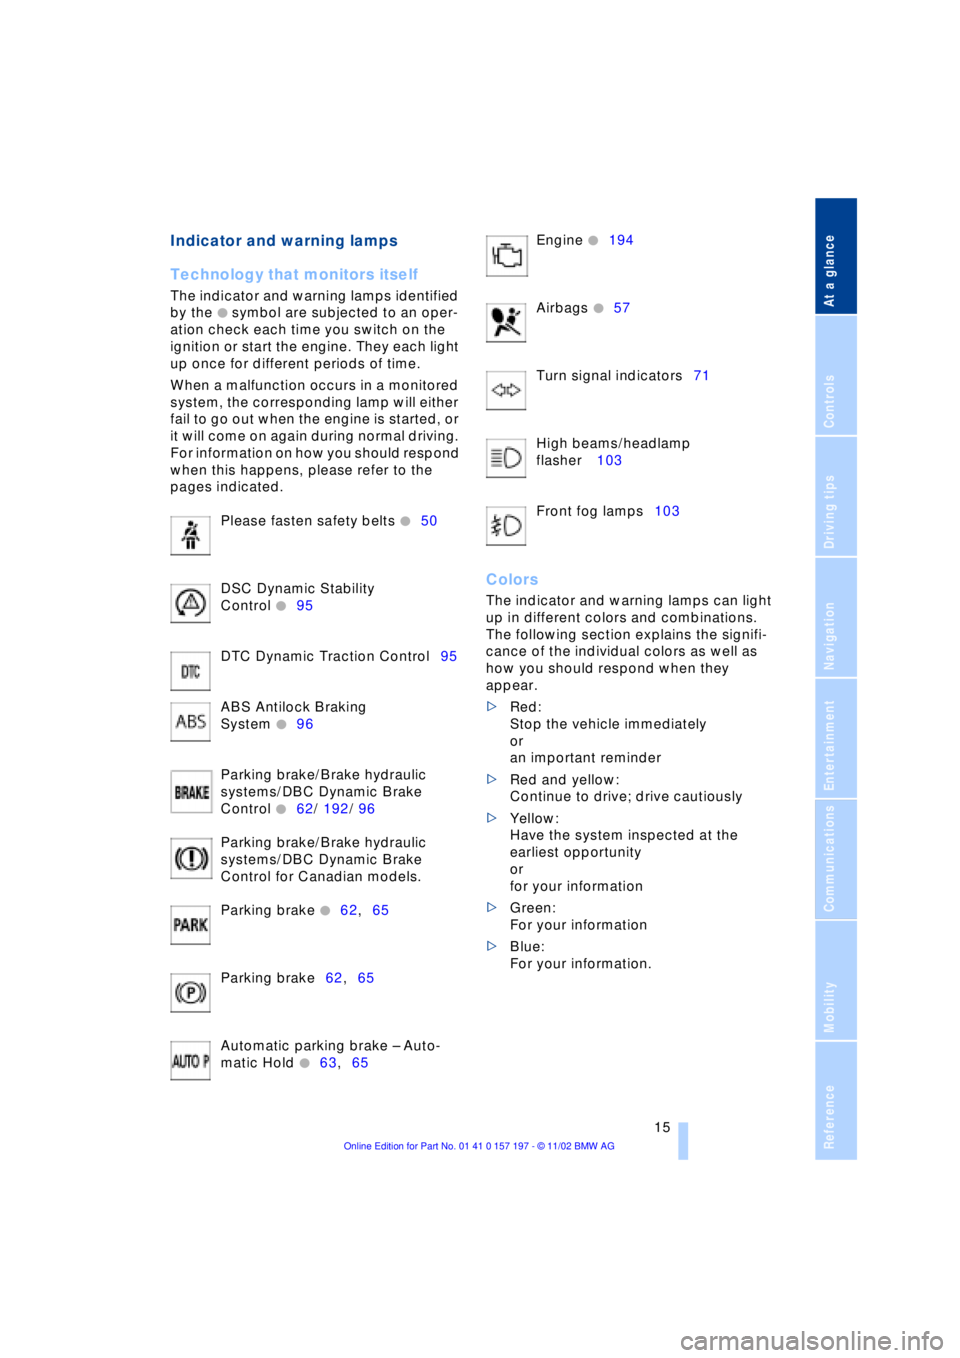
Indicator and warning lamps
Technology that monitors itself
The indicator and warning lamps identified
by the
+ symbol are subjected to an oper-
ation check each time you switch on the
ignition or start the engine. They each light
up once for different periods of time.
When a malfunction occurs in a monitored
system, the corresponding lamp will either
fail to go out when the engine is started, or
it will come on again during normal driving.
For information on how you should respond
when this happens, please refer to the
pages indicated.
Please fasten safety belts
+50
DSC Dynamic Stability
Control
+95
DTC Dynamic Traction Control95
ABS Antilock Braking
System
+96
Parking brake/Brake hydraulic
systems/DBC Dynamic Brake
Control
+62/ 192/ 96
Parking brake/Brake hydraulic
systems/DBC Dynamic Brake
Control for Canadian models.
Parking brake
+62,65
Parking brake62,65
Automatic parking brake Ð Auto-
matic Hold
+63,65 Engine
+194
Airbags
+57
Turn signal indicators71
High beams/headlamp
flasher 103
Front fog lamps103
Colors
The indicator and warning lamps can light
up in different colors and combinations.
The following section explains the signifi-
cance of the individual colors as well as
how you should respond when they
appear.
>Red:
Stop the vehicle immediately
or
an important reminder
>Red and yellow:
Continue to drive; drive cautiously
>Yellow:
Have the system inspected at the
earliest opportunity
or
for your information
>Green:
For your information
>Blue:
For your information.
Page 36 of 229
Opening and closing
34
Opening and closing
Key/remote control
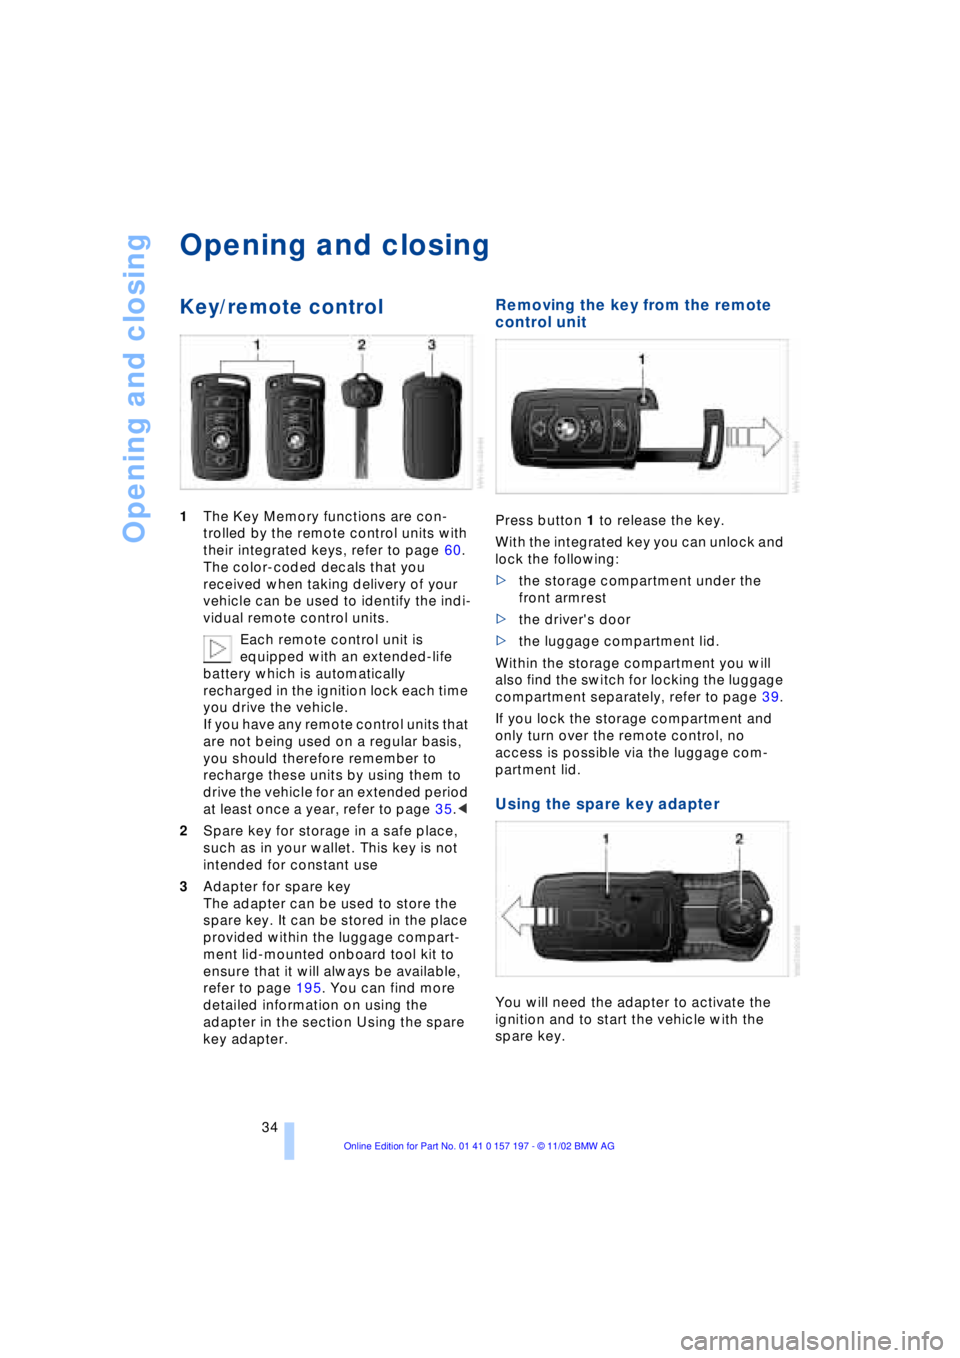
1The Key Memory functions are con-
trolled by the remote control units with
their integrated keys, refer to page 60.
The color-coded decals that you
received when taking delivery of your
vehicle can be used to identify the indi-
vidual remote control units.
Each remote control unit is
equipped with an extended-life
battery which is automatically
recharged in the ignition lock each time
you drive the vehicle.
If you have any remote control units that
are not being used on a regular basis,
you should therefore remember to
recharge these units by using them to
drive the vehicle for an extended period
at least once a year, refer to page 35.<
2Spare key for storage in a safe place,
such as in your wallet. This key is not
intended for constant use
3Adapter for spare key
The adapter can be used to store the
spare key. It can be stored in the place
provided within the luggage compart-
ment lid-mounted onboard tool kit to
ensure that it will always be available,
refer to page 195. You can find more
detailed information on using the
adapter in the section Using the spare
key adapter.
Removing the key from the remote
control unit
Press button 1 to release the key.
With the integrated key you can unlock and
lock the following:
>the storage compartment under the
front armrest
>the driver's door
>the luggage compartment lid.
Within the storage compartment you will
also find the switch for locking the luggage
compartment separately, refer to page 39.
If you lock the storage compartment and
only turn over the remote control, no
access is possible via the luggage com-
partment lid.
Using the spare key adapter
You will need the adapter to activate the
ignition and to start the vehicle with the
spare key.
Page 41 of 229
At a glance
Controls
Driving tips
Communications
Navigation
Entertainment
Mobility
Reference
39
Opening separately
Insert the key in the luggage compartment
lid's lock and turn it all the way to the right
Ð the lid opens.
To avoid being locked out inadvert-
ently, avoid laying the remote control
unit down in the luggage compartment. The
luggage compartment is locked again as
soon as you close the lid.
If you use the key to unlock the luggage
compartment lid while the alarm system is
armed, the alarm will be triggered. To
deactivate the alarm,
>unlock the vehicle using the remote
control, refer to page 36, or
>insert the remote control all the way into
the ignition lock, engaging the detent.<
Securing separately
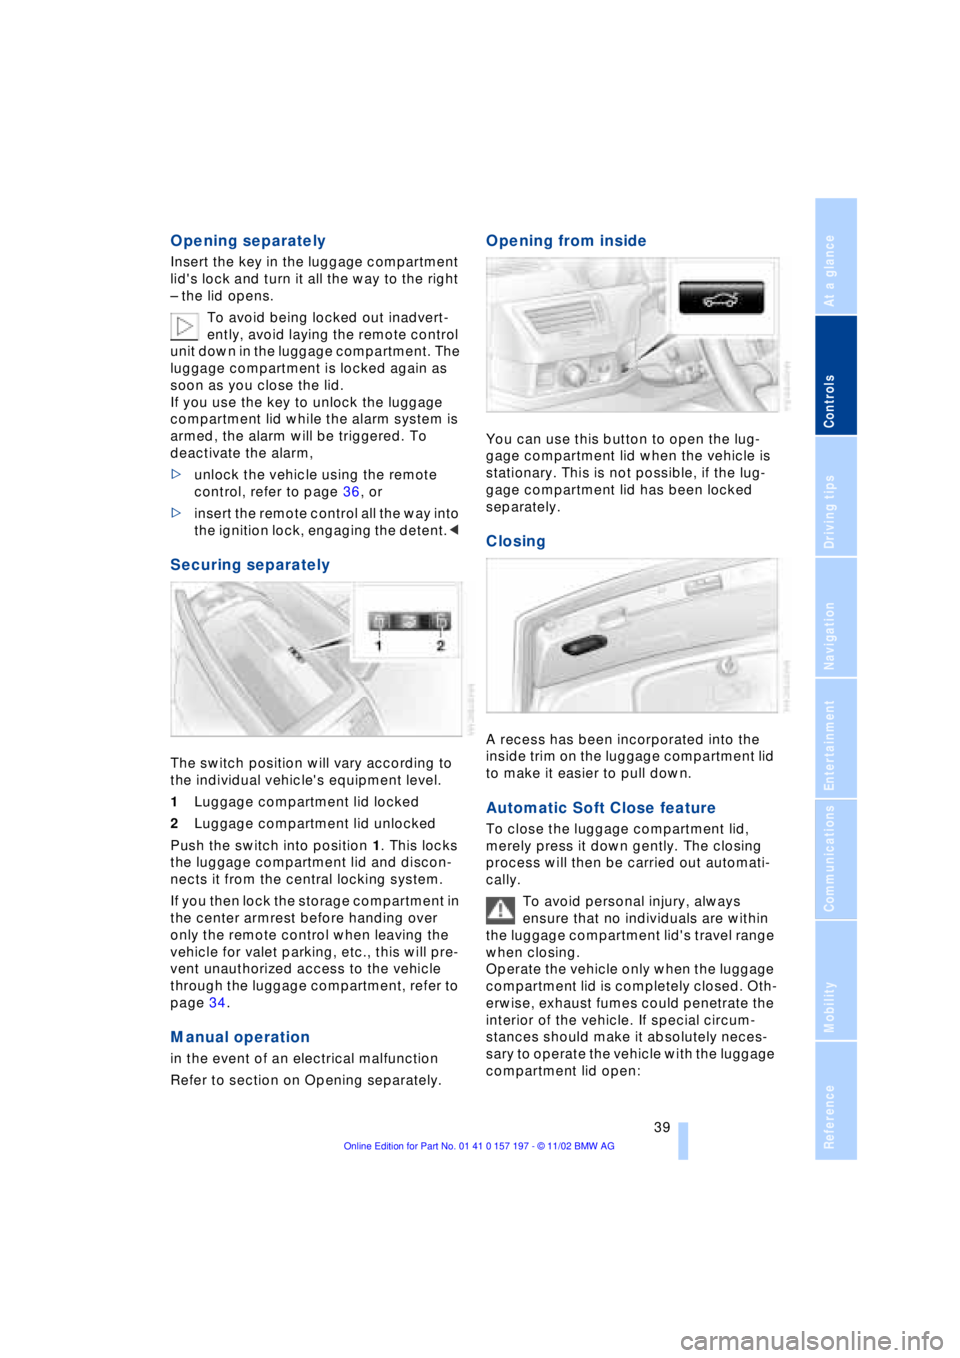
The switch position will vary according to
the individual vehicle's equipment level.
1Luggage compartment lid locked
2Luggage compartment lid unlocked
Push the switch into position 1. This locks
the luggage compartment lid and discon-
nects it from the central locking system.
If you then lock the storage compartment in
the center armrest before handing over
only the remote control when leaving the
vehicle for valet parking, etc., this will pre-
vent unauthorized access to the vehicle
through the luggage compartment, refer to
page 34.
Manual operation
in the event of an electrical malfunction
Refer to section on Opening separately.
Opening from inside
You can use this button to open the lug-
gage compartment lid when the vehicle is
stationary. This is not possible, if the lug-
gage compartment lid has been locked
separately.
Closing
A recess has been incorporated into the
inside trim on the luggage compartment lid
to make it easier to pull down.
Automatic Soft Close feature
To close the luggage compartment lid,
merely press it down gently. The closing
process will then be carried out automati-
cally.
To avoid personal injury, always
ensure that no individuals are within
the luggage compartment lid's travel range
when closing.
Operate the vehicle only when the luggage
compartment lid is completely closed. Oth-
erwise, exhaust fumes could penetrate the
interior of the vehicle. If special circum-
stances should make it absolutely neces-
sary to operate the vehicle with the luggage
compartment lid open:
Page 43 of 229
At a glance
Controls
Driving tips
Communications
Navigation
Entertainment
Mobility
Reference
41
Alarm system
The concept
The vehicle alarm system responds:
>When a door, the hood, or the luggage
compartment lid is opened
>To movement in the vehicle's interior Ð
interior motion sensor
>To changing the vehicle's tilt if someone
attempts to steal the wheels or tow the
vehicle
>To interruption of battery voltage.
The system responds to unauthorized
vehicle entry and attempted theft by simul-
taneously activating:
>An acoustic alarm, which lasts for a
period of approx. 30 seconds
>The hazard warning flashers for approx.
five minutes
>The high beams, which flash on and off
in the same rhythm.
Arming and disarming the alarm
system
When you lock or unlock the vehicle, either
with the remote control unit or at the door
lock, the alarm system is armed or dis-
armed at the same time.
The system indicates that it has been cor-
rectly armed by switching on the hazard
warning flashers for a single cycle and by
emitting an acoustic signal.
You can have different acknowledg-
ment signals set to confirm arming
and disarming.<
You can open the luggage compartment
lid even if the alarm is armed using
button 3of the remote control, refer
to page 36. It is armed once again when
the lid is closed.
Pressing the Panic mode button for a
longer period triggers the alarm, refer
to page 36.<
Indicator lamp displays
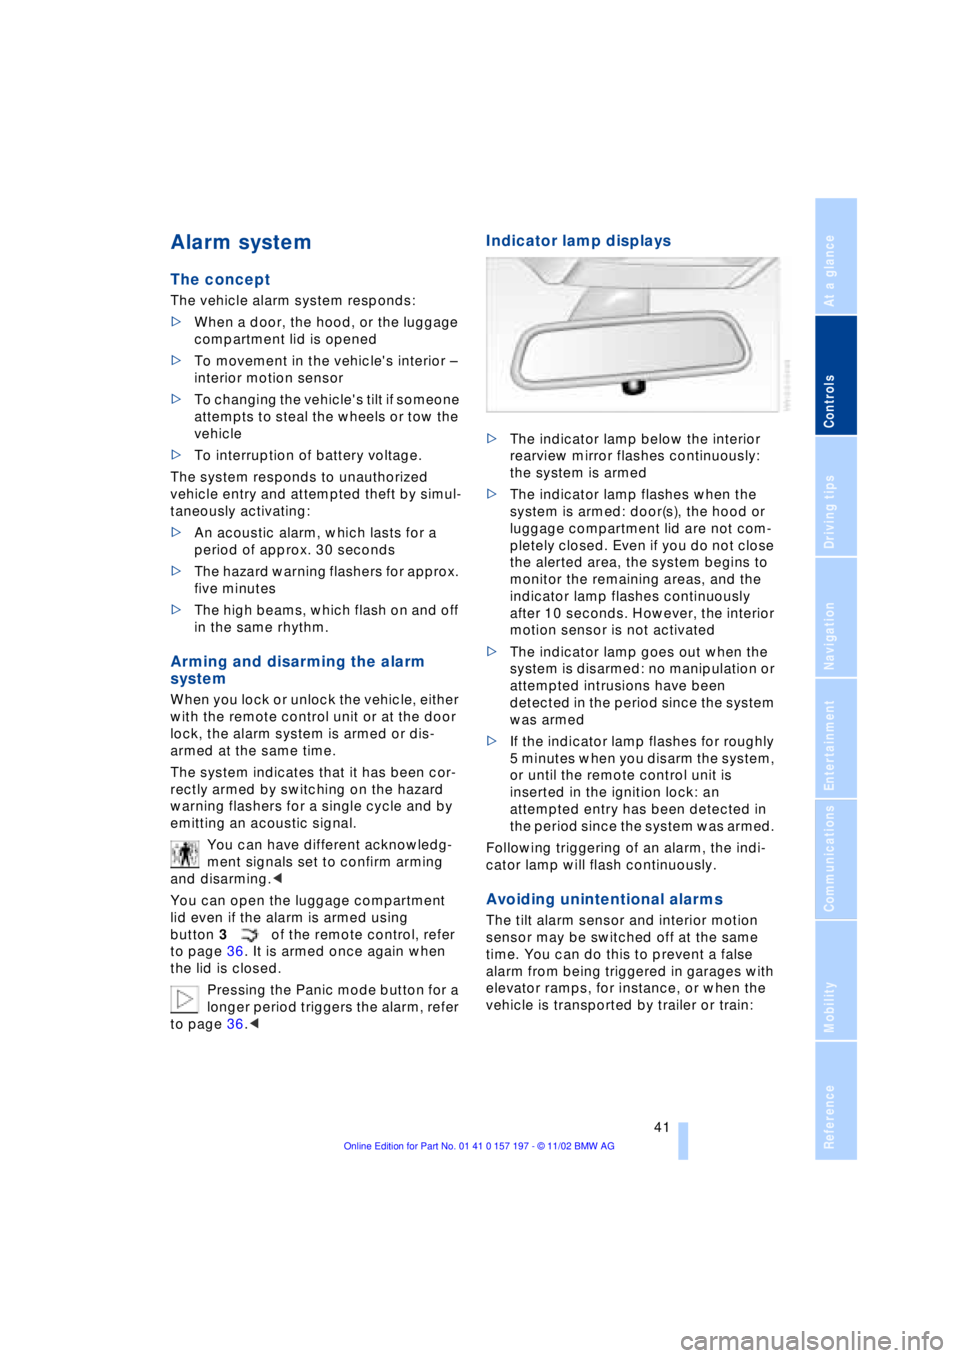
>The indicator lamp below the interior
rearview mirror flashes continuously:
the system is armed
>The indicator lamp flashes when the
system is armed: door(s), the hood or
luggage compartment lid are not com-
pletely closed. Even if you do not close
the alerted area, the system begins to
monitor the remaining areas, and the
indicator lamp flashes continuously
after 10 seconds. However, the interior
motion sensor is not activated
>The indicator lamp goes out when the
system is disarmed: no manipulation or
attempted intrusions have been
detected in the period since the system
was armed
>If the indicator lamp flashes for roughly
5 minutes when you disarm the system,
or until the remote control unit is
inserted in the ignition lock: an
attempted entry has been detected in
the period since the system was armed.
Following triggering of an alarm, the indi-
cator lamp will flash continuously.
Avoiding unintentional alarms
The tilt alarm sensor and interior motion
sensor may be switched off at the same
time. You can do this to prevent a false
alarm from being triggered in garages with
elevator ramps, for instance, or when the
vehicle is transported by trailer or train:
Page 44 of 229
Opening and closing
42 Lock, i.e. arm by pressing twice; press
button 2of the remote control
twice in succession, refer to page 36, or
lock twice with the key, refer to page 37.
The indicator lamp lights up briefly and
then flashes continuously. The tilt alarm
sensor and the interior motion sensor are
switched off as long as the system is
armed.
If you desire, the
>tilt alarm sensor
>interior motion sensor
can be switched off permanently. Please
contact your BMW center for assistance.<
Interior motion sensor
In order for the interior motion sensor to
function properly, the windows and sliding/
tilt sunroof must be completely closed.
Be sure to deactivate the interior motion
sensor, refer to section on Avoiding unin-
tentional alarms, when you wish to leave
the windows or sliding/tilt sunroof open.
Electric power windows
Opening and closing windows
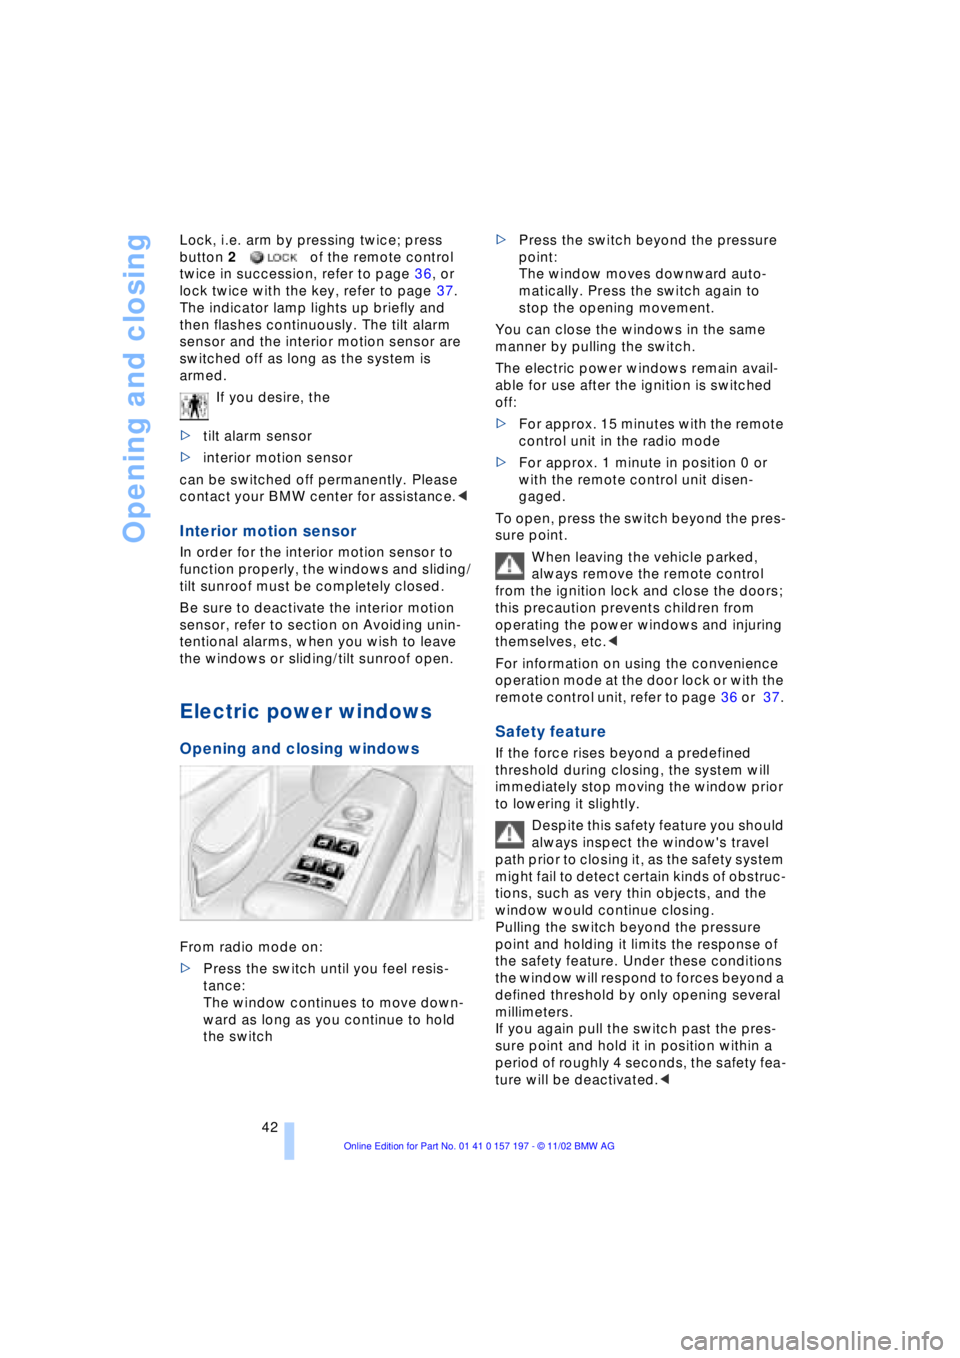
From radio mode on:
>Press the switch until you feel resis-
tance:
The window continues to move down-
ward as long as you continue to hold
the switch >Press the switch beyond the pressure
point:
The window moves downward auto-
matically. Press the switch again to
stop the opening movement.
You can close the windows in the same
manner by pulling the switch.
The electric power windows remain avail-
able for use after the ignition is switched
off:
>For approx. 15 minutes with the remote
control unit in the radio mode
>For approx. 1 minute in position 0 or
with the remote control unit disen-
gaged.
To open, press the switch beyond the pres-
sure point.
When leaving the vehicle parked,
always remove the remote control
from the ignition lock and close the doors;
this precaution prevents children from
operating the power windows and injuring
themselves, etc.<
For information on using the convenience
operation mode at the door lock or with the
remote control unit, refer to page 36 or 37.
Safety feature
If the force rises beyond a predefined
threshold during closing, the system will
immediately stop moving the window prior
to lowering it slightly.
Despite this safety feature you should
always inspect the window's travel
path prior to closing it, as the safety system
might fail to detect certain kinds of obstruc-
tions, such as very thin objects, and the
window would continue closing.
Pulling the switch beyond the pressure
point and holding it limits the response of
the safety feature. Under these conditions
the window will respond to forces beyond a
defined threshold by only opening several
millimeters.
If you again pull the switch past the pres-
sure point and hold it in position within a
period of roughly 4 seconds, the safety fea-
ture will be deactivated.<