2003 BMW 760LI SEDAN ESP
[x] Cancel search: ESPPage 46 of 229
Opening and closing
44
Automatic* opening and closing
Press the switch past the pressure point
and then release it.
In addition, the following response is also
automatic:
With the sunroof open, press the switch in
the Raise direction: the sunroof rises to its
tilt-up end position.
Press the switch again in any direction to
stop the sunroof.
The automatic opening feature in the
Raise direction can be deactivated.
Please contact your BMW center for assis-
tance.<
Safety feature
If the sliding/tilt sunroof encounters resis-
tance
>when it is closing from the raised posi-
tion
>when it is closing from a point roughly
past the middle of its travel,
the closing cycle is interrupted and the
sliding/tilt sunroof will open again slightly.
Despite this safety feature you should
always inspect the sunroof's travel
range prior to closing it, as the safety fea-
ture might fail to detect certain kinds of
obstructions, such as very thin objects, and
the sunroof would continue closing.
Pressing the switch beyond the pressure
point and holding it limits the response of
the safety feature. The sunroof only opens
a short distance.
If you again press the switch past the pres-
sure point and hold it in position within
about 1.5 seconds, the safety feature will
be deactivated.<
When you close the sliding/tilt sun-
roof it will slow down as it approaches
the end of its travel path; this is to allow the
safety feature to respond more precisely to
any obstructions encountered in this crit-
ical range.<
Following interruptions in electrical
power supply
Following interruptions in electrical power,
for instance, when the battery is discon-
nected, it is possible that the sliding/tilt
sunroof will extend to its tilt-up position,
but fail to respond to other commands.
Should this occur, please have the sunroof
reinitialized at your BMW center.
Malfunctions
In the event of an electrical malfunction,
you can operate the sliding/tilt sunroof
manually:
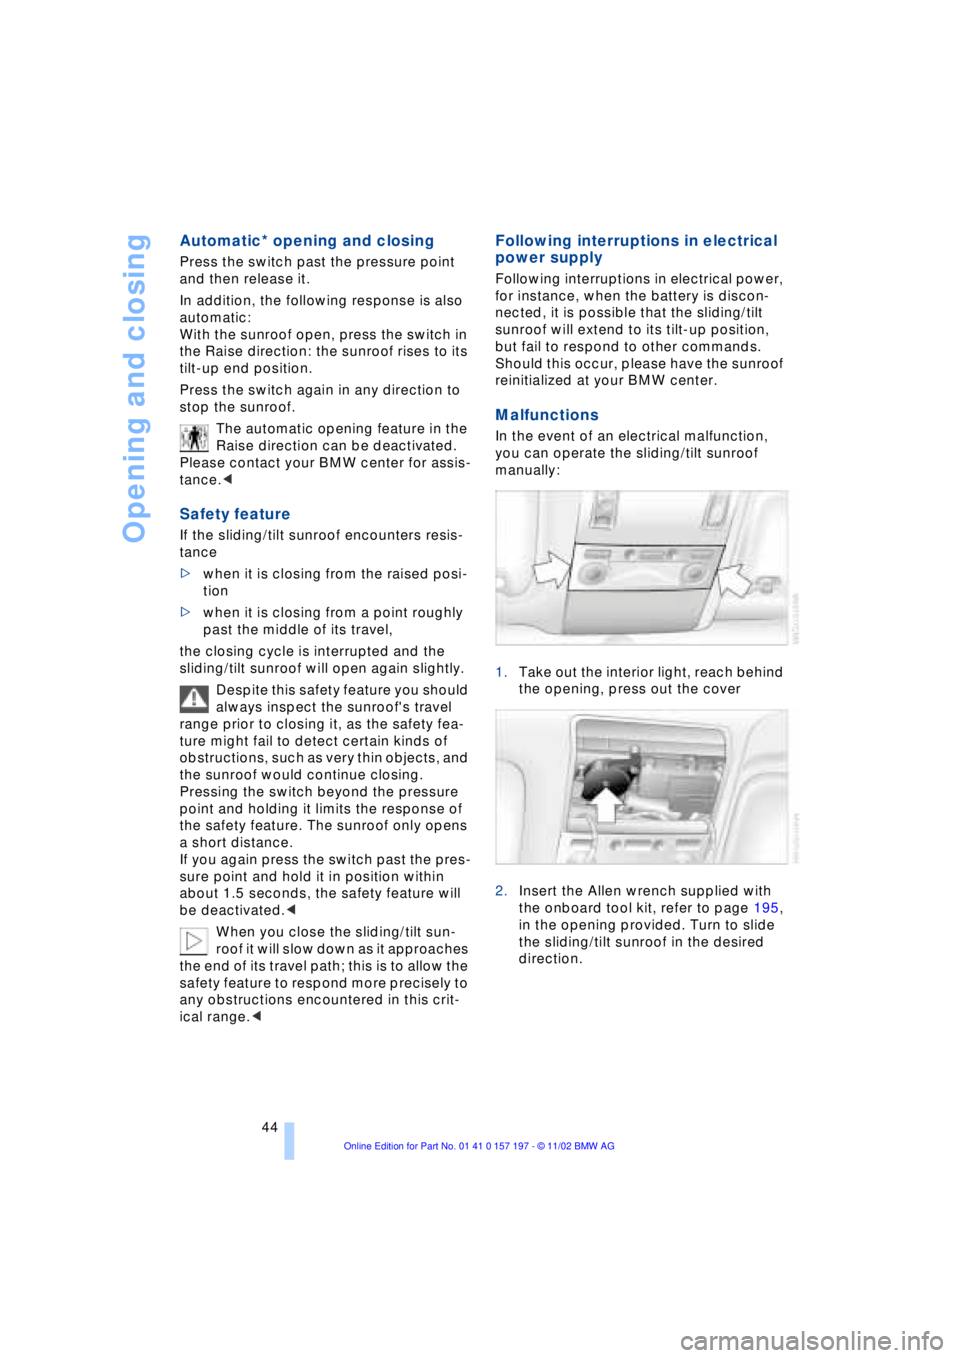
1.Take out the interior light, reach behind
the opening, press out the cover
2.Insert the Allen wrench supplied with
the onboard tool kit, refer to page 195,
in the opening provided. Turn to slide
the sliding/tilt sunroof in the desired
direction.
Page 47 of 229
At a glance
Controls
Driving tips
Communications
Navigation
Entertainment
Mobility
Reference
45
Adjustments
Sit safely
The ideal sitting position can make a vital
contribution to relaxed driving that is as
fatigue-free as possible. The sitting posi-
tion plays an important role together with
the safety belts and airbags in providing
occupants with maximum levels of passive
safety in an accident. To ensure that the
safety systems operate with optimal effi-
ciency, we strongly urge you to observe the
instructions contained in the following sec-
tion.
For additional information on transporting
children safely, refer to page 57.
Sitting safely with airbags
Always maintain an adequate dis-
tance between yourself and the air-
bags. Always hold the steering wheel by
its rim with hands at the 9 o'clock and
3 o'clock positions, to minimize the risk of
injuries to your hands and arms in the event
of airbag deployment.
No one and nothing is to come between the
airbags and the seat occupant.
To prevent possible leg injuries should the
knee airbag deploy in an accident, ensure
that the front passenger assumes a correct
sitting position. Do not use the cover of the
front airbag on the front passenger side as
a storage area for objects, or as a rest for
feet or legs.<
For airbag locations and additional infor-
mation on airbags, refer to page 55.
Safe sitting position with safety belts
For the safety of all vehicle occupants,
please comply with the following instruc-
tions for wearing safety belts.
Never allow more than one person to
wear a single safety belt. Never allow
infants or small children to ride in a pas-
senger's lap.
Avoid twisting the belt while routing it firmly
across the hips and shoulder. Wear it as snugly against your body as possible. Do
not allow the belt to rest against hard or
fragile objects.
Do not route the belt across your neck, or
run it across sharp edges. Be sure that the
belt does not become caught or jammed.
Avoid wearing loose or bulky clothing that
would prevent the belt from resting
securely against your body; pull on the
shoulder strap periodically to keep it ten-
sioned.
In the event of a frontal impact, a loose lap
belt could slide over your hips, leading to
abdominal injury. In addition, the safety
belt's restraint effectiveness is reduced if
the belt is worn loosely.
Expectant mothers should always wear
their safety belts, taking care to position
the lap belt against the lower hips, where it
will not exert pressure against the abdom-
inal area.<
For putting on safety belts, refer to
page 50.
Seats
For your personal safety when adjusting
the seat position, please follow the instruc-
tions below carefully.
Never attempt to adjust your seat
while operating the vehicle. The seat
could respond with unexpected move-
ment, and the ensuing loss of vehicle con-
trol could lead to an accident.
Never recline the backrest to an extremely
horizontal position while operating the
vehicle Ð this precaution is especially
important for front passengers and the
occupants of electric power rear seats to
remember. Failure to observe these pre-
cautions can prevent the belts from pro-
viding effective protection against injury, as
passengers could slide under the belts in
an accident.<
Page 50 of 229
Adjustments
48
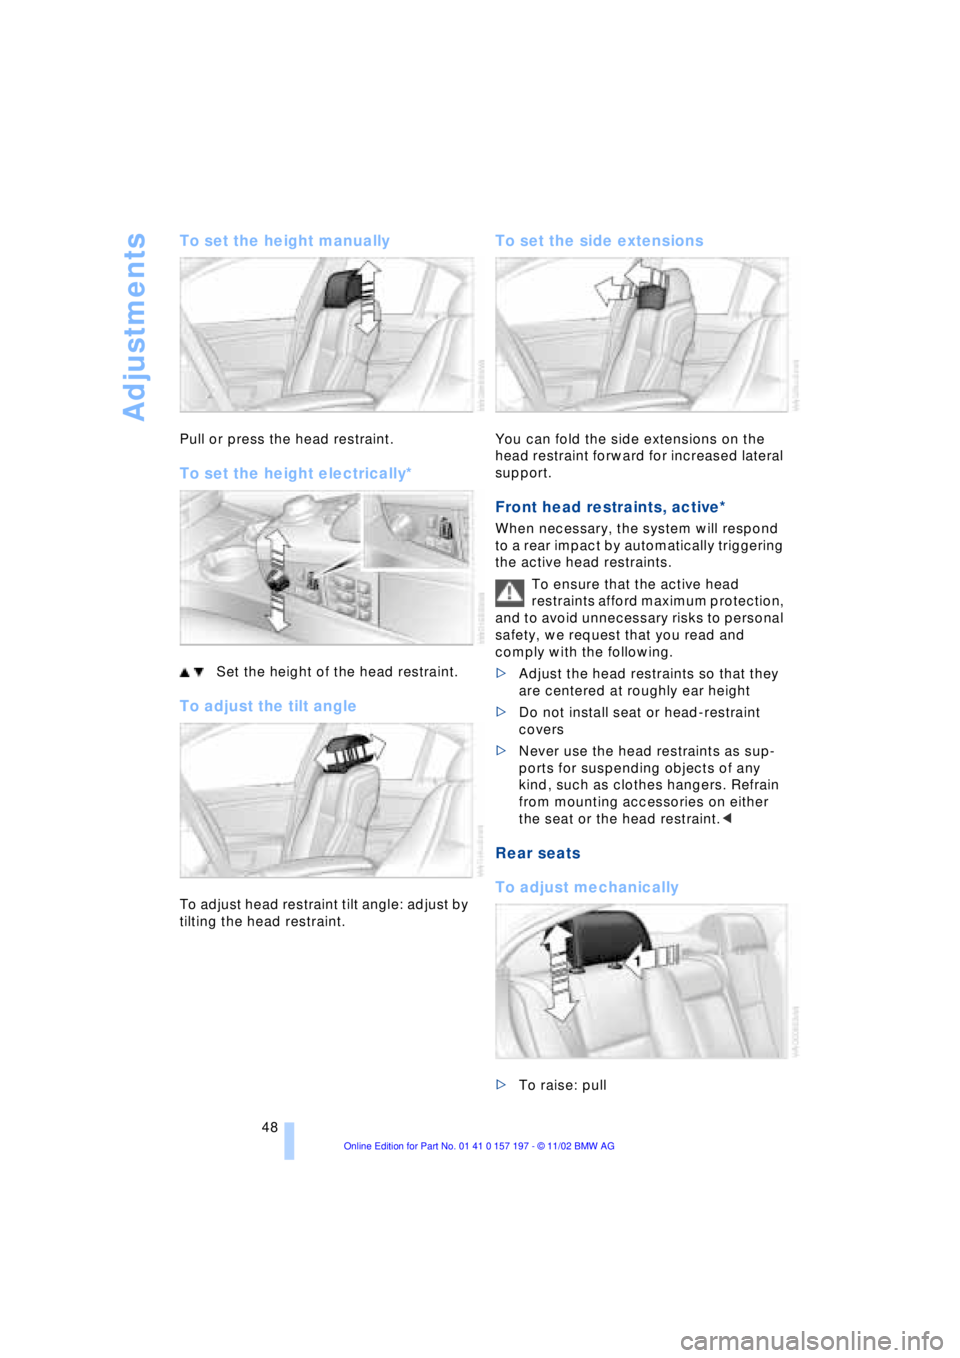
To set the height manually
Pull or press the head restraint.
To set the height electrically*
Set the height of the head restraint.
To adjust the tilt angle
To adjust head restraint tilt angle: adjust by
tilting the head restraint.
To set the side extensions
You can fold the side extensions on the
head restraint forward for increased lateral
support.
Front head restraints, active*
When necessary, the system will respond
to a rear impact by automatically triggering
the active head restraints.
To ensure that the active head
restraints afford maximum protection,
and to avoid unnecessary risks to personal
safety, we request that you read and
comply with the following.
>Adjust the head restraints so that they
are centered at roughly ear height
>Do not install seat or head-restraint
covers
>Never use the head restraints as sup-
ports for suspending objects of any
kind, such as clothes hangers. Refrain
from mounting accessories on either
the seat or the head restraint.<
Rear seats
To adjust mechanically
>To raise: pull
Page 52 of 229
Adjustments
50
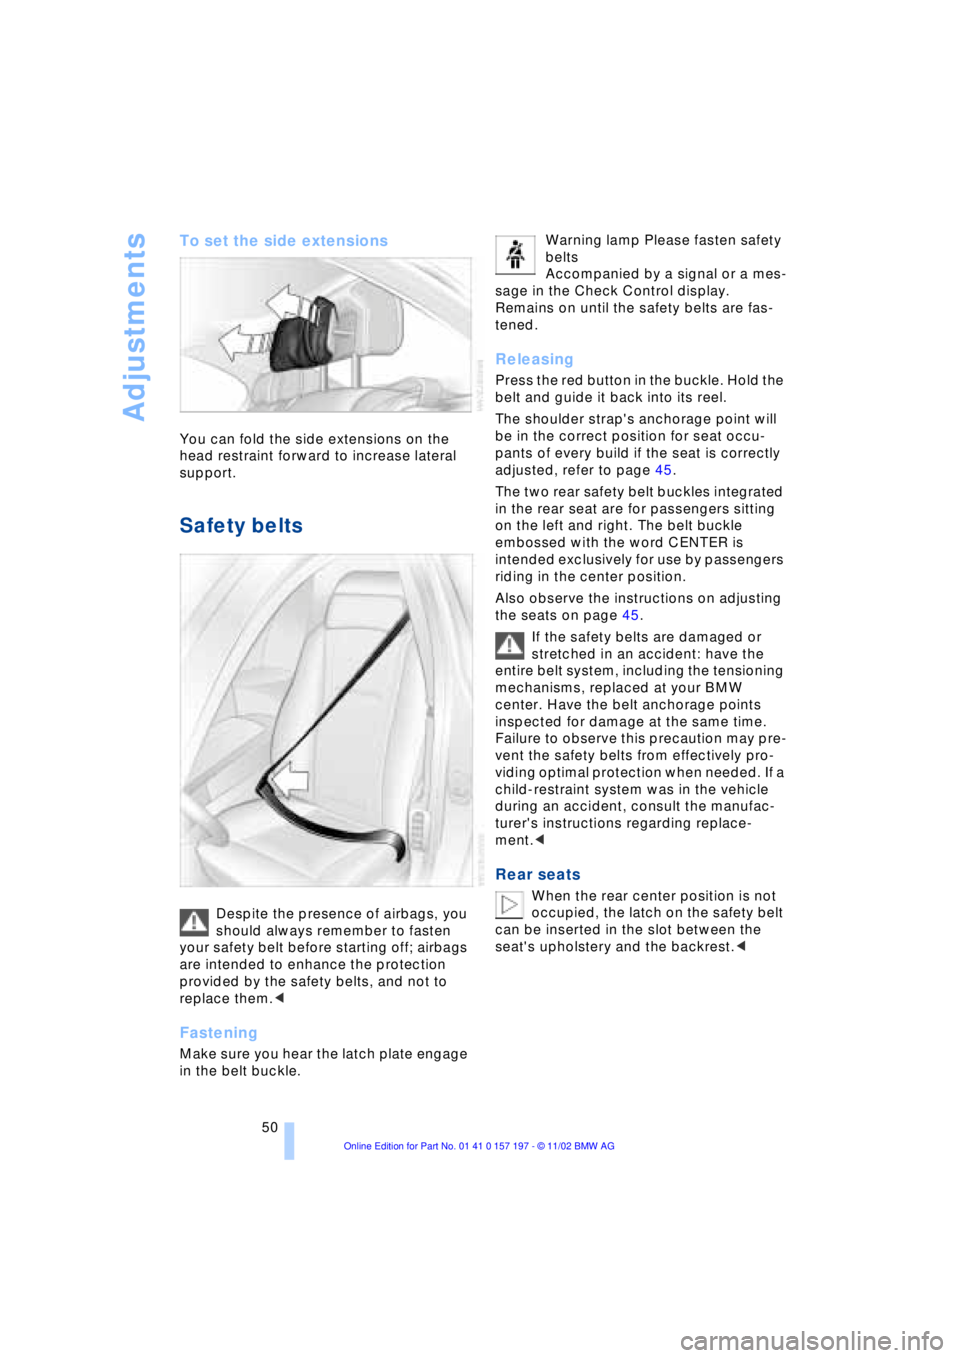
To set the side extensions
You can fold the side extensions on the
head restraint forward to increase lateral
support.
Safety belts
Despite the presence of airbags, you
should always remember to fasten
your safety belt before starting off; airbags
are intended to enhance the protection
provided by the safety belts, and not to
replace them.<
Fastening
Make sure you hear the latch plate engage
in the belt buckle. Warning lamp Please fasten safety
belts
Accompanied by a signal or a mes-
sage in the Check Control display.
Remains on until the safety belts are fas-
tened.
Releasing
Press the red button in the buckle. Hold the
belt and guide it back into its reel.
The shoulder strap's anchorage point will
be in the correct position for seat occu-
pants of every build if the seat is correctly
adjusted, refer to page 45.
The two rear safety belt buckles integrated
in the rear seat are for passengers sitting
on the left and right. The belt buckle
embossed with the word CENTER is
intended exclusively for use by passengers
riding in the center position.
Also observe the instructions on adjusting
the seats on page 45.
If the safety belts are damaged or
stretched in an accident: have the
entire belt system, including the tensioning
mechanisms, replaced at your BMW
center. Have the belt anchorage points
inspected for damage at the same time.
Failure to observe this precaution may pre-
vent the safety belts from effectively pro-
viding optimal protection when needed. If a
child-restraint system was in the vehicle
during an accident, consult the manufac-
turer's instructions regarding replace-
ment.<
Rear seats
When the rear center position is not
occupied, the latch on the safety belt
can be inserted in the slot between the
seat's upholstery and the backrest.<
Page 54 of 229
Adjustments
52
Rear
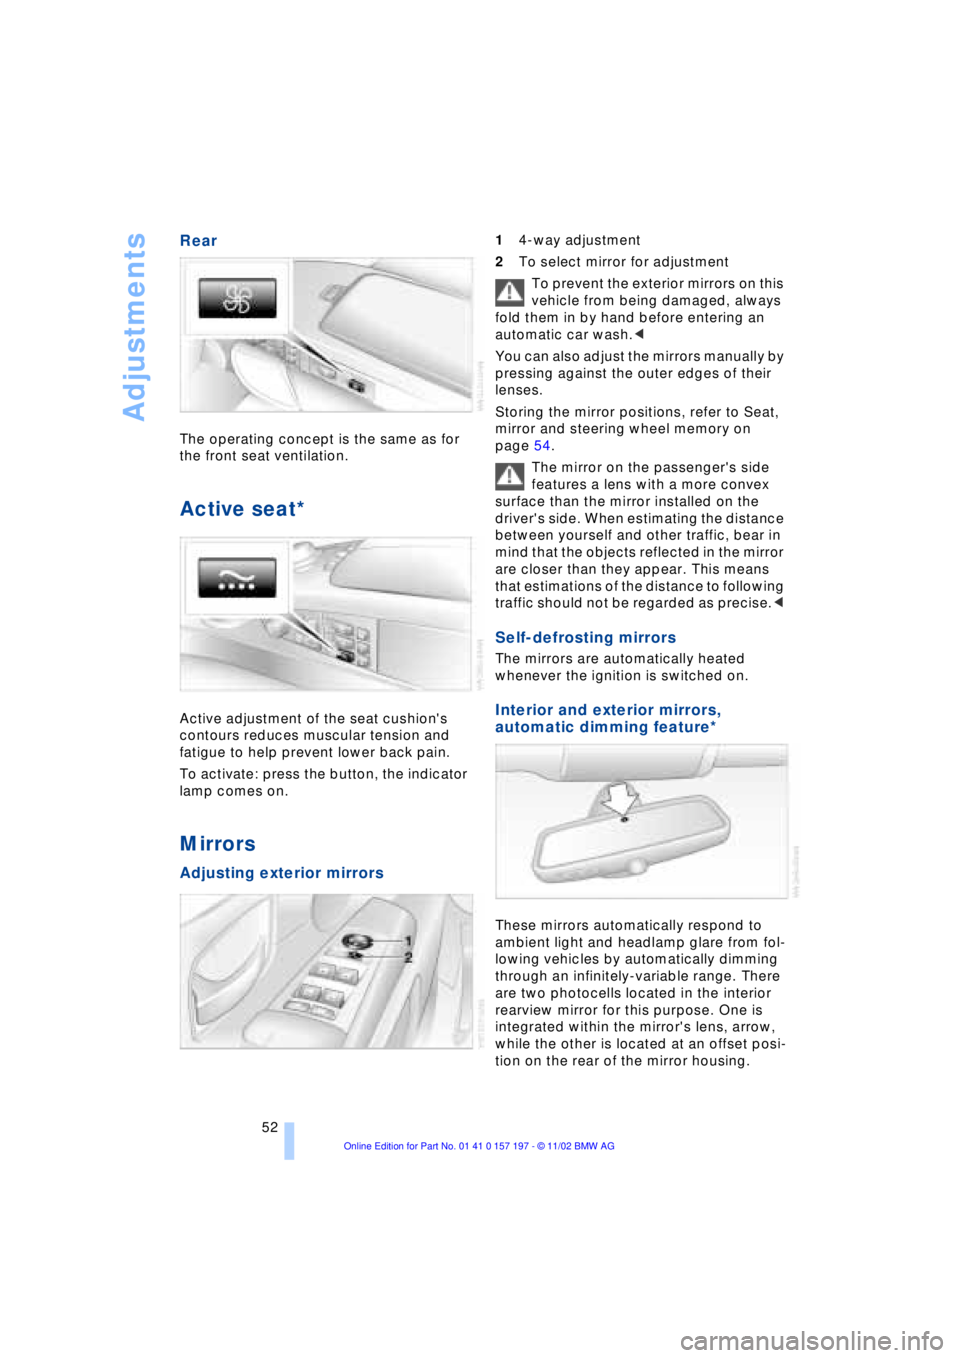
The operating concept is the same as for
the front seat ventilation.
Active seat*
Active adjustment of the seat cushion's
contours reduces muscular tension and
fatigue to help prevent lower back pain.
To activate: press the button, the indicator
lamp comes on.
Mirrors
Adjusting exterior mirrors
14-way adjustment
2To select mirror for adjustment
To prevent the exterior mirrors on this
vehicle from being damaged, always
fold them in by hand before entering an
automatic car wash.<
You can also adjust the mirrors manually by
pressing against the outer edges of their
lenses.
Storing the mirror positions, refer to Seat,
mirror and steering wheel memory on
page 54.
The mirror on the passenger's side
features a lens with a more convex
surface than the mirror installed on the
driver's side. When estimating the distance
between yourself and other traffic, bear in
mind that the objects reflected in the mirror
are closer than they appear. This means
that estimations of the distance to following
traffic should not be regarded as precise.<
Self-defrosting mirrors
The mirrors are automatically heated
whenever the ignition is switched on.
Interior and exterior mirrors,
automatic dimming feature*
These mirrors automatically respond to
ambient light and headlamp glare from fol-
lowing vehicles by automatically dimming
through an infinitely-variable range. There
are two photocells located in the interior
rearview mirror for this purpose. One is
integrated within the mirror's lens, arrow,
while the other is located at an offset posi-
tion on the rear of the mirror housing.
Page 58 of 229
Adjustments
56
Protective effect
The front airbags help protect the front
passengers by responding to frontal
impacts in which safety belts alone cannot
provide adequate restraint. When needed,
the head and side airbags help provide
protection in the event of side impact. The
side airbags help restrain the side of the
occupant's upper torso, and the head air-
bags help support the head while also
helping provide protection against any
objects penetrating into the passenger
compartment. The knee airbags help pro-
tect the legs against impact against the
cockpit.
The side airbags in the rear pas-
senger area of your vehicle may
already have been deactivated either at the
time of manufacture or by a BMW center.
You may have them activated if you desire
to do so. Please contact your BMW center
for additional information.<
For information on the correct sitting posi-
tion, refer to page 45.
The airbags do not deploy in
response to minor accidents or rear
collisions, nor do they respond to certain
kinds of vehicle rollover.<
Even when all safety guidelines are
observed, there is a small residual risk that
passengers will sustain facial, hand or arm
injuries in isolated instances. The ignition
and inflation noise may provoke a mild Ð
usually temporary Ð hearing loss in
extremely sensitive individuals.
Important safety notes
Do not apply adhesive materials to
the cover panels of the airbags, cover
them or modify them in any other way.
Do not attempt to remove the airbag
restraint system from the vehicle. If you
note any indication of system malfunction,
if you desire to have an airbag deactivated,
or if the airbags are triggered in response
to an accident, you should always entrust
all inspection, repair and dismantling oper-
ations to your BMW center.
Never modify or tamper with either the wiring or the individual components in the
airbag system. This category includes the
upholstery in the center of the steering
wheel, on the instrument panel, the side
trim panels on the front or rear doors, and
the roof pillars along with the sides of the
headliner. Do not attempt to remove or dis-
mantle the steering wheel.
To ensure compliance with official safety
regulations, entrust disposal of airbag gen-
erators only to a BMW center.
Unprofessional attempts to service the
system could lead to failure in an emer-
gency or undesired airbag activation, either
of which could result in personal injury.
Do not touch the individual components
directly after the system has been trig-
gered, because there is a danger of
burns.<
At all times, occupants should sit
upright and be properly restrained Ð
infants and small children in appropriate
child-restraint systems; larger children and
adults using the safety belts. Never let an
occupant's head rest near or on a side
airbag because the inflating airbag could
cause a serious or fatal injury. Please note
that the word Airbag imprinted on the door
trim panel indicates the airbag's location.
Never install a rearward-facing child-
restraint system on the front passenger
seat. If you do so, the child could be
severely injured when the airbag is trig-
gered.
Children under 13 years of age and chil-
dren less than 5 ft (150 cm) tall should
always ride in the rear and the restraint sys-
tems should be secured with the vehicle's
safety belts.
Accident research shows that the safest
place for children in an automobile is in the
rear seat. However, a child sitting in the
rear seat and not properly restrained may
place his or her head on or near the airbag,
if so equipped.
For example, a child Ñ even though belted
Ñ may fall asleep with his or her head
against the side airbag. It may be difficult
for a driver to ensure that children in the
rear seat will remain properly positioned at
all times and do not place their heads on or
Page 59 of 229
At a glance
Controls
Driving tips
Communications
Navigation
Entertainment
Mobility
Reference
57
near the side airbag. Therefore, we recom-
mend that the rear side airbags, if provided,
be deactivated if you plan to transport chil-
dren in the rear seat.
The rear seat side airbags may already
have been deactivated, either at the time of
manufacture or by a BMW center. Labels in
the rear door opening should indicate the
status of your rear seat side airbags. If you
are uncertain of their status, or wish to have
the airbags activated or deactivated,
please contact your BMW center.<
Even when all these guidelines are
observed, there is still a small residual risk
of injuries to the face, hands and arms
occurring from airbag deployment in iso-
lated instances. The ignition and inflation
noise may provoke a mild temporary
hearing loss in extremely sensitive individ-
uals.
Airbag warning information is also provided
on the sun visors.
Indicator lamp
The indicator lamp shows the
airbag and belt-tensioner system's
operational status as soon as you
insert the remote control unit in the ignition.
System operational:
>The indicator lamp comes on briefly.
System malfunction:
>The indicator lamp fails to come on or
>it remains on continuously.
A system malfunction could prevent the
system from responding to an impact
occurring within its normal response range.
Please respond to any signs of malfunction
by having the airbag system inspected
immediately at a BMW center.
Transporting children safely
Commercially-available child-restraint sys-
tems are designed to be secured with a lap
belt or with the lap belt portion of a combi-
nation lap/shoulder belt. Improperly or
inadequately installed restraint systems can increase the risk of injury to children.
Always read and follow the instructions that
come with the system.
Child-restraint system with tether
strap
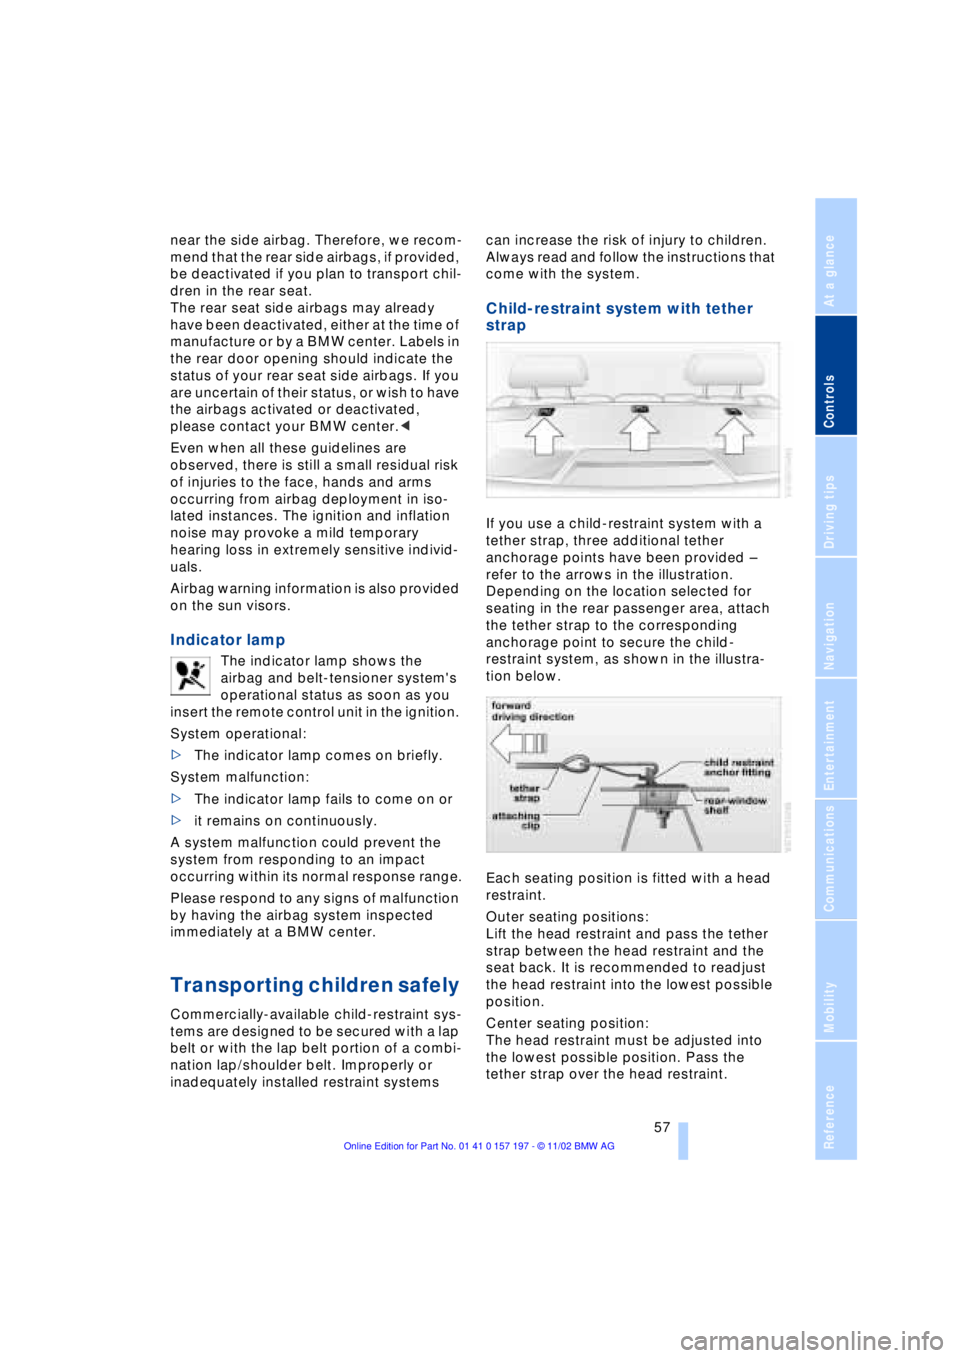
If you use a child-restraint system with a
tether strap, three additional tether
anchorage points have been provided Ð
refer to the arrows in the illustration.
Depending on the location selected for
seating in the rear passenger area, attach
the tether strap to the corresponding
anchorage point to secure the child-
restraint system, as shown in the illustra-
tion below.
Each seating position is fitted with a head
restraint.
Outer seating positions:
Lift the head restraint and pass the tether
strap between the head restraint and the
seat back. It is recommended to readjust
the head restraint into the lowest possible
position.
Center seating position:
The head restraint must be adjusted into
the lowest possible position. Pass the
tether strap over the head restraint.
Page 62 of 229
Adjustments
60
Vehicle Memory, Key
Memory
How the system functions
Doubtless you have often reflected on how
great it would be if you could configure
your vehicle's various adjustment settings
to meet your own personal requirements. In
developing your vehicle, BMW has incor-
porated a number of options for personal
adjustment which you can set in the Con-
trol Center. You can have these pro-
grammed at your BMW center.
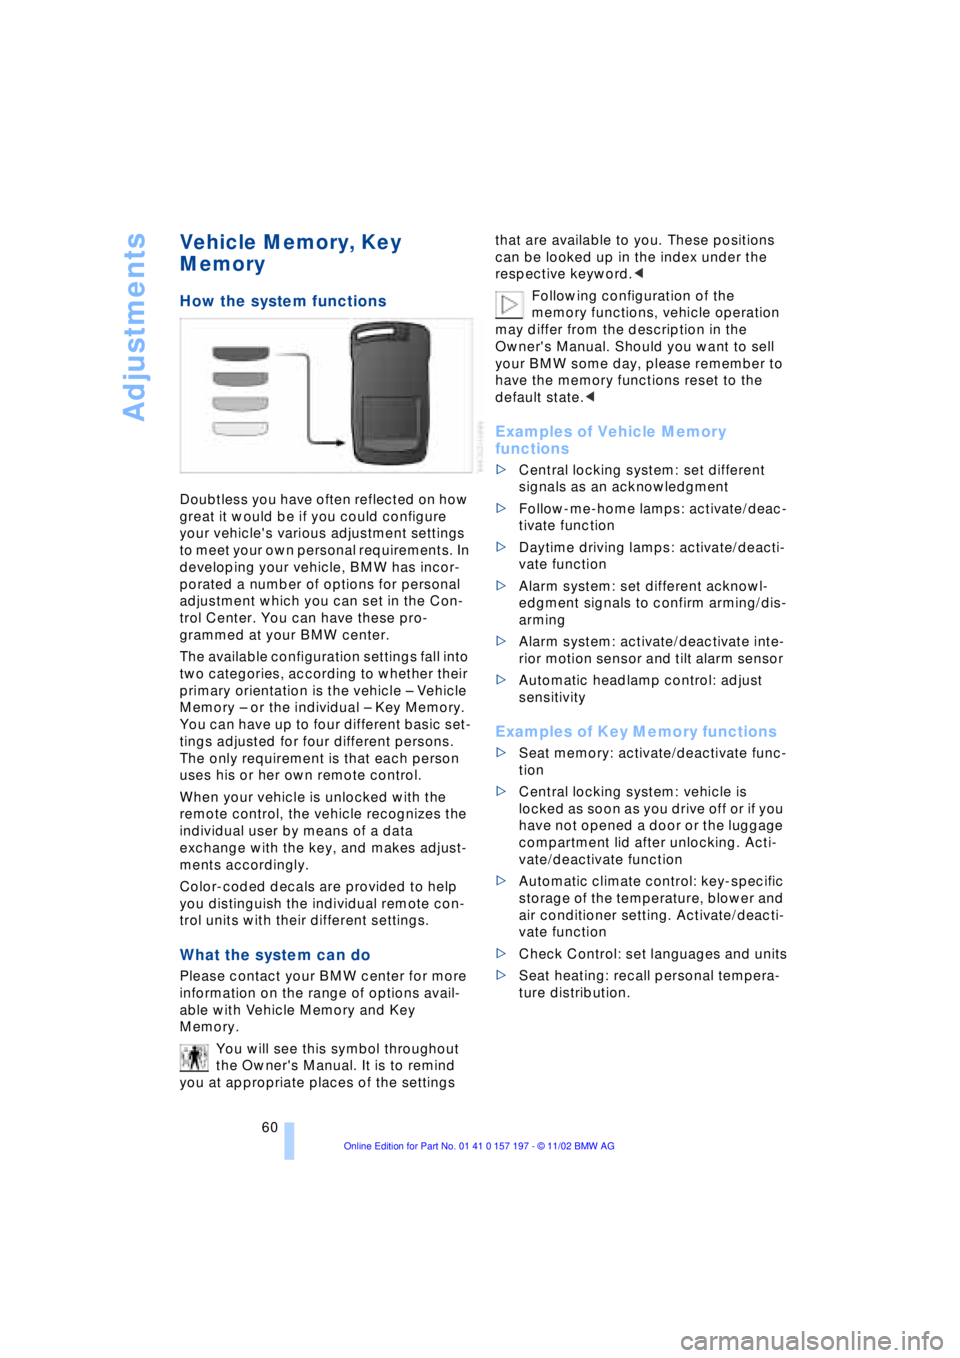
The available configuration settings fall into
two categories, according to whether their
primary orientation is the vehicle Ð Vehicle
Memory Ð or the individual Ð Key Memory.
You can have up to four different basic set-
tings adjusted for four different persons.
The only requirement is that each person
uses his or her own remote control.
When your vehicle is unlocked with the
remote control, the vehicle recognizes the
individual user by means of a data
exchange with the key, and makes adjust-
ments accordingly.
Color-coded decals are provided to help
you distinguish the individual remote con-
trol units with their different settings.
What the system can do
Please contact your BMW center for more
information on the range of options avail-
able with Vehicle Memory and Key
Memory.
You will see this symbol throughout
the Owner's Manual. It is to remind
you at appropriate places of the settings that are available to you. These positions
can be looked up in the index under the
respective keyword.<
Following configuration of the
memory functions, vehicle operation
may differ from the description in the
Owner's Manual. Should you want to sell
your BMW some day, please remember to
have the memory functions reset to the
default state.<
Examples of Vehicle Memory
functions
>Central locking system: set different
signals as an acknowledgment
>Follow-me-home lamps: activate/deac-
tivate function
>Daytime driving lamps: activate/deacti-
vate function
>Alarm system: set different acknowl-
edgment signals to confirm arming/dis-
arming
>Alarm system: activate/deactivate inte-
rior motion sensor and tilt alarm sensor
>Automatic headlamp control: adjust
sensitivity
Examples of Key Memory functions
>Seat memory: activate/deactivate func-
tion
>Central locking system: vehicle is
locked as soon as you drive off or if you
have not opened a door or the luggage
compartment lid after unlocking. Acti-
vate/deactivate function
>Automatic climate control: key-specific
storage of the temperature, blower and
air conditioner setting. Activate/deacti-
vate function
>Check Control: set languages and units
>Seat heating: recall personal tempera-
ture distribution.