2003 BMW 760LI SEDAN fold seats
[x] Cancel search: fold seatsPage 19 of 229
At a glance
Controls
Driving tips
Communications
Navigation
Entertainment
Mobility
Reference
17
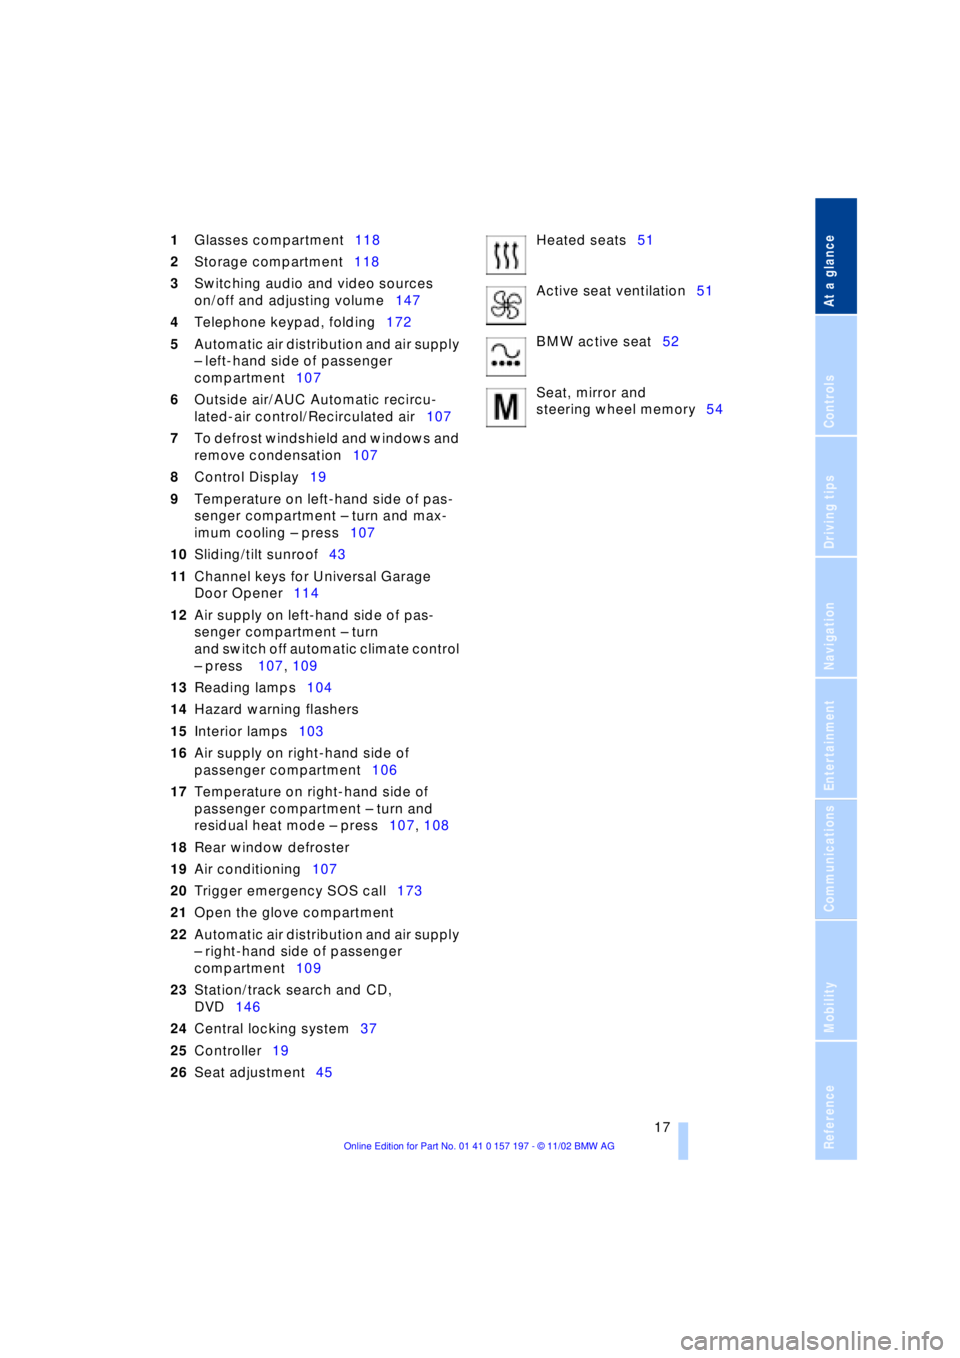
1Glasses compartment118
2Storage compartment118
3Switching audio and video sources
on/off and adjusting volume147
4Telephone keypad, folding172
5Automatic air distribution and air supply
Ð left-hand side of passenger
compartment107
6Outside air/AUC Automatic recircu-
lated-air control/Recirculated air107
7To defrost windshield and windows and
remove condensation107
8Control Display19
9Temperature on left-hand side of pas-
senger compartment Ð turn and max-
imum cooling Ð press107
10Sliding/tilt sunroof43
11Channel keys for Universal Garage
Door Opener114
12Air supply on left-hand side of pas-
senger compartment Ð turn
and switch off automatic climate control
Ð press 107, 109
13Reading lamps104
14Hazard warning flashers
15Interior lamps103
16Air supply on right-hand side of
passenger compartment106
17Temperature on right-hand side of
passenger compartment Ð turn and
residual heat mode Ð press107, 108
18Rear window defroster
19Air conditioning107
20Trigger emergency SOS call173
21Open the glove compartment
22Automatic air distribution and air supply
Ð right-hand side of passenger
compartment109
23Station/track search and CD,
DVD146
24Central locking system37
25Controller19
26Seat adjustment45Heated seats51
Active seat ventilation51
BMW active seat52
Seat, mirror and
steering wheel memory54
Page 50 of 229
Adjustments
48
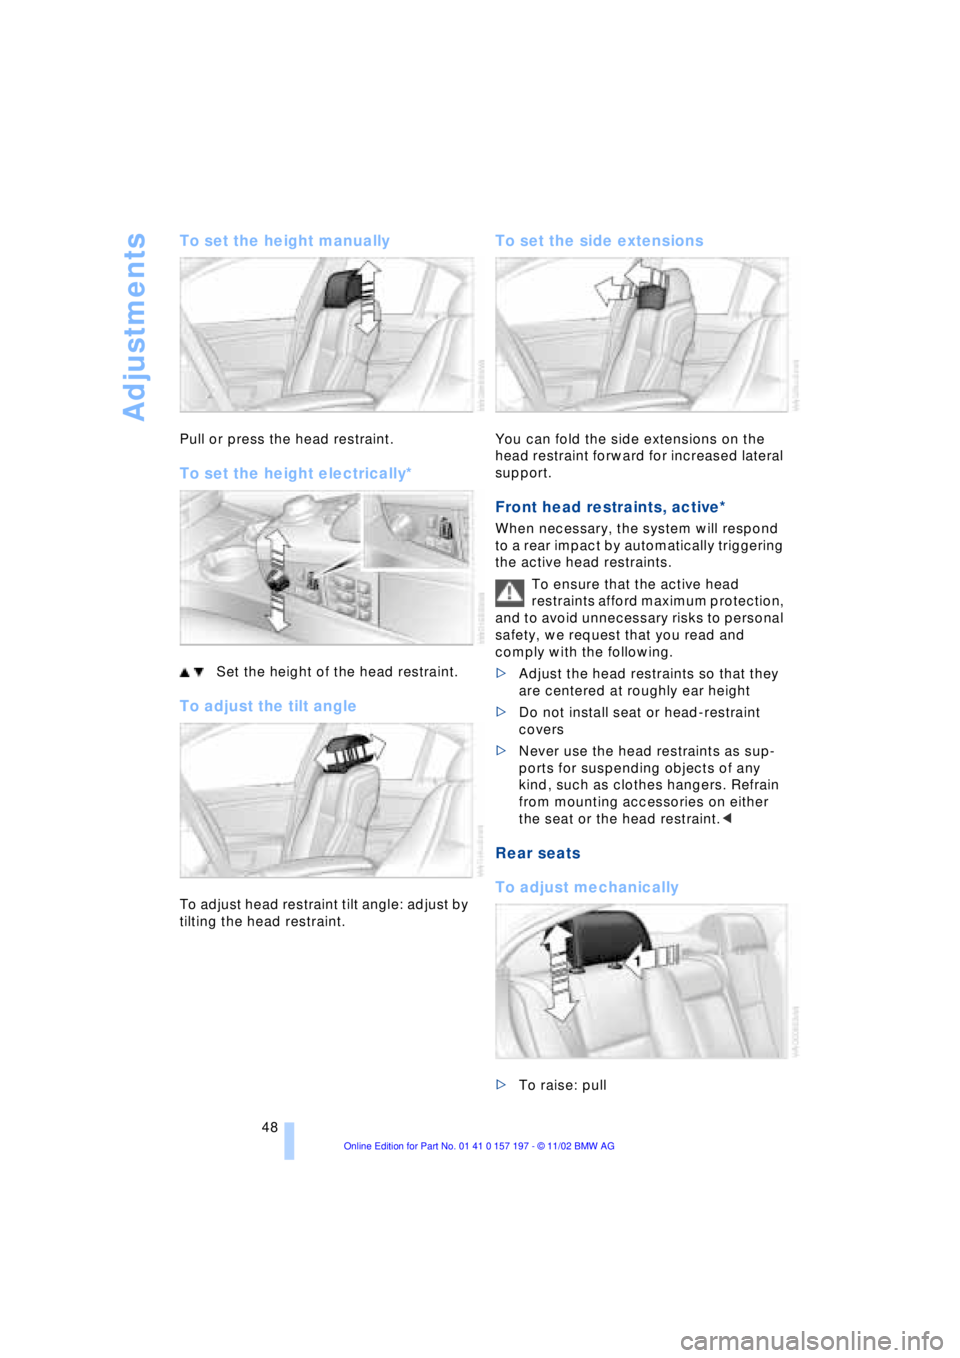
To set the height manually
Pull or press the head restraint.
To set the height electrically*
Set the height of the head restraint.
To adjust the tilt angle
To adjust head restraint tilt angle: adjust by
tilting the head restraint.
To set the side extensions
You can fold the side extensions on the
head restraint forward for increased lateral
support.
Front head restraints, active*
When necessary, the system will respond
to a rear impact by automatically triggering
the active head restraints.
To ensure that the active head
restraints afford maximum protection,
and to avoid unnecessary risks to personal
safety, we request that you read and
comply with the following.
>Adjust the head restraints so that they
are centered at roughly ear height
>Do not install seat or head-restraint
covers
>Never use the head restraints as sup-
ports for suspending objects of any
kind, such as clothes hangers. Refrain
from mounting accessories on either
the seat or the head restraint.<
Rear seats
To adjust mechanically
>To raise: pull
Page 52 of 229
Adjustments
50
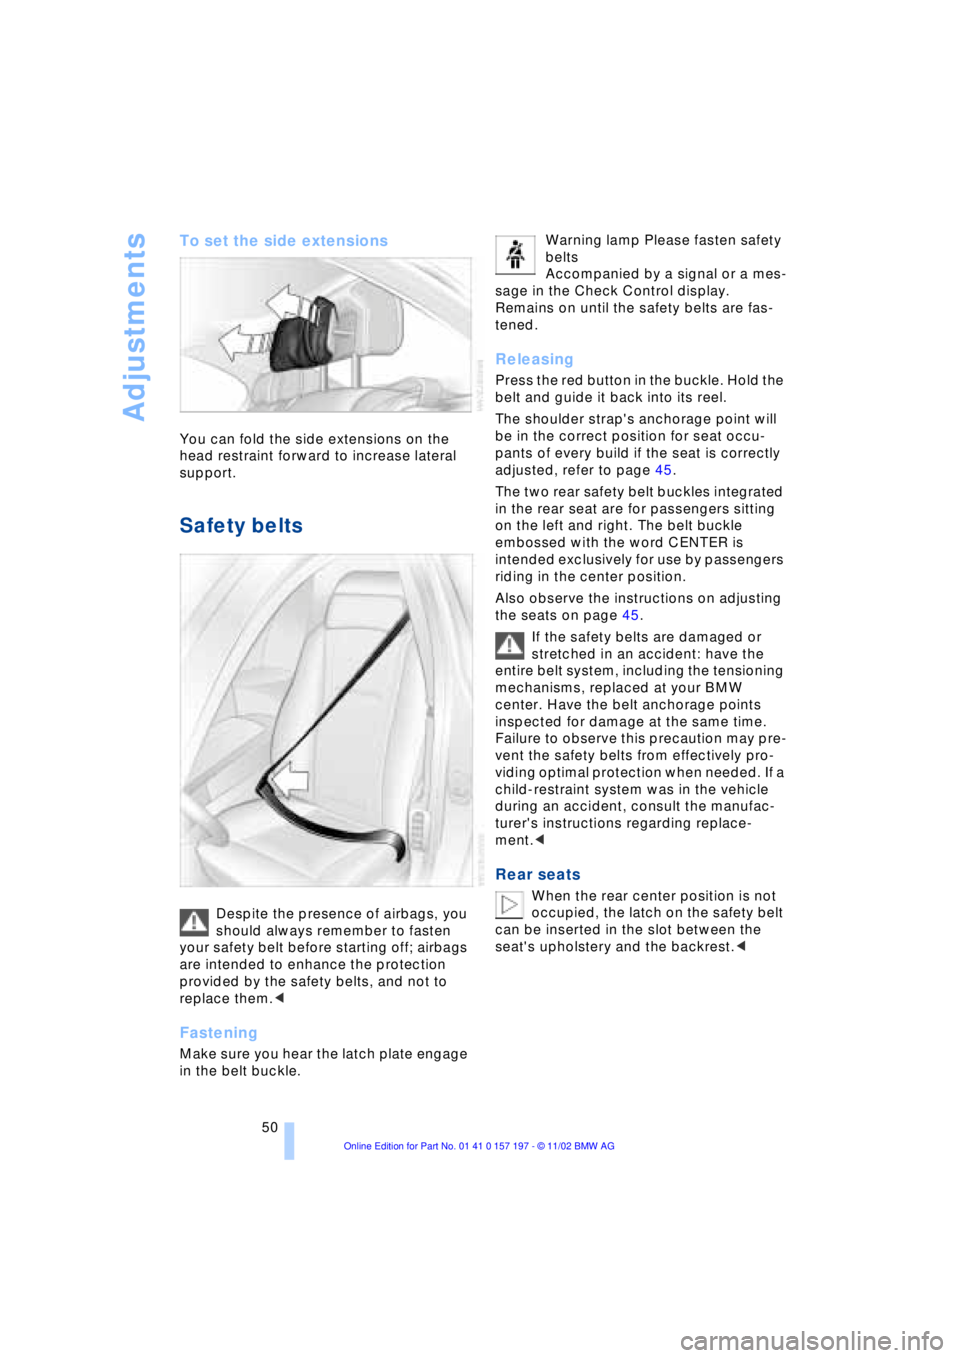
To set the side extensions
You can fold the side extensions on the
head restraint forward to increase lateral
support.
Safety belts
Despite the presence of airbags, you
should always remember to fasten
your safety belt before starting off; airbags
are intended to enhance the protection
provided by the safety belts, and not to
replace them.<
Fastening
Make sure you hear the latch plate engage
in the belt buckle. Warning lamp Please fasten safety
belts
Accompanied by a signal or a mes-
sage in the Check Control display.
Remains on until the safety belts are fas-
tened.
Releasing
Press the red button in the buckle. Hold the
belt and guide it back into its reel.
The shoulder strap's anchorage point will
be in the correct position for seat occu-
pants of every build if the seat is correctly
adjusted, refer to page 45.
The two rear safety belt buckles integrated
in the rear seat are for passengers sitting
on the left and right. The belt buckle
embossed with the word CENTER is
intended exclusively for use by passengers
riding in the center position.
Also observe the instructions on adjusting
the seats on page 45.
If the safety belts are damaged or
stretched in an accident: have the
entire belt system, including the tensioning
mechanisms, replaced at your BMW
center. Have the belt anchorage points
inspected for damage at the same time.
Failure to observe this precaution may pre-
vent the safety belts from effectively pro-
viding optimal protection when needed. If a
child-restraint system was in the vehicle
during an accident, consult the manufac-
turer's instructions regarding replace-
ment.<
Rear seats
When the rear center position is not
occupied, the latch on the safety belt
can be inserted in the slot between the
seat's upholstery and the backrest.<
Page 119 of 229
At a glance
Controls
Driving tips
Communications
Navigation
Entertainment
Mobility
Reference
117
Glove compartment
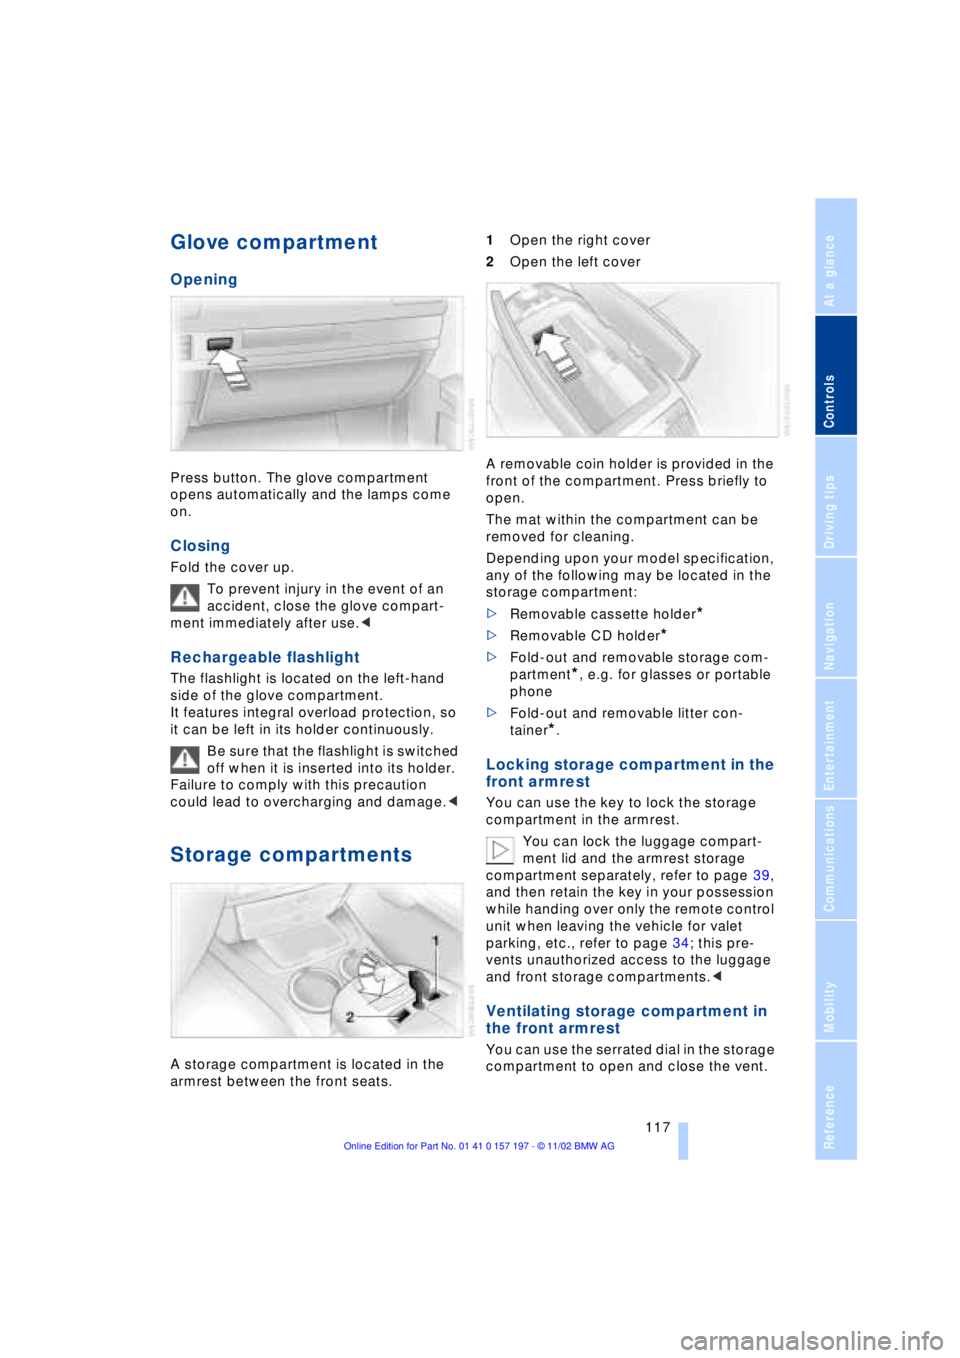
Opening
Press button. The glove compartment
opens automatically and the lamps come
on.
Closing
Fold the cover up.
To prevent injury in the event of an
accident, close the glove compart-
ment immediately after use.<
Rechargeable flashlight
The flashlight is located on the left-hand
side of the glove compartment.
It features integral overload protection, so
it can be left in its holder continuously.
Be sure that the flashlight is switched
off when it is inserted into its holder.
Failure to comply with this precaution
could lead to overcharging and damage.<
Storage compartments
A storage compartment is located in the
armrest between the front seats. 1Open the right cover
2Open the left cover
A removable coin holder is provided in the
front of the compartment. Press briefly to
open.
The mat within the compartment can be
removed for cleaning.
Depending upon your model specification,
any of the following may be located in the
storage compartment:
>Removable cassette holder
*
>Removable CD holder
*
>Fold-out and removable storage com-
partment
*, e.g. for glasses or portable
phone
>Fold-out and removable litter con-
tainer
*.
Locking storage compartment in the
front armrest
You can use the key to lock the storage
compartment in the armrest.
You can lock the luggage compart-
ment lid and the armrest storage
compartment separately, refer to page 39,
and then retain the key in your possession
while handing over only the remote control
unit when leaving the vehicle for valet
parking, etc., refer to page 34; this pre-
vents unauthorized access to the luggage
and front storage compartments.<
Ventilating storage compartment in
the front armrest
You can use the serrated dial in the storage
compartment to open and close the vent.
Page 122 of 229
Practical interior accessories
120
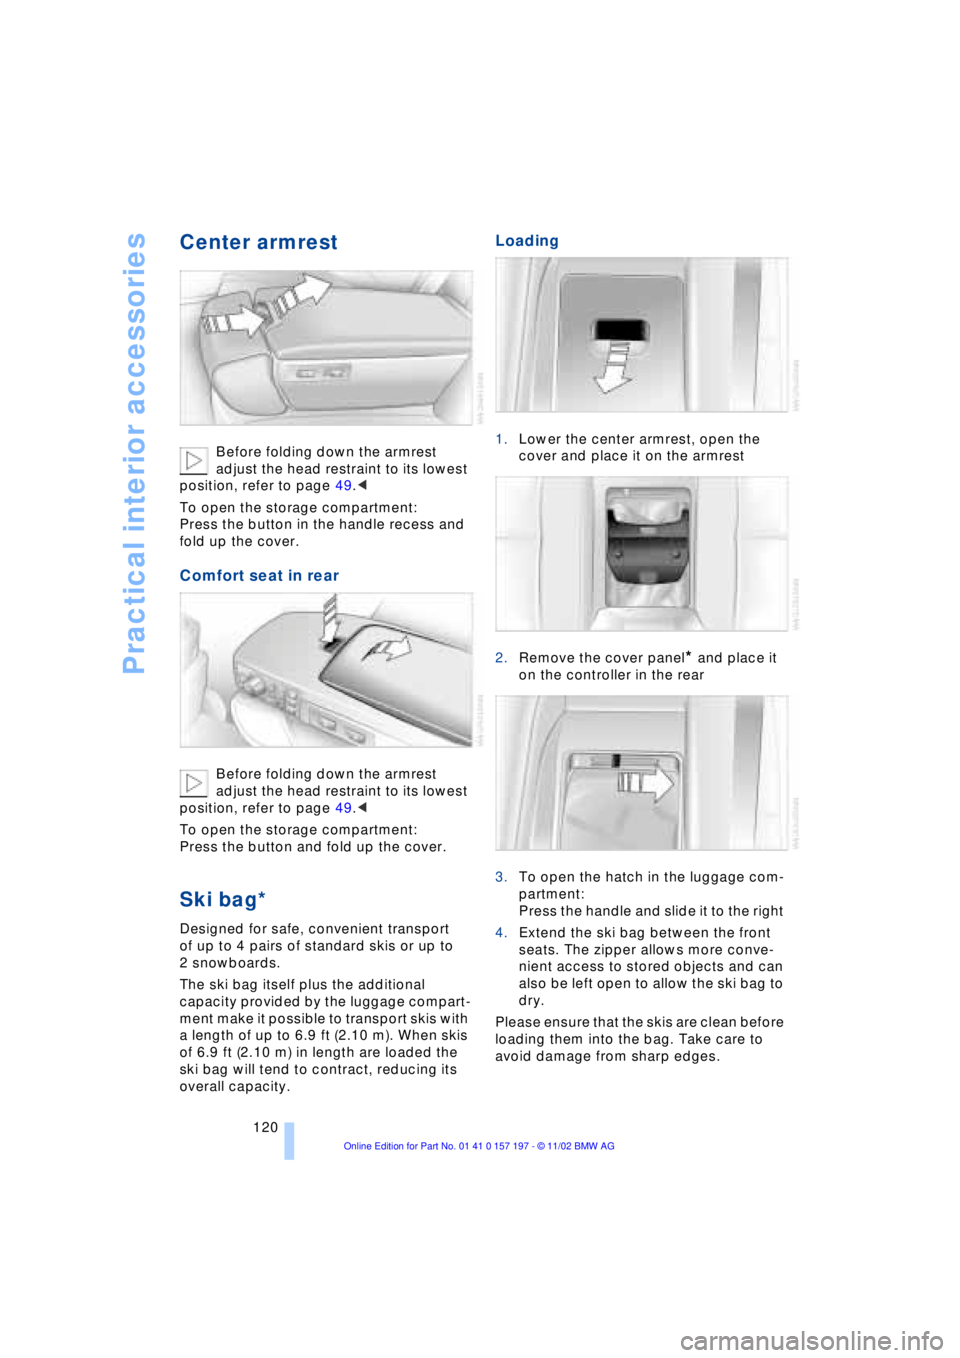
Center armrest
Before folding down the armrest
adjust the head restraint to its lowest
position, refer to page 49.<
To open the storage compartment:
Press the button in the handle recess and
fold up the cover.
Comfort seat in rear
Before folding down the armrest
adjust the head restraint to its lowest
position, refer to page 49.<
To open the storage compartment:
Press the button and fold up the cover.
Ski bag*
Designed for safe, convenient transport
of up to 4 pairs of standard skis or up to
2 snowboards.
The ski bag itself plus the additional
capacity provided by the luggage compart-
ment make it possible to transport skis with
a length of up to 6.9 ft (2.10 m). When skis
of 6.9 ft (2.10 m) in length are loaded the
ski bag will tend to contract, reducing its
overall capacity.
Loading
1.Lower the center armrest, open the
cover and place it on the armrest
2.Remove the cover panel
* and place it
on the controller in the rear
3.To open the hatch in the luggage com-
partment:
Press the handle and slide it to the right
4.Extend the ski bag between the front
seats. The zipper allows more conve-
nient access to stored objects and can
also be left open to allow the ski bag to
dry.
Please ensure that the skis are clean before
loading them into the bag. Take care to
avoid damage from sharp edges.