2002 NISSAN ALTIMA brake
[x] Cancel search: brakePage 175 of 249
cwhere atmospheric pollution exists.
cwhere road salt is used.
Temperature
A temperature increase accelerates the rate
of corrosion to those parts which are not
well ventilated.
Air pollution
Industrial pollution, the presence of salt in
the air in coastal areas, or heavy road salt
use accelerates the corrosion process.
Road salt also accelerates the disintegra-
tion of paint surfaces.
TO PROTECT YOUR VEHICLE
FROM CORROSION
cwash and wax your vehicle often to keep
the vehicle clean.
calways check for minor damage to the
paint and repair it as soon as possible.
ckeep drain holes at the bottom of the
doors open to avoid water accumulation.
ccheck the underbody for accumulation of
sand, dirt or salt. If present, wash with
water as soon as possible.
CAUTION
cNEVER remove dirt, sand or other
debris from the passenger compart-
ment by washing it out with a hose.
Remove dirt with a vacuum cleaner
or broom.
cNever allow water or other liquids to
come in contact with electronic com-
ponents inside the vehicle as this
may damage them.
Chemicals used for road surface de-icing
are extremely corrosive. They accelerate
corrosion and deterioration of underbody
components such as the exhaust system,
fuel and brake lines, brake cables, floor pan
and fenders.
In winter, the underbody must be
cleaned periodically.
For additional protection against rust and
corrosion, which may be required in some
areas, consult an authorized NISSAN
dealer.
7-6Appearance and care
ZX
Page 177 of 249

8 Maintenance and do-it-yourself
Maintenance requirements .....................................8-2
General maintenance .............................................8-3
Explanation of general maintenance
items ..................................................................8-3
Maintenance precautions .......................................8-5
Engine compartment check locations QR
engine .....................................................................8-7
Engine compartment check locations VQ
engine .....................................................................8-8
Engine cooling system ...........................................8-9
Checking engine coolant level ..........................8-9
Changing engine coolant ................................8-10
Engine oil .............................................................8-10
Checking engine oil level ................................8-10
Changing engine oil ........................................8-11
Changing engine oil filter.................................8-13
Automatic transmission fluid ................................8-14
Temperature conditions for checking ..............8-14
Power steering fluid..............................................8-15
Brake and clutch fluid...........................................8-16
Brake fluid........................................................8-16
Clutch fluid .......................................................8-16Window washer fluid ............................................8-17
Battery ..................................................................8-17
Jump starting ...................................................8-18
Drive belts ............................................................8-19
Spark plugs ..........................................................8-20
Replacing spark plugs (QR25DE) ...................8-20
Replacing spark plugs (VQ35DE) ...................8-20
Air cleaner ............................................................8-21
Cabin air filter (if so equipped) ........................8-21
Windshield wiper blades ......................................8-24
Cleaning ..........................................................8-24
Replacing .........................................................8-24
Parking brake and brake pedal ............................8-25
Checking parking brake...................................8-25
Checking brake pedal .....................................8-25
Brake booster ..................................................8-26
Clutch pedal .........................................................8-26
Checking clutch pedal .....................................8-26
Fuses ....................................................................8-27
Engine compartment .......................................8-27
Passenger compartment .................................8-28
Keyfob battery replacement .................................8-29
ZX
Page 181 of 249

Steering wheelCheck for changes in the
steering conditions, such as excessive free-
play, hard steering or strange noises.
SeatsCheck seat position controls such as
seat adjusters, seatback recliner, etc. to
ensure they operate smoothly and all
latches lock securely in every position.
Check that the head restraints move up and
down smoothly and the locks (if so
equipped) hold securely in all latched posi-
tions.
Seat beltsCheck that all parts of the seat
belt system (e.g., buckles, anchors, adjust-
ers and retractors) operate properly and
smoothly, and are installed securely. Check
the belt webbing for cuts, fraying, wear or
damage.
Accelerator pedalCheck the pedal for
smooth operation and make sure the pedal
does not catch or require uneven effort.
Keep the floor mat away from the pedal.
Clutch pedal*Make sure the pedal oper-
ates smoothly and check that it has the
proper free travel.
BrakesCheck that the brakes do not pull
the vehicle to one side when applied.Brake pedal and booster*Check the pedal
for smooth operation and make sure it has
the proper distance under it when de-
pressed fully. Check the brake booster func-
tion. Be certain to keep the floor mat away
from the pedal.
Parking brake*Check that the lever has
the proper travel and confirm that your
vehicle is held securely on a fairly steep hill
with only the parking brake applied.
Automatic transmission P (Park) posi-
tion mechanismCheck that the lock re-
lease button on the selector lever operates
properly and smoothly. On a fairly steep hill
check that your vehicle is held securely with
the selector lever in the P position without
applying any brakes.
Under the hood and vehicle
The maintenance items listed here should
be checked periodically (e.g., each time you
check the engine oil or refuel).
Windshield washer fluid*Check that there
is adequate fluid in the reservoir.
Engine oil level*Check the level after
parking the vehicle on a level surface with
the engine off. Wait more than 10 minutesfor the oil to drain back into the oil pan.
Brake and clutch fluid levels*Make sure
that the brake and clutch fluid level is be-
tween the MIN and MAX lines on the reser-
voir.
Power steering fluid level* and lines
Check the level when the fluid is cold, with
the engine off. Check the lines for proper
attachment, leaks, cracks, etc.
Automatic transmission fluid level*
Check the level after putting the selector
lever in P with the engine idling at operating
temperature.
Engine coolant level*Check the coolant
level when the engine is cold.
Radiator and hosesCheck the front of the
radiator and clean off any dirt, insects,
leaves, etc., that may have accumulated.
Make sure the hoses have no cracks, de-
formation, rot or loose connections.
Engine drive belts*Make sure the drive
belts are not frayed, worn, cracked or oily.
Battery*Check the fluid level in each cell. It
should be between the MAX and MIN lines.
Vehicles operated in high temperatures or
under severe conditions require frequent
8-4Maintenance and do-it-yourself
ZX
Page 182 of 249
checks of the battery fluid level.
Exhaust systemMake sure there are no
loose supports, cracks or holes. If the sound
of the exhaust seems unusual or there is a
smell of exhaust fumes, immediately have
the exhaust system inspected by an autho-
rized NISSAN dealer. See the carbon mon-
oxide warning in the ``Starting and driving''
section of this manual.
UnderbodyThe underbody is frequently
exposed to corrosive substances such as
those used on icy roads or to control dust. It
is very important to remove these sub-
stances from the underbody, otherwise rust
may form on the floor pan, frame, fuel lines
and exhaust system. At the end of winter,
the underbody should be thoroughly flushed
with plain water, in those areas where mud
and dirt may have accumulated. See the
``Appearance and care'' section of this
manual.
Fluid leaksCheck under the vehicle for
fuel, oil, water or other fluid leaks after the
vehicle has been parked for a while. Water
dripping from the air conditioner after use is
normal. If you should notice any leaks or if
gasoline fumes are evident, check for the
cause and have it corrected immediately.When performing any inspection or mainte-
nance work on your vehicle, always take
care to prevent serious accidental injury to
yourself or damage to the vehicle. The
following are general precautions which
should be closely observed.
WARNING
cPark the vehicle on a level surface,
apply the parking brake securely and
block the wheels to prevent the ve-
hicle from moving. For manual trans-
mission models, move the shift lever
to (N) Neutral. For an automatic
transmission models, move the shift
selector lever to P (Park).
cBe sure the ignition key is in the OFF
or LOCK position when performing
any parts replacement or repairs.
cYour vehicle is equipped with an
automatic engine cooling fan. It may
come on at any time without warn-
ing, even if the ignition key is in the
OFF position and the engine is not
running. To avoid injury, always dis-
connect the negative battery cable
before working near the fan.c
If you must work with the engine run-
ning, keep your hands, clothing, hair
and tools away from moving fans,
belts and any other moving parts.
cIt is advisable to secure or remove
any loose clothing and remove any
jewelry, such as rings, watches, etc.
before working on your vehicle.
cAlways wear eye protection when-
ever you work on your vehicle.
cIf you must run the engine in an
enclosed space such as a garage, be
sure there is proper ventilation for
exhaust gases to escape.
cNever get under the vehicle while it
is supported only by a jack. If it is
necessary to work under the vehicle,
support it with safety stands.
c
Keep smoking materials, flame and
sparks away from the fuel tank and
battery.
cOn gasoline engine models with the
multiport fuel injection (MFI) system,
the fuel filter or fuel lines should be
serviced by an authorized NISSAN
MAINTENANCE
PRECAUTIONS
Maintenance and do-it-yourself8-5
ZX
Page 184 of 249

1. Power steering fluid reservoir
2. Spark plug caps
3. Brake fluid reservoir
4. Clutch fluid reservoir (M/T models)
5. Air cleaner
6. Battery
7. Fuse/fusible link box
8. Transmission dipstick (A/T models)
9. Engine oil dipstick
10. Radiator cap
11. Fuse block
12. Windshield washer fluid reservoir
13. Coolant reservoir
14. Engine oil filler cap
NOTE: Engine cover removed for clarity
LDI0073
ENGINE COMPARTMENT
CHECK LOCATIONS QR
ENGINE
Maintenance and do-it-yourself8-7
ZX
Page 185 of 249

1. Power steering fluid reservoir
2. Engine oil filler cap
3. Brake fluid reservoir
4. Clutch fluid reservoir (M/T models)
5. Air cleaner
6. Battery
7. Fuse/fusible link box
8. Transmission dipstick (A/T models)
9. Engine oil dipstick
10. Radiator cap
11. Fuse block
12. Windshield washer fluid reservoir
13. Coolant reservoir
NOTE: Engine cover removed for clarity
LDI0074
ENGINE COMPARTMENT
CHECK LOCATIONS VQ
ENGINE
8-8Maintenance and do-it-yourself
ZX
Page 187 of 249
CHANGING ENGINE COOLANT
An authorized NISSAN dealer can change
the engine coolant. The service procedure
is found in NISSAN's Service Manual.
Improper servicing can result in reduced
heater performance and engine over-
heating.
WARNING
cTo avoid the danger of being
scalded, never change the coolant
when the engine is hot.
cNever remove the radiator cap when
the engine is hot. Serious burns
could be caused by high pressure
fluid escaping from the radiator.
cAvoid direct skin contact with used
coolant. If skin contact is made,
wash thoroughly with soap or hand
cleaner as soon as possible.
cKeep coolant out of reach of children
and pets.
CHECKING ENGINE OIL LEVEL
1. Park the vehicle on a level surface and
apply the parking brake.
2. Start the engine and let it idle until it
reaches operating temperature.
3. Turn off the engine.Wait more than 10
minutes for the oil to drain back into
the oil pan.
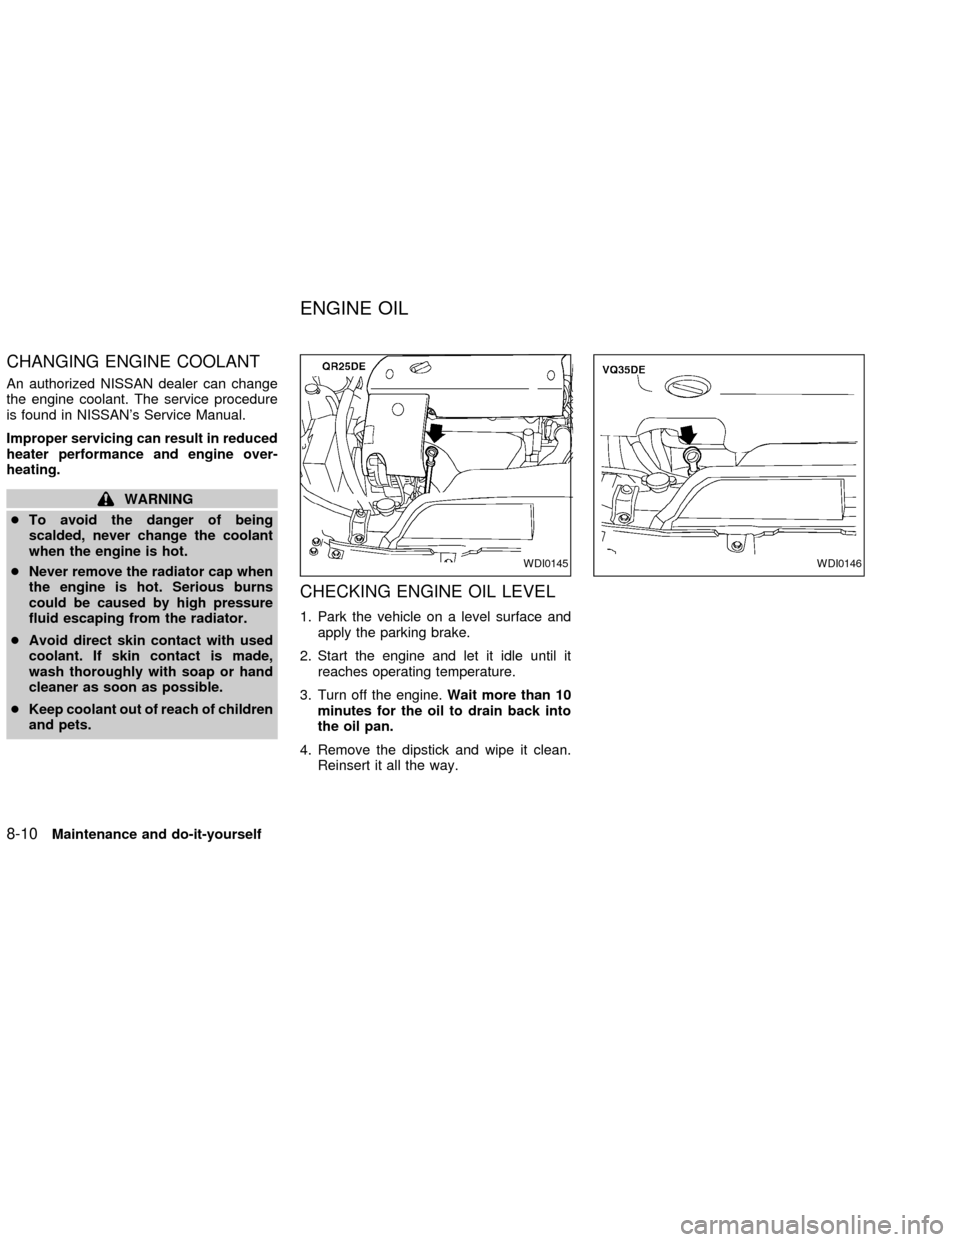
4. Remove the dipstick and wipe it clean.
Reinsert it all the way.
WDI0145WDI0146
ENGINE OIL
8-10Maintenance and do-it-yourself
ZX
Page 188 of 249
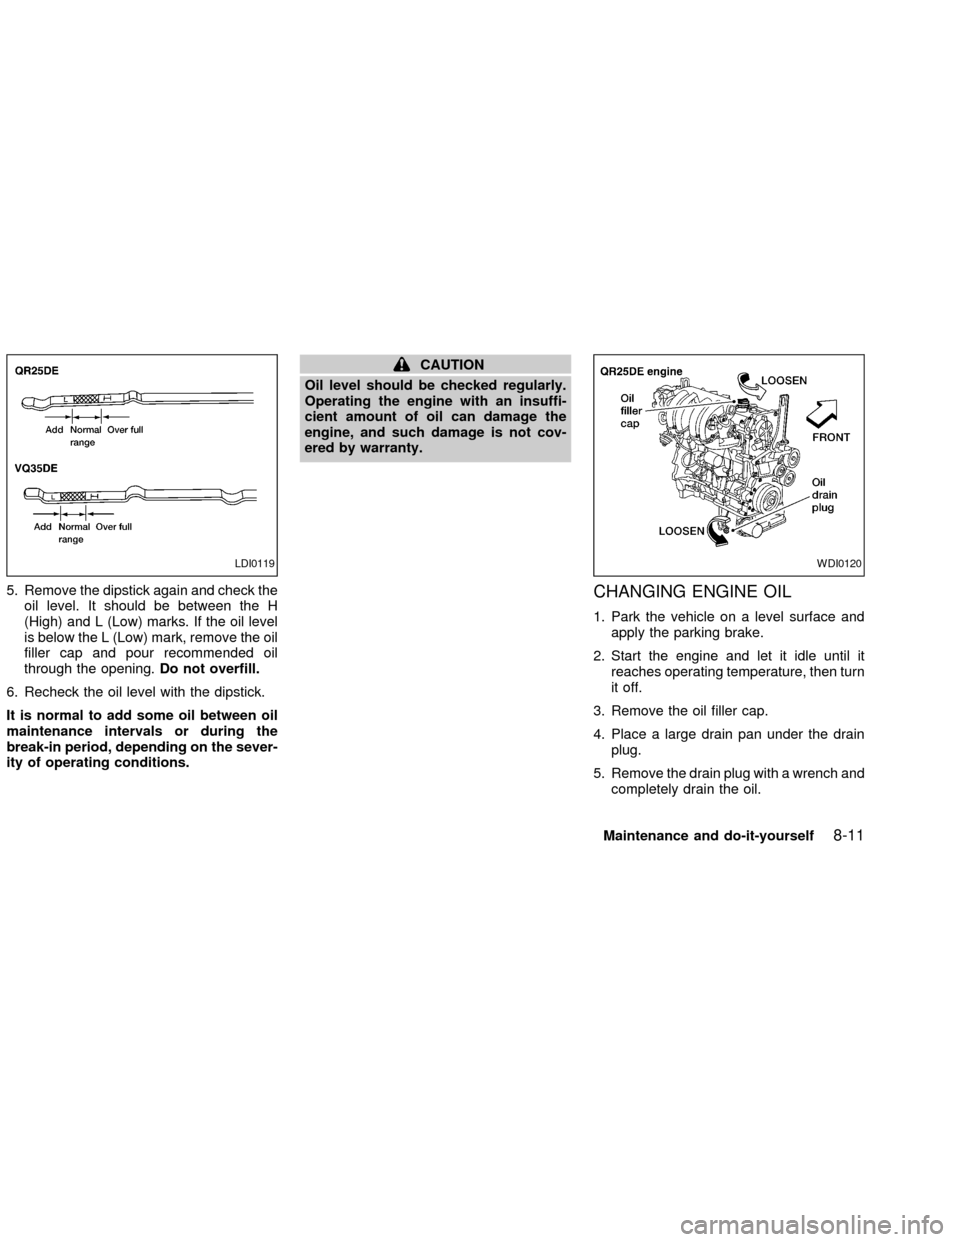
5. Remove the dipstick again and check the
oil level. It should be between the H
(High) and L (Low) marks. If the oil level
is below the L (Low) mark, remove the oil
filler cap and pour recommended oil
through the opening.Do not overfill.
6. Recheck the oil level with the dipstick.
It is normal to add some oil between oil
maintenance intervals or during the
break-in period, depending on the sever-
ity of operating conditions.
CAUTION
Oil level should be checked regularly.
Operating the engine with an insuffi-
cient amount of oil can damage the
engine, and such damage is not cov-
ered by warranty.
CHANGING ENGINE OIL
1. Park the vehicle on a level surface and
apply the parking brake.
2. Start the engine and let it idle until it
reaches operating temperature, then turn
it off.
3. Remove the oil filler cap.
4. Place a large drain pan under the drain
plug.
5. Remove the drain plug with a wrench and
completely drain the oil.
LDI0119WDI0120
Maintenance and do-it-yourself8-11
ZX