Page 823 of 2100

6A±13
ENGINE MECHANICAL (6VE1 3.5L)
Troubleshooting Procedure for Slapping or Hitting etc Noise
The slapping sound stops when spark plug on bad
cylinder is shorted out.
Condition
Possible causeCorrection
Timing belt noiseTiming belt tension is incorrectReplace pusher or adjust the tension
pulley or replace timing belt
Tensioner bearing defectiveReplace
Timing belt defectiveReplace
Timing pulley defectiveReplace
Timing belt comes in contact with
timing coverReplace timing belt and timing cover
Valve noiseValve clearance incorrectReplace adjusting shim
Valve and valve guide seizedReplace valve and valve guide
Valve spring broken or weakenedReplace
Valve seat off±positionedCorrect
Camshaft worn outReplace
Crankshaft noiseCrankshaft end play excessive
(noise occurs when clutch is
engaged)Replace thrust bearing
Engine knockingPreignition due to use of spark plugs
of inadequate heat rangeInstall Spark Plugs of adequate heat
range
Carbon deposits in combustion
chambersClean
Fuel too low in octane ratingReplace fuel
Wide Open Throttle enrichment
system failureRefer to Section 6E
Selection of transmission gear
incorrectCaution operator of incorrect gear
selection
Engine overheatingRefer to ªEngine Lacks Powerº
OthersWater pump defectiveReplace
Drive belt slippingReplace auto tensioner or drive belt
Page 824 of 2100

6A±14
ENGINE MECHANICAL (6VE1 3.5L)
Abnormal Combustion
ConditionPossible causeCorrection
Trouble in fuel systemFuel pressure control valve defectiveReplace
Fuel filter cloggedReplace
Fuel pump cloggedClean or replace
Fuel tank or fuel pipe cloggedClean or replace
Fuel injector cloggedClean or replace
Fuel pump relay defectiveReplace
Power supply cable for fuel pump
broken or poor connectionsReconnect, correct or replace
Mass Airflow (MAF) Sensor circuit
open or defectiveCorrect or replace
MAF Sensor defectiveReplace
Manifold Absolute Pressure Sensor
circuit open or shortedCorrect or replace
Manifold Absolute Pressure Sensor
defectiveReplace
Engine Coolant Temperature (ECT)
Sensor circuit open or shortedCorrect or replace
ECT Sensor defectiveReplace
Throttle Position Sensor adjustment
incorrectReadjust
Throttle Position Sensor defectiveReplace
Throttle Position Sensor connector
poor connectionsReconnect
Vehicle Speed Sensor cable poor
connections or defectiveCorrect or replace
Vehicle Speed Sensor loosely fixedFix tightly
Vehicle Speed Sensor in wrong
contact or defectiveReplace
Powertrain Control Module cable
poor connections or defectiveCorrect or replace
Trouble in emission control systemHeated Oxygen Sensor circuit openCorrect or replace
Heated Oxygen Sensor defectiveReplace
Signal vacuum hose loosely fitted or
defectiveCorrect or replace
EGR Valve circuit open or shortedCorrect or replace
Exhaust Gas Recirculation Valve
defectiveReplace
ECT Sensor circuit open or shortedCorrect or replace
Canister Purge Valve circuit open or
shortedCorrect or replace
Canister Purge Valve defectiveReplace
ECT Sensor defectiveReplace
Positive Crankcase Ventilation
(PCV) valve and hose cloggedCorrect or replace
Evaporator systemRefer to Section 6E
Trouble in ignition systemÐÐÐÐRefer to ªEngine Lacks Powerº
Page 827 of 2100

6A±17
ENGINE MECHANICAL (6VE1 3.5L)
Fuel Consumption Excessive
ConditionPossible causeCorrection
Trouble in fuel systemMixture too rich or too lean due to
trouble in fuel injection systemRefer to ªAbnormal Combustionº
Fuel cut function does not workRefer to ªAbnormal Combustionº
Trouble in ignition systemMisfiring or abnormal combustion
due to trouble in ignition systemRefer to ªHard Startº or ªAbnormal
Combustionº
OthersEngine idle speed too highReset Idle Air Control Valve
Fuel system leakageCorrect or replace
Clutch slippingCorrect
Brake dragCorrect
Selection of transmission gear
incorrectCaution operator of incorrect gear
selection
Excessive Exhaust Gas
Recirculation flow due to trouble in
Exhaust Gas Recirculation systemRefer to ªAbnormal Combustionº
Lubrication Problems
ConditionPossible causeCorrection
Oil pressure too lowWrong oil in useReplace with correct engine oil
Relief valve stickingReplace
Oil pump not operating properlyCorrect or replace
Oil pump strainer cloggedClean or replace strainer
Oil pump wornReplace
Oil pressure gauge defectiveCorrect or replace
Crankshaft bearing or connecting
rod bearing wornReplace
Oil contaminationWrong oil in useReplace with correct engine oil
Oil filter cloggedReplace oil filter
Cylinder head gasket damageReplace gasket
Burned gases leakingReplace piston and piston rings or
cylinder body assembly
Oil not reaching valve systemOil passage in cylinder head or
cylinder body cloggedClean or correct
Engine Oil Pressure Check
1. Check for dirt, gasoline or water in the engine oil.
a. Check the viscosity of the oil.
b. Check the viscosity of the oil.
c. Change the oil if the viscosity is outside the
specified standard.
d. Refer to the ªMaintenance and Lubricationº section
of this manual.
2. Check the engine oil level.
The level should fall somewhere between the ªADDº
and the ªFULLº marks on the oil level dipstick.
If the oil level does not reach the ªADDº mark on the
oil level dipstick, engine oil must be added.3. Remove the oil pressure unit.
4. Install an oil pressure gauge.
5. Start the engine and allow the engine to reach normal
operating temperature (About 80�C).
6. Measure the oil pressure.
Oil pressure should be:
392±550 kPa (56.9±80.4 psi) at 3000 rpm.
7. Stop the engine.
8. Remove the oil pressure gauge.
9. Install the oil pressure unit.
10. Start the engine and check for leaks.
Page 829 of 2100
6A±19
ENGINE MECHANICAL (6VE1 3.5L)
Cylinder Head Cover LH
Removal
1. Disconnect battery ground cable.
2. Remove engine cover from the dowels on the
common chamber.
F06RY001
3. Disconnect positive crankcase ventilation hose.
4. Remove ground cable fixing bolt on cylinder head
cover.
5. Ignition coil connector and ignition coil.
�Disconnect the three connectors from the ignition
coils.
�Remove harness bracket bolt on cylinder head
cover.
�Remove fixing bolts on ignition coils.
060RY022
Legend
(1) Ignition Coil Connector
(2) Bolt
(3) Ignition Coil Assemblies
6. Disconnect fuel injector harness connector then
remove fuel injector harness bracket bolt.
7. Remove eight fixing bolts, then the cylinder head
cover.
010RW001
NOTE: Where do you refer the tech in case of bolt
removal difficulties.
Page 830 of 2100

6A±20
ENGINE MECHANICAL (6VE1 3.5L)
Installation
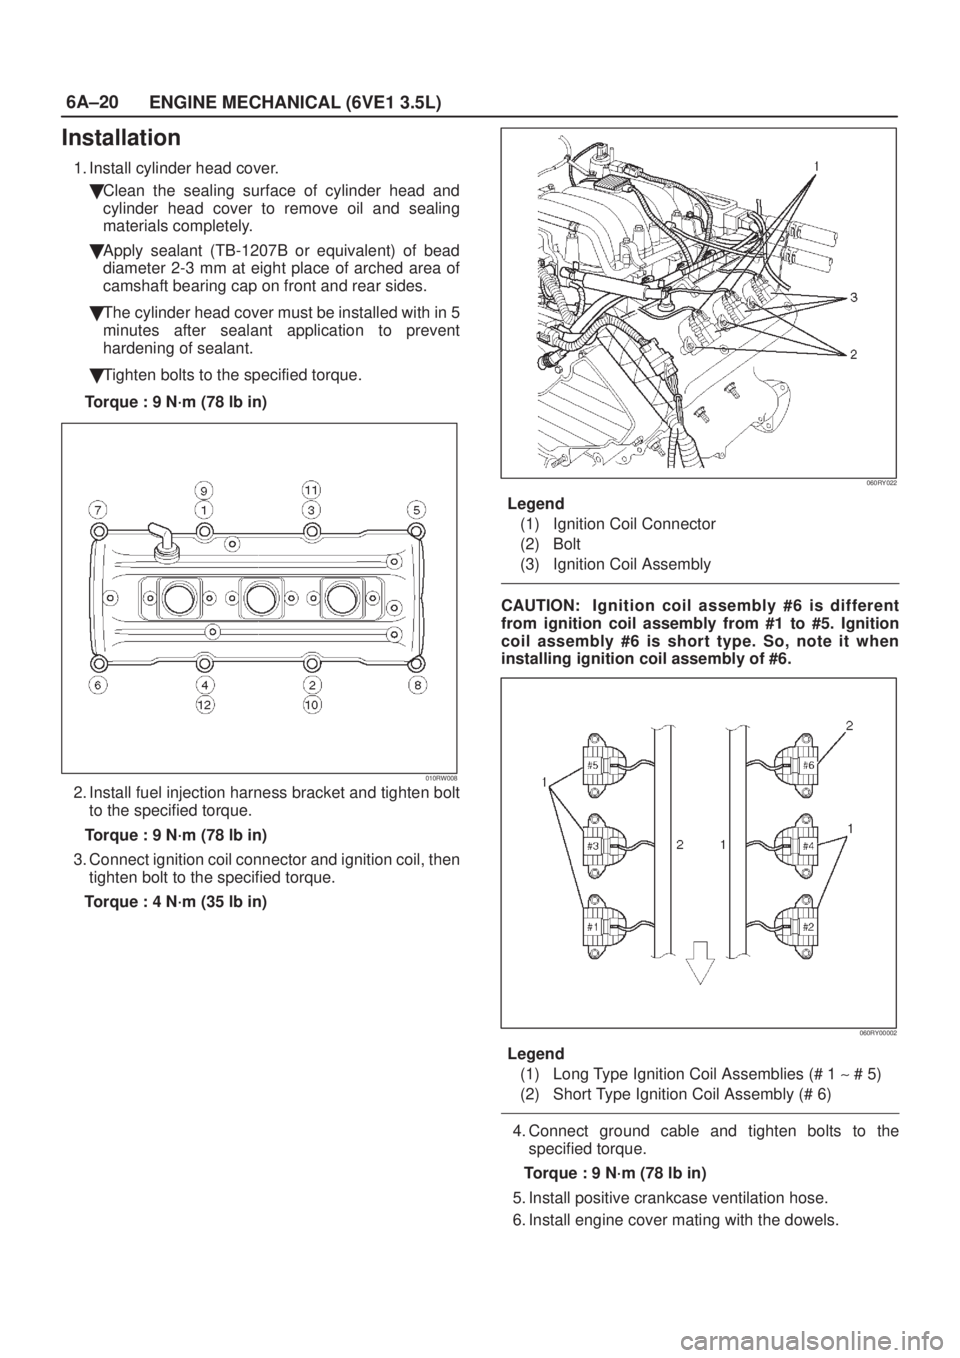
1. Install cylinder head cover.
�Clean the sealing surface of cylinder head and
cylinder head cover to remove oil and sealing
materials completely.
�Apply sealant (TB-1207B or equivalent) of bead
diameter 2-3 mm at eight place of arched area of
camshaft bearing cap on front and rear sides.
�The cylinder head cover must be installed with in 5
minutes after sealant application to prevent
hardening of sealant.
�Tighten bolts to the specified torque.
Torque : 9 N´m (78 lb in)
010RW008
2. Install fuel injection harness bracket and tighten bolt
to the specified torque.
Torque : 9 N´m (78 lb in)
3. Connect ignition coil connector and ignition coil, then
tighten bolt to the specified torque.
Torque : 4 N´m (35 lb in)
060RY022
Legend
(1) Ignition Coil Connector
(2) Bolt
(3) Ignition Coil Assembly
CAUTION: Ignition coil assembly #6 is different
from ignition coil assembly from #1 to #5. Ignition
coil assembly #6 is short type. So, note it when
installing ignition coil assembly of #6.
060RY00002
Legend
(1) Long Type Ignition Coil Assemblies (# 1 ~ # 5)
(2) Short Type Ignition Coil Assembly (# 6)
4. Connect ground cable and tighten bolts to the
specified torque.
Torque : 9 N´m (78 lb in)
5. Install positive crankcase ventilation hose.
6. Install engine cover mating with the dowels.
Page 831 of 2100

6A±21
ENGINE MECHANICAL (6VE1 3.5L)
Cylinder Head Cover RH
Removal
1. Disconnect battery ground cable.
2. Remove engine cover from the dowele on the
common chamber.
F06RY001
3. Disconnect ventilation hose from cylinder head cover.
4. Disconnect three ignition coil connectors from ignition
coils and remove harness bracket bolts on cylinder
head cover then remove ignition coil fixing bolts on
ignition coils and remove ignition coils.
5. Disconnect fuel injector harness connector then
remove fuel injector harness bracket bolt.
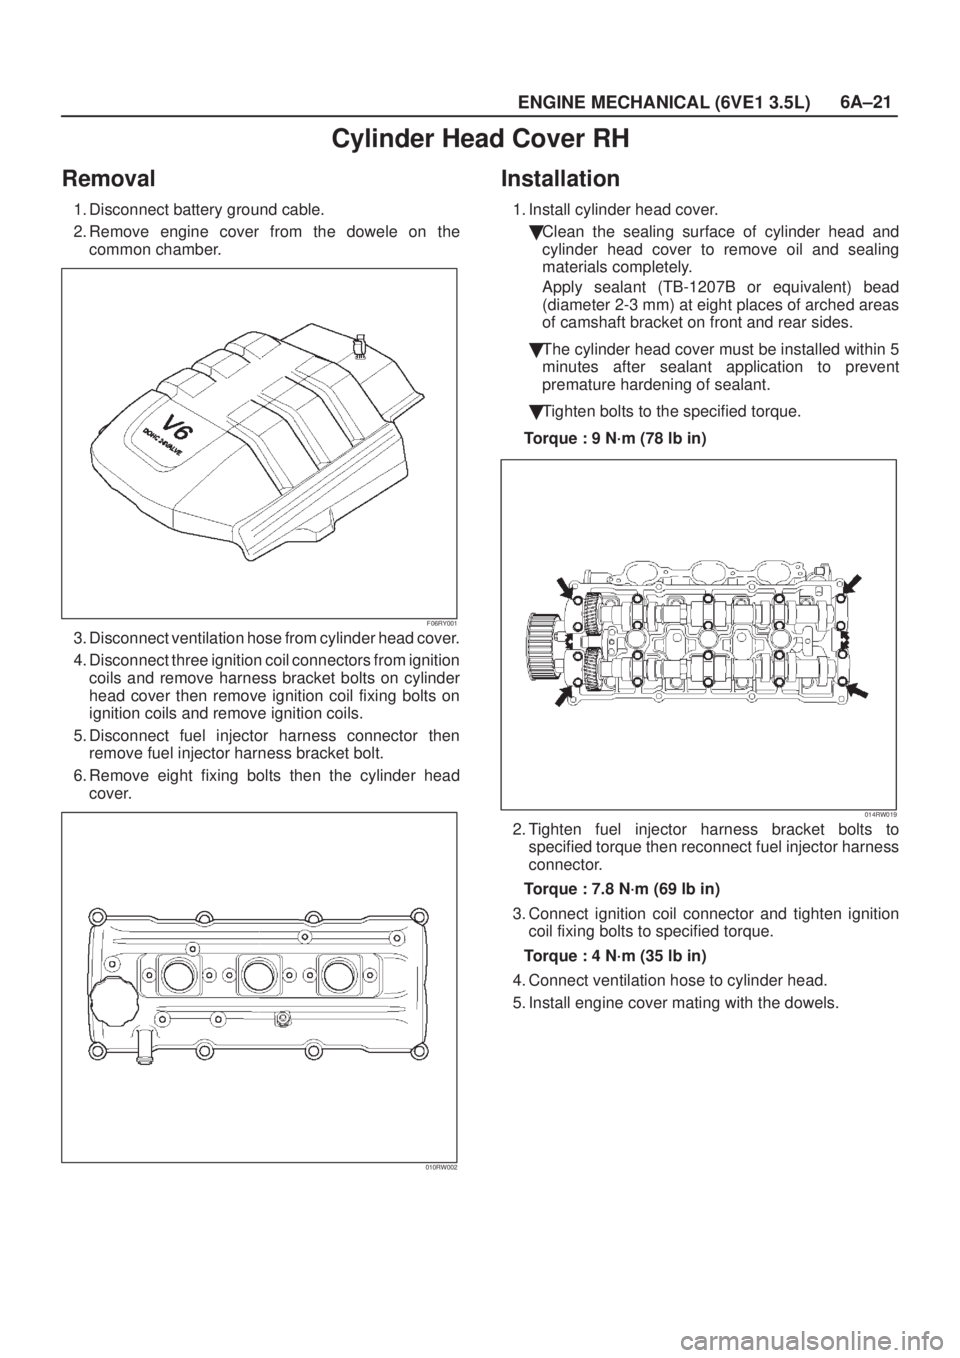
6. Remove eight fixing bolts then the cylinder head
cover.
010RW002
Installation
1. Install cylinder head cover.
�Clean the sealing surface of cylinder head and
cylinder head cover to remove oil and sealing
materials completely.
Apply sealant (TB-1207B or equivalent) bead
(diameter 2-3 mm) at eight places of arched areas
of camshaft bracket on front and rear sides.
�The cylinder head cover must be installed within 5
minutes after sealant application to prevent
premature hardening of sealant.
�Tighten bolts to the specified torque.
Torque : 9 N´m (78 lb in)
014RW019
2. Tighten fuel injector harness bracket bolts to
specified torque then reconnect fuel injector harness
connector.
Torque : 7.8 N´m (69 lb in)
3. Connect ignition coil connector and tighten ignition
coil fixing bolts to specified torque.
Torque : 4 N´m (35 lb in)
4. Connect ventilation hose to cylinder head.
5. Install engine cover mating with the dowels.
Page 897 of 2100
6A±87
ENGINE MECHANICAL (6VE1 3.5L)
Main Data and Specification
General Specification
ItemSpecificationsItem6VE1
Engine type, number of cylinders and arrangementWater cooled, four cycle V6
Form of combustion chamberPent-roof type
Valve mechanism4-Cams, 4-Valves, DOHC Gear & Belt Drive
Cylinder liner typeCasted in cylinder drive
Total piston displacement3494 cc
Cylinder bore x stroke93.4mm x 85mm
(3.677 in x 3.346 in)
Compression ratio9.1
Compression pressure at 300rpm1.37 MPa (14.0 Kg/cm2)
Engine idling speed rpmNon adjustable (750)
Valve clearanceIntake: 0.28 mm (0.11 in)
Exhaust: 0.30mm (0.12in)
Oil capacity5.3 liters
Ignition timingNon adjustable (20� BTDC at idle rpm)
Spark plugPK16PR11, RC10PYP4, K16PR-P11
Plug gap1.0 mm±1.1 mm(0.0394 in ± 0.0433 in)
Page 898 of 2100
6A±88
ENGINE MECHANICAL (6VE1 3.5L)
Torque Specifications
Ignition coil, Spark plug, Crankshaft position sensor and Under cover
E06R100001