Page 1915 of 2100
8F±39 BODY STRUCTURE
Front Window Regulator, Glass and Glass Run
Parts Location
635R200012
Legend
(1) Glass
(2) Glass Run
(3) Door Mirror Assembly
(4) Door Mirror Cover
(5) Tweeter
(6) Speaker Spacer
(7) Speaker Assembly
(8) Inner Waist Seal
(9) Door Trim Panel
(10) Power Window Switch
(11) Inside Lock Bracket(12) Inside Handle
(13) Pull Box
(14) Courtesy Light
(15) Pull Box Bracket
(16) Waterproof Sheet
(17) Front Door Panel
(18) Door Lock Assembly
(19) Door Lock Cylinder
(20) Outside Handle
(21) Window Regulator
(22) Outer Waist Seal
Page 1917 of 2100

8F±41 BODY STRUCTURE
7. Remove the inner waist seal.
8. Remove the tweeter.
9. Remove the courtesy light.
10. Remove the pull box bracket.
11. Remove the inside lock bracket.
�Disconnect the cable.
12. Remove the speaker (2) and speaker spacer (1).
�Disconnect the speaker connector (3).
890R200028
13. Remove the waterproof sheet.
14. Remove the outer waist seal.
�Remove the rear side screw and pull the outer waist
seal upward.
15. Remove the window glass.
�Operate the requlator (power window switch) to
adjust the glass height and expose the access hole.
Remove the 2 bolts fixing the bottom channel and
the requlator. Remove the glass.
631R200001
631R200002
16. Remove the window regulator.
�Remove the 7 fixing bolts and disconnect the
window regulator motor harness connector.
17. Remove the glass run.
�Pull the glass run (6) from the door frame.
631RS007
Installation
To install, follow the removal steps in the reverse order,
noting the following points:
1. Check to see that the window regulator operates
smoothly and the glass opens and closes properly.
2. Install the waterproof sheet tightly against the door
panel.
3. Tighten the window regulator assembly fixing bolts to
the specified torque.
Torque : 6 N´m (52 lb in)
Page 1918 of 2100
8F±42BODY STRUCTURE
Rear Window Regulator, Glass and Glass Run
Parts Location
655R200009
Legend
(1) Glass Run
(2) Glass
(3) Division Bar
(4) Fixed Glass
(5) Window Regulator
(6) Outside Handle
(7) Door Lock Assembly
(8) Pull Box Bracket
(9) Speaker Spacer
(10) Speaker(11) Pull Box
(12) Door Trim Panel
(13) Courtesy Light
(14) Power Window Switch
(15) Inside Handle
(16) Inside Lock Bracket
(17) Inner Waist Seal
(18) Tweeter
(19) Waterproof Sheet
(20) Outer Waist Seal
(21) Rear Door Panel
Page 1920 of 2100
8F±44BODY STRUCTURE
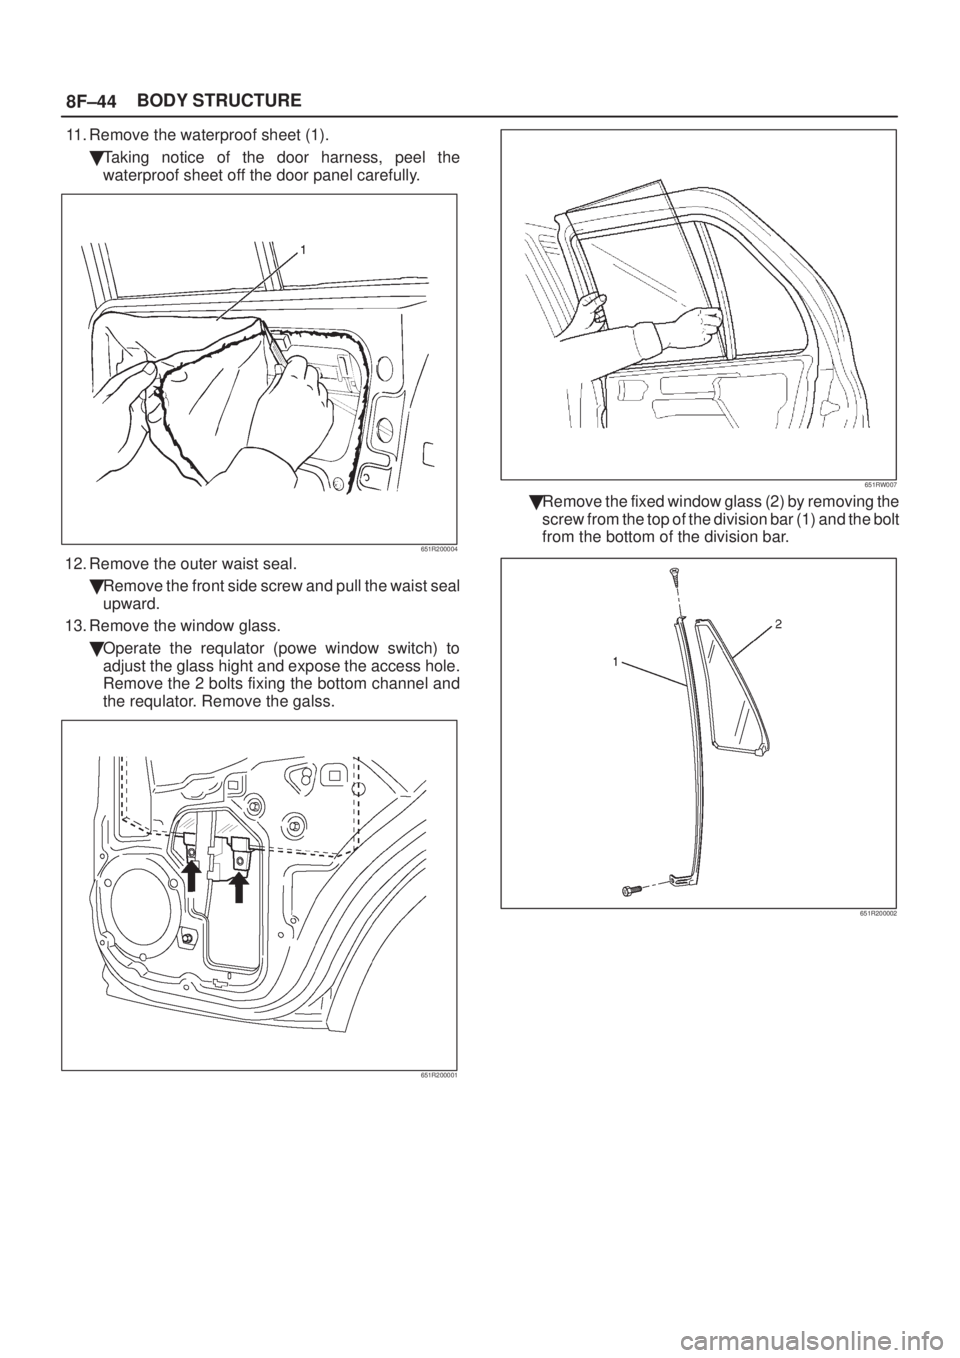
11. Remove the waterproof sheet (1).
�Taking notice of the door harness, peel the
waterproof sheet off the door panel carefully.
651R200004
12. Remove the outer waist seal.
�Remove the front side screw and pull the waist seal
upward.
13. Remove the window glass.
�Operate the requlator (powe window switch) to
adjust the glass hight and expose the access hole.
Remove the 2 bolts fixing the bottom channel and
the requlator. Remove the galss.
651R200001
651RW007
�Remove the fixed window glass (2) by removing the
screw from the top of the division bar (1) and the bolt
from the bottom of the division bar.
651R200002
Page 1921 of 2100
8F±45 BODY STRUCTURE
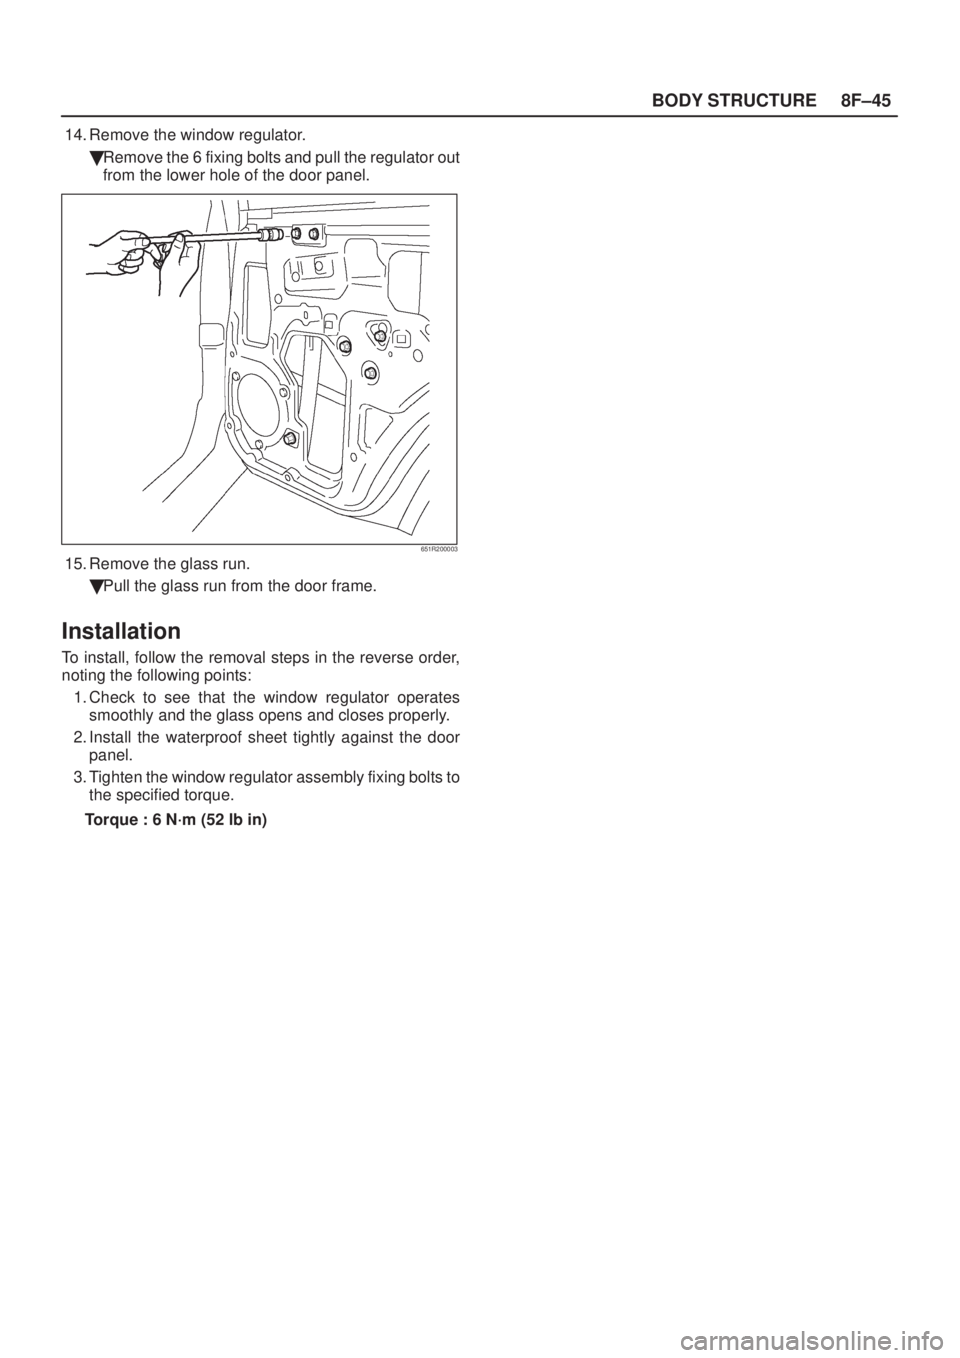
14. Remove the window regulator.
�Remove the 6 fixing bolts and pull the regulator out
from the lower hole of the door panel.
651R200003
15. Remove the glass run.
�Pull the glass run from the door frame.
Installation
To install, follow the removal steps in the reverse order,
noting the following points:
1. Check to see that the window regulator operates
smoothly and the glass opens and closes properly.
2. Install the waterproof sheet tightly against the door
panel.
3. Tighten the window regulator assembly fixing bolts to
the specified torque.
Torque : 6 N´m (52 lb in)
Page 1922 of 2100
8F±46BODY STRUCTURE
Tailgate
Parts Location
681R200006
Legend
(1) Tailgate Assembly
(2) Tailgate Stay Assembly
(3) Rear Roof Trim Cover
(4) Tailgate Upper Cover Assembly
(5) Tailgate Hinge
(6) High Mount Stoplight
(7) Dove Tail
(8) Tailgate Lock Assembly
(9) Vent Grill(10) Tailgate Upper Center Trim Cover
(11) Tailgate Upper Side Trim Cover
(12) Tailgate Lower Trim Cover
(13) Tailgate Pull Box
(14) Clip
(15) Rear Wiper Motor Assembly
(16) Tailgate Panel Assembly
(17) Outside Handle
(18) Clip
Page 1923 of 2100

8F±47 BODY STRUCTURE
Removal
1. Disconnect the battery ground cable.
2. Remove the rear roof trim cover.
�Pry the six clip positions free from the body panel.
3. Remove the tailgate upper center trim cover.
�Pry the four clip positions (1) free from the tailgate.
4. Remove the tailgate pull box.
�Pry the tailgate pull box from the tailgate assembly.
5. Remove the three clips.
6. Remove the tailgate lower trim cover.
�Pry the thirteen clip positions (1) free from the
tailgate.
7. Remove the tailgate upper side trim cover.
�Pry the three clip positions (1) free from the tail gate
(RH/LH).
681R200007
8. Disconnect the high mount stoplight and rear
defogger and tailgate lock harness connectors.
9. Pull out the washer hose.
10. Remove the tailgate hinges (RH/LH).
�Remove the two bolts.
11. Remove the tailgate stay assembly (RH/LH).
�Remove the two bolts.
12. Remove the tailgate assembly.
�Remove the tailgate assembly may require two
people.
�Carefully remove the tailgate assembly not to
damage the hinge.
13. Remove the tailgate upper cover assemblies
(RH/LH).
14. Remove the dove tails (RH/LH).
15. Remove the vent grills (RH/LH).
16. Remove the high mount stoplight.
17. Remove the rear wiper arm.
�Refer to
Rear Wiper Arm/Blade in Wiper/Washer
System section.
18. Remove the rear wiper motor assembly.19. Remove the tailgate lock assembly and outside
handle.
�Refer to
Tailgate Lock in Security And Locks
section.
20. Remove the license plate garnish (1).
�Remove the four screws (3) and the clip (2).
803R200010
21. Remove the license plate light.
22. Remove the tailgate harness.
Page 1924 of 2100
8F±48BODY STRUCTURE
Installation
To install, follow the removal steps in the reverse order,
noting the following points:
1. When installing the hinge to the body, exercise
special care not to damage the body paint surface.
2. Align the tailgate fitting to the body.
�Check the roof and tailgate (1).
Clearance: 10.7 mm (0.42 in)
Height (step): ±2 mm (0.08 in)
�Check the tailgate fitting to the rear quarter panel
(2), (4).
Clearance: 5.0 mm (0.196 in)
Height (step): Flush
�Check the tailgate fitting to the rear bumper.
Clearance: 6.5 mm (0.26 in)
Adjust clearance with tailgate hinges. Adjust height
(step) by tapping on the tailgate lightly with a rubber
hammer.
610R200011
 Glass
(2) Glass Run
(3) Door Mirror Assembly
(4) Door Mirror Cover
(5) Tweeter
(6) Speaker Spacer")
 Glass Run
(2) Glass
(3) Division Bar
(4) Fixed Glass
(5) Window Regulator
(6) Outside Handle
(7) Do")
 Tailgate Assembly
(2) Tailgate Stay Assembly
(3) Rear Roof Trim Cover
(4) Tailgate Upper Cover Assembly
(5) Tailgate Hinge
(6) High M")
