Page 52 of 230
FEATURES OF YOUR HYUNDAI 1- 39
B260A03L-GAT INSTRUMENT CLUSTER AND INDICATOR LIGHTS (Conventional type)
1. Cruise Indicator (If installed)
2. Tachometer
3. Turn Signal Indicator Light
4. Speedometer
5. High Beam Indicator Light
6. Fuel Gauge
7. Traction Control Indicator Light (If installed)
8. Front Fog Indicator Light
9. Stop/Tail Light Failure Warning Light 10.Parking Brake/Low Brake Fluid
Level Warning Light
11.Seat Belt Warning Light
12.Charging System Warning Light
13.Door Ajar Warning Light
14.Low Oil Pressure Warning Light
15.Trunk Lid Open Warning Light
16.SRS (Airbag) Warning Light
17.Odometer/Trip Odometer 18.Odometer/ Trip Odometer Reset
Switch
19.Malfunction Indicator Light(MIL)
(If installed)
20.Coolant Temperature Gauge
21.Automatic Transaxle Position Indi-
cator Light (If installed)
22.Low Fuel Warning Light
23.Anti-Lock Brake Warning Light B260A03L
1
2
343
5
67
89 1 011
1213
1415
16 17 18 19 20 21 22
23
Page 53 of 230
1- 40 FEATURES OF YOUR HYUNDAI
B260B01L-GAT INSTRUMENT CLUSTER AND INDICATOR LIGHTS (Super vision type)
1. Coolant Temperature Gauge
2. Tachometer
3. Turn Signal Indicator Light
4. High Beam Indicator Light
5. Speedometer
6. Front Fog Indicator Light
7. Cruise Indicator (If installed)
8. Fuel Gauge
9. Traction Control Indicator Light
(If installed) 10.Stop/Tail Light Failure Warning
Light
11.Door Ajar Warning Light
12.Seat Belt Warning Light
13.Trunk Lid Open Warning Light
14.Charging System Warning Light
15.Parking Brake/Low Brake Fluid Level Warning Light
16.Low Oil Pressure Warning Light
17.SRS (Airbag) Warning Light 18.Automatic Transaxle Position Indi-
cator Light (If installed)
19. Odometer/ Trip Odometer
20.Odometer/ Trip Odometer Reset Switch
21.Malfunction Indicator Light(MIL) (If installed)
22.Low Fuel Warning Light
23.Anti-Lock Brake Warning Light B260A04L
1
2
4
3 3
56 78
9
10 1112 13
14 15 16 17 18 19 20 21 22 23
Page 54 of 230
FEATURES OF YOUR HYUNDAI 1- 41
B260C02L-GAT
TRACTION CONTROL INDICATOR LIGHT(If installed)
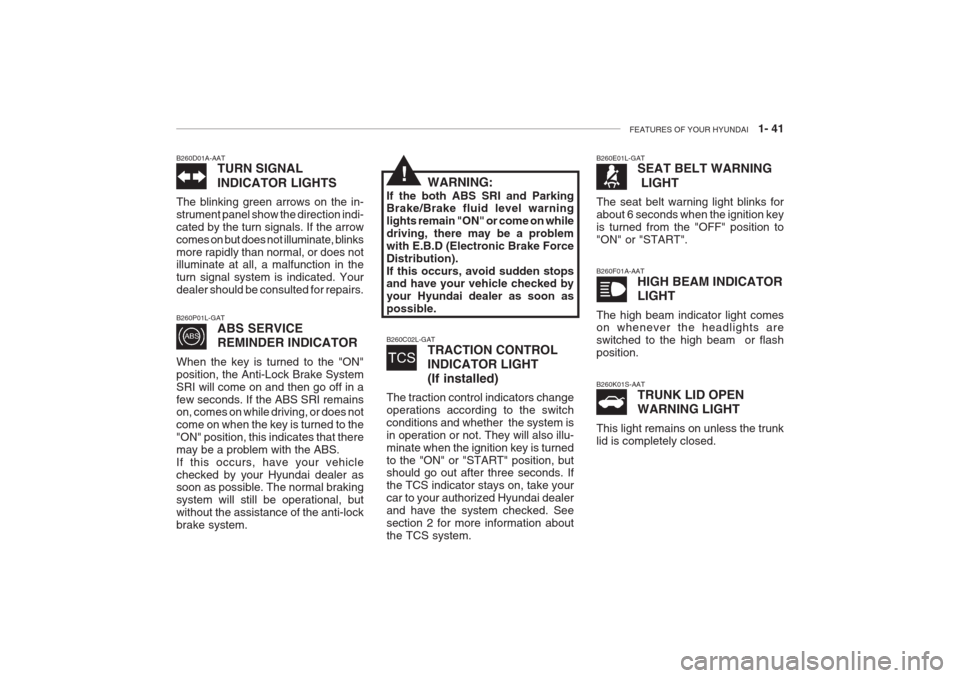
The traction control indicators change operations according to the switchconditions and whether the system isin operation or not. They will also illu-minate when the ignition key is turnedto the "ON" or "START" position, but should go out after three seconds. If the TCS indicator stays on, take yourcar to your authorized Hyundai dealerand have the system checked. Seesection 2 for more information aboutthe TCS system.
B260D01A-AAT TURN SIGNAL INDICATOR LIGHTS
The blinking green arrows on the in- strument panel show the direction indi-cated by the turn signals. If the arrowcomes on but does not illuminate, blinksmore rapidly than normal, or does not illuminate at all, a malfunction in the turn signal system is indicated. Yourdealer should be consulted for repairs. B260F01A-AAT
HIGH BEAM INDICATOR LIGHT
The high beam indicator light comes on whenever the headlights are switched to the high beam or flashposition.
B260E01L-GAT
SEAT BELT WARNING LIGHT
The seat belt warning light blinks for about 6 seconds when the ignition keyis turned from the "OFF" position to"ON" or "START". B260K01S-AAT TRUNK LID OPEN WARNING LIGHT
This light remains on unless the trunk lid is completely closed.
B260P01L-GAT
ABS SERVICE REMINDER INDICATOR
When the key is turned to the "ON" position, the Anti-Lock Brake SystemSRI will come on and then go off in afew seconds. If the ABS SRI remains on, comes on while driving, or does not come on when the key is turned to the"ON" position, this indicates that theremay be a problem with the ABS.If this occurs, have your vehiclechecked by your Hyundai dealer as soon as possible. The normal braking system will still be operational, butwithout the assistance of the anti-lockbrake system. WARNING:
If the both ABS SRI and Parking Brake/Brake fluid level warning lights remain "ON" or come on whiledriving, there may be a problem
with E.B.D (Electronic Brake Force
Distribution).If this occurs, avoid sudden stops and have your vehicle checked by your Hyundai dealer as soon aspossible.
!
Page 72 of 230
FEATURES OF YOUR HYUNDAI 1- 59
2. Remove the front overhead light
and switch panel, using a phillips screwdriver. HXGS235
HXGS236
3. Insert the hexagonal head wrench provided with the vehicle into the socket. This wrench can be found in the vehicle's trunk or glove box.
4. Turn the wrench clockwise to open or counterclockwise to close thesunroof.
B480A01L-GAT FRONT MAP LIGHT
(With sunroof) The two map light switches are located on both sides of the interior light. Push in the map light switch to turn the light on or off. HXG602J
Page 77 of 230
1- 64 FEATURES OF YOUR HYUNDAI
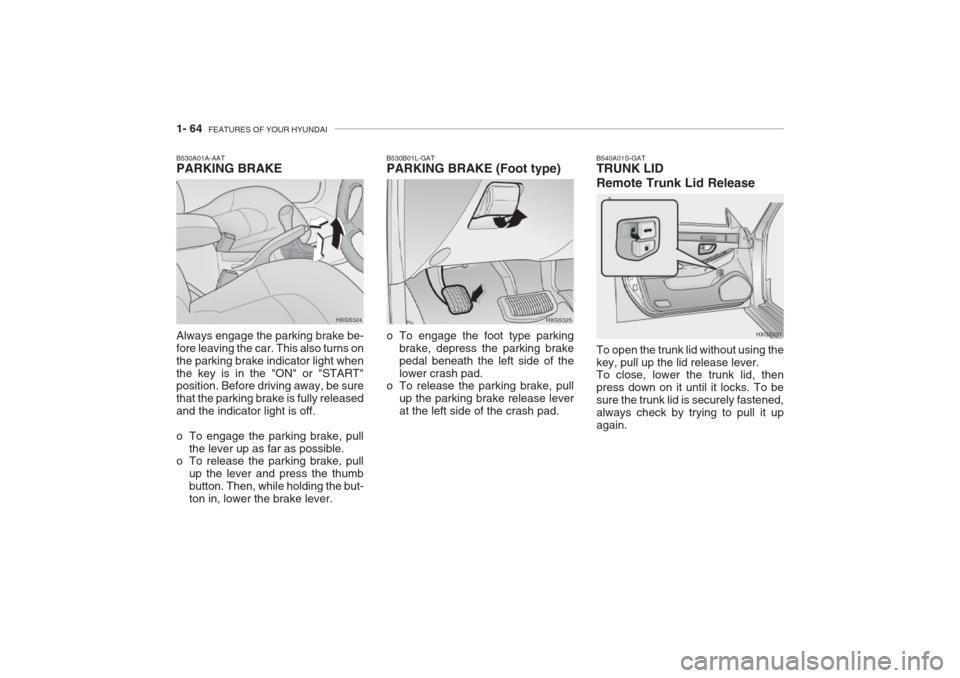
B540A01S-GAT TRUNK LID Remote Trunk Lid Release To open the trunk lid without using the key, pull up the lid release lever. To close, lower the trunk lid, then press down on it until it locks. To besure the trunk lid is securely fastened,always check by trying to pull it upagain. HXGS231B530B01L-GAT PARKING BRAKE (Foot type)
o To engage the foot type parking
brake, depress the parking brake pedal beneath the left side of thelower crash pad.
o To release the parking brake, pull
up the parking brake release leverat the left side of the crash pad. HXGS325
Always engage the parking brake be- fore leaving the car. This also turns onthe parking brake indicator light whenthe key is in the "ON" or "START" position. Before driving away, be sure that the parking brake is fully releasedand the indicator light is off.
o To engage the parking brake, pull
the lever up as far as possible.
o To release the parking brake, pull
up the lever and press the thumb button. Then, while holding the but-ton in, lower the brake lever.
B530A01A-AAT PARKING BRAKE
HXGS324
Page 78 of 230
FEATURES OF YOUR HYUNDAI 1- 65
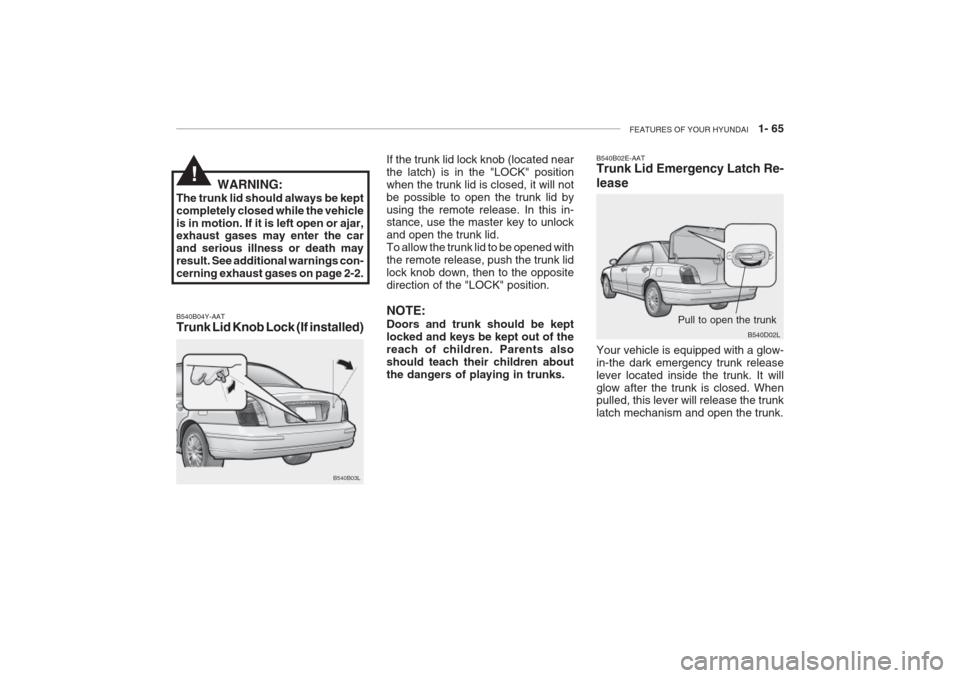
B540B04Y-AAT Trunk Lid Knob Lock (If installed) If the trunk lid lock knob (located near the latch) is in the "LOCK" positionwhen the trunk lid is closed, it will notbe possible to open the trunk lid byusing the remote release. In this in- stance, use the master key to unlock and open the trunk lid.To allow the trunk lid to be opened withthe remote release, push the trunk lidlock knob down, then to the oppositedirection of the "LOCK" position. NOTE: Doors and trunk should be kept locked and keys be kept out of thereach of children. Parents alsoshould teach their children aboutthe dangers of playing in trunks.
B540B03L
WARNING:
The trunk lid should always be keptcompletely closed while the vehicleis in motion. If it is left open or ajar, exhaust gases may enter the car and serious illness or death mayresult. See additional warnings con-cerning exhaust gases on page 2-2.
!
B540B02E-AAT Trunk Lid Emergency Latch Re- lease Your vehicle is equipped with a glow- in-the dark emergency trunk releaselever located inside the trunk. It willglow after the trunk is closed. When pulled, this lever will release the trunk latch mechanism and open the trunk. Pull to open the trunk
B540D02L
Page 79 of 230
1- 66 FEATURES OF YOUR HYUNDAI
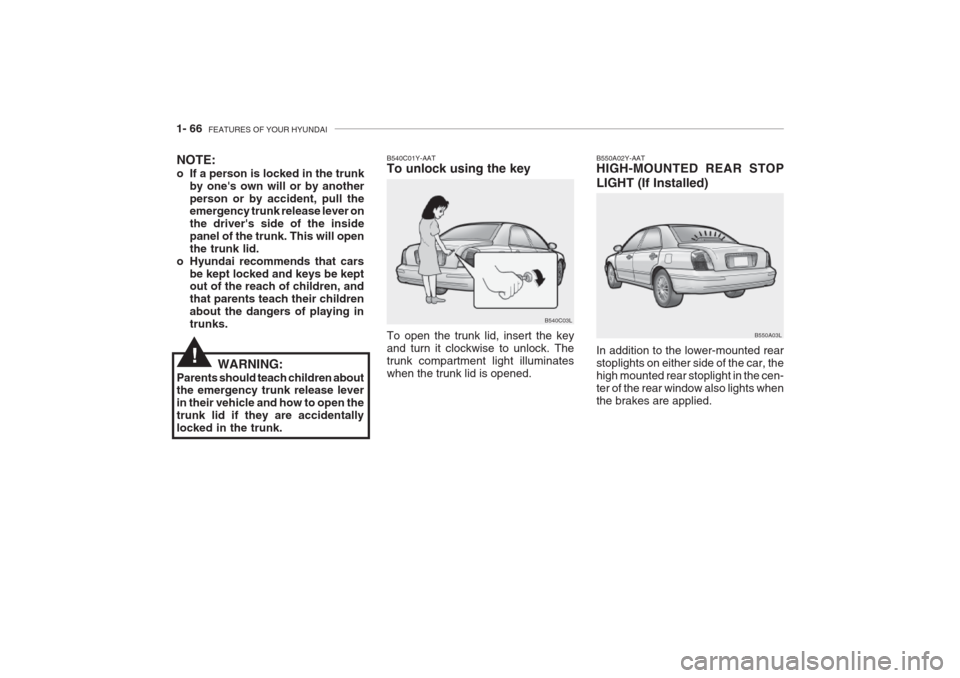
B550A02Y-AAT HIGH-MOUNTED REAR STOP LIGHT (If Installed) In addition to the lower-mounted rear stoplights on either side of the car, thehigh mounted rear stoplight in the cen-ter of the rear window also lights whenthe brakes are applied. B550A03L
To open the trunk lid, insert the key and turn it clockwise to unlock. Thetrunk compartment light illuminateswhen the trunk lid is opened.
NOTE:
o If a person is locked in the trunk
by one's own will or by another person or by accident, pull the emergency trunk release lever on the driver's side of the insidepanel of the trunk. This will openthe trunk lid.
o Hyundai recommends that cars be kept locked and keys be kept out of the reach of children, and that parents teach their childrenabout the dangers of playing intrunks. B540C01Y-AAT To unlock using the key
B540C03L
WARNING:
Parents should teach children about the emergency trunk release lever in their vehicle and how to open thetrunk lid if they are accidentallylocked in the trunk.
!
Page 80 of 230
FEATURES OF YOUR HYUNDAI 1- 67
HXGS255
WARNING:
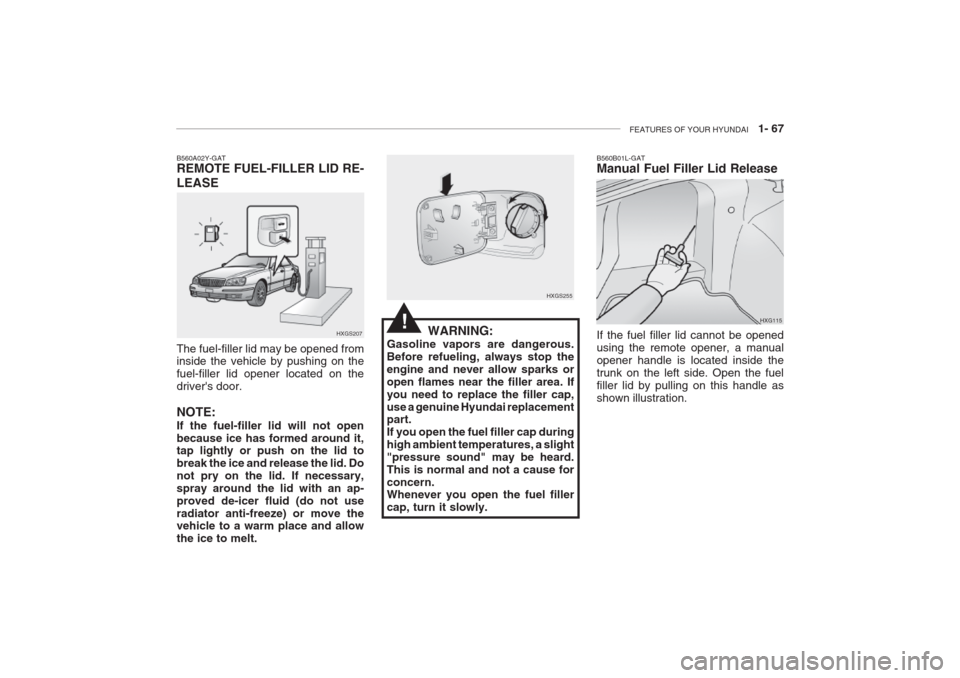
Gasoline vapors are dangerous. Before refueling, always stop theengine and never allow sparks oropen flames near the filler area. Ifyou need to replace the filler cap,use a genuine Hyundai replacement part. If you open the fuel filler cap duringhigh ambient temperatures, a slight"pressure sound" may be heard.This is normal and not a cause forconcern. Whenever you open the fuel filler cap, turn it slowly.
HXGS207
B560A02Y-GAT REMOTE FUEL-FILLER LID RE- LEASE The fuel-filler lid may be opened from inside the vehicle by pushing on the fuel-filler lid opener located on thedriver's door. NOTE: If the fuel-filler lid will not open because ice has formed around it, tap lightly or push on the lid to break the ice and release the lid. Donot pry on the lid. If necessary,spray around the lid with an ap-proved de-icer fluid (do not useradiator anti-freeze) or move the vehicle to a warm place and allow the ice to melt.
!HXG115
B560B01L-GAT Manual Fuel Filler Lid Release If the fuel filler lid cannot be opened using the remote opener, a manualopener handle is located inside thetrunk on the left side. Open the fuelfiller lid by pulling on this handle asshown illustration.