2002 Hyundai Grandeur oil change
[x] Cancel search: oil changePage 120 of 230
FEATURES OF YOUR HYUNDAI 1- 107
B940L01L-GAT
1. Playing CD
o Insert the CD with the label facing
upward.
o Insert the CD to start CD playback,
during radio operation or cassette tape playing.
o When a disc is in the CD deck, if you
press the play button the CD playerwill begin playing even if the radio or cassette player is being used.
o The CD player can be used when
the ignition switch is in either the "ON" or "ACC" position.
2. FF/REW While the disc is playing, if you hold down the FF button continuously, thetrack number is increased and viceversa.
3. TRACK UP/DOWN
o The desired track on the disc cur- rently being played can be selected using the track number.
o Press once to skip forward to the beginning of the next track.
o Press once to skip back to the beginning of the track. 4. SCAN (If installed)
o Press the SCAN button to playback
the first 10 seconds of each track.
o Press the SCAN button again within
10 sec. when you have reached the desired track.
5. REPEAT
o To repeat the track you are currently listening to, press the RPT button. To cancel , press again.
o If you do not release RPT operation
after all the tracks are played back,the unit will play back again from thefirst track.
6. EQ Button Press the EQ button to select the CLASSIC, JAZZ, ROCK and DEFEATMODE for the desired tone quality.Each press of the button changes thedisplay as follows; NOTE:
o To assure proper operation of the
unit, keep the vehicle interior tem- perature within a normal range by using the vehicle's air condition- ing or heating system.
o When replacing the fuse, replace it with a fuse having the correctcapacity.
o The preset station frequencies are all erased when the car bat-tery is disconnected. Therefore,all data will have to be set againif this should occur.
o Do not add any oil to the rotating parts. Keep magnets, screwdriv- ers and other metallic objects away from the tape mechanismand head.
o This equipment is designed to
be used only in a 12 volt DCbattery system with negative ground.
o This unit is made of precision parts. Do not attempt to disas- semble or adjust any parts.
CLASSIC � JAZZ � ROCK � DEFEAT
�
Page 131 of 230
2- 2 DRIVING YOUR HYUNDAI
C010A01A-AAT
WARNING: ENGINE EXHAUST CAN BE DANGEROUS!
Engine exhaust fumes can be extremely dangerous. If, at any time, you smell exhaust fumes inside the vehicle, open the windows immediately. o Do not inhale exhaust fumes. Exhaust fumes contain carbon monoxide, a colorless, odorless gas that can cause unconsciousness and death by asphyxiation. o Be sure the exhaust system does not leak. The exhaust system should be checked whenever the vehicle is raised to change the oil or for any other purpose. If you hear a change in the sound of the exhaust or if you drive over something that strikes the underneath side of the car, have the exhaust system checked as soon as possible by your Hyundai dealer. o Do not run the engine in an enclosed area. Letting the engine idle in your garage, even with the garage door open, is a hazardous practice. Never run theengine in your garage any longer than it takes to start the engine and back the car out. o Avoid idling the engine for prolonged periods with people inside the car. If it is necessary to idle the engine for a prolonged period with people inside the car, be sure to do so only in an open area with the air intake set at "Fresh" and the fan operating at one of the higher speeds so fresh airis drawn into the interior. If you must drive with the trunk open because you are carrying objects that make this necessary:1. Close all windows. 2. Open side vents. 3. Set the air intake control at "Fresh", the air flow control at "Floor" or "Face" and the fan at one of the higher speeds.
To assure proper operation of the ventilation system, be sure the ventilation air intakes located just in front of the windshield are kept clear of snow, ice, leaves or other obstructions.!
Page 145 of 230
2- 16 DRIVING YOUR HYUNDAI
C160F01A-AAT Check Spark Plugs and Ignition System Inspect your spark plugs as described in Section 6 and replace them if neces-sary. Also check all ignition wiring andcomponents to be sure they are notcracked, worn or damaged in any way. C160G01A-GAT To Keep Locks from Freezing To keep the locks from freezing, squirt an approved de-icer fluid or glycerineinto the key opening. If a lock is cov-ered with ice, squirt it with an approvedde-icing fluid to remove the ice. If the lock is frozen internally, you may be able to thaw it out by using a heatedkey. Handle the heated key with careto avoid burning your fingers. NOTE: The proper temperature for using the immobilizer key is from -40°C to 80°C. If you heat the immobilizerkey over 80°C to open the frozenlock, it may cause damage to thetransponder in its head.
C160C01A-AAT Use High Quality Ethylene Glycol Coolant Your Hyundai is delivered with high quality ethylene glycol coolant in thecooling system. It is the only type of coolant that should be used because it helps prevent corrosion in the coolingsystem, lubricates the water pump andprevents freezing. Be sure to replaceor replenish your coolant in accor-dance with the maintenance schedule in Section 5. Before winter, have your coolant tested to assure that its freez-ing point is sufficient for the tempera-tures anticipated during the winter. C160D01A-AAT Check Battery and Cables Winter puts additional burdens on the battery system. Visually inspect thebattery and cables as described inSection 6. The level of charge in yourbattery can be checked by your Hyun- dai dealer or a service station.
C160E01A-AATChange to "Winter Weight" Oil if Necessary In some climates it is recommended that a lower viscosity "winter weight"oil be used during cold weather. See Section 9 for recommendations. If you aren't sure what weight oil you shoulduse, consult your Hyundai dealer.
noted that installing tire chains on thetire will provide a greater driving force,but will not prevent side skids. NOTE: Tire chains are not legal in all prov- inces. Check province laws before fitting tire chains.
Page 175 of 230
VEHICLE MAINTENANCE REQUIREMENTS 5- 7
F060A01A-AAT EXPLANATION OF SCHEDULED MAINTENANCE ITEMS F060M01A-AAT
o Engine Oil and Filter The engine oil and filter should be changed at the intervals specified in the maintenance schedule. If the caris being driven in severe conditions,more frequent oil and filter changesare required. F060B01A-AAT
o Drive Belts Inspect all drive belts for evidence of cuts, cracks, excessive wear or oil and replace if necessary. Drive belts should be checked periodically forproper tension and adjusted as nec-essary. After installing a new filter, run theengine for several minutes, and checkfor leaks at the connections. Fuelfilters should be installed by trainedtechnicians. F060D01A-AAT
o Fuel Lines, Fuel Hoses and
Connections
Check the fuel lines, fuel hoses and connections for leakage and damage. Have a trained technician replace anydamaged or leaking parts immedi-ately. F060E01A-AAT
o Timing Belt Inspect all parts related to the timing belt for damage and deformation.Replace any damaged parts immedi-ately. F060G01A-AAT
o Vapor Hose and Fuel Filler Cap The vapor hose and fuel filler cap should be inspected at those inter-vals specified in the maintenanceschedule. Make sure that a new va-por hose or fuel filler cap is correctlyreplaced. F060F01A-AAT
o Vacuum, Crankcase Ventila-
tion Hoses
Inspect the surface of hoses for evi-
dence of heat and/or mechanical dam-age. Hard and brittle rubber, crack-ing, tears, cuts, abrasions, and ex- cessive swelling indicate deteriora- tion. Particular attention should bepaid to examine those hose surfacesnearest to high heat sources, such asthe exhaust manifold. Inspect the hose routing to assure
that the hoses do not come in contactwith any heat source, sharp edges ormoving component which might cause heat damage or mechanical wear. Inspect all hose connections, such asclamps and couplings, to make surethey are secure, and that no leaks arepresent. Hoses should be replacedimmediately if there is any evidence of deterioration or damage.
F060C01A-AAT
o Fuel Filter A clogged filter can limit the speed at which the vehicle may be driven, dam-age the emission system and causehard starting. If an excessive amountof foreign matter accumulates in thefuel tank, the filter may require re- placement more frequently.
Page 176 of 230
5- 8 VEHICLE MAINTENANCE REQUIREMENTS
F060H01A-AAT
o Air Cleaner Filter A Genuine Hyundai air cleaner filter is recommended when the filter is re-placed. F060J01A-AAT
o Spark Plugs Make sure to install new spark plugs of the correct heat range. F070C02A-AAT
o Coolant The coolant should be changed at the intervals specified in the mainte-nance schedule. F070D01A-AAT
o Manual Transaxle Oil Inspect the manual transaxle oil ac- cording to the maintenance schedule. NOTE: If the oil level is low, check for possible leaks before adding oil. Do not overfill. F070E03A-AAT
o Automatic Transaxle Fluid and
Filter
The fluid level should be in the "HOT"range of the dipstick, after the engineand transaxle are at normal operatingtemperature. Check the automatic transaxle fluid level with the engine running and the transaxle in neutral,with the parking brake properly ap-
plied. Use DIAMOND ATF SP-III or
SK ATF SP-III when adding or chang-ing fluid. F070F01A-AAT
o Brake Hoses and Lines
Visually check for proper installation, chafing, cracks, deterioration and any leakage. Replace any deteriorated ordamaged parts immediately. F070G02A-AAT
o Brake Fluid
Check brake fluid level in the brake fluid reservoir. The level should bebetween "MIN" and "MAX" marks onthe side of the reservoir. Use onlyhydraulic brake fluid conforming toDOT 3 or DOT 4. F070H01A-AAT
o Rear Brake Drums/Linings,
Parking Brake
Check the rear brake drums and lin-ings for scoring, burning, leaking fluid,broken parts, and excessive wear.Inspect the parking brake system in- cluding the parking brake lever and cables. For detailed service proce-dures, refer to the Shop Manual. F070J01A-AAT
o Brake Pads, Calipers and
Rotors
Check the pads for excessive wear, discs for run out and wear, and cali- pers for fluid leakage. F070K01A-AAT
o Exhaust Pipe and Muffler
Visually inspect the exhaust pipes, muffler and hangers for cracks, dete-rioration, or damage. Start the engineand listen carefully for any exhaust gas leakage. Tighten connections or replace parts as necessary.
Page 184 of 230
DO-IT-YOURSELF MAINTENANCE 6- 7
G040A02A-AAT
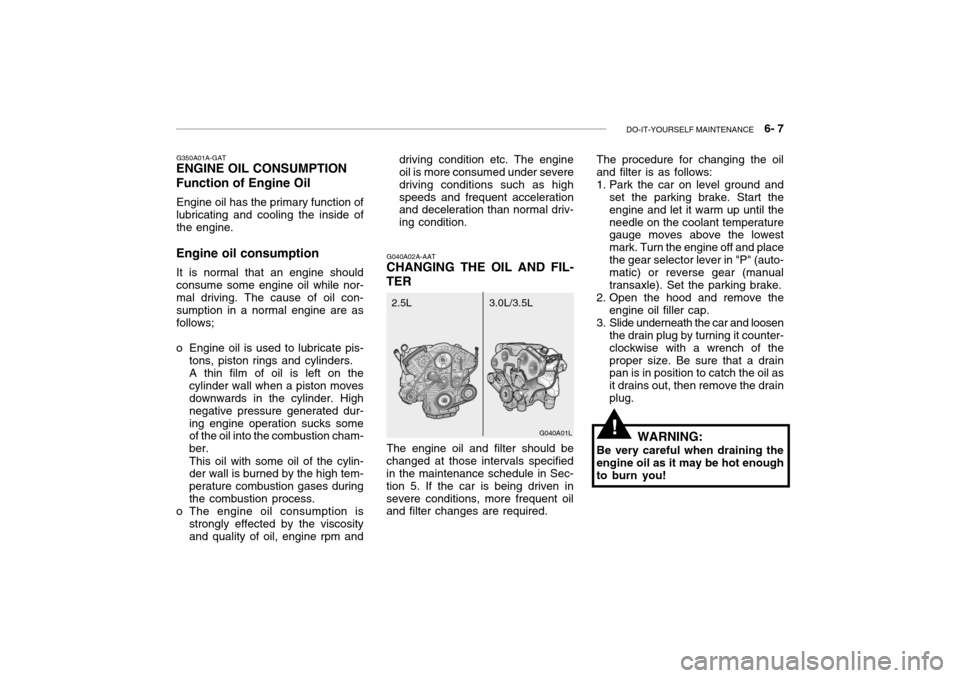
CHANGING THE OIL AND FIL- TER The procedure for changing the oil and filter is as follows:
1. Park the car on level ground and
set the parking brake. Start the engine and let it warm up until theneedle on the coolant temperature gauge moves above the lowest mark. Turn the engine off and placethe gear selector lever in "P" (auto- matic) or reverse gear (manual transaxle). Set the parking brake.
2. Open the hood and remove the engine oil filler cap.
3. Slide underneath the car and loosen the drain plug by turning it counter-clockwise with a wrench of theproper size. Be sure that a drain pan is in position to catch the oil as it drains out, then remove the drainplug.
WARNING:
Be very careful when draining theengine oil as it may be hot enoughto burn you!
The engine oil and filter should be
changed at those intervals specified in the maintenance schedule in Sec- tion 5. If the car is being driven insevere conditions, more frequent oil and filter changes are required. G040A01L
3.0L/3.5L
2.5L
G350A01A-GAT
ENGINE OIL CONSUMPTION Function of Engine Oil
Engine oil has the primary function of lubricating and cooling the inside ofthe engine.
Engine oil consumption It is normal that an engine shouldconsume some engine oil while nor-
mal driving. The cause of oil con- sumption in a normal engine are as follows;
o Engine oil is used to lubricate pis- tons, piston rings and cylinders.A thin film of oil is left on thecylinder wall when a piston moves downwards in the cylinder. High negative pressure generated dur-ing engine operation sucks some of the oil into the combustion cham- ber. This oil with some oil of the cylin- der wall is burned by the high tem- perature combustion gases duringthe combustion process.
o The engine oil consumption is
strongly effected by the viscosity and quality of oil, engine rpm and driving condition etc. The engine
oil is more consumed under severe driving conditions such as highspeeds and frequent acceleration and deceleration than normal driv- ing condition.
!
Page 203 of 230
6- 26 DO-IT-YOURSELF MAINTENANCE
Replacement instructions:
1. Allow the bulb to cool. Wear eye protection.
2. Always grasp the bulb by its plastic base, avoid touching the glass.
G260A01L-GAT
REPLACEMENT OF LIGHT BULBS
Before attempting to replace a light
bulb, be sure the switch is turned to the "OFF" position. The next paragraph shows how to
reach the light bulbs so they may be changed. Be sure to replace the burned-out bulb with one of the samenumber and wattage rating. See page 6-33 for the wattage de-
scriptions.
G270A03L
G270A01L-GAT
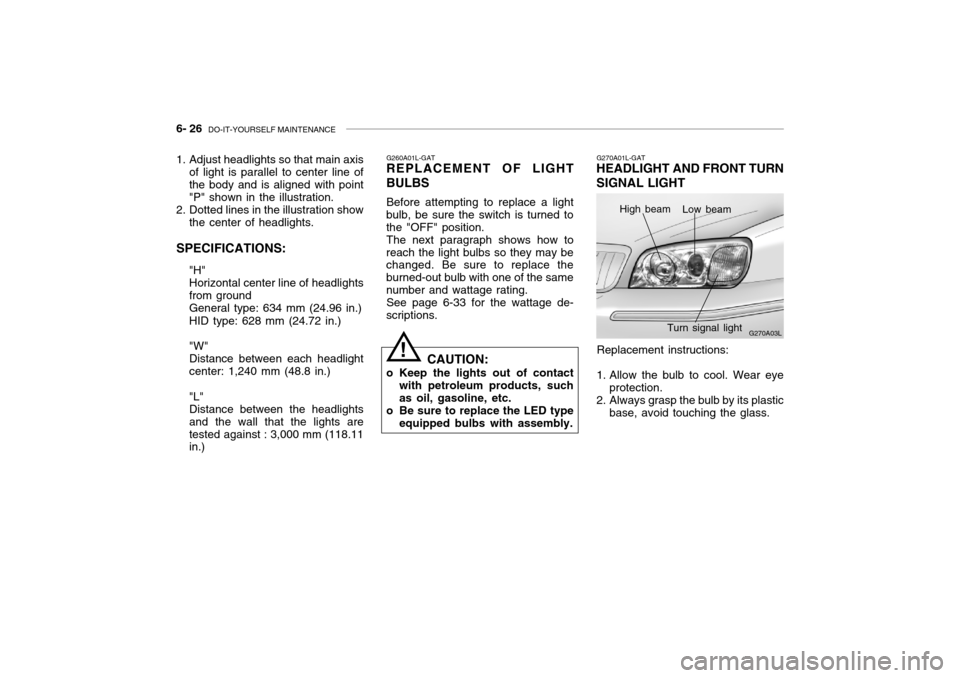
HEADLIGHT AND FRONT TURN SIGNAL LIGHT
High beam Low beam
Turn signal light
! CAUTION:
o Keep the lights out of contact with petroleum products, such as oil, gasoline, etc.
o Be sure to replace the LED type equipped bulbs with assembly.
1. Adjust headlights so that main axis
of light is parallel to center line ofthe body and is aligned with point"P" shown in the illustration.
2. Dotted lines in the illustration show
the center of headlights.
SPECIFICATIONS: "H"Horizontal center line of headlightsfrom groundGeneral type: 634 mm (24.96 in.) HID type: 628 mm (24.72 in.) "W" Distance between each headlightcenter: 1,240 mm (48.8 in.) "L" Distance between the headlightsand the wall that the lights aretested against : 3,000 mm (118.11 in.)