2002 FIAT DUCATO 244 key
[x] Cancel search: keyPage 157 of 246
CONNECT Nav+
156
VOLUME ADJUSTMENT
To increase the volume: turn the
knob 16-fig. 1clockwise.
To lower the volume: turn the knob
16-fig. 1counter-clockwise.
During adjustment, the volume lev-
el is shown graphically on the display
(only in the main menu of audio
sources).
IMPORTANTThe volume of
PTY31 Alarm/Traffic Announcement
(TA), telephone, telephone ringer and
voice recognition can be adjusted sep-
arately.
Automatic volume lowering
during phone calls
During phone calls, the radio volume
is turned down automatically and the
screen shows the telephone symbol.MUTE function (turning down
the audio volume)
To turn off the volume of the audio
system (Radio, CD), with any operat-
ing mode on (MAIN, NAV, TRIP),
keep the button 18-fig. 1pressed; this
way the radio turns off and the display
shows the wording “Audio OFF”. To
turn the radio on again, briefly press
the button 18-fig. 1, thereby turning
the audio function on again with the
corresponding screen.
NAV MUTE function (excluding
navigator voice messages)
To turn off the navigator voice in-
structions keep the “NAV” key
pressed 20-fig. 1. The volume will
lower gradually (Soft Mute function)
and the display will show the word-
ing “NAV MUTE”.
Too high a volume may be
a danger for the driver and
for other persons in the traffic. The
volume should therefore always be
adjusted in such a way as to still be
able to hear the noises in the sur-
rounding environment (for example
horns, ambulances, police cars,
etc.).
WARNING
Page 158 of 246

CONNECT Nav+
157
Soft Mute function
When the MUTE function (audio sys-
tem) or NAV MUTE (navigator) is
turned on or off, the volume lowers
or highers gradually (Soft Mute func-
tion). The Soft Mute function is also
turned on pressing one of the six pre-
set keys 1 ÷ 6 fig. 1, key 11-fig. 1or
key 12-fig. 1for tuning radio stations. To turn off the NAV MUTE function
press the “NAV” key 20-fig. 1at
length: the volume will gradually in-
crease (Soft Mute function) returning
to the value set previously.
With the NAV MUTE function on, all
the other navigator functions are us-
able and if traffic information is re-
ceived with the TA function on or an
emergency alarm is received the mes-
sage ignores the MUTE function.PROTECTION AGAINST
OVERHEATING
The components of the telematic
system are protected against over-
heating. The device stops it from
working when the temperature of the
module exceeds the established limit.
In this case the function activated by
the module that has reached the tem-
perature limit is switched off and the
display shows a warning message for
the user.
To resume the interrupted function,
the user should wait for the temper-
ature of the module to fall below the
limit; this condition will be indicated
by the message going off from the dis-
play followed by the reactivation of the
function.
Conversely, to exit the screen with
the message immediately and activate
a different function, press “ESC” 23-
fig. 1.
Page 159 of 246
CONNECT Nav+
158
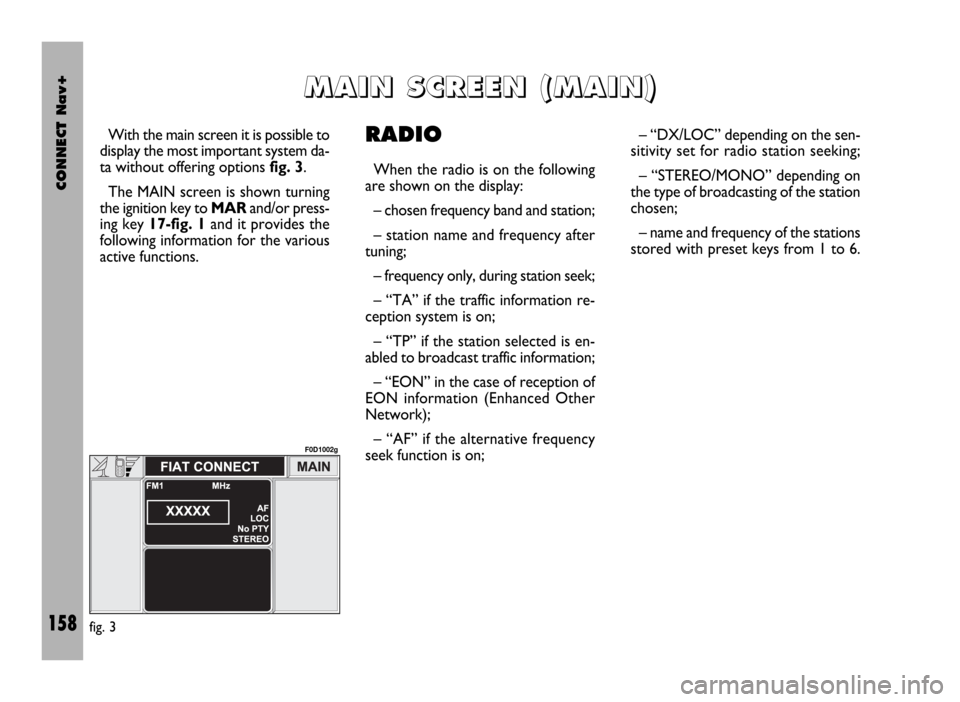
With the main screen it is possible to
display the most important system da-
ta without offering options fig. 3.
The MAIN screen is shown turning
the ignition key to MAR and/or press-
ing key 17-fig. 1and it provides the
following information for the various
active functions.RADIO
When the radio is on the following
are shown on the display:
– chosen frequency band and station;
– station name and frequency after
tuning;
– frequency only, during station seek;
– “TA” if the traffic information re-
ception system is on;
– “TP” if the station selected is en-
abled to broadcast traffic information;
– “EON” in the case of reception of
EON information (Enhanced Other
Network);
– “AF” if the alternative frequency
seek function is on;– “DX/LOC” depending on the sen-
sitivity set for radio station seeking;
– “STEREO/MONO” depending on
the type of broadcasting of the station
chosen;
– name and frequency of the stations
stored with preset keys from 1 to 6.
M M
A A
I I
N N
S S
C C
R R
E E
E E
N N
( (
M M
A A
I I
N N
) )
fig. 3
F0D1002g
Page 161 of 246
CONNECT Nav+
160
DROP-DOWN
MENU
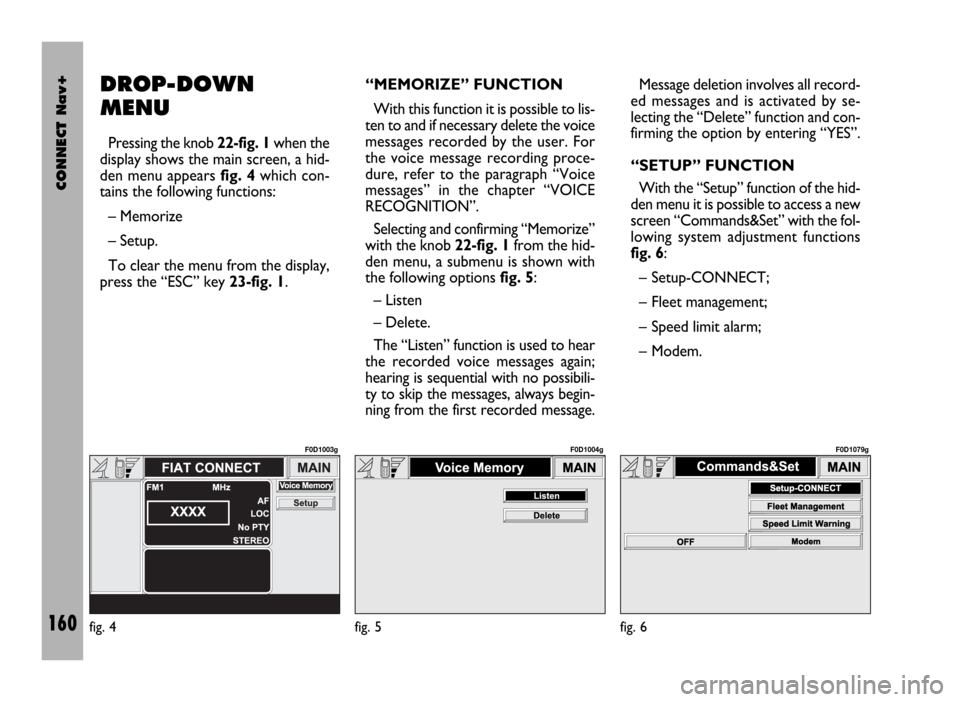
Pressing the knob 22-fig. 1when the
display shows the main screen, a hid-
den menu appears fig. 4which con-
tains the following functions:
– Memorize
– Setup.
To clear the menu from the display,
press the “ESC” key 23-fig. 1.“MEMORIZE” FUNCTION
With this function it is possible to lis-
ten to and if necessary delete the voice
messages recorded by the user. For
the voice message recording proce-
dure, refer to the paragraph “Voice
messages” in the chapter “VOICE
RECOGNITION”.
Selecting and confirming “Memorize”
with the knob 22-fig. 1from the hid-
den menu, a submenu is shown with
the following options fig. 5:
– Listen
– Delete.
The “Listen” function is used to hear
the recorded voice messages again;
hearing is sequential with no possibili-
ty to skip the messages, always begin-
ning from the first recorded message.Message deletion involves all record-
ed messages and is activated by se-
lecting the “Delete” function and con-
firming the option by entering “YES”.
“SETUP” FUNCTION
With the “Setup” function of the hid-
den menu it is possible to access a new
screen “Commands&Set” with the fol-
lowing system adjustment functions
fig. 6:
– Setup-CONNECT;
– Fleet management;
– Speed limit alarm;
– Modem.
fig. 4
F0D1003g
fig. 5
F0D1004g
fig. 6
F0D1079g
Page 164 of 246
CONNECT Nav+
163
– turn knob 22-fig. 1to select the
required value, then press to con-
firm;
– turn knob 22-fig. 1to select
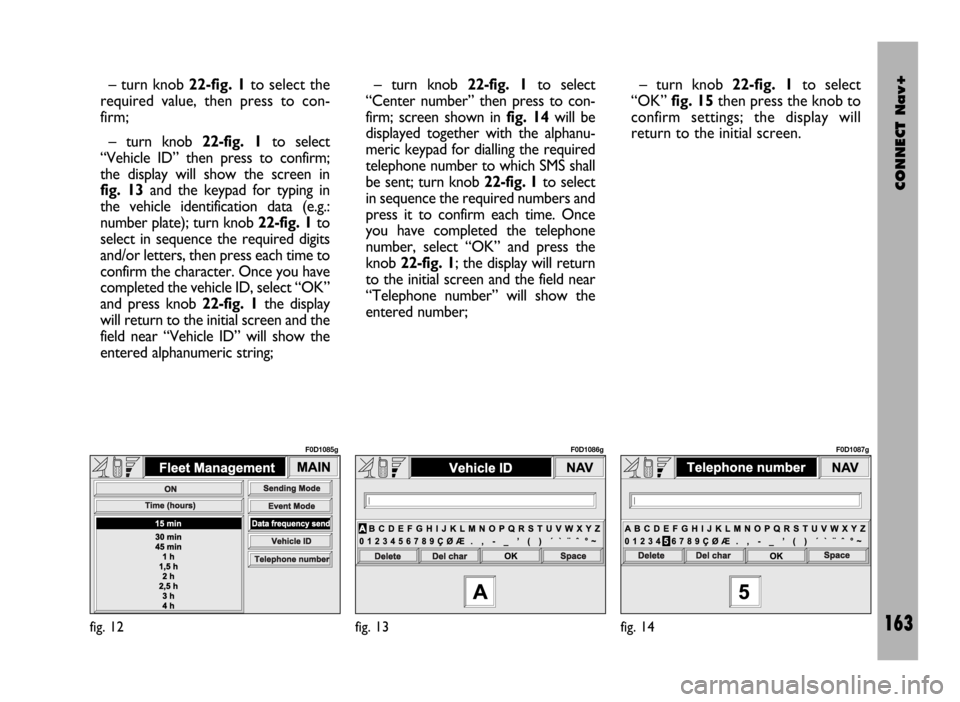
“Vehicle ID” then press to confirm;
the display will show the screen in
fig. 13and the keypad for typing in
the vehicle identification data (e.g.:
number plate); turn knob 22-fig. 1to
select in sequence the required digits
and/or letters, then press each time to
confirm the character. Once you have
completed the vehicle ID, select “OK”
and press knob 22-fig. 1the display
will return to the initial screen and the
field near “Vehicle ID” will show the
entered alphanumeric string;– turn knob 22-fig. 1to select
“Center number” then press to con-
firm; screen shown in fig. 14will be
displayed together with the alphanu-
meric keypad for dialling the required
telephone number to which SMS shall
be sent; turn knob 22-fig. 1to select
in sequence the required numbers and
press it to confirm each time. Once
you have completed the telephone
number, select “OK” and press the
knob 22-fig. 1; the display will return
to the initial screen and the field near
“Telephone number” will show the
entered number;– turn knob 22-fig. 1to select
“OK” fig. 15then press the knob to
confirm settings; the display will
return to the initial screen.
fig. 12
F0D1085g
fig. 13
F0D1086g
fig. 14
F0D1087g
Page 173 of 246
CONNECT Nav+
172
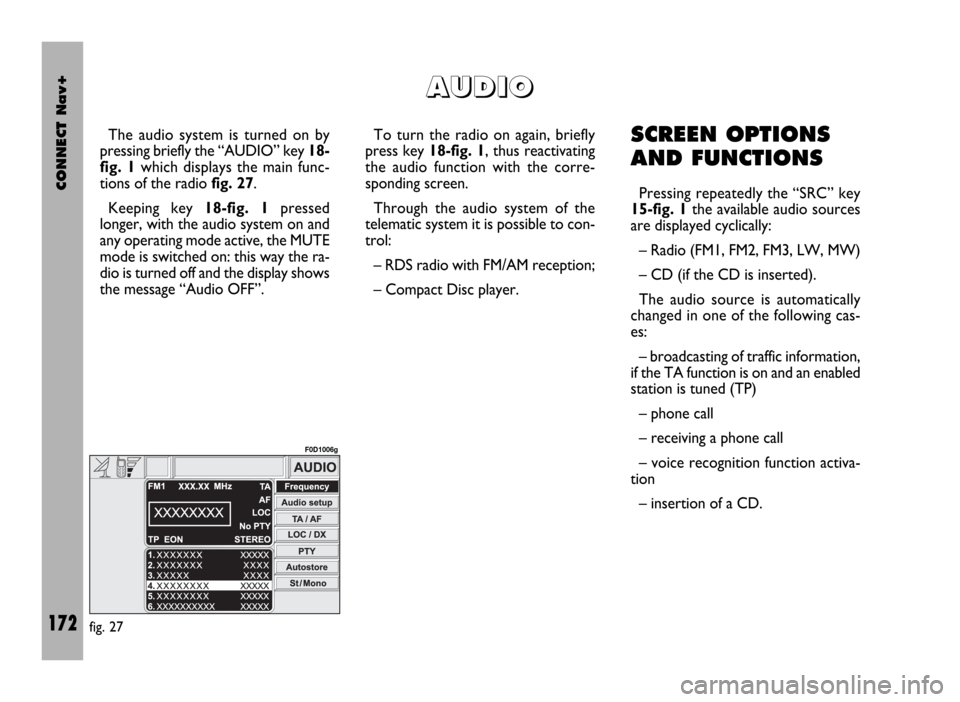
The audio system is turned on by
pressing briefly the “AUDIO” key 18-
fig. 1which displays the main func-
tions of the radio fig. 27.
Keeping key 18-fig. 1pressed
longer, with the audio system on and
any operating mode active, the MUTE
mode is switched on: this way the ra-
dio is turned off and the display shows
the message “Audio OFF”. To turn the radio on again, briefly
press key 18-fig. 1, thus reactivating
the audio function with the corre-
sponding screen.
Through the audio system of the
telematic system it is possible to con-
trol:
– RDS radio with FM/AM reception;
– Compact Disc player.SCREEN OPTIONS
AND FUNCTIONS
Pressing repeatedly the “SRC” key
15-fig. 1the available audio sources
are displayed cyclically:
– Radio (FM1, FM2, FM3, LW, MW)
– CD (if the CD is inserted).
The audio source is automatically
changed in one of the following cas-
es:
– broadcasting of traffic information,
if the TA function is on and an enabled
station is tuned (TP)
– phone call
– receiving a phone call
– voice recognition function activa-
tion
– insertion of a CD.
A A
U U
D D
I I
O O
fig. 27
F0D1006g
Page 177 of 246
CONNECT Nav+
176
– turn and press the knob 22-fig. 1
to select and confirm “Balance”, the
function that changes the sound dis-
tribution in the passenger compart-
ment between the right and left speak-
ers;
– turn the knob 22-fig. 1to change
the sound distribution in the passen-
ger compartment between the right
and left speakers, then press the knob
to confirm the adjustment.
In the same way, choose and confirm
the “Fader” function to change the
sound distribution between the front
and rear speakers.
After adjustment, select “OK” with
the knob 22-fig. 1and then press it to
confirm the setting and to go back to
the previous screen. If “ESC” 23-fig. 1
is pressed you go back to the previous
screen with the settings stored previ-
ously.RADIO MODE
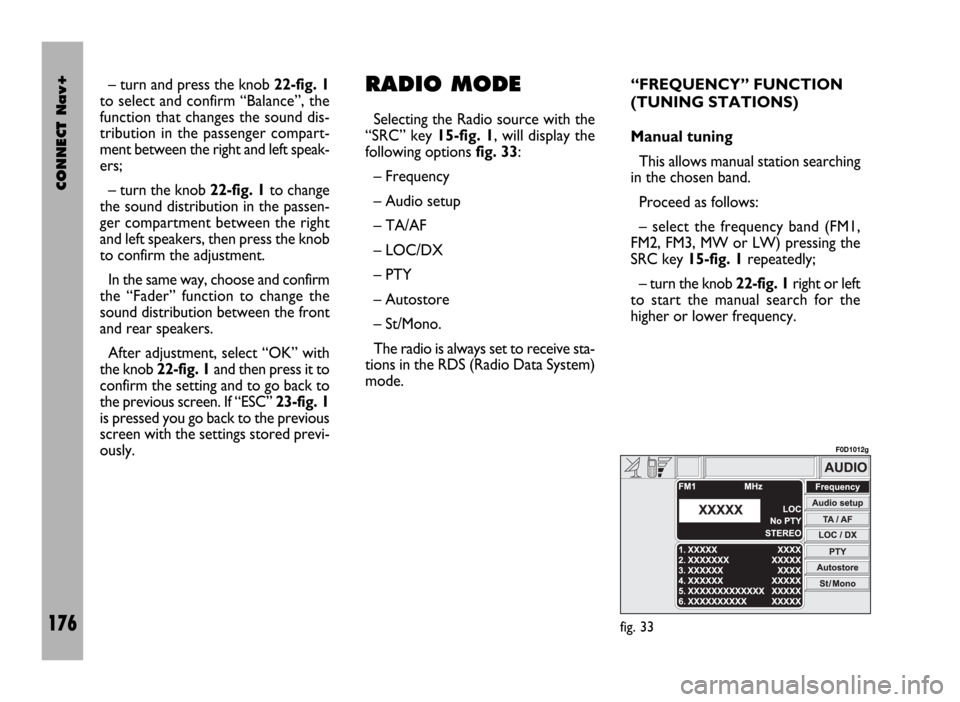
Selecting the Radio source with the
“SRC” key 15-fig. 1, will display the
following options fig. 33:
– Frequency
– Audio setup
– TA/AF
– LOC/DX
– PTY
– Autostore
– St/Mono.
The radio is always set to receive sta-
tions in the RDS (Radio Data System)
mode.“FREQUENCY” FUNCTION
(TUNING STATIONS)
Manual tuning
This allows manual station searching
in the chosen band.
Proceed as follows:
– select the frequency band (FM1,
FM2, FM3, MW or LW) pressing the
SRC key 15-fig. 1repeatedly;
– turn the knob 22-fig. 1right or left
to start the manual search for the
higher or lower frequency.
fig. 33
F0D1012g
Page 178 of 246

CONNECT Nav+
177
Automatic tuning
This function seeks automatically sta-
tions in the chosen band.
Proceed as follows:
– select the frequency band (FM1,
FM2, FM3, LW or MW) pressing re-
peatedly the SRC key 15-fig. 1;
– Press key 11-fig. 1o 12-fig. 1to
start the automatic search for tuning
the next station that can be received
in the direction chosen, respectively
lowering or highering the frequency;
the display will show “SEEK”.
If the “TA” function is on (traffic in-
formation), the tuner only seeks sta-
tions that broadcast traffic bulletins.
If the “PTY” function is on, the tuner
only seeks PTY stations. Manual station
storage
The station being heard can be
stored in the range chosen with keys
1 ÷ 6-fig. 1.
Keep one of these keys pressed un-
til the display shows the number of the
key with which the station has been
stored.
Listening to stored stations
Proceed as follows:
– choose the required frequency
band
(FM1, FM2, FM3, LW or MW) press-
ing repeatedly the “SRC” key 15-
fig. 1;
– press briefly one of the keys 1÷6-
fig. 1.
In the FM1, FM2 and FM3 bands, if
reception is poor and the AF alterna-
tive frequency seek function is on, a
station with the strongest signal that
is broadcasting the same programme
is automatically sought. “AUDIO SETUP” FUNCTION
(AUDIO ADJUSTMENTS)
The audio parameters can be acti-
vated and adjusted in the same way
with all the audio sources (Radio, CD).
The adjustment procedures are de-
scribed in the related paragraph of the
previous chapter.
“TA” FUNCTION (TRAFFIC
INFORMATION)
Certain stations in the FM band
(FM1, FM2 and FM3) are also enabled
to broadcast information about the
conditions of the traffic. In this case
the displays shows the abbreviation
“TP”.
To turn the TA function (Traffic An-
nouncement) on/off for traffic bul-
letins, repeatedly press the knob 22-
fig. 1after selecting the TA/AF func-
tion.
The cyclic activation of the TA/AF
functions, which is obtained by brief
presses on the knob 22-fig. 1, is the
following: AF – TA – TA and AF –
both functions off – AF …etc.