Page 105 of 187

105n
IndexDataTechnologyRepairsMaintenanceControlsOverview
Winter operationThe onset of winter is often accompa-
nied by rapid changes in weather.
Adaptations in driving style should be
accompanied by preparations on the
vehicle itself to ensure that your vehicle
operation through the winter remains
safe and trouble-free.CoolantEnsure that the coolant contains the
year-round 50 : 50 ratio of water and
antifreeze with corrosion inhibitor. This
mixture provides protection against
freezing down to approx. Ð 34 7
(Ð 37 6). Replace the coolant every
three years.LocksBMW door lock deicer can be used to
free the doors if they are frozen. This
deicer also contains lubricant.
After using deicer, treatment with BMW
lock cylinder grease is recommended.
Rubber seals and components In order to prevent freezing, apply BMW
rubber treatment to weather-stripping
on the doors, hood, luggage compart-
ment and to convertible top seals.
A full range of car-care products is
available from your BMW center.< Snow chainsBMW snow chains
* can be mounted on
both summer and winter tires. Mount
them in pairs on the rear wheels only.
Comply with the manufacturer's safety
precautions. Do not exceed a speed
limit of 30 mph (50 km/h) when driving
with chains. As an exception in this
situation, we recommend that you
switch off the ASC+T/DSC
* system
when snow chains are mounted. Refer
to pages 73, 74.
Starting offWhen starting from a full stop or
"rocking" free in deep snow, we recom-
mend that you switch off the ASC+T/
DSC
* system, refer to pages 73, 74.
Driving on low-traction road
surfacesUse smooth, gentle pressure to control
the accelerator pedal. Avoid excessive
engine speeds and shift to the next
higher gear at an early point. Shift down
into the next lowest gear when
approaching uphill or downhill grades.
Maintain an adequate distance between
yourself and the vehicle ahead.Brakes Winter road conditions substantially
reduce the traction available between
the tires and the road surface.
Remember that Ð in every situation Ð
braking distances will be significantly
longer as a result of this.
ABS is intended to prevent the wheels
from locking during brake applications,
thus helping to maintain vehicle stability
and steering response.
Page 106 of 187

106n
Winter operation Power steeringIf it should occur that the ABS does not
respond in a critical braking situation
and the wheels lock: reduce the pres-
sure on the brake pedal until the wheels
just start to roll again while still main-
taining enough force to continue
braking. Following that, increase pedal
pressure again. Reduce the pressure as
the wheels lock, then reapply pressure.
Repeat this process.
This type of staggered braking will
shorten the braking distance, and the
vehicle still remains responsive to
steering.
You can still attempt to steer around
hazards once you have reduced the
pressure on the brake pedal.
Do not shift down on slick road
surfaces. Doing so could cause
the rear wheels to lose traction and
skid, which could result in the loss of
vehicle control.<
Declutch during hard braking on
road surfaces which provide only
poor or uneven traction.<
Skid controlDepress the clutch and release the
accelerator pedal, or place the selector
lever of the automatic transmission into
the "Neutral" position. Countersteer
carefully and attempt to regain control
of the vehicle.ParkingEngage 1st or reverse gear. If your
vehicle is equipped with an automatic
transmission, place the selector lever in
"Park". On vehicles with manual trans-
mission, also apply the parking brake
when parking on inclined surfaces. In
order to prevent the parking brake
linings from locking due to frost or
corrosion, dry them by gently applying
the parking brake as the vehicle is
coming to a stop. Make sure that
following traffic is not endangered.
The brake lamps do not light
up when the parking brake is
applied.<
If you notice a change in steering
response (high steering effort, for
example):
Consult a BMW center to have the
system checked.
If the power steering fails,
increased effort will be required
to steer the vehicle.<
Page 107 of 187

are approved only up to a power")
107n
IndexDataTechnologyRepairsMaintenanceControlsOverview
Cellular phone
*
Car radio reception
Mobile communications systems
(cellular phones, two-way radios, etc.)
are approved only up to a power output
of 10 watts. Nonetheless, they may
cause interference in the operation of
your vehicle if they are not specifically
designed for use in your vehicle. BMW
can neither test nor assume responsi-
bility for every individual product being
offered on the market. We recommend
that you consult your BMW center
before purchasing any device of this
kind.
To ensure that your BMW continues to
provide reliable and trouble-free opera-
tion, refrain from using a cellular phone
or other radio device with an antenna
located inside the passenger compart-
ment. The antenna should always be
fitted on the outside of the vehicle.
Before loading the vehicle on
a car-carrier train or driving it
through a car wash, remove the
antenna.<
The reception and sound quality
obtained from mobile radios varies
according to a variety of factors,
including the broadcast range of the
transmitter and the directional orienta-
tion of the antenna. Interference factors
such as high-tension power lines, build-
ings and natural obstructions can all
lead to unavoidable reception interfer-
ence, regardless of how well the
vehicle's sound system is operating.
Climatic factors such as intense solar
radiation, fog, rain and snow can also
interfere with reception.
Cellular phones without official BMW
approval can also generate interference
during use. This phenomenon assumes
the form of a low-pitched hum
emanating from the speaker system.
Please refer to the Owner's Manual
provided with your sound system for
detailed information on its use.Whenever necessary (when
entering a car wash, for instance),
remove the rod antenna
*. To remove
the antenna, grasp the rod at the
bottom and unscrew it to the left from
the antenna base.<
You will find additional information
concerning car radio reception in the
chapter "Advanced technology" on
page 166.
Page 108 of 187

108n
Hardtop
* Ð roadster
The fabric top does not have to be
removed even in winter, when the
hardtop is normally in constant use. In
order to prevent water spots and
mildew stains, the fabric top must be
completely dry before it is stored in the
convertible top compartment.
Two people are necessary for the
installation and removal of the hardtop.
Work with extreme caution during this
operation to avoid paint damage and
damage to the body and hardtop.
You may purchase a hardtop lift
* from
your BMW center. This accessory is
especially designed to facilitate installa-
tion and removal of the hardtop.
InstallationHook the protective fabric on the
convertible top linkage (arrow).
Open the convertible top and fold it
down in the convertible top compart-
ment, refer to pages 40 and 44.
When doing this, make sure the rear
window is laid down evenly and free
of creases. To prevent the rear window
from being scratched, position the
protective fabric in the window fold.
Do not install the convertible top cover.
Lower the side windows and remove
the rod antenna if necessary to avoid
damage.367de384
Rotate the cover panel which is located
in the right and left trim panels behind
the seats in the direction of the arrow
until the opening for the hardtop mount
is completely free.
Remove the hardtop from the protec-
tive cover. Clean any dirt and dust from
the contact surfaces between the
hardtop and the vehicle body in order
to protect against abrasion.
Position the hardtop on the mounts with
the assistance of a second person.367de385
Page 109 of 187
, turn the screw (arrow) two t")
109n
IndexDataTechnologyRepairsMaintenanceControlsOverview
Hardtop
* Ð roadster
Using the wrench from the onboard tool
kit (fastened to the jack with a Velcro¨
strip), turn the screw (arrow) two to
three turns into the windshield frame on
the right and left sides.367de386
Turn the right and left locking levers of
the rear hardtop mounting fasteners in
the direction of the arrow to the stop.
The rear mounting fasteners are
locked correctly when the locking
levers engage audibly and point to the
rear of the vehicle.<
Finally, tighten the screws in the wind-
shield frame (refer to the left column)
and secure the wrench in the onboard
tool kit.
After you have driven approx.
30 to 60 miles (50 to 100 km),
check the front hardtop fasteners to be
sure that they are seated securely.< 367de387
RemovalReverse the above procedure for
removal of the hardtop.
The two screws of the front
hardtop fasteners remain perma-
nently in the windshield frame of your
vehicle to prevent their loss.<
Following the initial delivery of the
vehicle, or after the hardtop has been in
use for an extended period, closing the
convertible top requires increased
effort. You may find this operation
easier with the assistance of a second
person. Following that, the convertible
top should remain closed for at least
12 hours.
Page 110 of 187

110n
Information for your safetyThe factory-approved radial tires are
matched to the vehicle and have been
selected to provide optimum safety and
driving comfort on your vehicle.
In a very real sense, both tire life and
your own safety are riding on correct
tire specifications and inflation pres-
sures, refer to page 26.
Incorrect tire inflation pressure is
a frequent cause of tire damage. It
also significantly influences the road-
holding ability of your BMW. Be sure to
check the tire inflation pressures,
including the spare tire, on a regular
basis, at least twice a month and before
doing any extended driving, refer to
page 26. If this is not done, incorrect
tire pressures can cause driving insta-
bility and tire damage, ultimately
resulting in accidents.<
Check the inflation pressure of
the spare tire For checking tire pressures, there is a
valve extension (arrow) on the storage
tray of the spare wheel which is acces-
sible from outside.367de309
Tire tread Ð tire damageInspect your tires frequently for tread
wear, signs of damage and for foreign
objects lodged in the tread. Check the
tread pattern depth.
Tread depth should not be allowed to
go below 0.12 in (3 mm), even though
the legally specified minimum tread
depth is 0.063 in (1.6 mm). Tread wear
indicators (arrow) are embedded in the
base of the tire's tread. Their locations
are indicated by the legend TWI Ð Tread
Wear Indicator Ð at various points on
the tire's shoulder. When the tread
reaches a depth of 0.063 in (1.6 mm),
these indicators appear to signal that
the tires have worn to the minimum
legal level. Below 0.12 in (3 mm) tread
depth, there is an increased risk of
aquaplaning, even at relatively 390de331
Notes on inflation pressures Tire condition
Page 111 of 187

111n
IndexDataTechnologyRepairsMaintenanceControlsOverview
Tire condition Tire replacementmoderate speeds and with only small
amounts of water on the road.
Never continue driving on a
deflated (flat) tire. A flat tire greatly
impairs steering and braking response,
and can lead to complete loss of
control over the vehicle.
Avoid overloading the vehicle so that
the permitted load on the tires is not
exceeded. Overloading causes over-
heating and damage inside the tires.
The ultimate result can assume the
form of a sudden air loss.
Unusual vibrations encountered during
normal vehicle operation can indicate a
flat tire or some other vehicle malfunc-
tion. The type of problem can be
caused by contact with curbs, etc. This
is also true for irregularities in the
vehicle's handling characteristics, such
as a pronounced tendency to pull to the
left or right. Should this occur, respond
by immediately reducing your speed.
Proceed carefully to the nearest BMW
center or professional tire center, or
have the vehicle towed in to have it, its
wheels and tires inspected.
Tire damage (up to and including
sudden and complete air loss) can pose
an extreme hazard for both vehicle
occupants and other road users.< To maintain good handling and vehicle
response, use only tires of a single tread
configuration from a single manufac-
turer. BMW tests and approves wheel
and tire combinations, refer to page 116.
DOT Quality GradesTread wear
Traction AA A B C
Temperature A B C
All passenger vehicle tires must
conform to Federal Safety
Requirements in addition to these
grades.
rating based on the wear rate of the tire
when tested under controlled condi-
tions on a specified government test
course.
For example, a tire graded 150 would
wear one and one-half (1g) times as
well on the government course as a tire
graded 100. The relative performance
of tires depends upon the actual condi-
tions of their use, however, and may
depart significantly from the norm due
to variations in driving habits, service
practices and differences in road char-
acteristics and climate.
Page 112 of 187

112n
Tire replacementTractionThe traction grades, from highest to
lowest, are AA, A, B and C.
Those grades represent the tire's ability
to stop on wet pavement as measured
under controlled conditions on speci-
fied government test surfaces of
asphalt and concrete. A tire marked C
may have poor traction performance.
The traction grade assigned to
this tire is based on straight-
ahead braking traction tests, and does
not include acceleration, cornering,
hydroplaning, or peak traction charac-
teristics.<
TemperatureThe temperature grades are A (the
highest), B and C, representing the
tire's resistance to the generation of
heat and its ability to dissipate heat
when tested under controlled condi-
tions on a specified indoor laboratory
test wheel.
Sustained high temperature can cause
the material of the tire to degenerate
and reduce tire life, and excessive
temperature can lead to sudden tire
failure. The grade C corresponds to a
level of performance which all
passenger vehicle tires must meet
under the Federal Motor Vehicle Safety
Standard No. 109. Grades B and A
represent higher levels of performance
on the laboratory test wheel than the
minimum required by law.
The temperature grade for this tire
is established for a tire that is
properly inflated and not overloaded.
Excessive speed, under-inflation, or
excessive loading, either separately or
in combination, can cause heat buildup
and possible tire failure.<
Uniform Tire Quality GradingQuality grades can be found where
applicable on the tire sidewall between
tread shoulder and maximum section
width. For example:
Tread wear 200
Traction AA
Temperature A
Do not use retreaded tires as this
could negatively affect driving
safety. This is due to the possible varia-
tions in casing structures and, in some
cases, to their extreme age, factors
which can lead to a decrease in their
durability.<
 1
1 2
2 3
3 4
4 5
5 6
6 7
7 8
8 9
9 10
10 11
11 12
12 13
13 14
14 15
15 16
16 17
17 18
18 19
19 20
20 21
21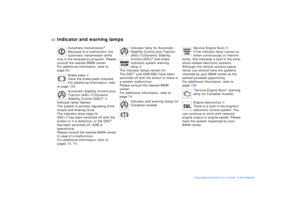 22
22 23
23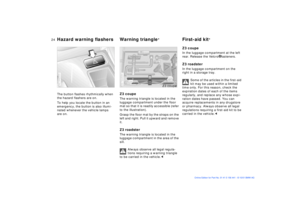 24
24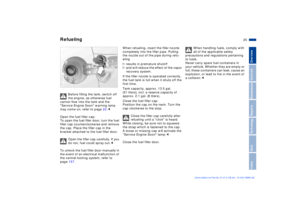 25
25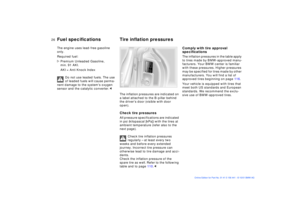 26
26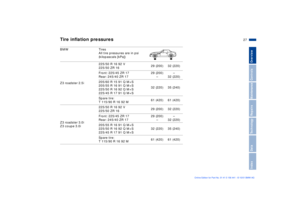 27
27 28
28 29
29 30
30 31
31 32
32 33
33 34
34 35
35 36
36 37
37 38
38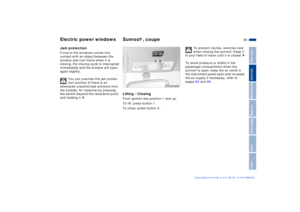 39
39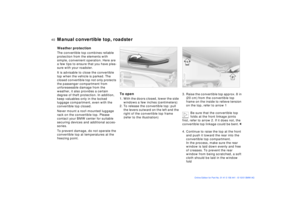 40
40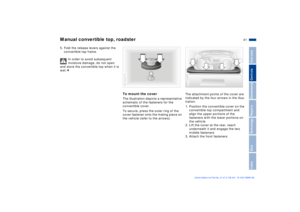 41
41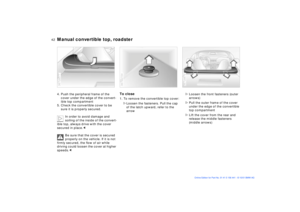 42
42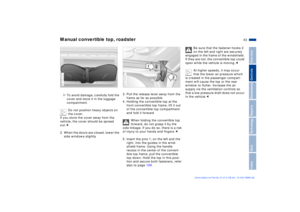 43
43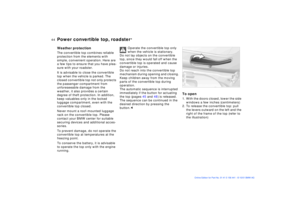 44
44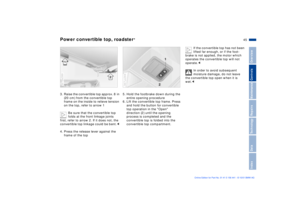 45
45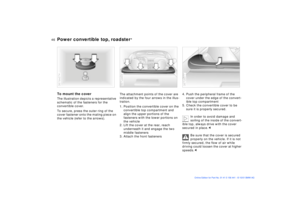 46
46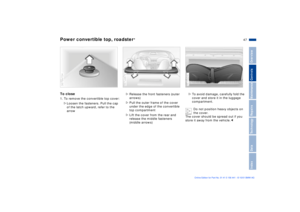 47
47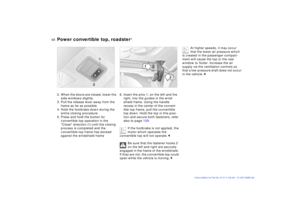 48
48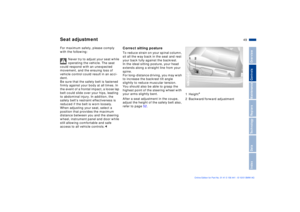 49
49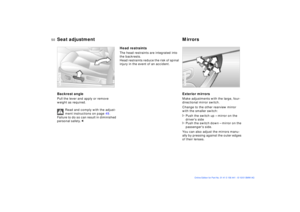 50
50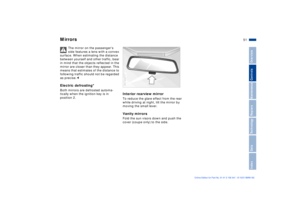 51
51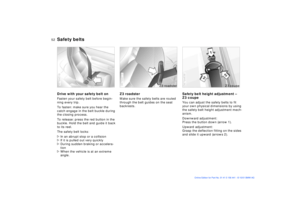 52
52 53
53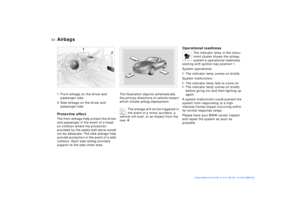 54
54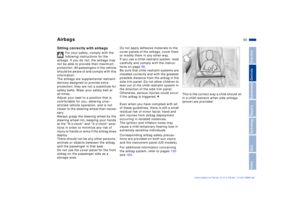 55
55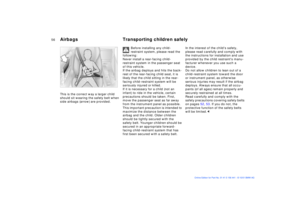 56
56 57
57 58
58 59
59 60
60 61
61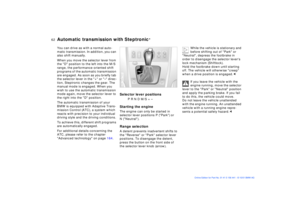 62
62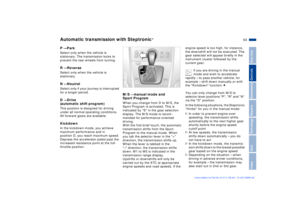 63
63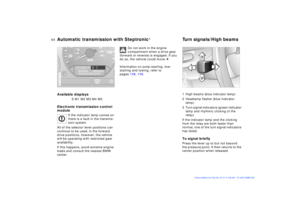 64
64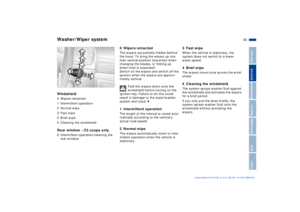 65
65 66
66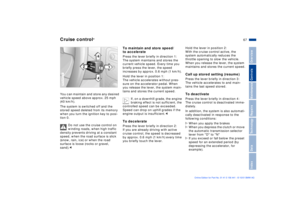 67
67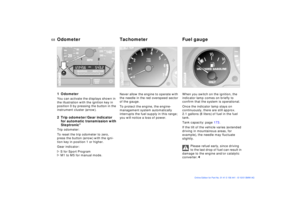 68
68 69
69 70
70 71
71 72
72 73
73 74
74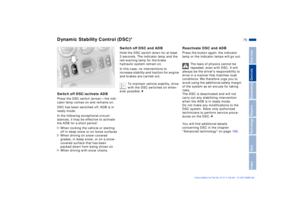 75
75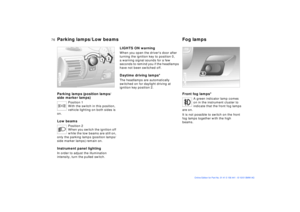 76
76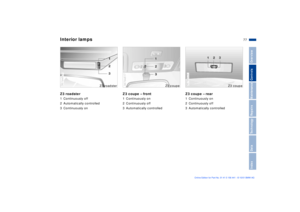 77
77 78
78 79
79 80
80 81
81 82
82 83
83 84
84 85
85 86
86 87
87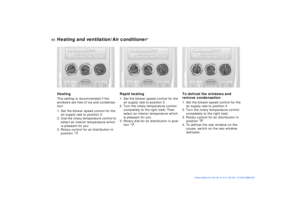 88
88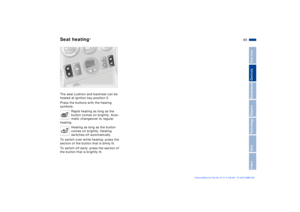 89
89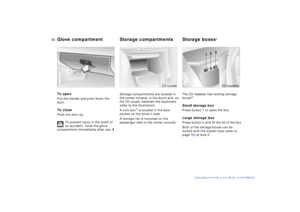 90
90 91
91 92
92 93
93 94
94 95
95 96
96 97
97 98
98 99
99 100
100 101
101 102
102 103
103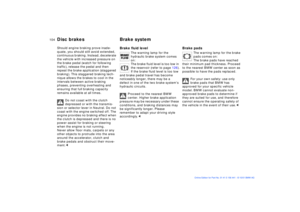 104
104 105
105 106
106 107
107 108
108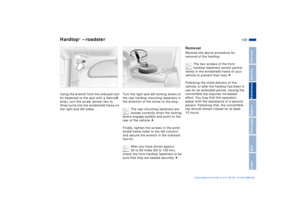 109
109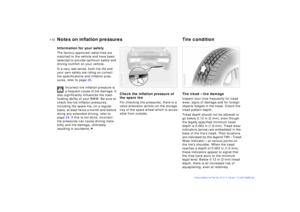 110
110 111
111 112
112 113
113 114
114 115
115 116
116 117
117 118
118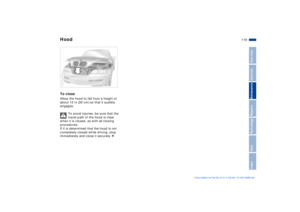 119
119 120
120 121
121 122
122 123
123 124
124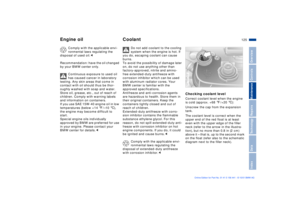 125
125 126
126 127
127 128
128 129
129 130
130 131
131 132
132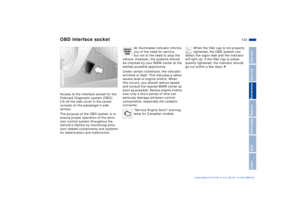 133
133 134
134 135
135 136
136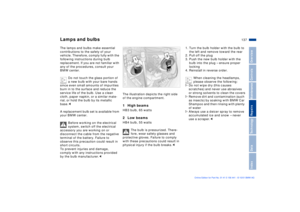 137
137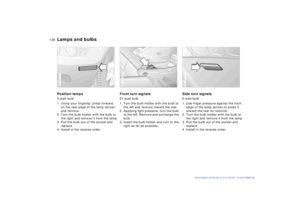 138
138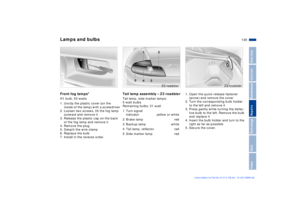 139
139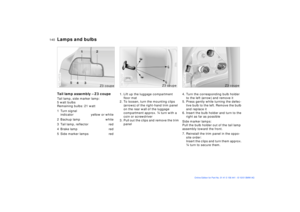 140
140 141
141 142
142 143
143 144
144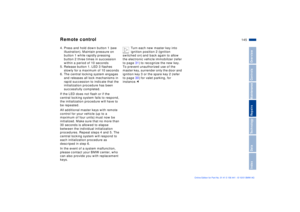 145
145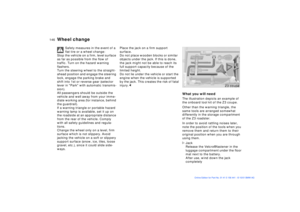 146
146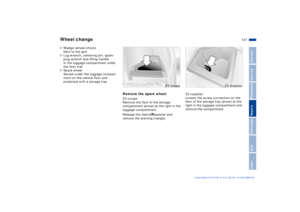 147
147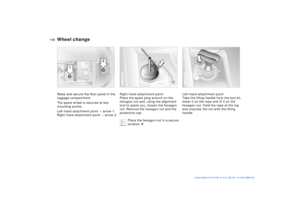 148
148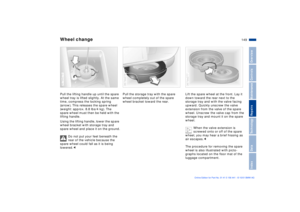 149
149 150
150 151
151 152
152 153
153 154
154 155
155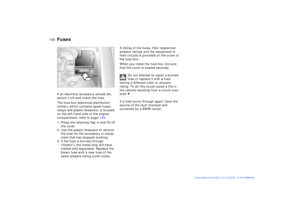 156
156 157
157 158
158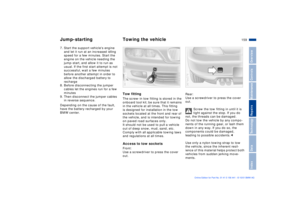 159
159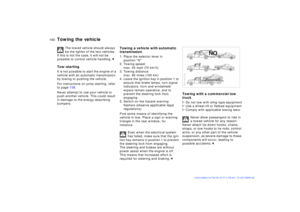 160
160 161
161 162
162 163
163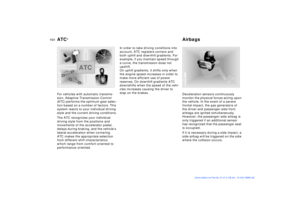 164
164 165
165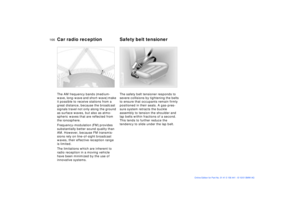 166
166 167
167 168
168 169
169 170
170 171
171 172
172 173
173 174
174 175
175 176
176 177
177 178
178 179
179 180
180 181
181 182
182 183
183 184
184 185
185 186
186