Page 17 of 96
1
General information and controls
15
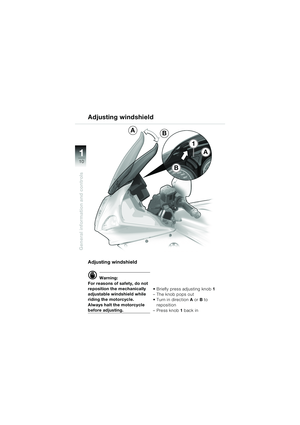
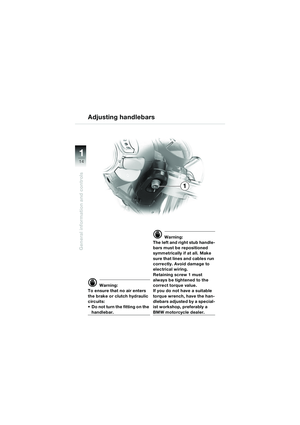
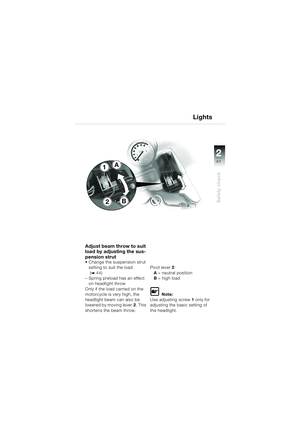
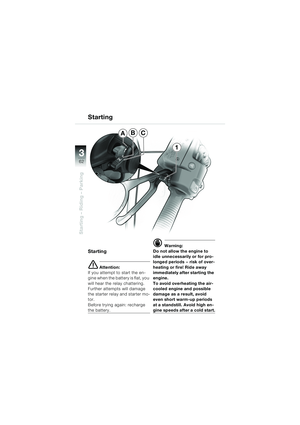
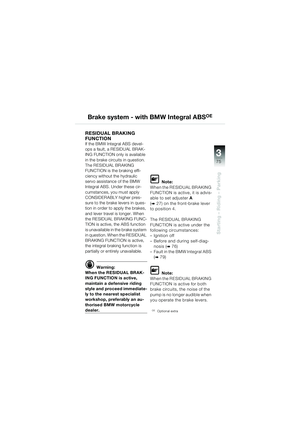
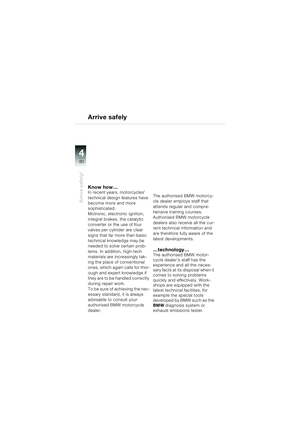
Adjusting reach A/B Slacken, but do not fully remove screw 1
Remove holder from serra-
tions
Move in direction A or B until
reach is correct Re-assemble the holder cor-
rectly in its retaining serra-
tions
Tighten the retaining screw 1 to
a torque of 20 Nm
Adjusting handlebars
A
B
10rsbkg2.book Seite 15 Dienstag, 19. November 2002 4:56 16
Page 18 of 96
1
General information and controls
16
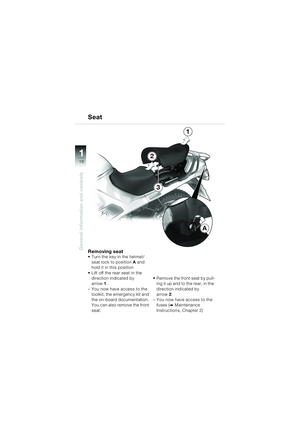
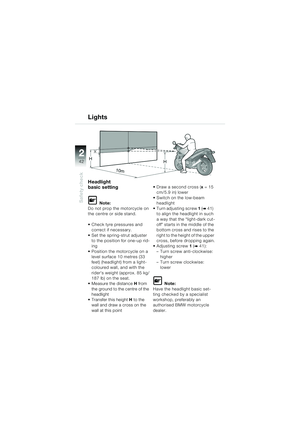
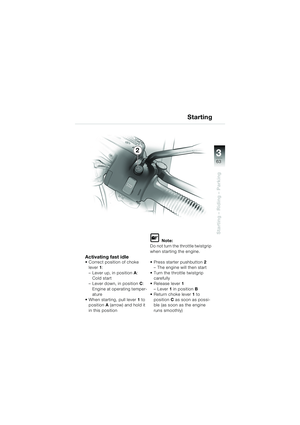
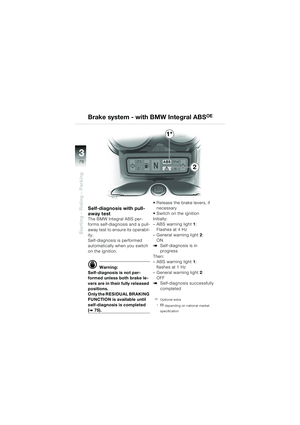
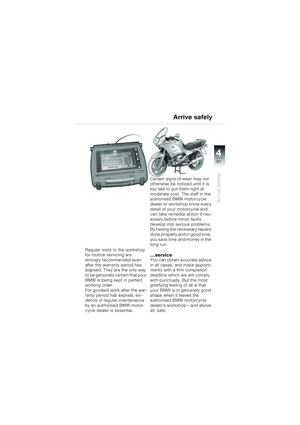
Removing seat Turn the key in the helmet/seat lock to position A and
hold it in this position
Lift off the rear seat in the direction indicated by
arrow 1.
– You now have access to the toolkit, the emergency kit and
the on-board documentation.
You can also remove the front
seat. Remove the front seat by pull-
ing it up and to the rear, in the
direction indicated by
arrow 2.
– You now have access to the fuses (
b Maintenance
Instructions, Chapter 2)
A
2
1
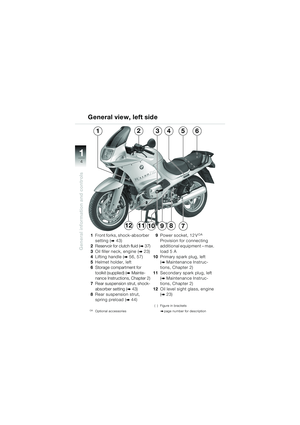
Seat
3
10rsbkg2.book Seite 16 Dienstag, 19. November 2002 4:56 16
Page 19 of 96
1
General information and controls
17
AB
C
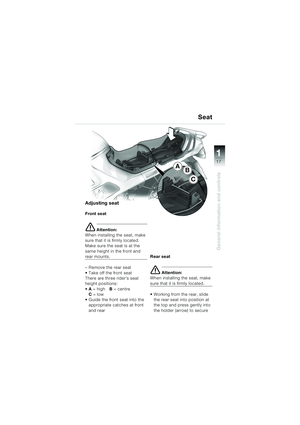
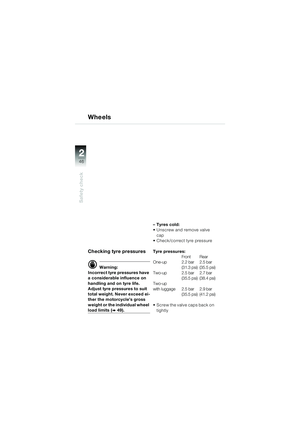
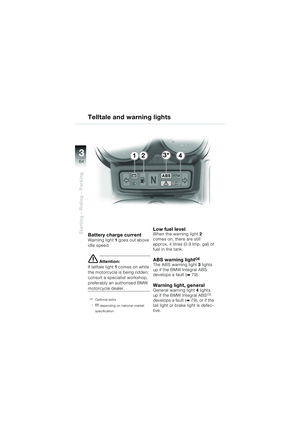
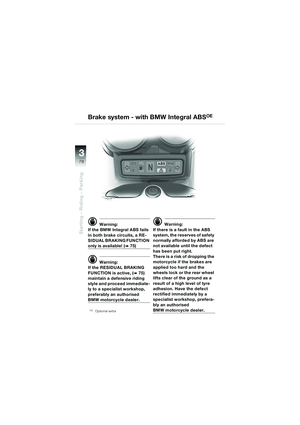
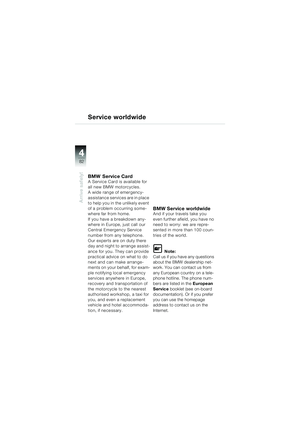
Adjusting seat
Front seat
e Attention:
When installing the seat, make
sure that it is firmly located.
Make sure the seat is at the
same height in the front and
rear mounts.
– Remove the rear seat
Take off the front seat
There are three rider's seat
height positions:
A = high B = centre
C = low
Guide the front seat into the appropriate catches at front
and rear Rear seat
e Attention:
When installing the seat, make
sure that it is firmly located.
Working from the rear, slide the rear seat into position at
the top and press gently into
the holder (arrow) to secure
Seat
10rsbkg2.book Seite 17 Dienstag, 19. November 2002 4:56 16
Page 20 of 96
1
General information and controls
18
A
3
2
1
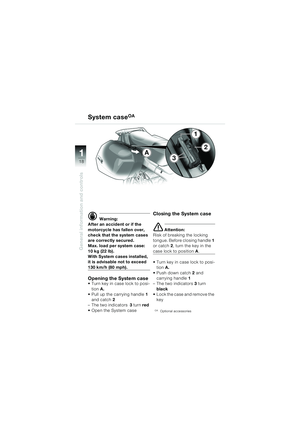
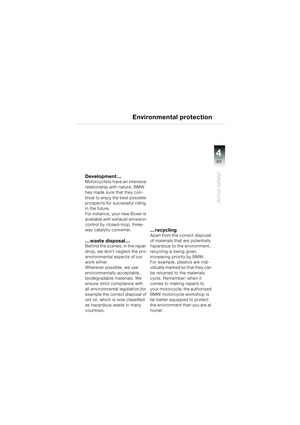
d Warning:
After an accident or if the
motorcycle has fallen over,
check that the system cases
are correctly secured.
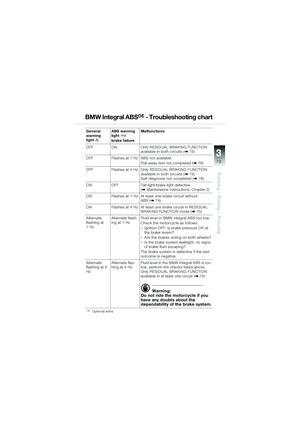
Max. load per system case:
10 kg (22 lb).
With System cases installed,
it is advisable not to exceed
130 km/h (80 mph).
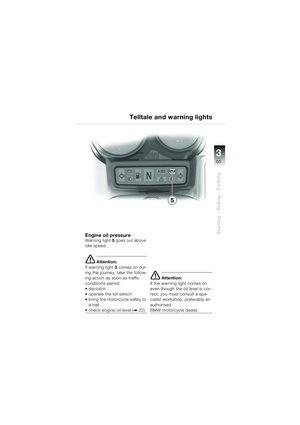
Opening the System case Turn key in case lock to posi-
tion A.
Pull up the carrying handle 1
and catch 2
– The two indicators 3 turn red
Open the System case
Closing the System case
e Attention:
Risk of breaking the locking
tongue. Before closing handle 1
or catch 2, turn the key in the
case lock to position A.
Turn key in case lock to posi- tion A.
Push down catch 2 and
carrying handle 1
– The two indicators 3 turn
black
Lock the case and remove the
key
OAOptional accessories
System caseOA
10rsbkg2.book Seite 18 Dienstag, 19. November 2002 4:56 16
Page 21 of 96
1
General information and controls
19
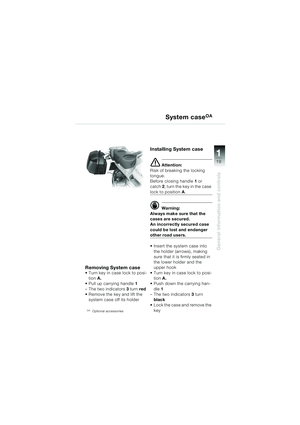
Removing System case Turn key in case lock to posi-tion A.
Pull up carrying handle 1
– The two indicators 3 turn red
Remove the key and lift the
system case off its holder
OAOptional accessories
Installing System case
e Attention:
Risk of breaking the locking
tongue.
Before closing handle 1 or
catch 2, turn the key in the case
lock to position A.
d Warning:
Always make sure that the
cases are secured.
An incorrectly secured case
could be lost and endanger
other road users.
Insert the system case into the holder (arrows), making
sure that it is firmly seated in
the lower holder and the
upper hook
Turn key in case lock to posi- tion A.
Push down the carrying han-
dle 1
– The two indicators 3 turn
black
Lock the case and remove the
key
System caseOA
10rsbkg2.book Seite 19 Dienstag, 19. November 2002 4:56 16
Page 22 of 96
22
20
Safety check
Checklist
Use the safety checklist –
before every journey
Please perform the safety
check accurately. If your motor-
cycle needs any routine mainte-
nance, you can then attend to it
before the journey starts
(
b Maintenance Instructions),
or have it carried out by your
BMW motorcycle dealer or
workshop, for example. This is
to ensure that your motorcycle
corresponds with road-vehicle
use and safety laws.
A motorcycle in perfect techni-
cal condition is essential for
your safety and that of other
road users.
10rsbkg2.book Seite 20 Dienstag, 19. November 2002 4:56 16
Page 23 of 96
2
21
2
Safety check
For this reason, check the
details in the following sections
before you start the journey:
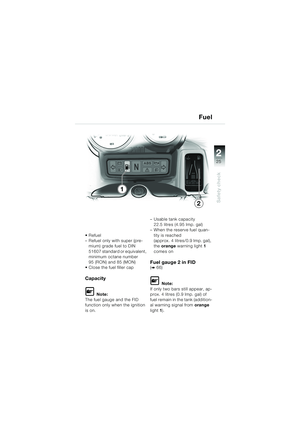
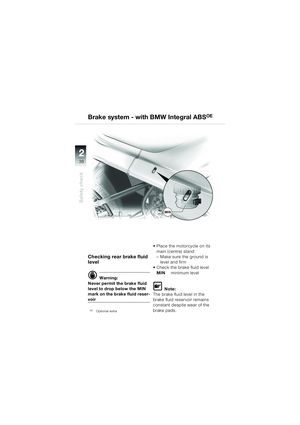
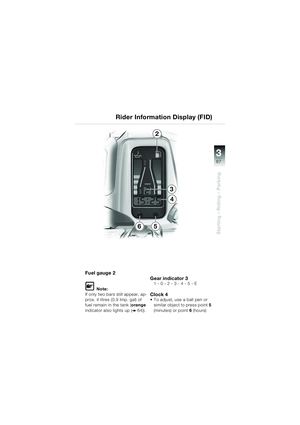
– Fuel level
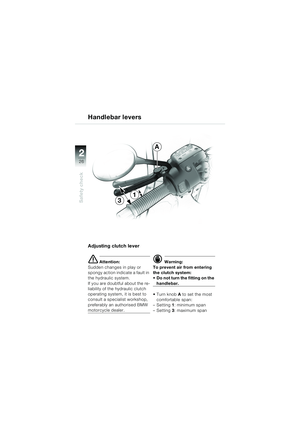
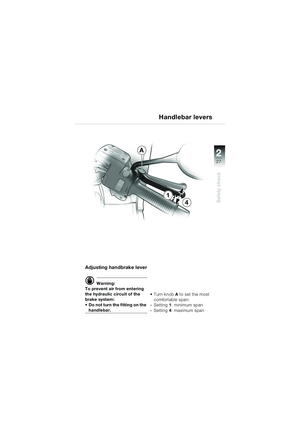
– Positions of the handlebar levers
– Brake fluid level
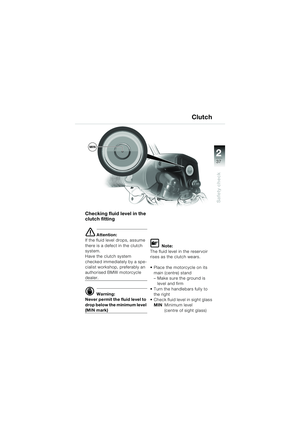
– Clutch fluid level
–Brakes
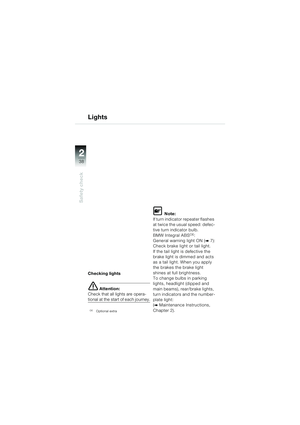
– Warning lights and telltale lights
–Lights
– Shock-absorber setting and spring preload
– Condition of wheels and
tyres, tread depth and tyre
pressures
– Load, gross weight – Check regularly on the basis
of this checklist
(every refuelling stop):
– Engine oil level
(every 2nd/3rd refuelling
stop):
– Brake pads
If you encounter any problems
or difficulties, it is always best to
contact your authorised
BMW motorcycle dealer. He will
provide the necessary advice
and assistance.
Checklist
10rsbkg2.book Seite 21 Dienstag, 19. November 2002 4:56 16
Page 24 of 96
 22
22
Safety check
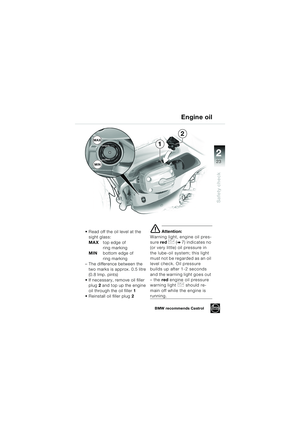
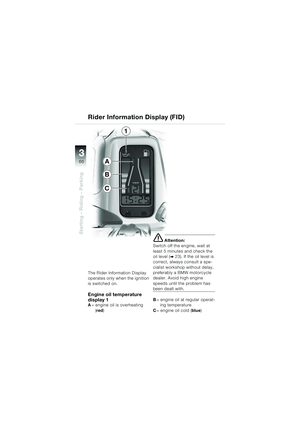
Engine oil
Checking oil levelCheck the oil level at regular
intervals.
Always check the oil level when
the engine is at operating tem-
perature, because the differ-
ence between t")
22
22
Safety check
Engine oil
Checking oil levelCheck the oil level at regular
intervals.
Always check the oil level when
the engine is at operating tem-
perature, because the differ-
ence between the oil level
indicated when the engine is at
operating temperature and the
oil level indicated when the
engine is very cold due to
extremely low outdoor
temperatures (-10 °C/14 °F)
can be as much as 10 mm
(0.4 in).
After switching off the engine,
wait at least 5 minutes for the oil
to drain back into the sump.Checking the oil level after the
engine has been run only briefly
or when it is not properly warm
will falsify the reading and could
lead to the engine being oper-
ated with the wrong quantity of
oil, because cold oil is viscous
and takes longer to drain back
into the sump. At extremely low
outdoor temperatures (-10 °C/
14 °F), this can take as long as
12 hours.
e Attention:
To avoid damage to the engine:
– Never exceed the maximum oil level.
– Always keep the oil level
above the minimum mark.
Always check the oil level with
the motorcycle upright.
Check the oil level with the engine at its regular operating
temperature
Check the oil level after the engine has been stopped for
at least 5 minutes
Make sure that the motorcy-
cle is upright
– Make sure the ground is level and firm
10rsbkg2.book Seite 22 Dienstag, 19. November 2002 4:56 16


 1
General information and controls
15
Adjusting reach A/B Slacken, but do not fully remove screw 1
Remove holder from serra-
tions
Move in direction A or B until
reach is correct Re-assembl")
 1
General information and controls
16
Removing seat Turn the key in the helmet/seat lock to position A and
hold it in this position
Lift off the rear seat in the direction indicated by
arrow 1.")
 1
General information and controls
17
AB
C
Adjusting seat
Front seat
e Attention:
When installing the seat, make
sure that it is firmly located.
Make sure the seat is at the
same height in the front")
 1
General information and controls
18
A
3
2
1
d Warning:
After an accident or if the
motorcycle has fallen over,
check that the system cases
are correctly secured.
Max. load per system case:
10 kg")
 1
General information and controls
19
Removing System case Turn key in case lock to posi-tion A.
Pull up carrying handle 1
– The two indicators 3 turn red
Remove the key and lift the
sys")
 22
20
Safety check
Checklist
Use the safety checklist –
before every journey
Please perform the safety
check accurately. If your motor-
cycle needs any routine mainte-
nance, you can then attend t")
 2
21
2
Safety check
For this reason, check the
details in the following sections
before you start the journey:
– Fuel level
– Positions of the handlebar levers
– Brake fluid level
– Clutch")