2002 BMW 745LI SEDAN warning
[x] Cancel search: warningPage 5 of 208
Inhaltsverzeichnis
Radio
143Select the frequency band
143Station selection
144Storing and retrieving a station
145Weather Band
CD Compact Disc
146Using the buttons to search for music
tracks
147Searching for music tracks in the
Control Display
CD changer
149Starting and stopping the CD changer
149Status displays
149Searching for music tracks in the
Control Display
150Using the buttons to search for music
tracks
MiniDisc MD
151Using the buttons to search for music
tracks
152Searching for music tracks in the
Control Display
Cassette
153Noise suppression
154Music track search
Using your mobile phone
158Safety notice
159Care instructions
159Operation
161Hands-free system
161To make SOS call
161Initial operation
162Getting started
162Telephone directory
163To select a number from the Top 8 list
164Redialing, including numbers not
initially reached
164Missed calls
Refueling
168Fuel filler door
169Fuel specifications
Wheels and tires
170Tire inflation pressure
171Tire condition
172Tire replacement
173Wheel and tire combinations
173Special characteristics of winter tires
173Snow chains*
Under the hood
175Hood
176Engine compartment
176Engine oil
177Coolant
178Brake fluid
Maintenance
179The BMW Maintenance System
179Care
Rules and regulations
180California Proposition 65 Warning
180OBD connector
Replacing components
181Onboard tool kit
181Windshield wiper blades
181Lamps and bulbs
183Changing a tire
185Battery
186Fuses
Help Ð Giving and receiving
187Warning triangle*
187First-aid kit*
187Jump-starting
188Towing
Technical data
192Engine specifications
193Dimensions
194Weights
194Capacities
Everything from A to Z
195Contents
Page 15 of 208
Cockpit
14
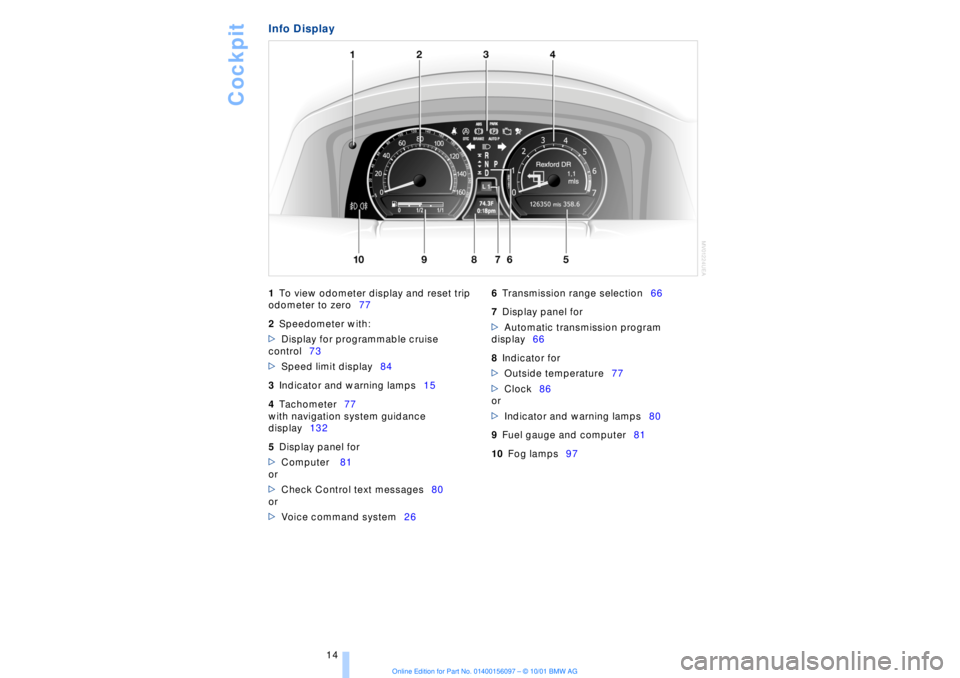
Info Display
1
To view odometer display and reset trip
odometer to zero77
2
Speedometer with:
>
Display for programmable cruise
control73
>
Speed limit display84
3
Indicator and warning lamps15
4
Tachometer77
with navigation system guidance
display132
5
Display panel for
>
Computer 81
or
>
Check Control text messages80
or
>
Voice command system26
6
Transmission range selection66
7
Display panel for
>
Automatic transmission program
display66
8
Indicator for
>
Outside temperature77
>
Clock86
or
>
Indicator and warning lamps80
9
Fuel gauge and computer81
10
Fog lamps97
Page 16 of 208
At a glanceControlsDriving tipsCommunicationsNavigationEntertainmentMobilityReference
15
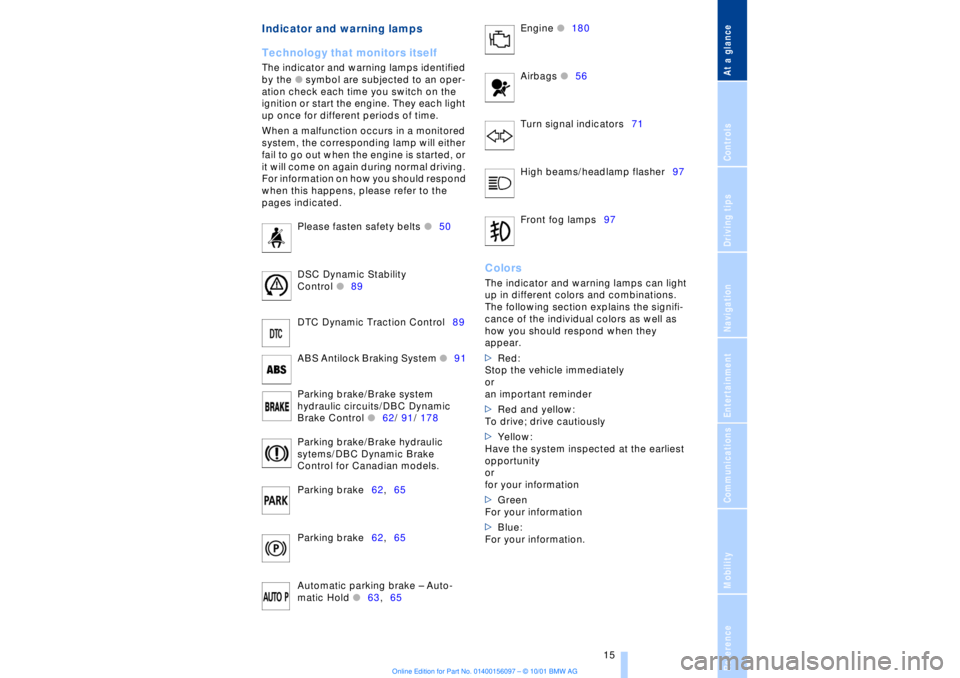
Indicator and warning lamps
Technology that monitors itself
The indicator and warning lamps identified
by the
l
symbol are subjected to an oper-
ation check each time you switch on the
ignition or start the engine. They each light
up once for different periods of time.
When a malfunction occurs in a monitored
system, the corresponding lamp will either
fail to go out when the engine is started, or
it will come on again during normal driving.
For information on how you should respond
when this happens, please refer to the
pages indicated.
Please fasten safety belts
l
50
DSC Dynamic Stability
Control
l
89
DTC Dynamic Traction Control89
ABS Antilock Braking System
l
91
Parking brake/Brake system
hydraulic circuits/DBC Dynamic
Brake Control
l
62/ 91/ 178
Parking brake/Brake hydraulic
sytems/DBC Dynamic Brake
Control for Canadian models.
Parking brake62,65
Parking brake62,65
Automatic parking brake Ð Auto-
matic Hold
l
63,65 Engine
l
180
Airbags
l56
Turn signal indicators71
High beams/headlamp flasher97
Front fog lamps97
ColorsThe indicator and warning lamps can light
up in different colors and combinations.
The following section explains the signifi-
cance of the individual colors as well as
how you should respond when they
appear.
>Red:
Stop the vehicle immediately
or
an important reminder
>Red and yellow:
To drive; drive cautiously
>Yellow:
Have the system inspected at the earliest
opportunity
or
for your information
>Green
For your information
>Blue:
For your information.
Page 18 of 208
At a glanceControlsDriving tipsCommunicationsNavigationEntertainmentMobilityReference
17
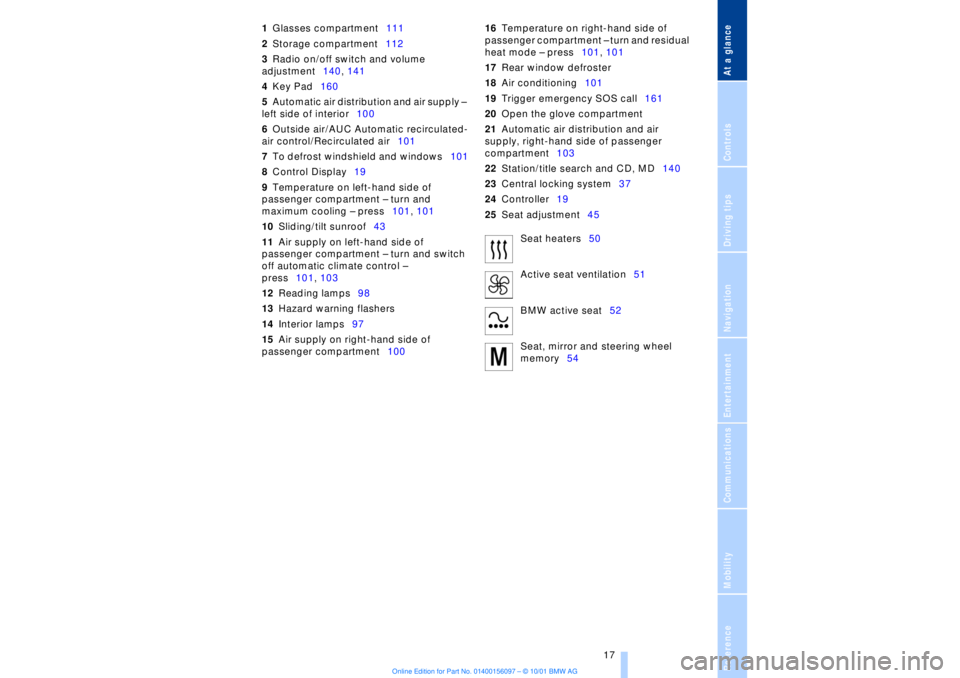
1Glasses compartment111
2Storage compartment112
3Radio on/off switch and volume
adjustment140, 141
4Key Pad160
5Automatic air distribution and air supply Ð
left side of interior100
6Outside air/AUC Automatic recirculated-
air control/Recirculated air101
7To defrost windshield and windows101
8Control Display19
9Temperature on left-hand side of
passenger compartment Ð turn and
maximum cooling Ð press101, 101
10Sliding/tilt sunroof43
11Air supply on left-hand side of
passenger compartment Ð turn and switch
off automatic climate control Ð
press101, 103
12Reading lamps98
13Hazard warning flashers
14Interior lamps97
15Air supply on right-hand side of
passenger compartment10016Temperature on right-hand side of
passenger compartment Ð turn and residual
heat mode Ð press101, 101
17Rear window defroster
18Air conditioning101
19Trigger emergency SOS call161
20Open the glove compartment
21Automatic air distribution and air
supply, right-hand side of passenger
compartment103
22Station/title search and CD, MD140
23Central locking system37
24Controller19
25Seat adjustment45
Seat heaters50
Active seat ventilation51
BMW active seat52
Seat, mirror and steering wheel
memory54
Page 36 of 208
At a glanceControlsDriving tipsCommunicationsNavigationEntertainmentMobilityReference
35
Central locking system The concept The central locking system is ready for
operation whenever the driver's door is
closed. This simultaneously engages and
releases the locks on the following:
>Doors
>Luggage compartment lid
>Fuel filler door.
The central locking system can be oper-
ated
>from outside via the remote control as
well as via the driver's door lock
>from inside via the button for the central
locking system.
When the system is locked from inside, the
fuel filler door remains unlocked, refer to
page 37.
The anti-theft system is automatically
armed whenever you activate the central
locking system from outside the vehicle.
The alarm system is armed/deactivated at
the same time.
In the event of an accident, the central
locking system unlocks automatically (only
those doors which were not locked sepa-
rately with the safety lock buttons). Refer to
page 38. In addition, the hazard warning
flashers and interior lamps come on.Opening and closing Ð from
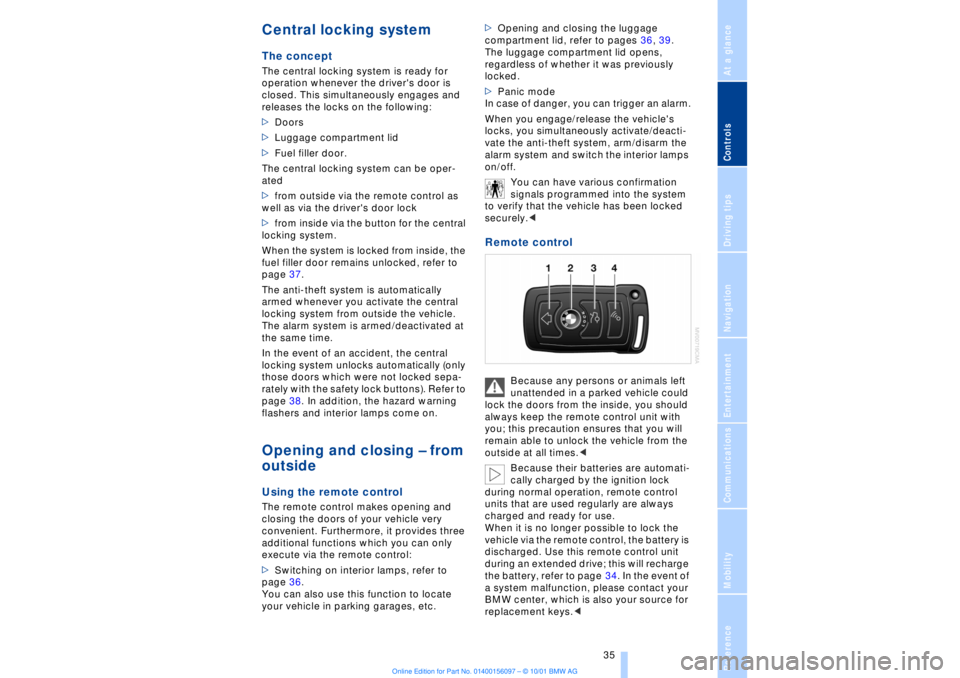
outside Using the remote control The remote control makes opening and
closing the doors of your vehicle very
convenient. Furthermore, it provides three
additional functions which you can only
execute via the remote control:
>Switching on interior lamps, refer to
page 36.
You can also use this function to locate
your vehicle in parking garages, etc. >Opening and closing the luggage
compartment lid, refer to pages 36, 39.
The luggage compartment lid opens,
regardless of whether it was previously
locked.
>Panic mode
In case of danger, you can trigger an alarm.
When you engage/release the vehicle's
locks, you simultaneously activate/deacti-
vate the anti-theft system, arm/disarm the
alarm system
and switch the interior lamps
on/off.
You can have various confirmation
signals programmed into the system
to verify that the vehicle has been locked
securely.<
Remote control
Because any persons or animals left
unattended in a parked vehicle could
lock the doors from the inside, you should
always keep the remote control unit with
you; this precaution ensures that you will
remain able to unlock the vehicle from the
outside at all times.<
Because their batteries are automati-
cally charged by the ignition lock
during normal operation, remote control
units that are used regularly are always
charged and ready for use.
When it is no longer possible to lock the
vehicle via the remote control, the battery is
discharged. Use this remote control unit
during an extended drive; this will recharge
the battery, refer to page 34. In the event of
a system malfunction, please contact your
BMW center, which is also your source for
replacement keys.<
Page 42 of 208

At a glanceControlsDriving tipsCommunicationsNavigationEntertainmentMobilityReference
41
>The hazard warning flashers for approx.
five minutes
>The high beams, which flash on and off
in the same rhythm.To arm and disarm the alarm system When you lock (or unlock) the vehicle,
either with the remote control unit or at the
door lock, the alarm system is armed (or
disarmed) at the same time.
The system indicates that is has been
correctly armed by switching on the hazard
warning flashers for a single cycle and by
emitting an acoustic signal.
You can have different acknowledg-
ment signals set to confirm arming
and disarming.<
Even with the alarm system armed, you can
open the luggage compartment lid using
the button 3on the remote control
unit, refer to page 36. The alarm system will
start to monitor the luggage compartment
lid again as soon as it is reclosed. Indicator lamp displays>The indicator lamp below the interior
rearview mirror flashes continuously: the
system is armed
>The indicator lamp flashes when the
system is armed: door(s), the hood or
luggage compartment lid are not
completely closed. Even if you do not close
the alerted area, the system begins to
monitor the remaining areas, and the indi-
cator lamp flashes continuously after
10 seconds. However, the interior motion
sensor is not activated >If the indicator lamp goes out when the
system is disarmed: no manipulation or
attempted intrusions have been detected in
the period since the system was armed
>If the indicator lamp flashes for roughly
5 minutes when you disarm the system, or
until the remote control unit is inserted in
the ignition lock: an attempted entry has
been detected in the period since the
system was armed.
Following triggering of an alarm, the indi-
cator lamp will flash continuously.
Avoiding unintentional alarms The tilt alarm sensor and interior motion
sensor may be switched off at the same
time. You can do this to prevent a false
alarm from being triggered (in garages with
elevator ramps, for instance), or when the
vehicle is transported by trailer or train:
Lock the vehicle, i. e., arm the alarm system
twice in a row by pressing button 2 on the
remote control unit twice in succession,
refer to page 36, or lock the vehicle twice
using the key, refer to page 37.
The indicator lamp flashes briefly and then
flashes continuously. The tilt alarm sensor
and the interior motion sensor are switched
off long as the system is armed.
If you desire, the
>tilt alarm sensor, and
>interior motion sensor
can be switched off permanently. Please
contact your BMW center for assistance.< Interior motion sensor In order for the interior motion sensor to
function properly, the windows and sliding/
tilt sunroof must be completely closed.
Be sure to deactivate the interior motion
sensor, see section on Avoiding uninten-
tional alarms, when you wish to leave the
windows or sliding/tilt sunroof open.
Page 51 of 208
Adjustments
50
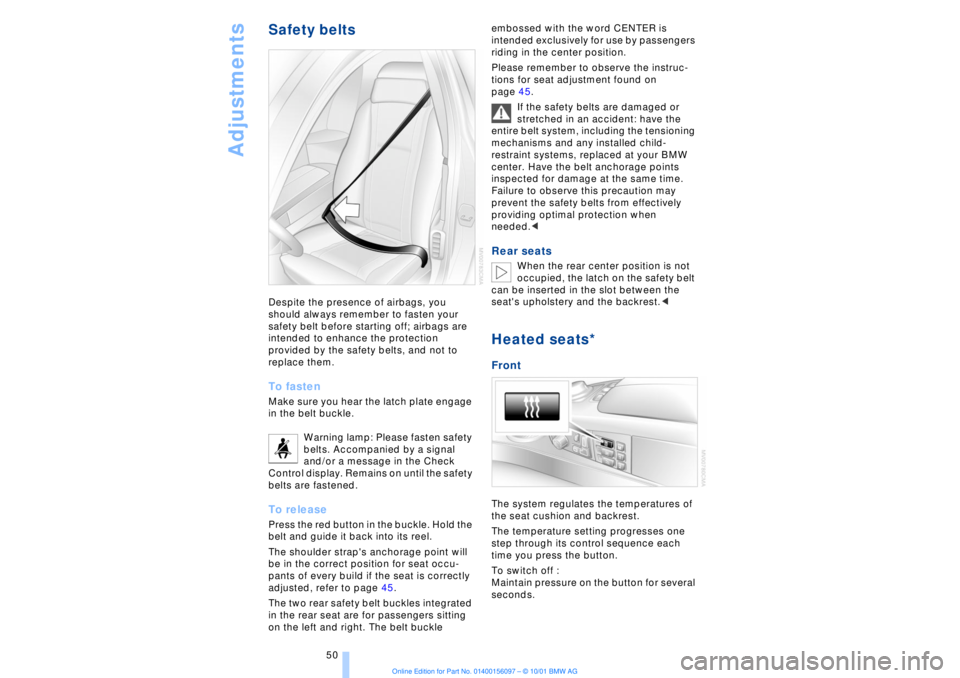
Safety beltsDespite the presence of airbags, you
should always remember to fasten your
safety belt before starting off; airbags are
intended to enhance the protection
provided by the safety belts, and not to
replace them. To fastenMake sure you hear the latch plate engage
in the belt buckle.
Warning lamp: Please fasten safety
belts. Accompanied by a signal
and/or a message in the Check
Control display. Remains on until the safety
belts are fastened. To releasePress the red button in the buckle. Hold the
belt and guide it back into its reel.
The shoulder strap's anchorage point will
be in the correct position for seat occu-
pants of every build if the seat is correctly
adjusted, refer to page 45.
The two rear safety belt buckles integrated
in the rear seat are for passengers sitting
on the left and right. The belt buckle embossed with the word CENTER is
intended exclusively for use by passengers
riding in the center position.
Please remember to observe the instruc-
tions for seat adjustment found on
page 45.
If the safety belts are damaged or
stretched in an accident: have the
entire belt system, including the tensioning
mechanisms and any installed child-
restraint systems, replaced at your BMW
center. Have the belt anchorage points
inspected for damage at the same time.
Failure to observe this precaution may
prevent the safety belts from effectively
providing optimal protection when
needed.<
Rear seats
When the rear center position is not
occupied, the latch on the safety belt
can be inserted in the slot between the
seat's upholstery and the backrest.<
Heated seats*Front The system regulates the temperatures of
the seat cushion and backrest.
The temperature setting progresses one
step through its control sequence each
time you press the button.
To switch off :
Maintain pressure on the button for several
seconds.
Page 57 of 208
Adjustments
56
Important safety notes
Do not apply adhesive materials to
the cover panels of the airbags, cover
them or modify them in any other way.
Do not attempt to remove the airbag
restraint system from the vehicle. If you
note any indication of system malfunction,
if you desire to have an airbag deactivated,
or if the airbags are triggered in response
to an accident, you should always entrust
all inspection, repair and dismantling oper-
ations to your BMW center.
Never modify or tamper with either the
wiring or the individual components in the
airbag system. This category includes the
upholstery in the center of the steering
wheel, on the instrument panel, the side
trim panels on the front and rear doors, and
the roof pillars along with the sides of the
headliner. Do not attempt to remove or
dismantle the steering wheel.
To ensure compliance with official safety
regulations, entrust disposal of airbag
generators to a BMW center.
Unprofessional attempts to service the
system could lead to failure in an emer-
gency or undesired airbag activation, either
of which could result in personal injury. Do
not touch the individual components
directly after the system has been trig-
gered, because there is a danger of
burns.<
At all times, occupants should sit
upright and be properly restrained Ð
infants and small children in appropriate
child-restraint systems; larger children and
adults using the safety belts. Never let an
occupant's head rest near or on a side
airbag because the inflating airbag could
cause a serious or fatal injury. Please note
that the word "Airbag" imprinted on the
door trim panel indicates the airbag's loca-
tion.
Never install a rear-facing child-restraint
device on the front passenger seat. If you
do so, the child could be injured when the
airbag is triggered.
Children should always ride in the rear and
the restraint systems should be secured
with the vehicle's belts.Accident research shows that the safest
place for children in an automobile is in the
rear seat. However, a child sitting in the
rear seat and not properly restrained may
place his or her head on or near the airbag,
if so equipped.
For example, a child Ñ even though belted
Ñ may fall asleep with his or her head
against the side airbag. It may be difficult
for a driver to ensure that children in the
rear seat will remain properly positioned at
all times and do not place their heads on or
near the side airbag. Therefore, we recom-
mend that the rear side airbags, if provided,
be deactivated if you plan to transport chil-
dren in the rear seat.
The rear seat side airbags may already
have been deactivated, either at the time of
manufacture or by a BMW center. Labels in
the rear door opening should indicate the
status of your rear-seat side airbags. If you
are uncertain of their status, or wish to have
the airbags activated or deactivated,
please contact your BMW center.<
Even when all these guidelines are
observed, there is still a small residual risk
of injuries to the face, hands and arms
occurring from airbag deployment in
isolated instances. The ignition and infla-
tion noise may provoke a mild temporary
hearing loss in extremely sensitive individ-
uals.
Airbag warning information is also provided
on the sun blinds.
Indicator lamp
The indicator lamp shows the
airbag and belt-tensioner system's
operational status as soon as you
insert the remote control unit in the ignition
(radio mode).
System operational:
>The indicator lamp comes on briefly.
System malfunction:
>The indicator lamp fails to come on or
>it remains on continuously.