2002 BMW 745LI SEDAN driver seat adjustment
[x] Cancel search: driver seat adjustmentPage 3 of 208
Inhaltsverzeichnis
Contents
Notes
6Using this Owner's Manual
6Symbols used
7The individual vehicle
7Editorial notice
8For you own safety
9REPORTING SAFETY DEFECTS
Cockpit
12Driver's side Ð Controls and displays
16Comfort and convenience Ð Controls
and displays
18Buttons in steering wheel
Control Center
19The concept
19Controller
19Control Display
20Symbols and lists
22Menus in Control Display
23Assistance window*
Voice command
25Voice command system*
25Voice commands
27Notices
27The notebook
29Brief commands
Opening and closing
34Keys
35Central locking system
35Opening and closing Ð from outside
37Opening and closing Ð from inside
38Doors
38Luggage compartment lid 40Luggage compartment
40Alarm system
42Electric power windows
43Sliding/tilt sunroof*
Adjustments
45Correct sitting position
45Seats
48Head restraints
50Safety belts
50Heated seats*
51Active seat ventilation*
52Active seat*
52Mirror
53Steering wheel adjustment
54Seat, mirror and steering wheel
memory
55Airbags
57Transporting children safely
58LATCH child-restraint system
59Child-safety locks
59Car Memory, Key Memory
Driving
61Ignition lock
62Starting the engine
62Switching off engine
62Parking brake
66Automatic transmission with L mode
69Automatic transmission with
Steptronic
71Turn signal indicators/headlamp
flasher
71Wiper system
73Washer fluid
© 2001 Bayerische Motoren Werke
Aktiengesellschaft
Munich, Germany
Reprints, in whole or part, approved
exclusively with written permission of
BMW AG, Munich.
Order No. 01 40 0 156 097
US X/2001
Printed in Germany
Printed on environmentally friendly paper
(bleached without chlorine, suitable for
recycling).
Page 47 of 208
Adjustments
46 notice on the active head restraints on
page 48.
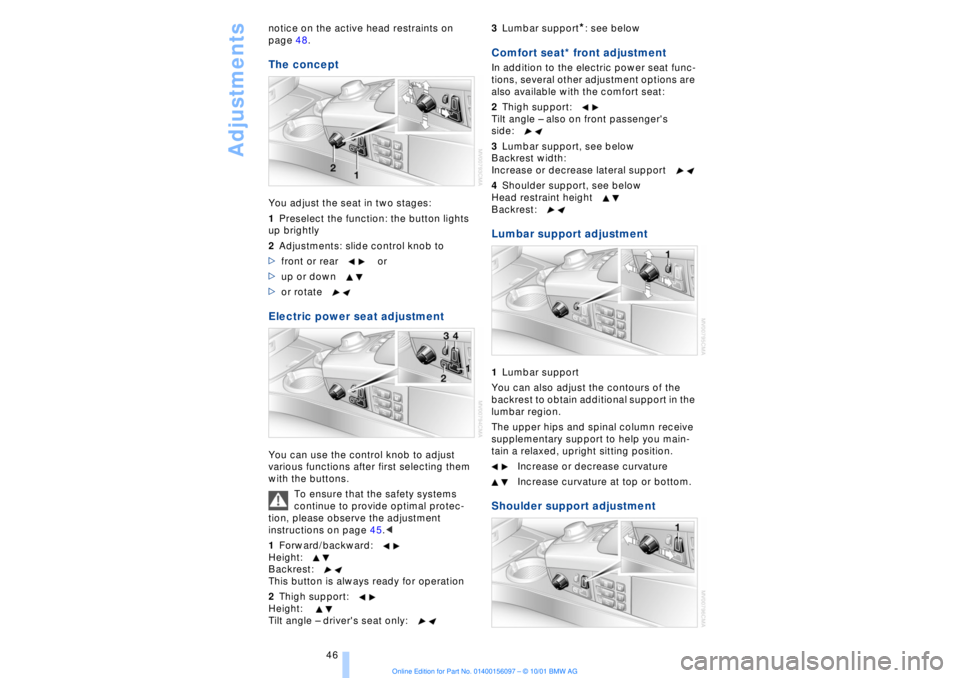
The conceptYou adjust the seat in two stages:
1Preselect the function: the button lights
up brightly
2Adjustments: slide control knob to
>front or rear or
>up or down
>or rotate Electric power seat adjustment You can use the control knob to adjust
various functions after first selecting them
with the buttons.
To ensure that the safety systems
continue to provide optimal protec-
tion, please observe the adjustment
instructions on page 45.<
1Forward/backward:
Height:
Backrest:
This button is always ready for operation
2Thigh support:
Height:
Tilt angle Ð driver's seat only:3Lumbar support
*: see below
Comfort seat* front adjustment In addition to the electric power seat func-
tions, several other adjustment options are
also available with the comfort seat:
2Thigh support:
Tilt angle Ð also on front passenger's
side:
3Lumbar support, see below
Backrest width:
Increase or decrease lateral support
4Shoulder support, see below
Head restraint height
Backrest: Lumbar support adjustment1Lumbar support
You can also adjust the contours of the
backrest to obtain additional support in the
lumbar region.
The upper hips and spinal column receive
supplementary support to help you main-
tain a relaxed, upright sitting position.
Increase or decrease curvature
Increase curvature at top or bottom. Shoulder support adjustment
Page 53 of 208
Adjustments
52
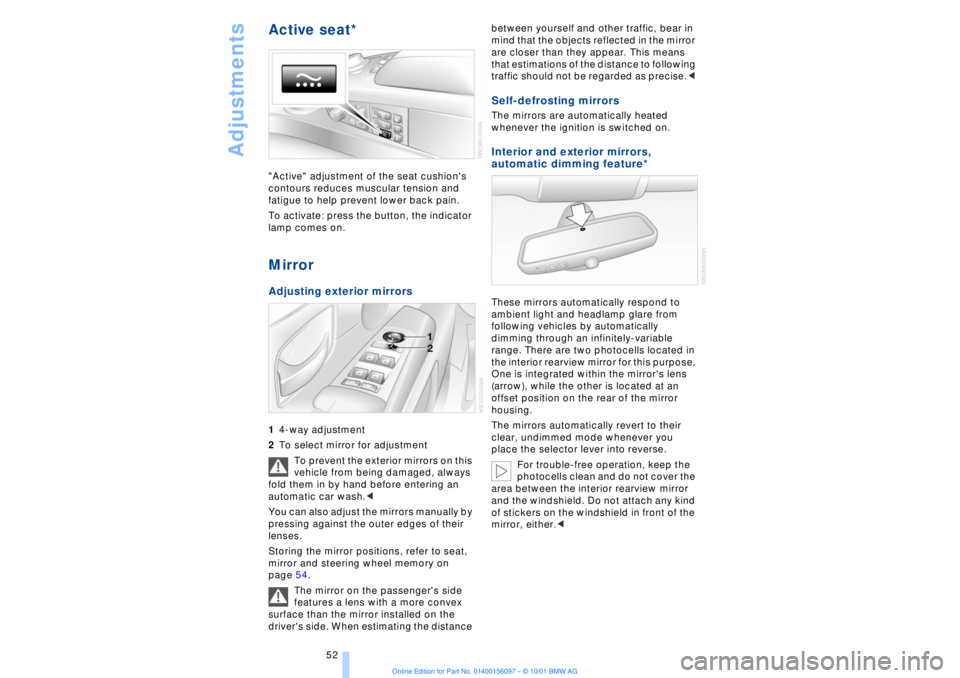
Active seat* "Active" adjustment of the seat cushion's
contours reduces muscular tension and
fatigue to help prevent lower back pain.
To activate: press the button, the indicator
lamp comes on. MirrorAdjusting exterior mirrors 14-way adjustment
2To select mirror for adjustment
To prevent the exterior mirrors on this
vehicle from being damaged, always
fold them in by hand before entering an
automatic car wash.<
You can also adjust the mirrors manually by
pressing against the outer edges of their
lenses.
Storing the mirror positions, refer to seat,
mirror and steering wheel memory on
page 54.
The mirror on the passenger's side
features a lens with a more convex
surface than the mirror installed on the
driver's side. When estimating the distance between yourself and other traffic, bear in
mind that the objects reflected in the mirror
are closer than they appear. This means
that estimations of the distance to following
traffic should not be regarded as precise.<
Self-defrosting mirrors The mirrors are automatically heated
whenever the ignition is switched on. Interior and exterior mirrors,
automatic dimming feature*
These mirrors automatically respond to
ambient light and headlamp glare from
following vehicles by automatically
dimming through an infinitely-variable
range. There are two photocells located in
the interior rearview mirror for this purpose.
One is integrated within the mirror's lens
(arrow), while the other is located at an
offset position on the rear of the mirror
housing.
The mirrors automatically revert to their
clear, undimmed mode whenever you
place the selector lever into reverse.
For trouble-free operation, keep the
photocells clean and do not cover the
area between the interior rearview mirror
and the windshield. Do not attach any kind
of stickers on the windshield in front of the
mirror, either.<
Page 54 of 208
At a glanceControlsDriving tipsCommunicationsNavigationEntertainmentMobilityReference
53
Lighted vanity mirror
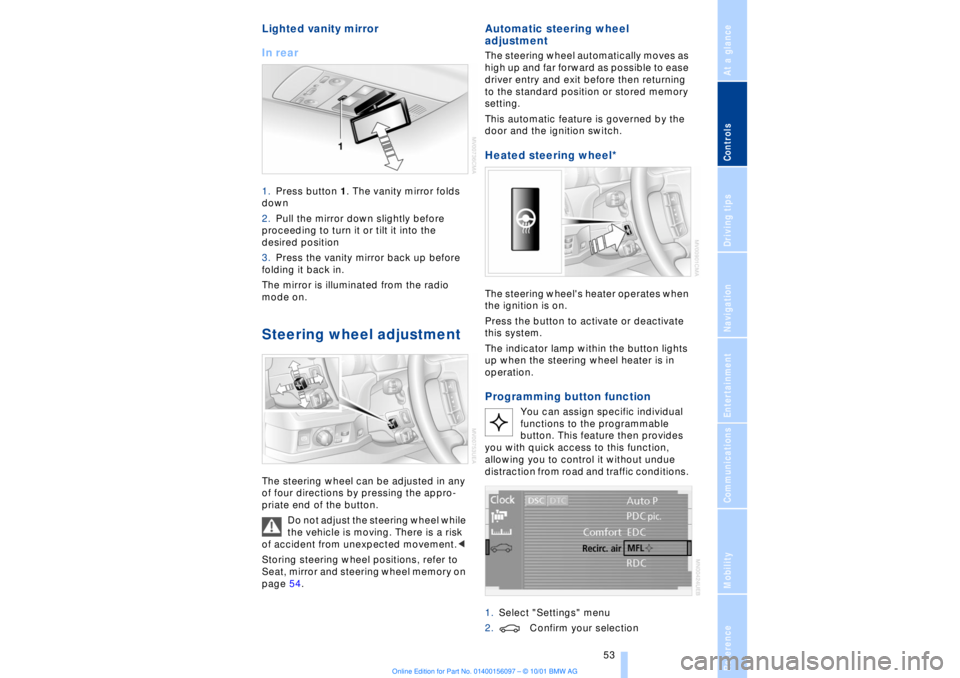
In rear 1.Press button 1. The vanity mirror folds
down
2.Pull the mirror down slightly before
proceeding to turn it or tilt it into the
desired position
3.Press the vanity mirror back up before
folding it back in.
The mirror is illuminated from the radio
mode on. Steering wheel adjustment The steering wheel can be adjusted in any
of four directions by pressing the appro-
priate end of the button.
Do not adjust the steering wheel while
the vehicle is moving. There is a risk
of accident from unexpected movement.<
Storing steering wheel positions, refer to
Seat, mirror and steering wheel memory on
page 54.
Automatic steering wheel
adjustment The steering wheel automatically moves as
high up and far forward as possible to ease
driver entry and exit before then returning
to the standard position or stored memory
setting.
This automatic feature is governed by the
door and the ignition switch. Heated steering wheel*
The steering wheel's heater operates when
the ignition is on.
Press the button to activate or deactivate
this system.
The indicator lamp within the button lights
up when the steering wheel heater is in
operation.Programming button function
You can assign specific individual
functions to the programmable
button. This feature then provides
you with quick access to this function,
allowing you to control it without undue
distraction from road and traffic conditions.
1.Select "Settings" menu
2.Confirm your selection
Page 55 of 208
Adjustments
54 3.Select "MFL." Continue to press the
controller until the desired function
appears:
>"Recirc. air"
In this mode the supply of outside air
remains blocked, refer to AUC Automatic
recirculated-air control on page 101
>"Navi info"
To repeat the most recent message from
the navigation system, refer to page 133
>"AUTO P"
To activate/deactivate Automatic Hold
refer to Automatic Hold on page 63.
You can select the displayed function using
button 1 in the steering wheel.
If you have activated the Automatic
hold feature, refer to page 63, you
can use button 1 to deactivate the system
for parking maneuvers, etc.<
Seat, mirror and steering
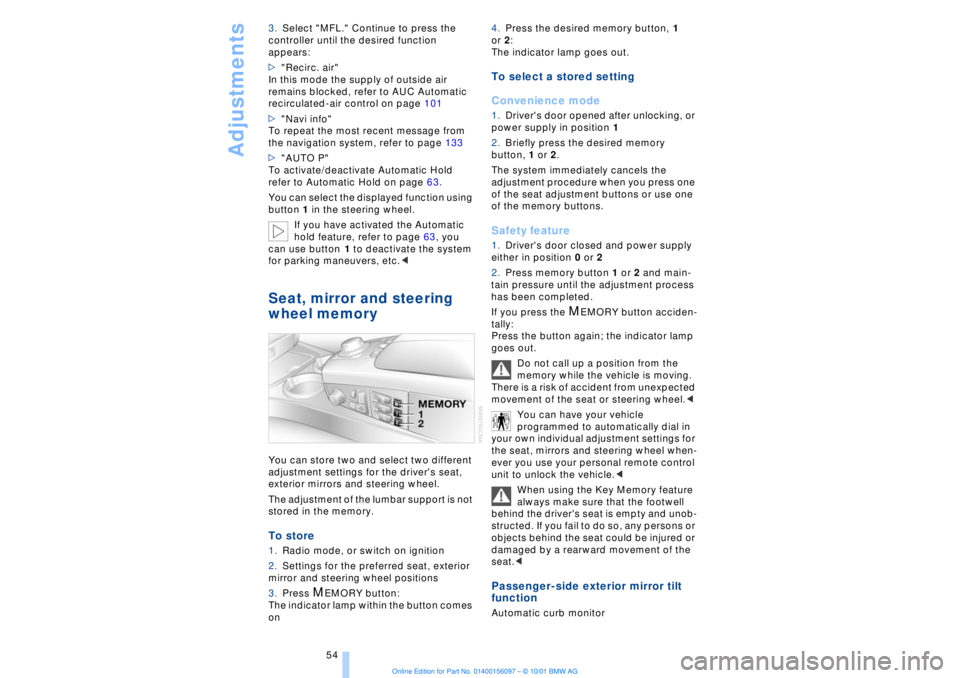
wheel memory You can store two and select two different
adjustment settings for the driver's seat,
exterior mirrors and steering wheel.
The adjustment of the lumbar support is not
stored in the memory. To store 1.Radio mode, or switch on ignition
2.Settings for the preferred seat, exterior
mirror and steering wheel positions
3.Press
M
EMORY button:
The indicator lamp within the button comes
on 4.Press the desired memory button, 1
or 2:
The indicator lamp goes out.
To select a stored setting
Convenience mode1.Driver's door opened after unlocking, or
power supply in position 1
2.Briefly press the desired memory
button, 1 or 2.
The system immediately cancels the
adjustment procedure when you press one
of the seat adjustment buttons or use one
of the memory buttons. Safety feature1.Driver's door closed and power supply
either in position 0 or 2
2.Press memory button 1 or 2 and main-
tain pressure until the adjustment process
has been completed.
If you press the
M
EMORY button acciden-
tally:
Press the button again; the indicator lamp
goes out.
Do not call up a position from the
memory while the vehicle is moving.
There is a risk of accident from unexpected
movement of the seat or steering wheel.<
You can have your vehicle
programmed to automatically dial in
your own individual adjustment settings for
the seat, mirrors and steering wheel when-
ever you use your personal remote control
unit to unlock the vehicle.<
When using the Key Memory feature
always make sure that the footwell
behind the driver's seat is empty and unob-
structed. If you fail to do so, any persons or
objects behind the seat could be injured or
damaged by a rearward movement of the
seat.<
Passenger-side exterior mirror tilt
function Automatic curb monitor
Page 57 of 208
Adjustments
56
Important safety notes
Do not apply adhesive materials to
the cover panels of the airbags, cover
them or modify them in any other way.
Do not attempt to remove the airbag
restraint system from the vehicle. If you
note any indication of system malfunction,
if you desire to have an airbag deactivated,
or if the airbags are triggered in response
to an accident, you should always entrust
all inspection, repair and dismantling oper-
ations to your BMW center.
Never modify or tamper with either the
wiring or the individual components in the
airbag system. This category includes the
upholstery in the center of the steering
wheel, on the instrument panel, the side
trim panels on the front and rear doors, and
the roof pillars along with the sides of the
headliner. Do not attempt to remove or
dismantle the steering wheel.
To ensure compliance with official safety
regulations, entrust disposal of airbag
generators to a BMW center.
Unprofessional attempts to service the
system could lead to failure in an emer-
gency or undesired airbag activation, either
of which could result in personal injury. Do
not touch the individual components
directly after the system has been trig-
gered, because there is a danger of
burns.<
At all times, occupants should sit
upright and be properly restrained Ð
infants and small children in appropriate
child-restraint systems; larger children and
adults using the safety belts. Never let an
occupant's head rest near or on a side
airbag because the inflating airbag could
cause a serious or fatal injury. Please note
that the word "Airbag" imprinted on the
door trim panel indicates the airbag's loca-
tion.
Never install a rear-facing child-restraint
device on the front passenger seat. If you
do so, the child could be injured when the
airbag is triggered.
Children should always ride in the rear and
the restraint systems should be secured
with the vehicle's belts.Accident research shows that the safest
place for children in an automobile is in the
rear seat. However, a child sitting in the
rear seat and not properly restrained may
place his or her head on or near the airbag,
if so equipped.
For example, a child Ñ even though belted
Ñ may fall asleep with his or her head
against the side airbag. It may be difficult
for a driver to ensure that children in the
rear seat will remain properly positioned at
all times and do not place their heads on or
near the side airbag. Therefore, we recom-
mend that the rear side airbags, if provided,
be deactivated if you plan to transport chil-
dren in the rear seat.
The rear seat side airbags may already
have been deactivated, either at the time of
manufacture or by a BMW center. Labels in
the rear door opening should indicate the
status of your rear-seat side airbags. If you
are uncertain of their status, or wish to have
the airbags activated or deactivated,
please contact your BMW center.<
Even when all these guidelines are
observed, there is still a small residual risk
of injuries to the face, hands and arms
occurring from airbag deployment in
isolated instances. The ignition and infla-
tion noise may provoke a mild temporary
hearing loss in extremely sensitive individ-
uals.
Airbag warning information is also provided
on the sun blinds.
Indicator lamp
The indicator lamp shows the
airbag and belt-tensioner system's
operational status as soon as you
insert the remote control unit in the ignition
(radio mode).
System operational:
>The indicator lamp comes on briefly.
System malfunction:
>The indicator lamp fails to come on or
>it remains on continuously.
Page 61 of 208
Adjustments
60
Examples of Car Memory functions>Various confirmation signals when the
vehicle's locks are engaged/released
>Activate/deactivate "Follow me home"
lamps function
>Activate/deactivate daytime driving
lamps, e. g., on Canadian models Examples of Key Memory functions >Automatic adjustment of electric power
driver's seat
>Engagement of vehicle locks when the
vehicle is set in motion
>When unlocking, the system disengages
the driver's door lock first before
proceeding to disengage the remaining
vehicle locks.
Page 104 of 208
At a glanceControlsDriving tipsCommunicationsNavigationEntertainmentMobilityReference
103
Switching off the automatic climate
control*
The air supply, the heater and
the air conditioner are all
switched off. You can restart
the automatic climate control
by pressing any of its buttons
except the REST button.
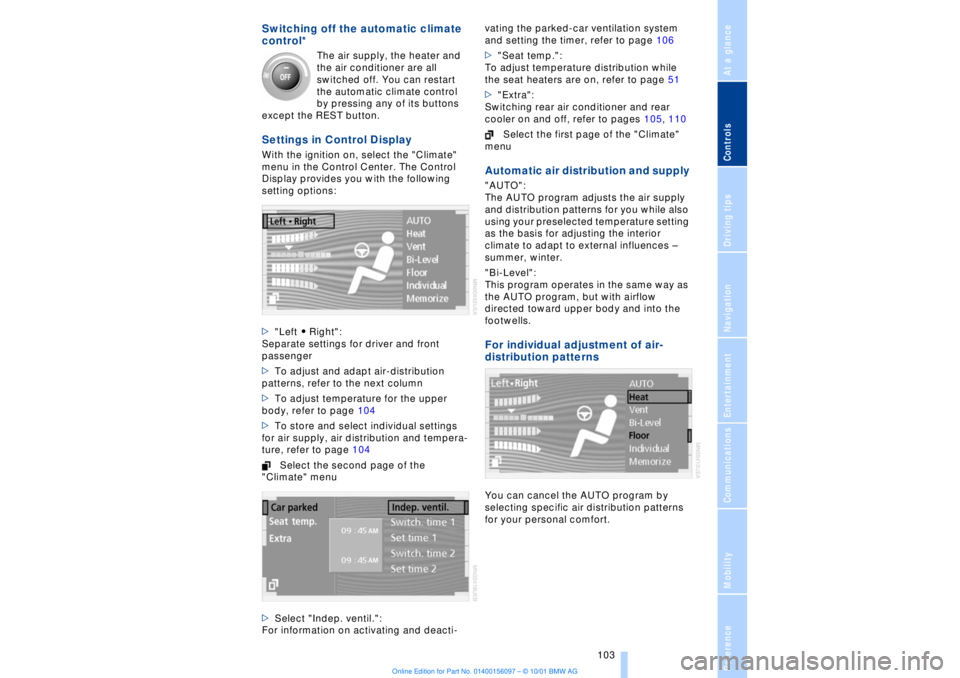
Settings in Control Display With the ignition on, select the "Climate"
menu in the Control Center. The Control
Display provides you with the following
setting options:
>"Left A Right":
Separate settings for driver and front
passenger
>To adjust and adapt air-distribution
patterns, refer to the next column
>To adjust temperature for the upper
body, refer to page 104
>To store and select individual settings
for air supply, air distribution and tempera-
ture, refer to page 104
Select the second page of the
"Climate" menu
>Select "Indep. ventil.":
For information on activating and deacti-vating the parked-car ventilation system
and setting the timer, refer to page 106
>"Seat temp.":
To adjust temperature distribution while
the seat heaters are on, refer to page 51
>"Extra":
Switching rear air conditioner and rear
cooler on and off, refer to pages 105, 110
Select the first page of the "Climate"
menu
Automatic air distribution and supply "AUTO":
The AUTO program adjusts the air supply
and distribution patterns for you while also
using your preselected temperature setting
as the basis for adjusting the interior
climate to adapt to external influences Ð
summer, winter.
"Bi-Level":
This program operates in the same way as
the AUTO program, but with airflow
directed toward upper body and into the
footwells. For individual adjustment of air-
distribution patternsYou can cancel the AUTO program by
selecting specific air distribution patterns
for your personal comfort.