2002 BMW 745LI SEDAN display
[x] Cancel search: displayPage 102 of 208
At a glanceControlsDriving tipsCommunicationsNavigationEntertainmentMobilityReference
101
Temperature adjustment
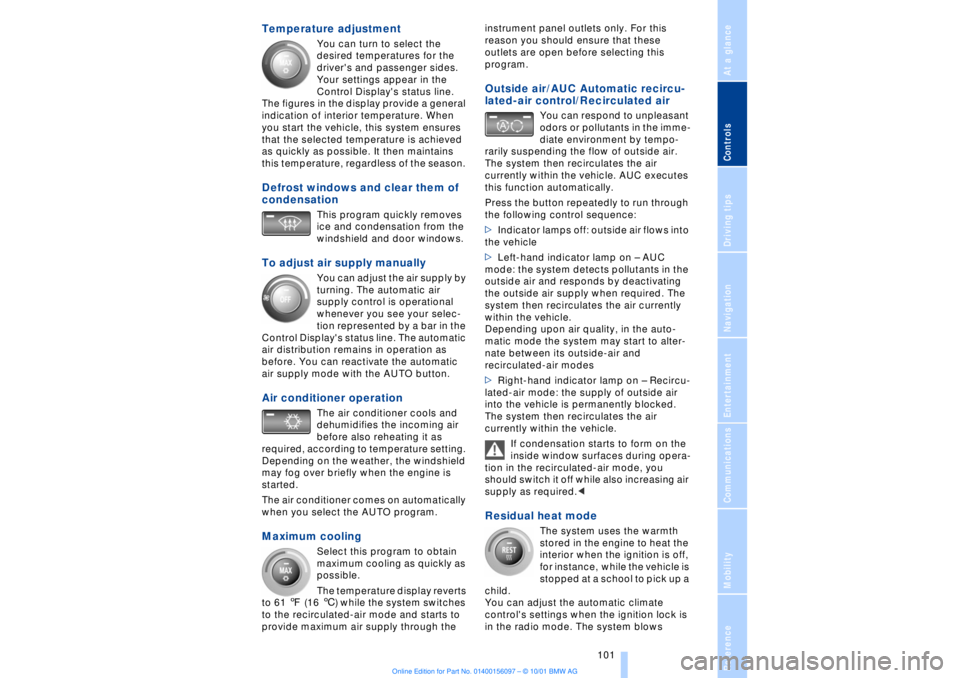
You can turn to select the
desired temperatures for the
driver's and passenger sides.
Your settings appear in the
Control Display's status line.
The figures in the display provide a general
indication of interior temperature. When
you start the vehicle, this system ensures
that the selected temperature is achieved
as quickly as possible. It then maintains
this temperature, regardless of the season.
Defrost windows and clear them of
condensation
This program quickly removes
ice and condensation from the
windshield and door windows.
To adjust air supply manually
You can adjust the air supply by
turning. The automatic air
supply control is operational
whenever you see your selec-
tion represented by a bar in the
Control Display's status line. The automatic
air distribution remains in operation as
before. You can reactivate the automatic
air supply mode with the AUTO button.
Air conditioner operation
The air conditioner cools and
dehumidifies the incoming air
before also reheating it as
required, according to temperature setting.
Depending on the weather, the windshield
may fog over briefly when the engine is
started.
The air conditioner comes on automatically
when you select the AUTO program.
Maximum cooling
Select this program to obtain
maximum cooling as quickly as
possible.
The temperature display reverts
to 61 7 (16 6) while the system switches
to the recirculated-air mode and starts to
provide maximum air supply through the instrument panel outlets only. For this
reason you should ensure that these
outlets are open before selecting this
program.
Outside air/AUC Automatic recircu-
lated-air control/Recirculated air
You can respond to unpleasant
odors or pollutants in the imme-
diate environment by tempo-
rarily suspending the flow of outside air.
The system then recirculates the air
currently within the vehicle. AUC executes
this function automatically.
Press the button repeatedly to run through
the following control sequence:
>Indicator lamps off: outside air flows into
the vehicle
>Left-hand indicator lamp on Ð AUC
mode: the system detects pollutants in the
outside air and responds by deactivating
the outside air supply when required. The
system then recirculates the air currently
within the vehicle.
Depending upon air quality, in the auto-
matic mode the system may start to alter-
nate between its outside-air and
recirculated-air modes
>Right-hand indicator lamp on Ð Recircu-
lated-air mode: the supply of outside air
into the vehicle is permanently blocked.
The system then recirculates the air
currently within the vehicle.
If condensation starts to form on the
inside window surfaces during opera-
tion in the recirculated-air mode, you
should switch it off while also increasing air
supply as required.<
Residual heat mode
The system uses the warmth
stored in the engine to heat the
interior when the ignition is off,
for instance, while the vehicle is
stopped at a school to pick up a
child.
You can adjust the automatic climate
control's settings when the ignition lock is
in the radio mode. The system blows
Page 103 of 208
A congenial climate
102 heated air into the interior in accordance
with the selected distribution pattern while
the ignition is off.
Provided that the engine has warmed
to its normal operating temperature
and the battery is charged, you can use this
function for up to 15 minutes after
switching off the ignition. The LED within
the button lights up to confirm compliance
with both of these conditions.<
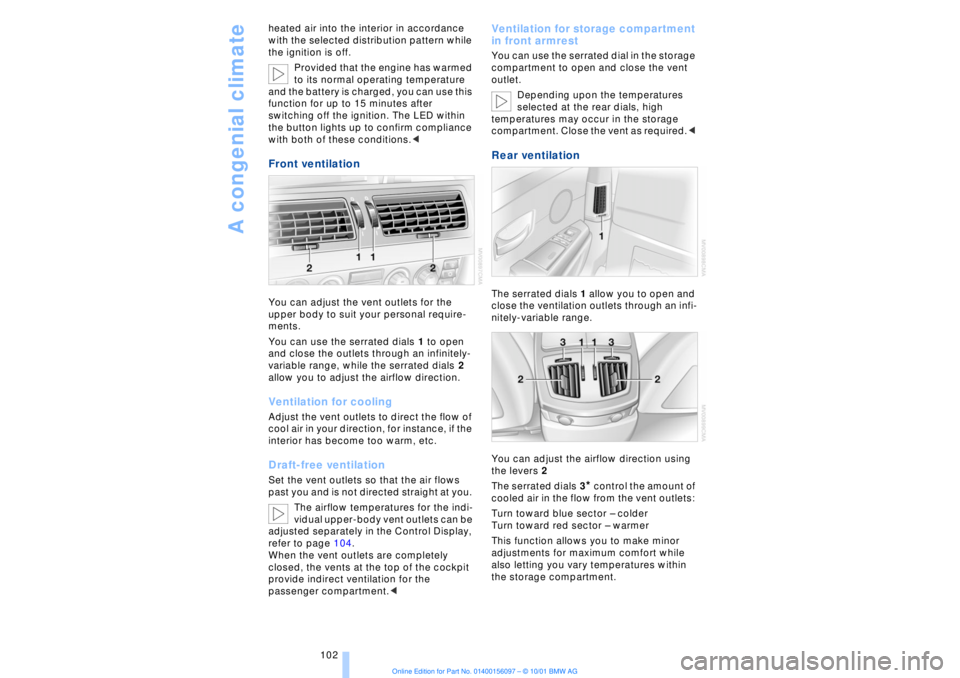
Front ventilation You can adjust the vent outlets for the
upper body to suit your personal require-
ments.
You can use the serrated dials 1 to open
and close the outlets through an infinitely-
variable range, while the serrated dials 2
allow you to adjust the airflow direction. Ventilation for cooling Adjust the vent outlets to direct the flow of
cool air in your direction, for instance, if the
interior has become too warm, etc.Draft-free ventilationSet the vent outlets so that the air flows
past you and is not directed straight at you.
The airflow temperatures for the indi-
vidual upper-body vent outlets can be
adjusted separately in the Control Display,
refer to page 104.
When the vent outlets are completely
closed, the vents at the top of the cockpit
provide indirect ventilation for the
passenger compartment.<
Ventilation for storage compartment
in front armrest You can use the serrated dial in the storage
compartment to open and close the vent
outlet.
Depending upon the temperatures
selected at the rear dials, high
temperatures may occur in the storage
compartment. Close the vent as required.< Rear ventilation The serrated dials 1 allow you to open and
close the ventilation outlets through an infi-
nitely-variable range.
You can adjust the airflow direction using
the levers 2
The serrated dials 3
* control the amount of
cooled air in the flow from the vent outlets:
Turn toward blue sector Ð colder
Turn toward red sector Ð warmer
This function allows you to make minor
adjustments for maximum comfort while
also letting you vary temperatures within
the storage compartment.
Page 104 of 208
At a glanceControlsDriving tipsCommunicationsNavigationEntertainmentMobilityReference
103
Switching off the automatic climate
control*
The air supply, the heater and
the air conditioner are all
switched off. You can restart
the automatic climate control
by pressing any of its buttons
except the REST button.
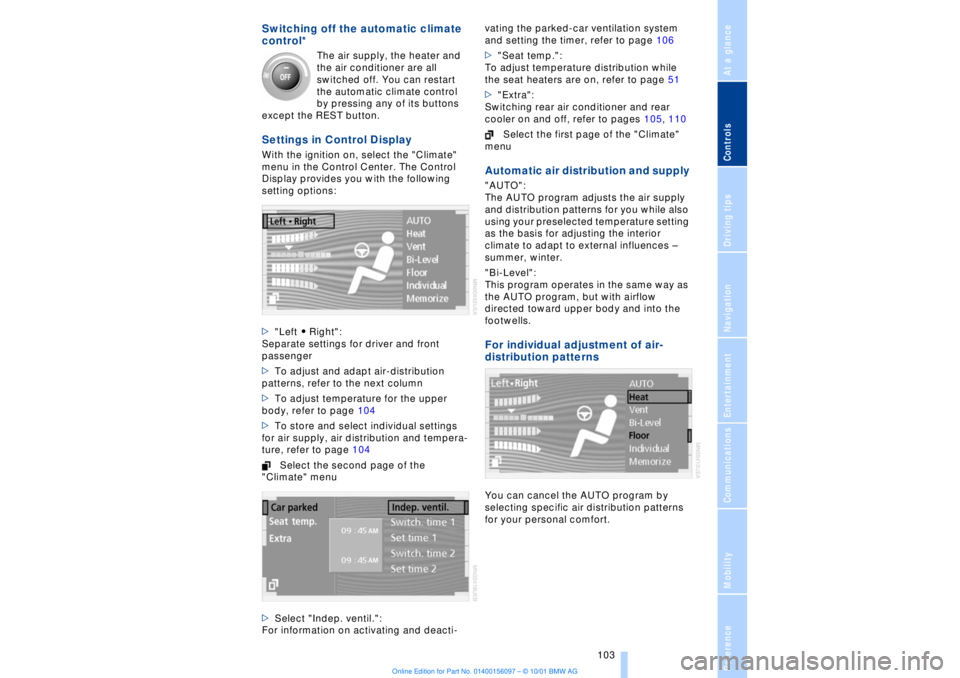
Settings in Control Display With the ignition on, select the "Climate"
menu in the Control Center. The Control
Display provides you with the following
setting options:
>"Left A Right":
Separate settings for driver and front
passenger
>To adjust and adapt air-distribution
patterns, refer to the next column
>To adjust temperature for the upper
body, refer to page 104
>To store and select individual settings
for air supply, air distribution and tempera-
ture, refer to page 104
Select the second page of the
"Climate" menu
>Select "Indep. ventil.":
For information on activating and deacti-vating the parked-car ventilation system
and setting the timer, refer to page 106
>"Seat temp.":
To adjust temperature distribution while
the seat heaters are on, refer to page 51
>"Extra":
Switching rear air conditioner and rear
cooler on and off, refer to pages 105, 110
Select the first page of the "Climate"
menu
Automatic air distribution and supply "AUTO":
The AUTO program adjusts the air supply
and distribution patterns for you while also
using your preselected temperature setting
as the basis for adjusting the interior
climate to adapt to external influences Ð
summer, winter.
"Bi-Level":
This program operates in the same way as
the AUTO program, but with airflow
directed toward upper body and into the
footwells. For individual adjustment of air-
distribution patternsYou can cancel the AUTO program by
selecting specific air distribution patterns
for your personal comfort.
Page 105 of 208
A congenial climate
104
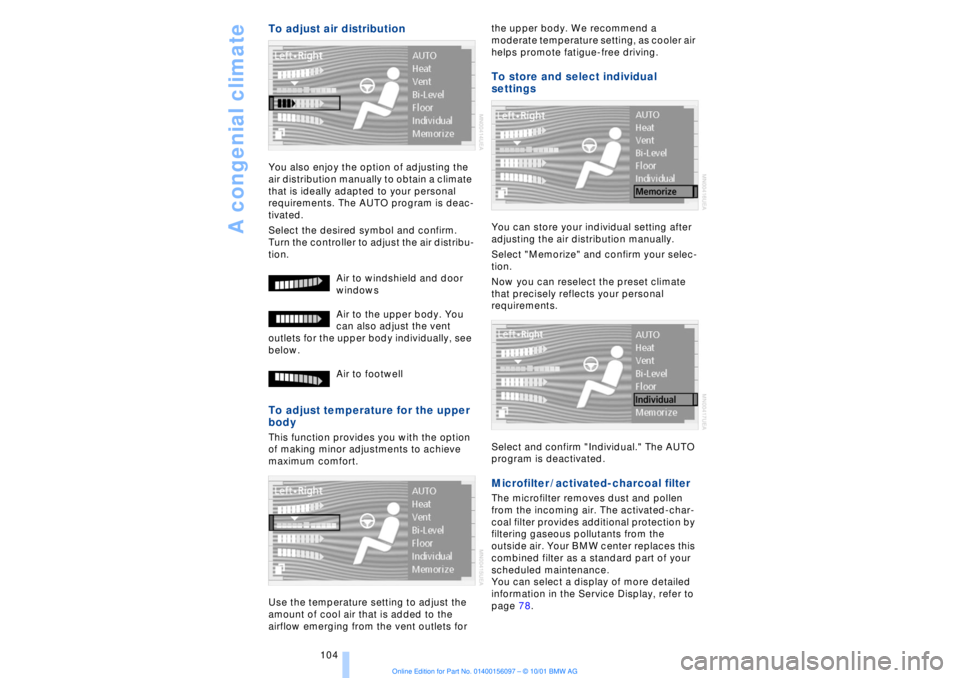
To adjust air distribution You also enjoy the option of adjusting the
air distribution manually to obtain a climate
that is ideally adapted to your personal
requirements. The AUTO program is deac-
tivated.
Select the desired symbol and confirm.
Turn the controller to adjust the air distribu-
tion.
Air to windshield and door
windows
Air to the upper body. You
can also adjust the vent
outlets for the upper body individually, see
below.
Air to footwell To adjust temperature for the upper
body This function provides you with the option
of making minor adjustments to achieve
maximum comfort.
Use the temperature setting to adjust the
amount of cool air that is added to the
airflow emerging from the vent outlets for the upper body. We recommend a
moderate temperature setting, as cooler air
helps promote fatigue-free driving.
To store and select individual
settings You can store your individual setting after
adjusting the air distribution manually.
Select "Memorize" and confirm your selec-
tion.
Now you can reselect the preset climate
that precisely reflects your personal
requirements.
Select and confirm "Individual." The AUTO
program is deactivated. Microfilter / activated-charcoal filter The microfilter removes dust and pollen
from the incoming air. The activated-char-
coal filter provides additional protection by
filtering gaseous pollutants from the
outside air. Your BMW center replaces this
combined filter as a standard part of your
scheduled maintenance.
You can select a display of more detailed
information in the Service Display, refer to
page 78.
Page 106 of 208
At a glanceControlsDriving tipsCommunicationsNavigationEntertainmentMobilityReference
105
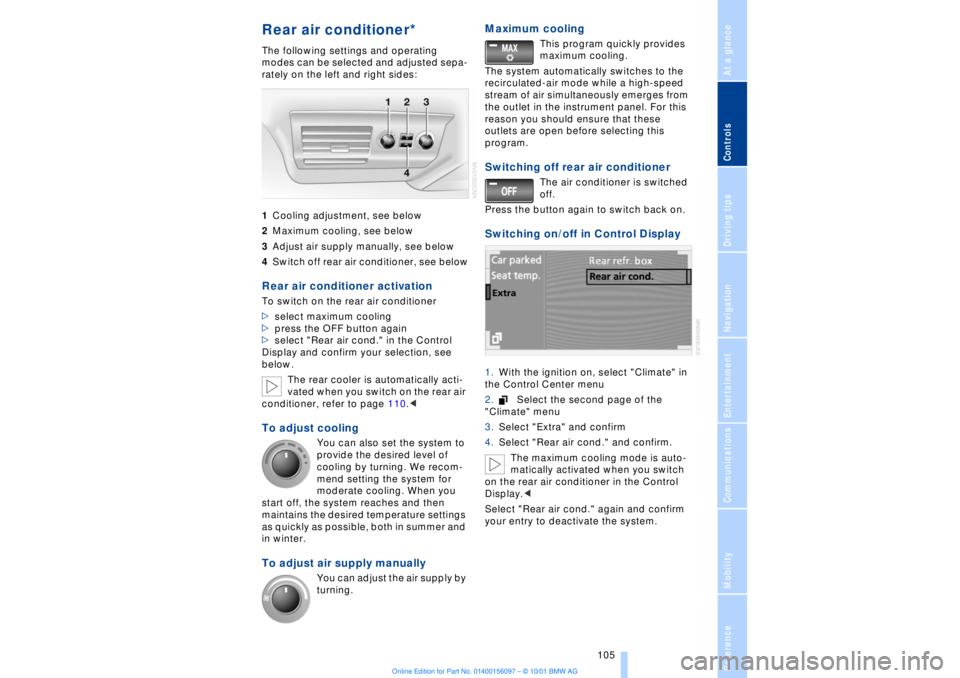
Rear air conditioner* The following settings and operating
modes can be selected and adjusted sepa-
rately on the left and right sides:
1Cooling adjustment, see below
2Maximum cooling, see below
3Adjust air supply manually, see below
4Switch off rear air conditioner, see belowRear air conditioner activation To switch on the rear air conditioner
>select maximum cooling
>press the OFF button again
>select "Rear air cond." in the Control
Display and confirm your selection, see
below.
The rear cooler is automatically acti-
vated when you switch on the rear air
conditioner, refer to page 110.< To adjust cooling
You can also set the system to
provide the desired level of
cooling by turning. We recom-
mend setting the system for
moderate cooling. When you
start off, the system reaches and then
maintains the desired temperature settings
as quickly as possible, both in summer and
in winter.
To adjust air supply manually
You can adjust the air supply by
turning.
Maximum cooling
This program quickly provides
maximum cooling.
The system automatically switches to the
recirculated-air mode while a high-speed
stream of air simultaneously emerges from
the outlet in the instrument panel. For this
reason you should ensure that these
outlets are open before selecting this
program.
Switching off rear air conditioner
The air conditioner is switched
off.
Press the button again to switch back on.
Switching on/off in Control Display 1.With the ignition on, select "Climate" in
the Control Center menu
2.Select the second page of the
"Climate" menu
3.Select "Extra" and confirm
4.Select "Rear air cond." and confirm.
The maximum cooling mode is auto-
matically activated when you switch
on the rear air conditioner in the Control
Display.<
Select "Rear air cond." again and confirm
your entry to deactivate the system.
Page 107 of 208
A congenial climate
106
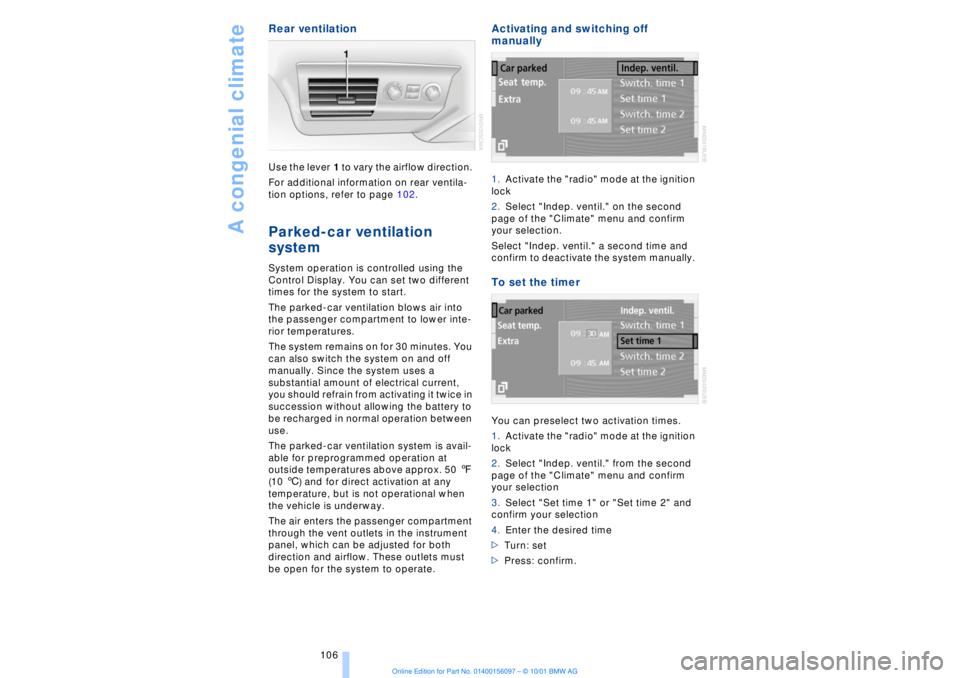
Rear ventilation Use the lever 1 to vary the airflow direction.
For additional information on rear ventila-
tion options, refer to page 102. Parked-car ventilation
system
System operation is controlled using the
Control Display. You can set two different
times for the system to start.
The parked-car ventilation blows air into
the passenger compartment to lower inte-
rior temperatures.
The system remains on for 30 minutes. You
can also switch the system on and off
manually. Since the system uses a
substantial amount of electrical current,
you should refrain from activating it twice in
succession without allowing the battery to
be recharged in normal operation between
use.
The parked-car ventilation system is avail-
able for preprogrammed operation at
outside temperatures above approx. 50 7
(10 6) and for direct activation at any
temperature, but is not operational when
the vehicle is underway.
The air enters the passenger compartment
through the vent outlets in the instrument
panel, which can be adjusted for both
direction and airflow. These outlets must
be open for the system to operate.
Activating and switching off
manually 1.Activate the "radio" mode at the ignition
lock
2.Select "Indep. ventil." on the second
page of the "Climate" menu and confirm
your selection.
Select "Indep. ventil." a second time and
confirm to deactivate the system manually. To set the timer You can preselect two activation times.
1.Activate the "radio" mode at the ignition
lock
2.Select "Indep. ventil." from the second
page of the "Climate" menu and confirm
your selection
3.Select "Set time 1" or "Set time 2" and
confirm your selection
4.Enter the desired time
>Turn: set
>Press: confirm.
Page 111 of 208
Practical interior accessories
110 lock and close the doors; this precaution
prevents children from using the sun blinds
and injuring themselves, etc.<
To automatically extend and retract
the sun blinds You can extend and retract the sun blinds
together by briefly pressing button 3. Rear cooler
*
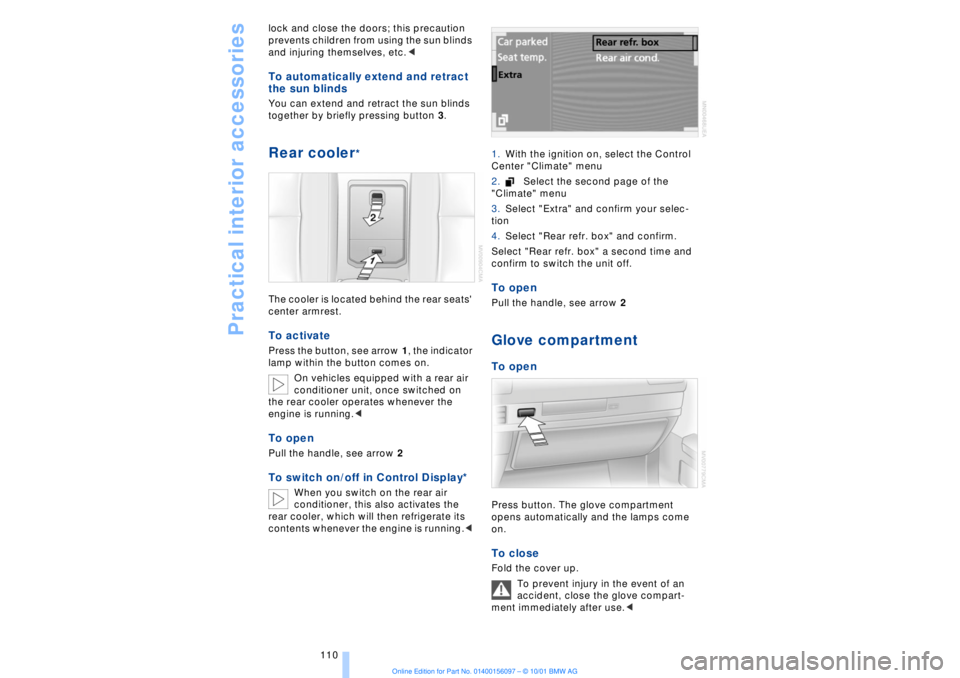
The cooler is located behind the rear seats'
center armrest. To activate Press the button, see arrow 1, the indicator
lamp within the button comes on.
On vehicles equipped with a rear air
conditioner unit, once switched on
the rear cooler operates whenever the
engine is running.< To openPull the handle, see arrow 2To switch on/off in Control Display*
When you switch on the rear air
conditioner, this also activates the
rear cooler, which will then refrigerate its
contents whenever the engine is running.< 1.With the ignition on, select the Control
Center "Climate" menu
2.Select the second page of the
"Climate" menu
3.Select "Extra" and confirm your selec-
tion
4.Select "Rear refr. box" and confirm.
Select "Rear refr. box" a second time and
confirm to switch the unit off.
To openPull the handle, see arrow 2Glove compartment To openPress button. The glove compartment
opens automatically and the lamps come
on. To close Fold the cover up.
To prevent injury in the event of an
accident, close the glove compart-
ment immediately after use.<
Page 120 of 208
At a glanceControlsDriving tipsCommunicationsNavigationEntertainmentMobilityReference
119
Brake system Braking with ABS The best way to achieve optimal response
from the ABS is to apply maximum pres-
sure to the brake pedal during emergencyÐ
panic stops. Since the vehicle maintains
steering responsiveness, you can never-
theless avoid possible obstacles with a
minimum of steering effort.
Pulsation at the brake pedal combines with
sounds from the hydraulic circuits to indi-
cate to the driver that ABS is in its active
mode.
Do not drive with your foot resting on
the brake pedal. Even light but
consistent pedal pressure can lead to high
temperatures, brake wear and possibly
even brake failure.< Disc brakes
Driving in wet conditions While driving in wet conditions and in
heavy rain, it is a good idea to apply light
pressure to the brake pedal every few
miles. Monitor traffic conditions to ensure
that this maneuver does not endanger
other road users. The heat generated in this
process helps dry the pads and rotors to
ensure that full braking efficiency will then
be available when you need it. Hills You can retain full and unimpaired braking
efficiency by downshifting to a gear in
which only minimal brake applications are
needed when descending long or steep
downhill stretches.
You can further enhance the engine's
braking effect by selecting a lower gear in
the automatic transmission's manual
mode, downshifting as far as first gear on
extremely steep stretches, refer to
page 68. This strategy helps you avoid
placing excessive loads on the brake
system.
Corrosion When the vehicle is driven only occasion-
ally, during extended periods when the
vehicle is not used at all, and in operating
conditions where brake applications are
less frequent, there is an increased
tendency for corrosion to form on rotors,
while contaminants accumulate on the
brake pads. This occurs because the
minimal pressure which must be exerted by
the pads during brake applications to clean
the rotors is not reached.
Should corrosion form on the brake rotors,
the brakes will tend to respond with a
pulsating effect that even extended appli-
cation will fail to cure.
Never allow the vehicle to coast with
the transmission in neutral Ð or with
the engine switched off; there is no engine
braking when the transmission is in neutral,
and no power-assist for brakes and
steering when the engine is not running.
Never allow floor mats, carpets or any other
objects to protrude into the area around the
accelerator and brake pedals and obstruct
their movement.< Brake pads
If the brake pad wear indicator lamp
appears in the Check Control,
accompanied by a text: please take
careful note of the additional information in
the Control Display panel.
Warning lamp for Canadian models.
The brake pads have reached their
minimum pad thickness. Have them
replaced at your BMW center as soon as
possible.
For your own safety: use only brake
pads that BMW has released for your
particular vehicle model. Because BMW
cannot assess the suitability of other brake
pads for use on your vehicle, we are unable
to assume continued responsibility for the
vehicle's operating safety if non-approved
pads are installed.<