2002 BMW 745LI SEDAN buttons
[x] Cancel search: buttonsPage 3 of 208
Inhaltsverzeichnis
Contents
Notes
6Using this Owner's Manual
6Symbols used
7The individual vehicle
7Editorial notice
8For you own safety
9REPORTING SAFETY DEFECTS
Cockpit
12Driver's side Ð Controls and displays
16Comfort and convenience Ð Controls
and displays
18Buttons in steering wheel
Control Center
19The concept
19Controller
19Control Display
20Symbols and lists
22Menus in Control Display
23Assistance window*
Voice command
25Voice command system*
25Voice commands
27Notices
27The notebook
29Brief commands
Opening and closing
34Keys
35Central locking system
35Opening and closing Ð from outside
37Opening and closing Ð from inside
38Doors
38Luggage compartment lid 40Luggage compartment
40Alarm system
42Electric power windows
43Sliding/tilt sunroof*
Adjustments
45Correct sitting position
45Seats
48Head restraints
50Safety belts
50Heated seats*
51Active seat ventilation*
52Active seat*
52Mirror
53Steering wheel adjustment
54Seat, mirror and steering wheel
memory
55Airbags
57Transporting children safely
58LATCH child-restraint system
59Child-safety locks
59Car Memory, Key Memory
Driving
61Ignition lock
62Starting the engine
62Switching off engine
62Parking brake
66Automatic transmission with L mode
69Automatic transmission with
Steptronic
71Turn signal indicators/headlamp
flasher
71Wiper system
73Washer fluid
© 2001 Bayerische Motoren Werke
Aktiengesellschaft
Munich, Germany
Reprints, in whole or part, approved
exclusively with written permission of
BMW AG, Munich.
Order No. 01 40 0 156 097
US X/2001
Printed in Germany
Printed on environmentally friendly paper
(bleached without chlorine, suitable for
recycling).
Page 5 of 208
Inhaltsverzeichnis
Radio
143Select the frequency band
143Station selection
144Storing and retrieving a station
145Weather Band
CD Compact Disc
146Using the buttons to search for music
tracks
147Searching for music tracks in the
Control Display
CD changer
149Starting and stopping the CD changer
149Status displays
149Searching for music tracks in the
Control Display
150Using the buttons to search for music
tracks
MiniDisc MD
151Using the buttons to search for music
tracks
152Searching for music tracks in the
Control Display
Cassette
153Noise suppression
154Music track search
Using your mobile phone
158Safety notice
159Care instructions
159Operation
161Hands-free system
161To make SOS call
161Initial operation
162Getting started
162Telephone directory
163To select a number from the Top 8 list
164Redialing, including numbers not
initially reached
164Missed calls
Refueling
168Fuel filler door
169Fuel specifications
Wheels and tires
170Tire inflation pressure
171Tire condition
172Tire replacement
173Wheel and tire combinations
173Special characteristics of winter tires
173Snow chains*
Under the hood
175Hood
176Engine compartment
176Engine oil
177Coolant
178Brake fluid
Maintenance
179The BMW Maintenance System
179Care
Rules and regulations
180California Proposition 65 Warning
180OBD connector
Replacing components
181Onboard tool kit
181Windshield wiper blades
181Lamps and bulbs
183Changing a tire
185Battery
186Fuses
Help Ð Giving and receiving
187Warning triangle*
187First-aid kit*
187Jump-starting
188Towing
Technical data
192Engine specifications
193Dimensions
194Weights
194Capacities
Everything from A to Z
195Contents
Page 12 of 208
At a glance This overview of buttons, switches and
displays is intended to serve as a source
of orientation in your vehicle's operating
environment.
The section will also assist you in
becoming acquainted with the control
concepts and options available for
operating the various systems.
Page 19 of 208
Cockpit
18
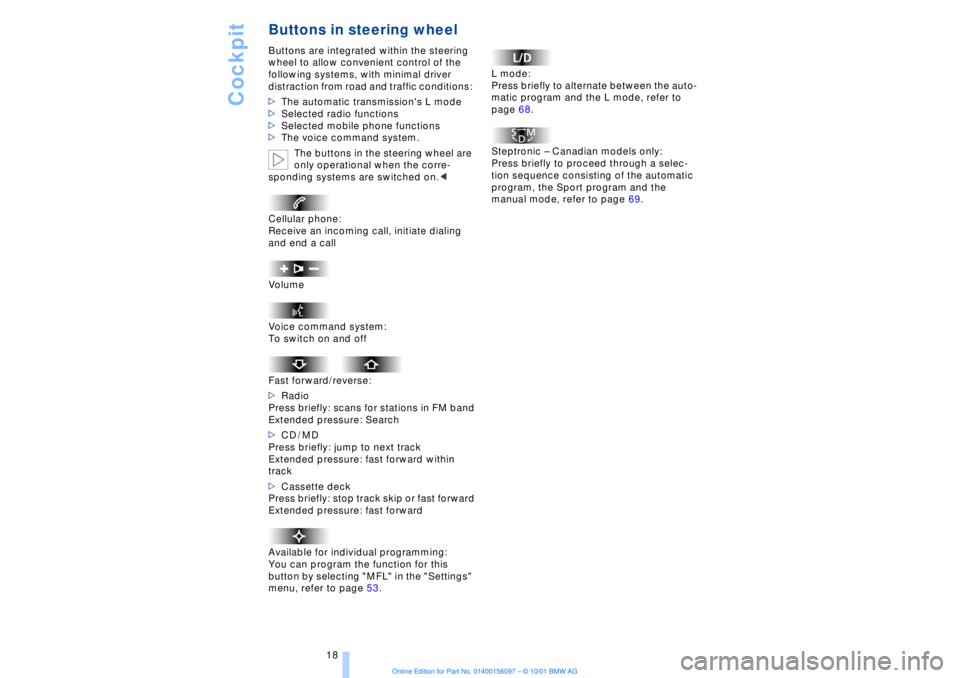
Buttons in steering wheel Buttons are integrated within the steering
wheel to allow convenient control of the
following systems, with minimal driver
distraction from road and traffic conditions:
>The automatic transmission's L mode
>Selected radio functions
>Selected mobile phone functions
>The voice command system.
The buttons in the steering wheel are
only operational when the corre-
sponding systems are switched on.<
Cellular phone:
Receive an incoming call, initiate dialing
and end a call
Volume
Voice command system:
To switch on and off
Fast forward/reverse:
>Radio
Press briefly: scans for stations in FM band
Extended pressure: Search
>CD / MD
Press briefly: jump to next track
Extended pressure: fast forward within
track
>Cassette deck
Press briefly: stop track skip or fast forward
Extended pressure: fast forward
Available for individual programming:
You can program the function for this
button by selecting "MFL" in the "Settings"
menu, refer to page 53. L mode:
Press briefly to alternate between the auto-
matic program and the L mode, refer to
page 68.
Steptronic Ð Canadian models only:
Press briefly to proceed through a selec-
tion sequence consisting of the automatic
program, the Sport program and the
manual mode, refer to page 69.
Page 36 of 208
At a glanceControlsDriving tipsCommunicationsNavigationEntertainmentMobilityReference
35
Central locking system The concept The central locking system is ready for
operation whenever the driver's door is
closed. This simultaneously engages and
releases the locks on the following:
>Doors
>Luggage compartment lid
>Fuel filler door.
The central locking system can be oper-
ated
>from outside via the remote control as
well as via the driver's door lock
>from inside via the button for the central
locking system.
When the system is locked from inside, the
fuel filler door remains unlocked, refer to
page 37.
The anti-theft system is automatically
armed whenever you activate the central
locking system from outside the vehicle.
The alarm system is armed/deactivated at
the same time.
In the event of an accident, the central
locking system unlocks automatically (only
those doors which were not locked sepa-
rately with the safety lock buttons). Refer to
page 38. In addition, the hazard warning
flashers and interior lamps come on.Opening and closing Ð from
outside Using the remote control The remote control makes opening and
closing the doors of your vehicle very
convenient. Furthermore, it provides three
additional functions which you can only
execute via the remote control:
>Switching on interior lamps, refer to
page 36.
You can also use this function to locate
your vehicle in parking garages, etc. >Opening and closing the luggage
compartment lid, refer to pages 36, 39.
The luggage compartment lid opens,
regardless of whether it was previously
locked.
>Panic mode
In case of danger, you can trigger an alarm.
When you engage/release the vehicle's
locks, you simultaneously activate/deacti-
vate the anti-theft system, arm/disarm the
alarm system
and switch the interior lamps
on/off.
You can have various confirmation
signals programmed into the system
to verify that the vehicle has been locked
securely.<
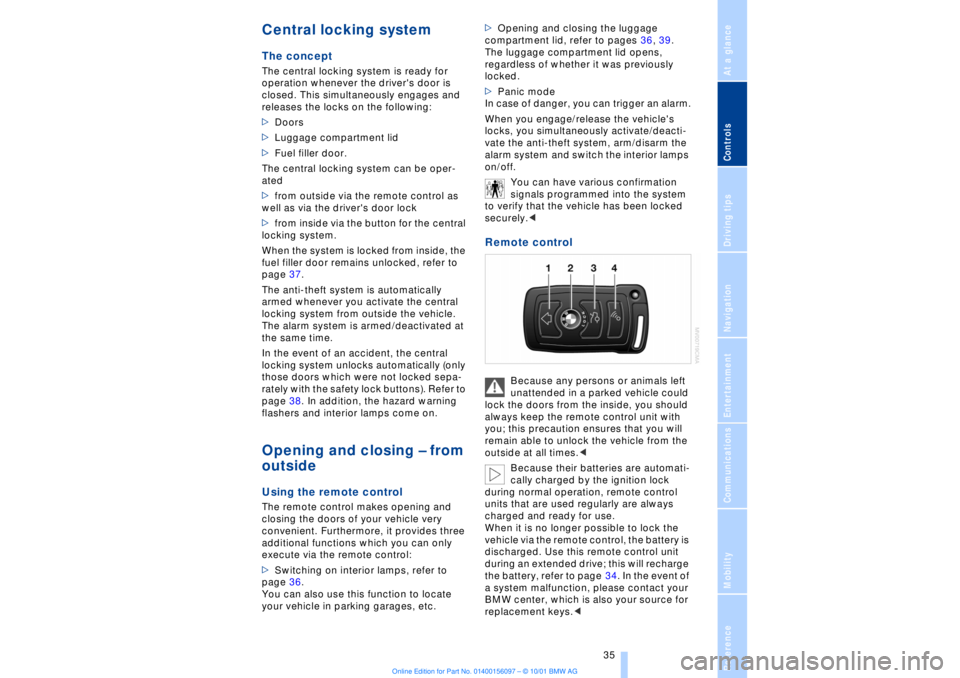
Remote control
Because any persons or animals left
unattended in a parked vehicle could
lock the doors from the inside, you should
always keep the remote control unit with
you; this precaution ensures that you will
remain able to unlock the vehicle from the
outside at all times.<
Because their batteries are automati-
cally charged by the ignition lock
during normal operation, remote control
units that are used regularly are always
charged and ready for use.
When it is no longer possible to lock the
vehicle via the remote control, the battery is
discharged. Use this remote control unit
during an extended drive; this will recharge
the battery, refer to page 34. In the event of
a system malfunction, please contact your
BMW center, which is also your source for
replacement keys.<
Page 37 of 208

Opening and closing
36
To unlock the vehiclePress button 1.
The interior lamps and the door-mounted
proximity lamps come on.
Press the button once to unlock the driver's
door only; press a second time to unlock all
remaining doors as well as the luggage
compartment lid and the fuel filler door. Convenience opening mode Maintain pressure on button 1. The
windows and the sliding/tilt sunroof open.
The sunroof will not be retracted if it is
already in its raised position. To lock and secure Press button 2. To switch off the tilt alarm sensor
and interior motion sensor Press button 2 again immediately after
locking.
For more detailed information, refer to
page 41. To switch on interior lamps and door-
mounted proximity lamps With the vehicle locked, press button 2.To switch on the interior lamps Press button 4.Panic mode By pressing and holding button 4 for more
than approx. two seconds, you can trigger
the alarm system in response to any
impending danger.
To switch off the alarm: press any of the
buttons.To open the luggage compartment
lidPress button 3.
The luggage compartment lid opens
slightly, regardless of whether it was previ-
ously locked or unlocked. During opening the luggage compart-
ment lid pivots upward and to the
rear. Ensure that adequate clearance is
available before opening.
To avoid being inadvertently locked out,
never lay the remote control unit down in
the luggage compartment. If the luggage
compartment lid was locked earlier, it will
relock automatically when closed.<
Automatic luggage compartment lid
operation*
To open the luggage compartment
lidPress button 3.
The luggage compartment lid opens all the
way, regardless of whether it was previ-
ously locked or unlocked.
To interrupt the opening process:
Press the button again while opening is in
progress.
During opening the luggage compart-
ment lid pivots upward and to the
rear. Ensure that adequate clearance is
available before opening.
To avoid being inadvertently locked out,
never lay the remote control unit down in
the luggage compartment. If the luggage
compartment lid was locked earlier, it will
relock automatically when closed.< External systems External systems or devices may cause
local interference in the functions of the
remote control.
Should the remote control unit fail to
operate owing to interference of this kind,
you can respond by using the key to unlock
your vehicle at one of the doors. For US owners only The transmitter and receiver units comply
with Section 15 of the FCC/Federal
Communication Commission regulations.
Operation is governed by the following:
FCC ID: LX8765S
LX8765E
LX8CAS
Page 39 of 208
Opening and closing
38 then pull the release handle above the
armrest
or
>pull the release handle for each door
twice: the first pull unlocks the door, and
the second one opens it.
When the low beams are switched on,
the interior door handles are also
lighted. The intensity of the lighting is
adjusted together the instrument lighting,
refer to page 97.<
To engage locks >Use the central locking button to lock all
of the doors simultaneously,
or
>press the individual safety lock buttons
down. To prevent the driver from being
inadvertently locked out of the vehicle, the
lock button on the driver's door automati-
cally extends again after a brief period if the
door remains open.
Do not use the safety lock buttons to
engage the locks for driving, as they
would then fail to disengage automatically
in the event of an accident.
Because any persons or animals left unat-
tended in a parked vehicle could lock the
doors from the inside, you should always
keep the remote control unit with you; this
precaution ensures that you will remain
able to unlock the vehicle from the outside
at all times.< Doors Soft Close Automatic* Apply gentle pressure to the door to close
it. The closing process will then be carried
out automatically.
To avoid injuries, ensure that the
door's travel path is completely free
and clear before closing.<
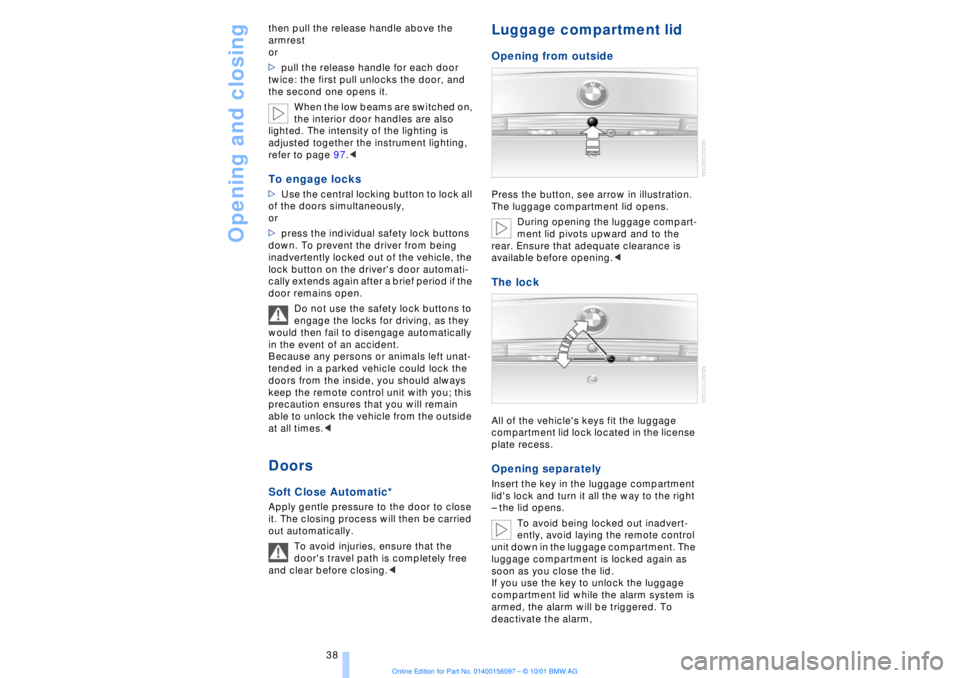
Luggage compartment lid Opening from outsidePress the button, see arrow in illustration.
The luggage compartment lid opens.
During opening the luggage compart-
ment lid pivots upward and to the
rear. Ensure that adequate clearance is
available before opening.
plate recess. Opening separately Insert the key in the luggage compartment
lid's lock and turn it all the way to the right
Ð the lid opens.
To avoid being locked out inadvert-
ently, avoid laying the remote control
unit down in the luggage compartment. The
luggage compartment is locked again as
soon as you close the lid.
If you use the key to unlock the luggage
compartment lid while the alarm system is
armed, the alarm will be triggered. To
deactivate the alarm,
Page 47 of 208
Adjustments
46 notice on the active head restraints on
page 48.
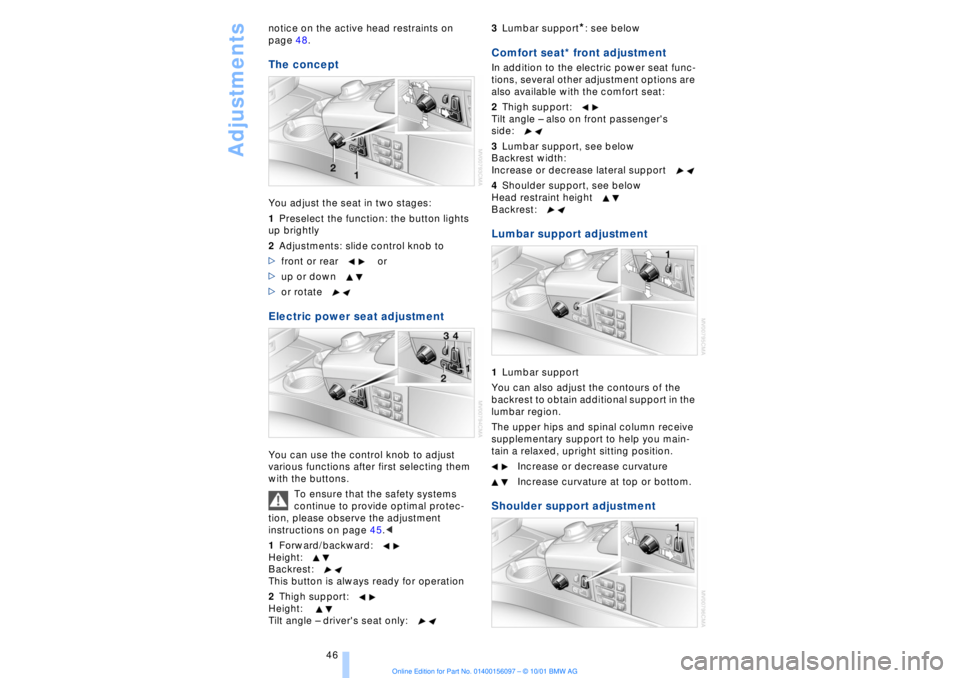
The conceptYou adjust the seat in two stages:
1Preselect the function: the button lights
up brightly
2Adjustments: slide control knob to
>front or rear or
>up or down
>or rotate Electric power seat adjustment You can use the control knob to adjust
various functions after first selecting them
with the buttons.
To ensure that the safety systems
continue to provide optimal protec-
tion, please observe the adjustment
instructions on page 45.<
1Forward/backward:
Height:
Backrest:
This button is always ready for operation
2Thigh support:
Height:
Tilt angle Ð driver's seat only:3Lumbar support
*: see below
Comfort seat* front adjustment In addition to the electric power seat func-
tions, several other adjustment options are
also available with the comfort seat:
2Thigh support:
Tilt angle Ð also on front passenger's
side:
3Lumbar support, see below
Backrest width:
Increase or decrease lateral support
4Shoulder support, see below
Head restraint height
Backrest: Lumbar support adjustment1Lumbar support
You can also adjust the contours of the
backrest to obtain additional support in the
lumbar region.
The upper hips and spinal column receive
supplementary support to help you main-
tain a relaxed, upright sitting position.
Increase or decrease curvature
Increase curvature at top or bottom. Shoulder support adjustment