2001 YAMAHA XVZ1300TF reset
[x] Cancel search: resetPage 20 of 132

INSTRUMENT AND CONTROL FUNCTIONS
3-5
3
EAU03565
Speedometer unit The speedometer unit is equipped with
the following:l
a digital speedometer (which
shows riding speed)
l
an odometer (which shows the to-
tal distance traveled)
l
two tripmeters (which show the
distance traveled since they were
last set to zero)
l
a fuel reserve tripmeter (which
shows the distance traveled on the
fuel reserve)
l
a clockOdometer and tripmeter modes
Pushing the “SELECT” button switches
the display between the odometer
mode “ODO” and the tripmeter modes
“TRIP 1” and “TRIP 2” in the following
order:
ODO
® TRIP 1
® TRIP 2
® ODO
If the fuel level warning light comes on
(see page 3-4), the odometer display
will automatically change to the fuel re-
serve tripmeter mode “TRIP F” and
start counting the distance traveled
from that point. In that case, pushing
the “SELECT” button switches the dis-
play between the various tripmeter and
odometer modes in the following order:
TRIP F
® TRIP 1
® TRIP 2
® ODO
®
TRIP FTo reset a tripmeter, select it by push-
ing the “SELECT” button, and then
push the “RESET” button. If you do not
reset the fuel reserve tripmeter manu-
ally, it will reset itself automatically and
the display will return to “TRIP 1” after
refueling and traveling 5 km.
NOTE:@ After resetting the fuel reserve tripme-
ter, the display will return to “TRIP 1”,
unless a different mode had been pre-
viously selected; in that case, the dis-
play automatically returns to the prior
mode. @Clock mode
To change the display to the clock
mode, push both the “SELECT” and
“RESET” buttons.
To change the display back to the
odometer modes, push the “SELECT”
button.
1. Speedometer
2. Odometer/tripmeters/clock
3. “RESET” button
4. “SELECT” buttonE_5jc.book Page 5 Monday, January 22, 2001 12:12 PM
Page 21 of 132
INSTRUMENT AND CONTROL FUNCTIONS
3-6
3 To set the clock:
1. Push both the “SELECT” and
“RESET” buttons for at least two
seconds.
2. When the hour digits start flashing,
push the “RESET” button to set
the hours.
3. Push the “SELECT” button, and
the minute digits will start flashing.
4. Push the “RESET” button to set
the minutes.
5. Push the “SELECT” button to start
the clock.
NOTE:@ After setting the clock, be sure to push
the “SELECT” button before turning the
key to “OFF”, otherwise the clock will
not be set. @
EAU04037
Cruise control systemThis motorcycle is equipped with a
cruise control system designed to
maintain a set traveling speed.
Activating and setting the cruise
control system
The cruise control system can only be
activated when riding in 4th or 5th gear
at speeds between 50 km/h and
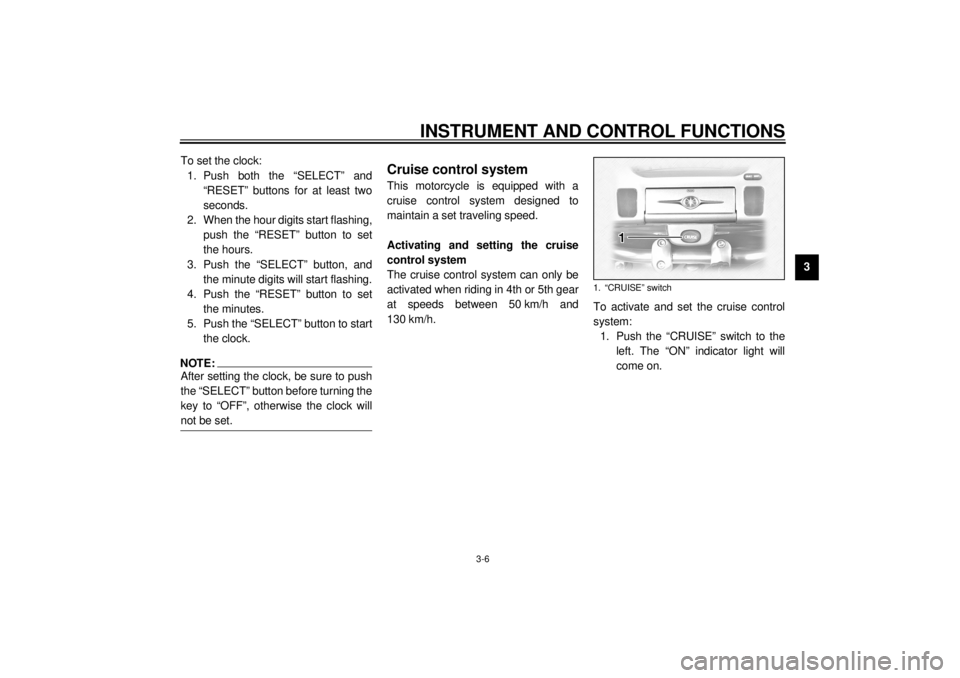
130 km/h.To activate and set the cruise control
system:
1. Push the “CRUISE” switch to the
left. The “ON” indicator light will
come on.
1. “CRUISE” switch
E_5jc.book Page 6 Monday, January 22, 2001 12:12 PM
Page 44 of 132
AUDIO SYSTEM
4-3
4
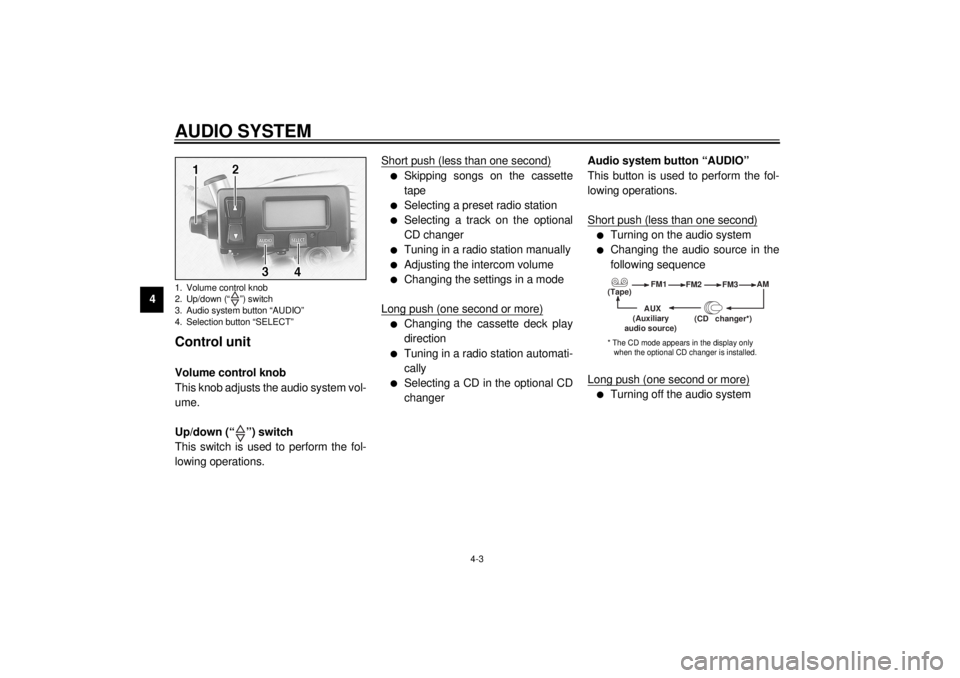
Control unit Volume control knob
This knob adjusts the audio system vol-
ume.
Up/down (“ ”) switch
This switch is used to perform the fol-
lowing operations.Short push (less than one second)
l
Skipping songs on the cassette
tape
l
Selecting a preset radio station
l
Selecting a track on the optional
CD changer
l
Tuning in a radio station manually
l
Adjusting the intercom volume
l
Changing the settings in a mode
Long push (one second or more)
l
Changing the cassette deck play
direction
l
Tuning in a radio station automati-
cally
l
Selecting a CD in the optional CD
changerAudio system button “AUDIO”
This button is used to perform the fol-
lowing operations.
Short push (less than one second)
l
Turning on the audio system
l
Changing the audio source in the
following sequence
Long push (one second or more)
l
Turning off the audio system
1. Volume control knob
2. Up/down (“ ”) switch
3. Audio system button “AUDIO”
4. Selection button “SELECT”
(Tape)FM1
FM2
FM3AM
AUX
(CD changer
*)
(Auxiliary
audio source)
* The CD mode appears in the display only
when the optional CD changer is installed.
E_5jc.book Page 3 Monday, January 22, 2001 12:12 PM
Page 45 of 132

AUDIO SYSTEM
4-4
4 Selection button “SELECT”
This button is used to perform the fol-
lowing operations.
Short push (less than two seconds)
l
Changing modes in the following
sequence
l
Programming preset radio stations
Long push (two seconds or more)
l
Selecting the preset radio station
programming mode
(Output)BASS TREBFAD
(Auto
volume)
(Intercom
volume)
Radio SP/HS
(Treble)
frequency(Fade )
1
2IC
AV
1
2This mode does not appear in the display when
the headsets are selected as the output.
This mode appears in the display only when one
of the radio frequency bands is selected as the au- dio source.
E_5jc.book Page 4 Monday, January 22, 2001 12:12 PM
Page 54 of 132
AUDIO SYSTEM
4-13
4
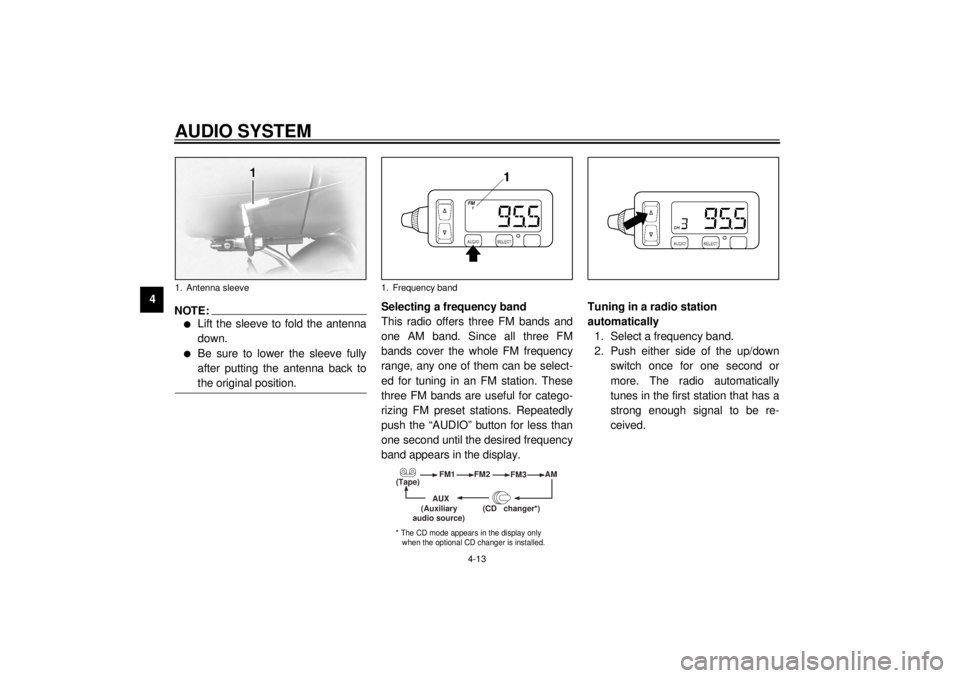
NOTE:_ l
Lift the sleeve to fold the antenna
down.
l
Be sure to lower the sleeve fully
after putting the antenna back to
the original position.
_
Selecting a frequency band
This radio offers three FM bands and
one AM band. Since all three FM
bands cover the whole FM frequency
range, any one of them can be select-
ed for tuning in an FM station. These
three FM bands are useful for catego-
rizing FM preset stations. Repeatedly
push the “AUDIO” button for less than
one second until the desired frequency
band appears in the display.Tuning in a radio station
automatically
1. Select a frequency band.
2. Push either side of the up/down
switch once for one second or
more. The radio automatically
tunes in the first station that has a
strong enough signal to be re-
ceived.
1. Antenna sleeve
1. Frequency band
(Tape)FM1
FM2
FM3AM
AUX
(CD changer
*)
(Auxiliary
audio source)
* The CD mode appears in the display only
when the optional CD changer is installed.
E_5jc.book Page 13 Monday, January 22, 2001 12:12 PM
Page 55 of 132
AUDIO SYSTEM
4-14
4
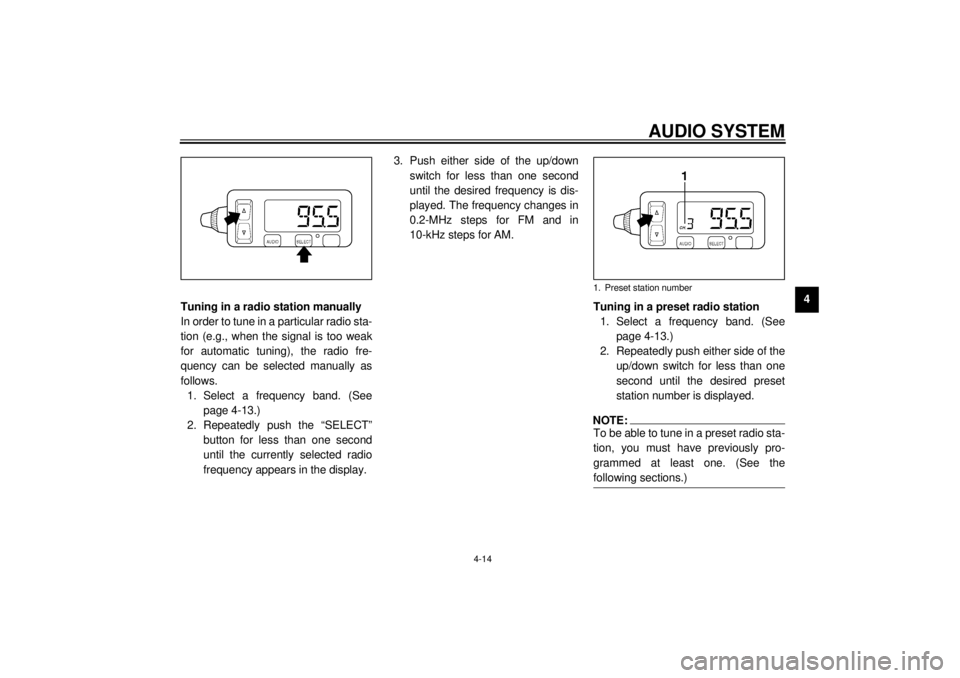
Tuning in a radio station manually
In order to tune in a particular radio sta-
tion (e.g., when the signal is too weak
for automatic tuning), the radio fre-
quency can be selected manually as
follows.
1. Select a frequency band. (See
page 4-13.)
2. Repeatedly push the “SELECT”
button for less than one second
until the currently selected radio
frequency appears in the display.3. Push either side of the up/down
switch for less than one second
until the desired frequency is dis-
played. The frequency changes in
0.2-MHz steps for FM and in
10-kHz steps for AM.
Tuning in a preset radio station
1. Select a frequency band. (See
page 4-13.)
2. Repeatedly push either side of the
up/down switch for less than one
second until the desired preset
station number is displayed.
NOTE:_ To be able to tune in a preset radio sta-
tion, you must have previously pro-
grammed at least one. (See the
following sections.) _1. Preset station number
E_5jc.book Page 14 Monday, January 22, 2001 12:12 PM
Page 56 of 132

AUDIO SYSTEM
4-15
4
Programing preset radio stations
manually
Up to six stations can be programmed
for each frequency band (FM1, FM2,
FM3, and AM) using either manual or
automatic tuning.
Using manual tuning
1. Manually tune in a radio station
that you wish to preset. (See page
4-14.)
2. Push the “SELECT” button once
for two seconds or more. The ra-
dio frequency and preset station
number “1” (to the right of “CH.”)
start flashing.3. Repeatedly push either side of the
up/down switch for less than one
second until the desired preset
number (“1” through “6”) is dis-
played.
NOTE:_ Selecting “A” will automatically pro-
gram the preset stations. See the fol-
lowing section. _4. Push the “SELECT” button once
for less than one second to store
the radio station selected in step 1
under the preset number selected
in step 3.
5. Repeat this procedure to preset
other radio stations.Using automatic tuning
1. Select a frequency band. (See
page 4-13.)
2. Push the “SELECT” button once
for two seconds or more. The ra-
dio frequency and preset station
number “1” (to the right of “CH.”)
start flashing.
3. Push either side of the up/down
switch once for one second or
more to tune in a station automati-
cally.
4. Repeatedly push either side of the
up/down switch for less than one
second until the desired preset
number (“1” through “6”) is dis-
played.
5. Push the “SELECT” button once
for less than one second to store
the radio station selected in step 3
under the preset number selected
in step 4.
6. Repeat this procedure to preset
other radio stations.
E_5jc.book Page 15 Monday, January 22, 2001 12:12 PM
Page 57 of 132
AUDIO SYSTEM
4-16
4
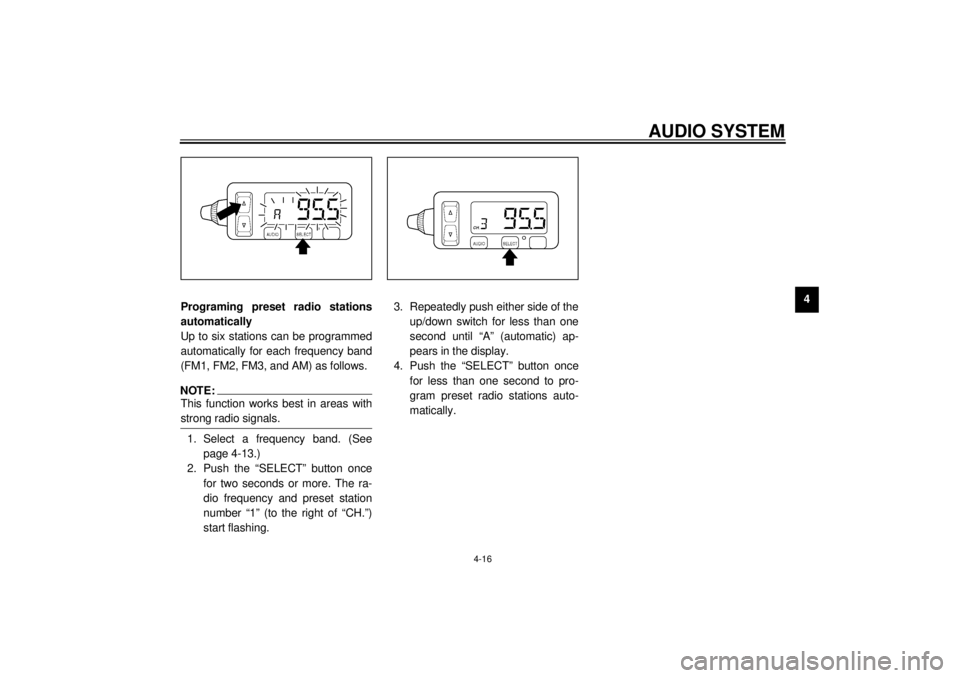
Programing preset radio stations
automatically
Up to six stations can be programmed
automatically for each frequency band
(FM1, FM2, FM3, and AM) as follows.
NOTE:_ This function works best in areas with
strong radio signals. _1. Select a frequency band. (See
page 4-13.)
2. Push the “SELECT” button once
for two seconds or more. The ra-
dio frequency and preset station
number “1” (to the right of “CH.”)
start flashing.3. Repeatedly push either side of the
up/down switch for less than one
second until “A” (automatic) ap-
pears in the display.
4. Push the “SELECT” button once
for less than one second to pro-
gram preset radio stations auto-
matically.
E_5jc.book Page 16 Monday, January 22, 2001 12:12 PM