Page 54 of 132
AUDIO SYSTEM
4-13
4
NOTE:_ l
Lift the sleeve to fold the antenna
down.
l
Be sure to lower the sleeve fully
after putting the antenna back to
the original position.
_
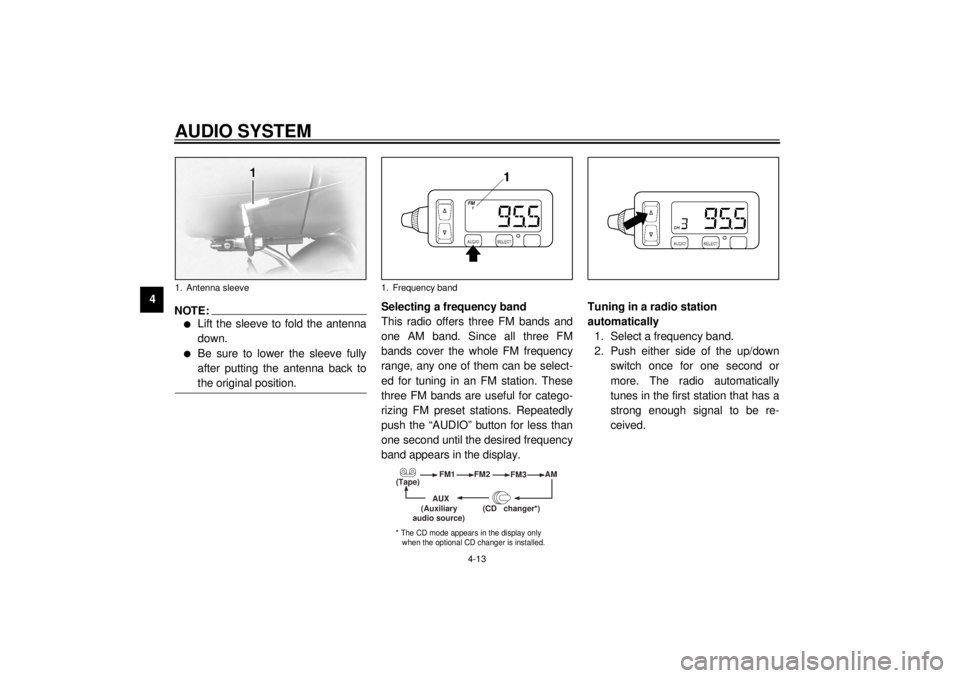
Selecting a frequency band
This radio offers three FM bands and
one AM band. Since all three FM
bands cover the whole FM frequency
range, any one of them can be select-
ed for tuning in an FM station. These
three FM bands are useful for catego-
rizing FM preset stations. Repeatedly
push the “AUDIO” button for less than
one second until the desired frequency
band appears in the display.Tuning in a radio station
automatically
1. Select a frequency band.
2. Push either side of the up/down
switch once for one second or
more. The radio automatically
tunes in the first station that has a
strong enough signal to be re-
ceived.
1. Antenna sleeve
1. Frequency band
(Tape)FM1
FM2
FM3AM
AUX
(CD changer
*)
(Auxiliary
audio source)
* The CD mode appears in the display only
when the optional CD changer is installed.
E_5jc.book Page 13 Monday, January 22, 2001 12:12 PM
Page 55 of 132
AUDIO SYSTEM
4-14
4
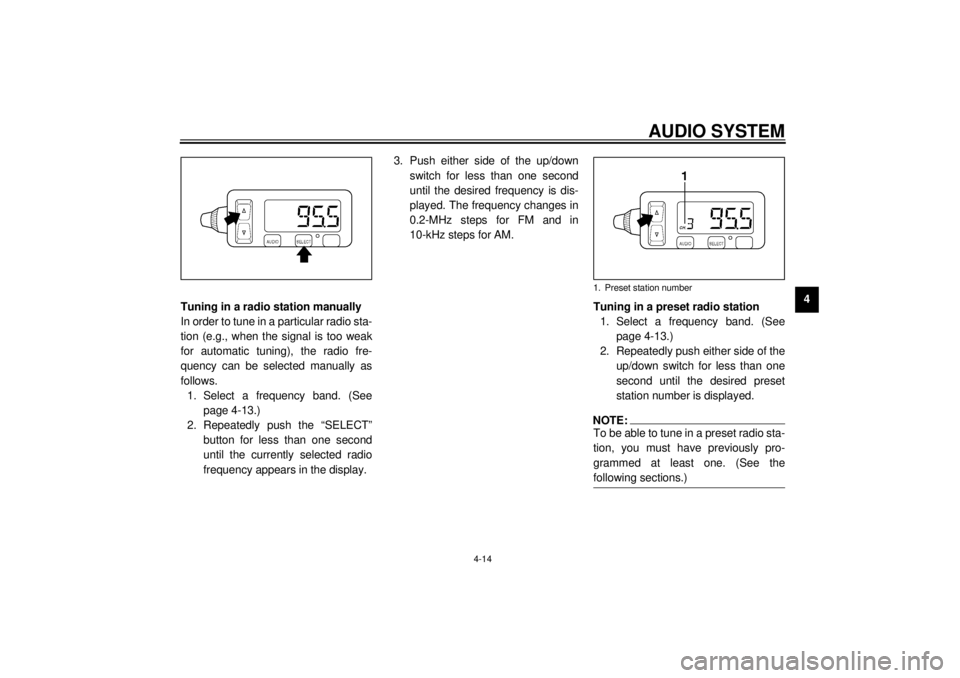
Tuning in a radio station manually
In order to tune in a particular radio sta-
tion (e.g., when the signal is too weak
for automatic tuning), the radio fre-
quency can be selected manually as
follows.
1. Select a frequency band. (See
page 4-13.)
2. Repeatedly push the “SELECT”
button for less than one second
until the currently selected radio
frequency appears in the display.3. Push either side of the up/down
switch for less than one second
until the desired frequency is dis-
played. The frequency changes in
0.2-MHz steps for FM and in
10-kHz steps for AM.
Tuning in a preset radio station
1. Select a frequency band. (See
page 4-13.)
2. Repeatedly push either side of the
up/down switch for less than one
second until the desired preset
station number is displayed.
NOTE:_ To be able to tune in a preset radio sta-
tion, you must have previously pro-
grammed at least one. (See the
following sections.) _1. Preset station number
E_5jc.book Page 14 Monday, January 22, 2001 12:12 PM
Page 56 of 132

AUDIO SYSTEM
4-15
4
Programing preset radio stations
manually
Up to six stations can be programmed
for each frequency band (FM1, FM2,
FM3, and AM) using either manual or
automatic tuning.
Using manual tuning
1. Manually tune in a radio station
that you wish to preset. (See page
4-14.)
2. Push the “SELECT” button once
for two seconds or more. The ra-
dio frequency and preset station
number “1” (to the right of “CH.”)
start flashing.3. Repeatedly push either side of the
up/down switch for less than one
second until the desired preset
number (“1” through “6”) is dis-
played.
NOTE:_ Selecting “A” will automatically pro-
gram the preset stations. See the fol-
lowing section. _4. Push the “SELECT” button once
for less than one second to store
the radio station selected in step 1
under the preset number selected
in step 3.
5. Repeat this procedure to preset
other radio stations.Using automatic tuning
1. Select a frequency band. (See
page 4-13.)
2. Push the “SELECT” button once
for two seconds or more. The ra-
dio frequency and preset station
number “1” (to the right of “CH.”)
start flashing.
3. Push either side of the up/down
switch once for one second or
more to tune in a station automati-
cally.
4. Repeatedly push either side of the
up/down switch for less than one
second until the desired preset
number (“1” through “6”) is dis-
played.
5. Push the “SELECT” button once
for less than one second to store
the radio station selected in step 3
under the preset number selected
in step 4.
6. Repeat this procedure to preset
other radio stations.
E_5jc.book Page 15 Monday, January 22, 2001 12:12 PM
Page 57 of 132
AUDIO SYSTEM
4-16
4
Programing preset radio stations
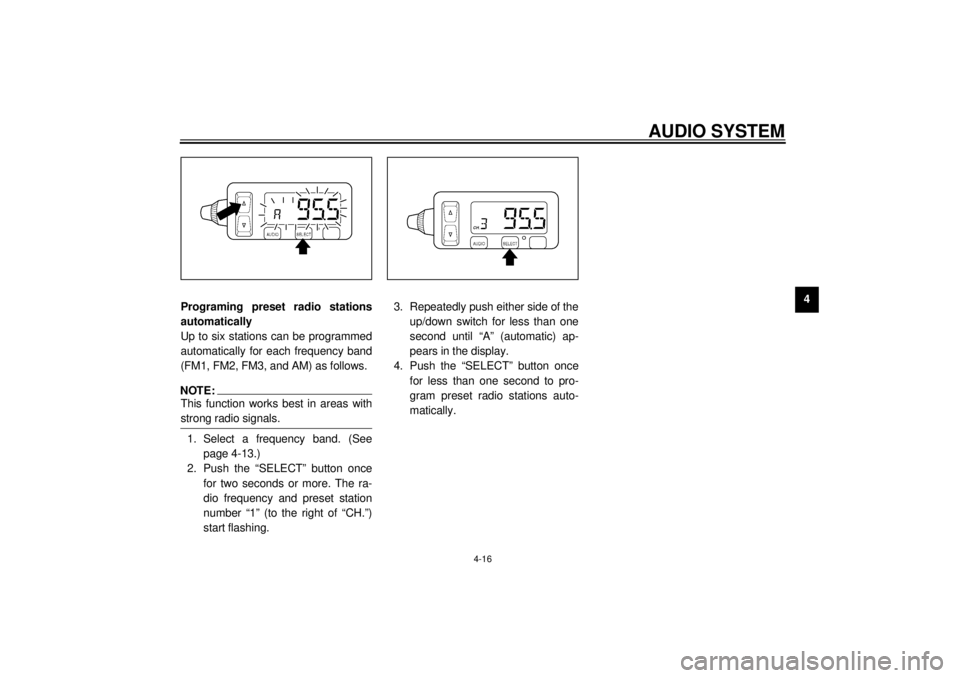
automatically
Up to six stations can be programmed
automatically for each frequency band
(FM1, FM2, FM3, and AM) as follows.
NOTE:_ This function works best in areas with
strong radio signals. _1. Select a frequency band. (See
page 4-13.)
2. Push the “SELECT” button once
for two seconds or more. The ra-
dio frequency and preset station
number “1” (to the right of “CH.”)
start flashing.3. Repeatedly push either side of the
up/down switch for less than one
second until “A” (automatic) ap-
pears in the display.
4. Push the “SELECT” button once
for less than one second to pro-
gram preset radio stations auto-
matically.
E_5jc.book Page 16 Monday, January 22, 2001 12:12 PM
Page 58 of 132
AUDIO SYSTEM
4-17
4
Optional CD changer
operation
WARNING
_ l
It is dangerous to operate the
CD changer while riding. Never
take your hands off the handle-
bars while riding.
l
Keep the volume at a low
enough level to be aware of traf-
fic conditions and ensure safe-
ty.
_An optional six-disc CD changer can be
mounted in the travel trunk. Ask a
Yamaha dealer to install the genuine
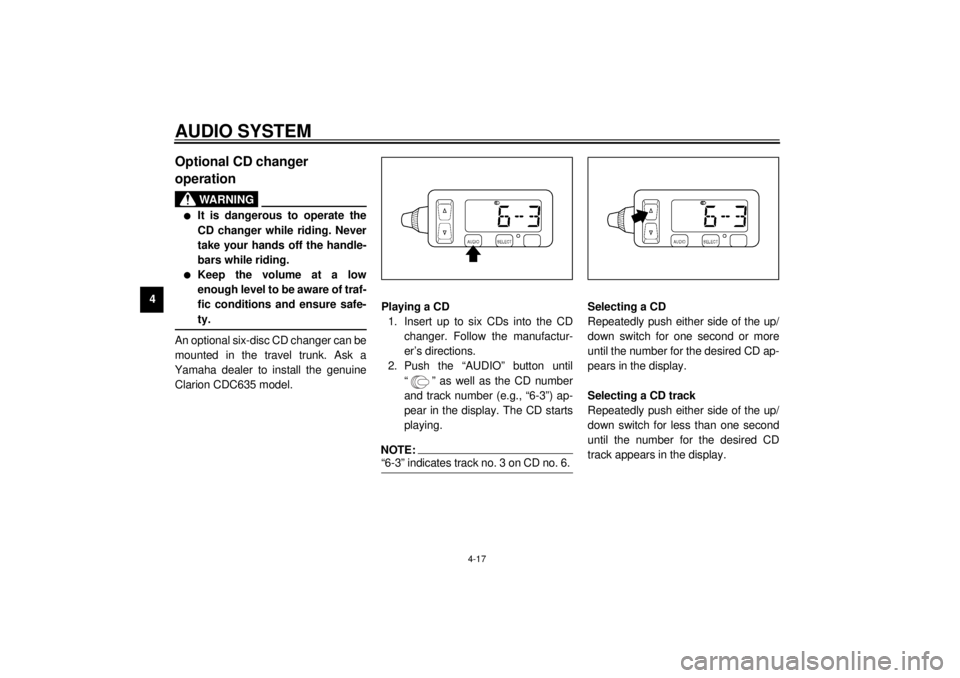
Clarion CDC635 model.Playing a CD
1. Insert up to six CDs into the CD
changer. Follow the manufactur-
er’s directions.
2. Push the “AUDIO” button until
“ ” as well as the CD number
and track number (e.g., “6-3”) ap-
pear in the display. The CD starts
playing.
NOTE:_ “6-3” indicates track no. 3 on CD no. 6. _
Selecting a CD
Repeatedly push either side of the up/
down switch for one second or more
until the number for the desired CD ap-
pears in the display.
Selecting a CD track
Repeatedly push either side of the up/
down switch for less than one second
until the number for the desired CD
track appears in the display.
E_5jc.book Page 17 Monday, January 22, 2001 12:12 PM
Page 59 of 132
AUDIO SYSTEM
4-18
4
Auxiliary audio source
operation Auxiliary audio equipment can be con-
nected to, and played through, the au-
dio system.
1. Insert the output plug of the auxil-
iary equipment into the jack locat-
ed at the right of the cassette
deck.2. Repeatedly push the “AUDIO” but-
ton for less than one second until
“AUX” appears in the display. The
auxiliary equipment can now be
played through the audio system.1. Auxiliary audio input jack
E_5jc.book Page 18 Monday, January 22, 2001 12:12 PM
Page 106 of 132

PERIODIC MAINTENANCE AND MINOR REPAIR
7-33
7To charge the battery
Have a Yamaha dealer charge the bat-
tery as soon as possible if it seems to
have discharged. Keep in mind that the
battery tends to discharge more quickly
if the motorcycle is equipped with op-
tional electrical accessories.
To store the battery
1. If the motorcycle will not be used
for more than one month, remove
the battery, fully charge it, and
then place it in a cool, dry place.
2. If the battery will be stored for
more than two months, check it at
least once a month and fully
charge it if necessary.
3. Fully charge the battery before in-
stallation.
4. After installation, make sure that
the battery leads are properly con-
nected to the battery terminals.
EC000102
CAUTION:@ l
Always keep the battery
charged. Storing a discharged
battery can cause permanent
battery damage.
l
To charge a sealed-type (MF)
battery, a special (constant-
voltage) battery charger is re-
quired. Using a conventional
battery charger will damage the
battery. If you do not have ac-
cess to a sealed-type (MF) bat-
tery charger, have a Yamaha
dealer charge your battery.
@
EAU01801*
Replacing the fuses The main fuse box is located behind
panel C. (See page 7-10 for panel re-
moval and installation procedures.)
Fuse box 1 is located behind cowling A.
(See page 7-6 for cowling removal and
installation procedures.)1. Cruise control fuse
2. Carburetor heater fuse
3. Auxiliary DC terminal fuse
4. Auxiliary DC jack fuse
5. Audio system fuse
6. Spare fuse (´ 2)
E_5jc.book Page 33 Monday, January 22, 2001 12:12 PM
Page 107 of 132
PERIODIC MAINTENANCE AND MINOR REPAIR
7-34
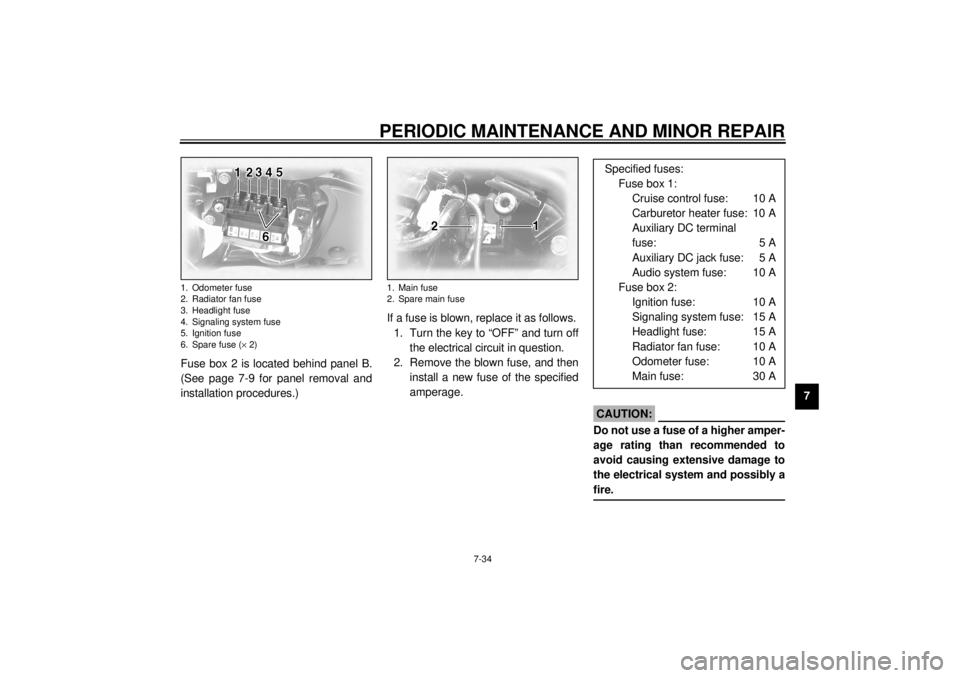
7 Fuse box 2 is located behind panel B.
(See page 7-9 for panel removal and
installation procedures.)If a fuse is blown, replace it as follows.
1. Turn the key to “OFF” and turn off
the electrical circuit in question.
2. Remove the blown fuse, and then
install a new fuse of the specified
amperage.
EC000103
CAUTION:@ Do not use a fuse of a higher amper-
age rating than recommended to
avoid causing extensive damage to
the electrical system and possibly a
fire. @
1. Odometer fuse
2. Radiator fan fuse
3. Headlight fuse
4. Signaling system fuse
5. Ignition fuse
6. Spare fuse (´ 2)
1. Main fuse
2. Spare main fuse
Specified fuses:
Fuse box 1:
Cruise control fuse: 10 A
Carburetor heater fuse: 10 A
Auxiliary DC terminal
fuse: 5 A
Auxiliary DC jack fuse: 5 A
Audio system fuse: 10 A
Fuse box 2:
Ignition fuse: 10 A
Signaling system fuse: 15 A
Headlight fuse: 15 A
Radiator fan fuse: 10 A
Odometer fuse: 10 A
Main fuse: 30 A
E_5jc.book Page 34 Monday, January 22, 2001 12:12 PM