Page 25 of 100

3-9
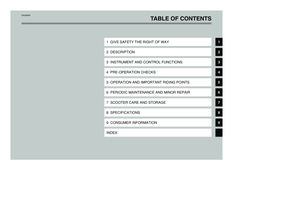
INSTRUMENT AND CONTROL FUNCTIONS
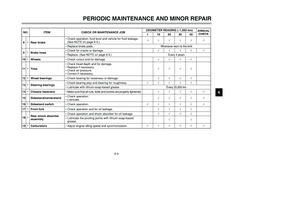
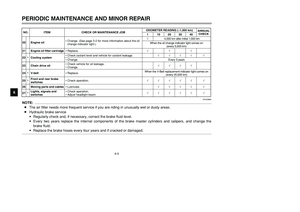
1
23
4
5
6
7
8
9
21
EAU03753
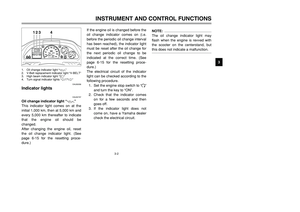
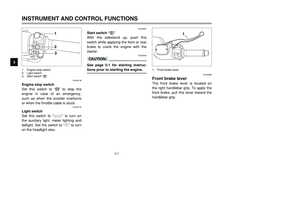
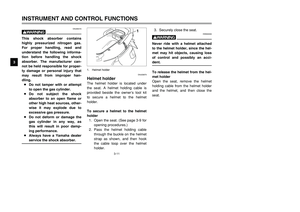
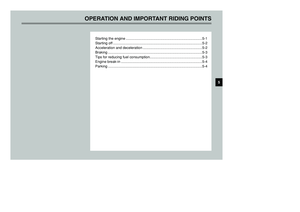
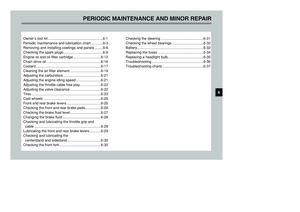
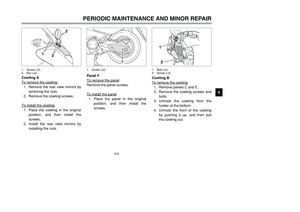
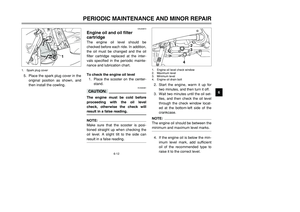
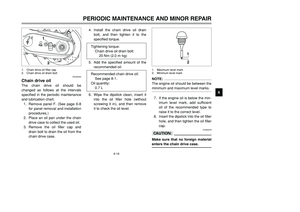
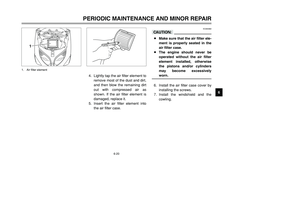
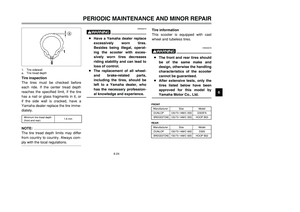
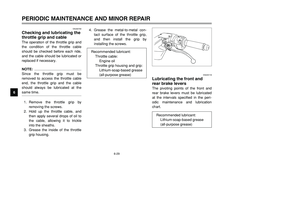
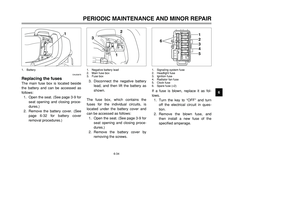
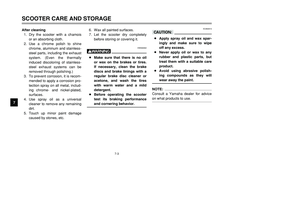
FuelMake sure that there is sufficient fuel
in the tank. Fill the fuel tank to the
bottom of the filler tube as shown.
EW000130
w8Do not overfill the fuel tank,
otherwise it may overflow
when the fuel warms up and
expands.
8Avoid spilling fuel on the hot
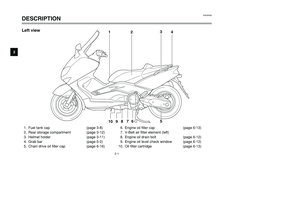
engine.1. Fuel tank filler tube
2. Fuel level
EAU00185
cCImmediately wipe off spilled fuel
with a clean, dry, soft cloth, since
fuel may deteriorate painted sur-
faces or plastic parts.
EAU03626
NOTE:
If knocking (or pinging) occurs, use
gasoline of a different brand or with a
higher octane grade.
Recommended fuel:
Regular unleaded gasoline with
a research octane number of 91
or higher
Fuel tank capacity:
14 L
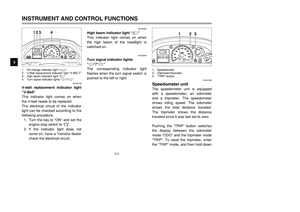
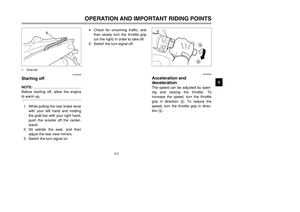
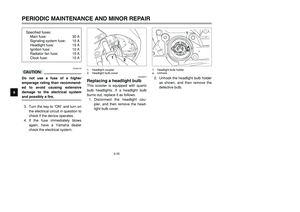
IGNITION
P
LOCK
ON
OFF
OPENPUSHPUSH
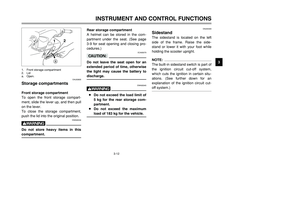
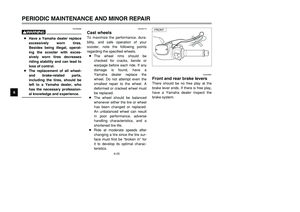
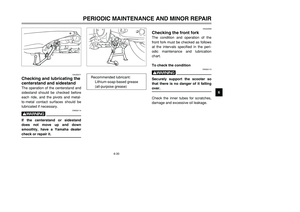
EAU03802
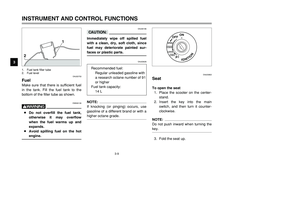
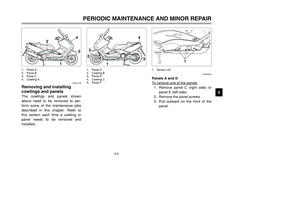
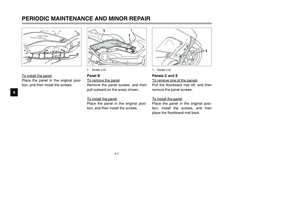
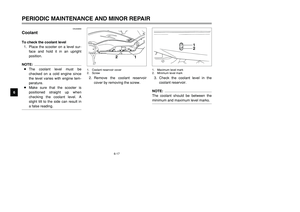
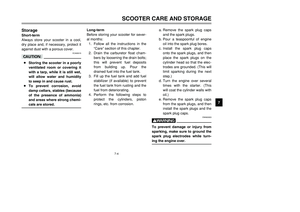
SeatTo open the seat
1. Place the scooter on the center-
stand.
2. Insert the key into the main
switch, and then turn it counter-
clockwise.NOTE:
Do not push inward when turning the
key.3. Fold the seat up.
5GJ-9-EV 5/26/01 11:04 AM Page 24
Page 26 of 100
3-10
INSTRUMENT AND CONTROL FUNCTIONS
1
23
4
5
6
7
8
9 To close the seat
1. Fold the seat down, and then
push it down to lock it in place.
2. Remove the key from the main
switch if the scooter will be left
unattended.
NOTE:
Make sure that the seat is properly
secured before riding.
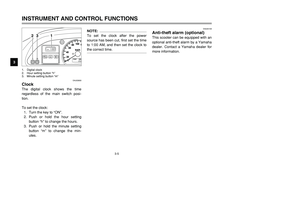
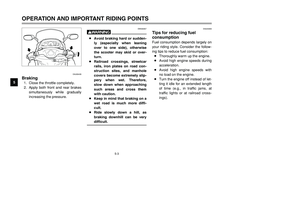
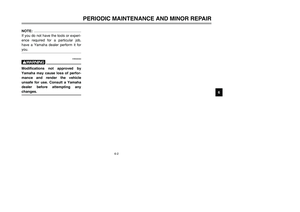
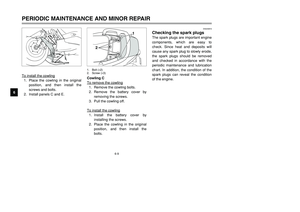
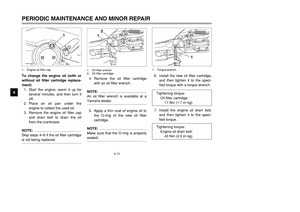
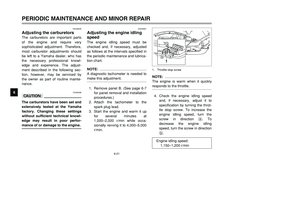
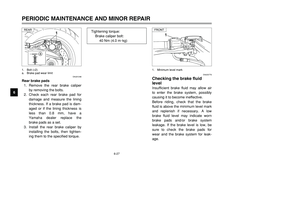
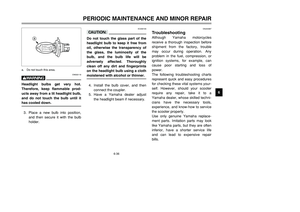
1
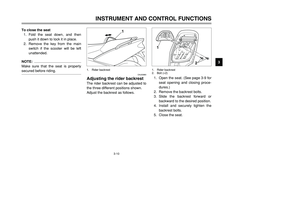
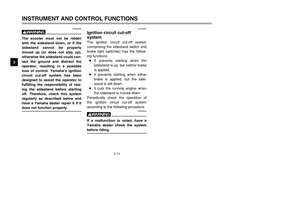
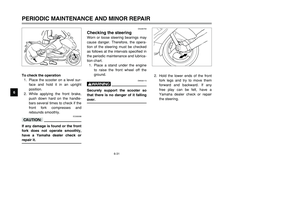
1. Rider backrest
EAU03880
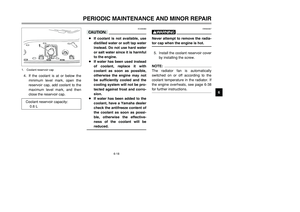
Adjusting the rider backrestThe rider backrest can be adjusted to
the three different positions shown.
Adjust the backrest as follows.
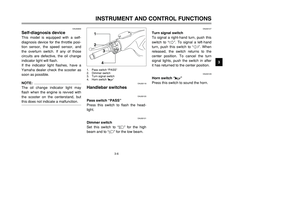
1
2
1. Rider backrest
2. Bolt (
×2)
1. Open the seat. (See page 3-9 for
seat opening and closing proce-
dures.)
2. Remove the backrest bolts.
3. Slide the backrest forward or
backward to the desired position.
4. Install and securely tighten the
backrest bolts.
5. Close the seat.
5GJ-9-EV 5/26/01 11:04 AM Page 25
Page 27 of 100

3-11
INSTRUMENT AND CONTROL FUNCTIONS
1
23
4
5
6
7
8
93. Securely close the seat.
EW000030
wNever ride with a helmet attached
to the helmet holder, since the hel-
met may hit objects, causing loss
of control and possibly an acci-
dent.To release the helmet from the hel-
met holder
Open the seat, remove the helmet
holding cable from the helmet holder
and the helmet, and then close the
seat.
EAU00315
wThis shock absorber contains
highly pressurized nitrogen gas.
For proper handling, read and
understand the following informa-
tion before handling the shock
absorber. The manufacturer can-
not be held responsible for proper-
ty damage or personal injury that
may result from improper han-
dling.
8Do not tamper with or attempt
to open the gas cylinder.
8Do not subject the shock
absorber to an open flame or
other high heat sources, other-
wise it may explode due to
excessive gas pressure.
8Do not deform or damage the
gas cylinder in any way, as
this will result in poor damp-
ing performance.
8Always have a Yamaha dealer
service the shock absorber.
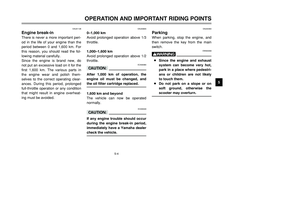
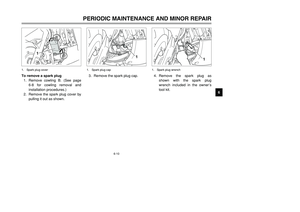
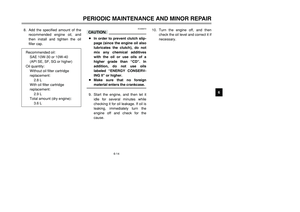
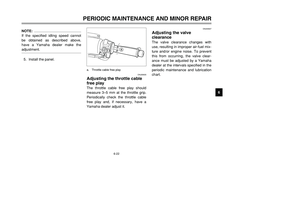
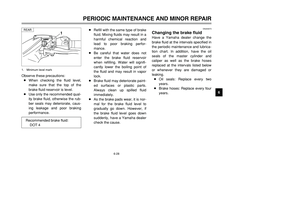
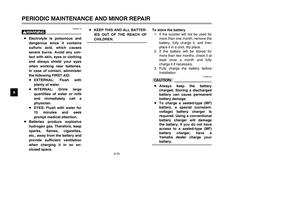
1EAU03879
Helmet holderThe helmet holder is located under
the seat. A helmet holding cable is
provided beside the owner’s tool kit
to secure a helmet to the helmet
holder.
To secure a helmet to the helmet
holder
1. Open the seat. (See page 3-9 for
opening procedures.)
2. Pass the helmet holding cable
through the buckle on the helmet
strap as shown, and then hook
the cable loop over the helmet
holder.1. Helmet holder
5GJ-9-EV 5/26/01 11:04 AM Page 26
Page 28 of 100

3-12
INSTRUMENT AND CONTROL FUNCTIONS
1
23
4
5
6
7
8
9
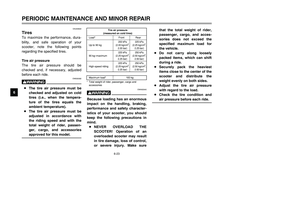
1
a2
EAU03805
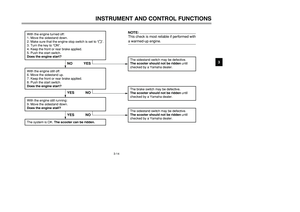
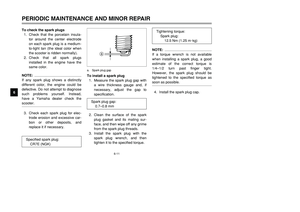
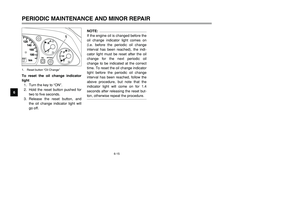
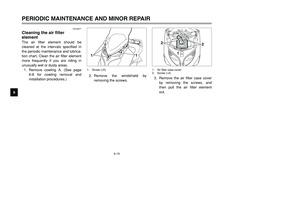
Storage compartmentsFront storage compartment
To open the front storage compart-
ment, slide the lever up, and then pull
on the lever.
To close the storage compartment,
push the lid into the original position.
EWA00034
wDo not store heavy items in this
compartment.1. Front storage compartment
2. Lid
a. Open.
Rear storage compartment
A helmet can be stored in the com-
partment under the seat. (See page
3-9 for seat opening and closing pro-
cedures.)
ECA00079
cCDo not leave the seat open for an
extended period of time, otherwise
the light may cause the battery to
discharge.
EWA00045
w8Do not exceed the load limit of
5 kg for the rear storage com-
partment.
8Do not exceed the maximum
load of 183 kg for the vehicle.
EAU00330
SidestandThe sidestand is located on the left
side of the frame. Raise the side-
stand or lower it with your foot while
holding the scooter upright.NOTE:
The built-in sidestand switch is part of
the ignition circuit cut-off system,
which cuts the ignition in certain situ-
ations. (See further down for an
explanation of the ignition circuit cut-
off system.)
5GJ-9-EV 5/26/01 11:04 AM Page 27
Page 29 of 100
,
otherwis")
3-13
INSTRUMENT AND CONTROL FUNCTIONS
1
23
4
5
6
7
8
9
EW000044
wThe scooter must not be ridden
with the sidestand down, or if the
sidestand cannot be properly
moved up (or does not stay up),
otherwise the sidestand could con-
tact the ground and distract the
operator, resulting in a possible
loss of control. Yamaha’s ignition
circuit cut-off system has been
designed to assist the operator in
fulfilling the responsibility of rais-
ing the sidestand before starting
off. Therefore, check this system
regularly as described below and
have a Yamaha dealer repair it if it
does not function properly.
EAU00337
Ignition circuit cut-off
systemThe ignition circuit cut-off system
(comprising the sidestand switch and
brake light switches) has the follow-
ing functions.
8It prevents starting when the
sidestand is up, but neither brake
is applied.
8It prevents starting when either
brake is applied, but the side-
stand is still down.
8It cuts the running engine when
the sidestand is moved down.
Periodically check the operation of
the ignition circuit cut-off system
according to the following procedure.
EW000045
wIf a malfunction is noted, have a
Yamaha dealer check the system
before riding.
5GJ-9-EV 5/26/01 11:04 AM Page 28
Page 30 of 100

3-14
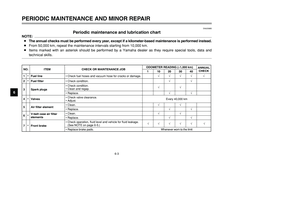
The sidestand switch may be defective.The scooter should not be ridden until
checked by a Yamaha dealer.
YES NO
With the engine turned off:
1. Move the sidestand down.
2. Make sure that the engine stop switch is set to “#”.
3. Turn the key to “ON”.
4. Keep the front or rear brake applied.
5. Push the start switch.
Does the engine start?
The brake switch may be defective.
The scooter should not be ridden until
checked by a Yamaha dealer.
With the engine still off:
6. Move the sidestand up.
7. Keep the front or rear brake applied.
8. Push the start switch.
Does the engine start?With the engine still running:
9. Move the sidestand down.
Does the engine stall?
The sidestand switch may be defective.
The scooter should not be ridden until
checked by a Yamaha dealer.NOTE:This check is most reliable if performed with
a warmed-up engine.
YES NO
The system is OK. The scooter can be ridden.
YES NO
INSTRUMENT AND CONTROL FUNCTIONS
1
23
4
5
6
7
8
9
5GJ-9-EV 5/26/01 11:04 AM Page 29
Page 31 of 100
1
2
3
4
5
6
7
8
95GJ-9-EV 5/26/01 11:04 AM Page 30
Page 32 of 100
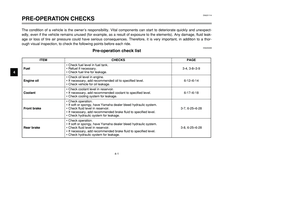
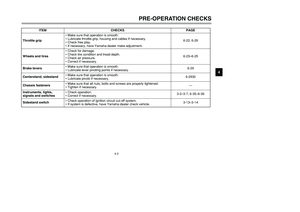
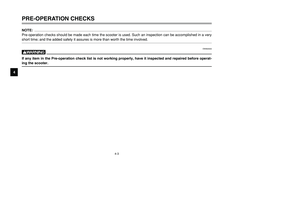
PRE-OPERATION CHECKS
Pre-operation check list ......................................................................4-1
4
5GJ-9-EV 5/26/01 11:04 AM Page 31