Page 17 of 100

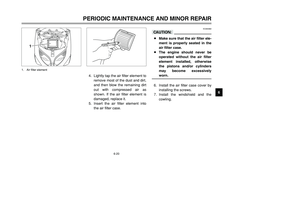
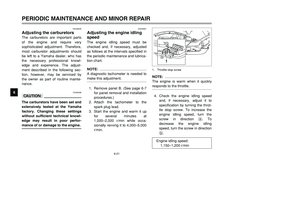
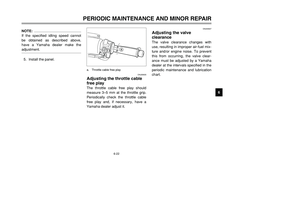
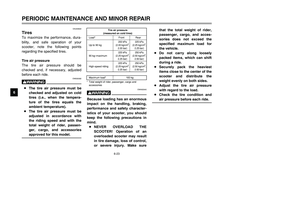
3-1
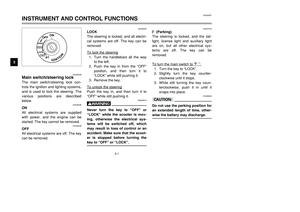
IGNITION
P
LOCK
ON
OFF
OPENPUSHPUSH
EAU00029
Main switch/steering lockThe main switch/steering lock con-
trols the ignition and lighting systems,
and is used to lock the steering. The
various positions are described
below.
EAU00036
ON
All electrical systems are supplied
with power, and the engine can be
started. The key cannot be removed.
EAU00038
OFF
All electrical systems are off. The key
can be removed.
EAU00040
LOCK
The steering is locked, and all electri-
cal systems are off. The key can be
removed.
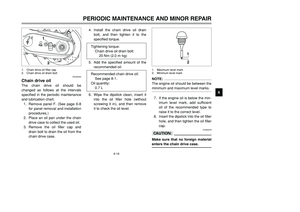
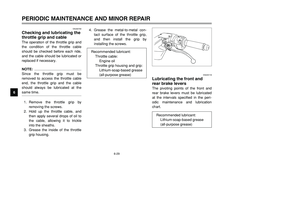
To lock the steering1. Turn the handlebars all the way
to the left.
2. Push the key in from the “OFF”
position, and then turn it to
“LOCK” while still pushing it.
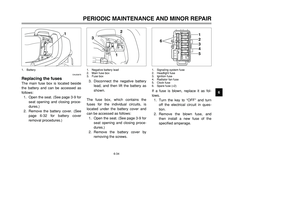
3. Remove the key.
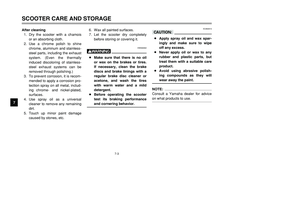
To unlock the steeringPush the key in, and then turn it to
“OFF” while still pushing it.
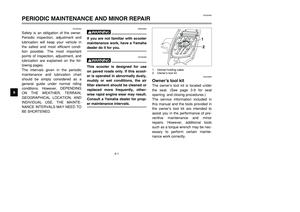
EW000016
wNever turn the key to “OFF” or
“LOCK” while the scooter is mov-
ing, otherwise the electrical sys-
tems will be switched off, which
may result in loss of control or an
accident. Make sure that the scoot-
er is stopped before turning the
key to “OFF” or “LOCK”.
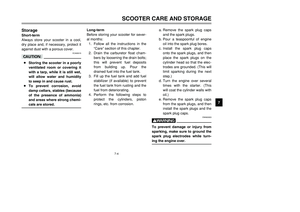
EAU03733
.
(Parking)
The steering is locked, and the tail-
light, license light and auxiliary light
are on, but all other electrical sys-
tems are off. The key can be
removed.
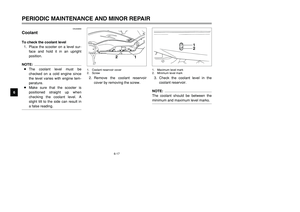
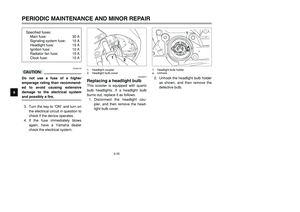
To turn the main switch to “
.”
:
1. Turn the key to “LOCK”.
2. Slightly turn the key counter-
clockwise until it stops.
3. While still turning the key coun-
terclockwise, push it in until it
snaps into place.
ECA00043
cCDo not use the parking position for
an extended length of time, other-
wise the battery may discharge.
EAU00027
INSTRUMENT AND CONTROL FUNCTIONS
1
23
4
5
6
7
8
95GJ-9-EV 5/26/01 11:04 AM Page 16
Page 18 of 100

3-2
123
4
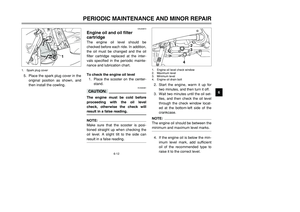
EAU00056
Indicator lights
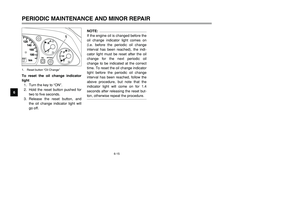
EAU03797
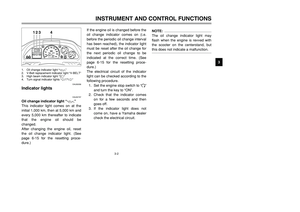
Oil change indicator light “
7
”
This indicator light comes on at the
initial 1,000 km, then at 5,000 km and
every 5,000 km thereafter to indicate
that the engine oil should be
changed.
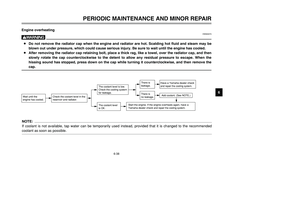
After changing the engine oil, reset
the oil change indicator light. (See
page 6-15 for the resetting proce-
dure.)If the engine oil is changed before the
oil change indicator comes on (i.e.
before the periodic oil change interval
has been reached), the indicator light
must be reset after the oil change for
the next periodic oil change to be
indicated at the correct time. (See
page 6-15 for the resetting proce-
dure.)
The electrical circuit of the indicator
light can be checked according to the
following procedure.
1. Set the engine stop switch to “#”
and turn the key to “ON”.
2. Check that the indicator comes
on for a few seconds and then
goes off.
3. If the indicator light does not
come on, have a Yamaha dealer
check the electrical circuit.
1. Oil change indicator light “
7
”
2. V-Belt replacement indicator light “V-BELT”
3. High beam indicator light “&”
4. Turn signal indicator lights “4”/“6”
INSTRUMENT AND CONTROL FUNCTIONS
1
23
4
5
6
7
8
9
NOTE:
The oil change indicator light may
flash when the engine is revved with
the scooter on the centerstand, but
this does not indicate a malfunction.
5GJ-9-EV 5/26/01 11:04 AM Page 17
Page 19 of 100

3-3
EAU00063
High beam indicator light “&”
This indicator light comes on when
the high beam of the headlight is
switched on.
EAU03299
Turn signal indicator lights
“4”/“6”
The corresponding indicator light
flashes when the turn signal switch is
pushed to the left or right.
EAU01586
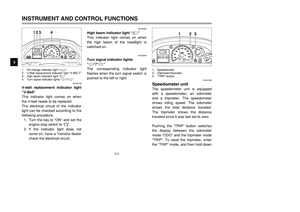
Speedometer unit The speedometer unit is equipped
with a speedometer, an odometer
and a tripmeter. The speedometer
shows riding speed. The odometer
shows the total distance traveled.
The tripmeter shows the distance
traveled since it was last set to zero.
Pushing the “TRIP” button switches
the display between the odometer
mode “ODO” and the tripmeter mode
“TRIP”. To reset the tripmeter, enter
the “TRIP” mode, and then hold down
INSTRUMENT AND CONTROL FUNCTIONS
1
23
4
5
6
7
8
9
123
1. Speedometer
2. Odometer/tripmeter
3.“TRIP” button
123
4
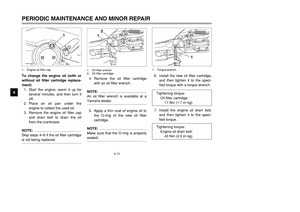
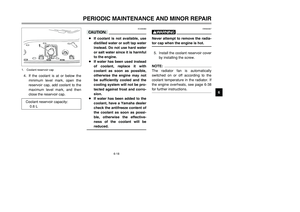
EAU03798
V-belt replacement indicator light
“V-Belt”
This indicator light comes on when
the V-belt needs to be replaced.
The electrical circuit of the indicator
light can be checked according to the
following procedure.
1. Turn the key to “ON” and set the
engine stop switch to “#”.
2. If the indicator light does not
come on, have a Yamaha dealer
check the electrical circuit.1. Oil change indicator light “
7
”
2. V-Belt replacement indicator light “V-BELT”
3. High beam indicator light “&”
4. Turn signal indicator lights “4”/“6”
5GJ-9-EV 5/26/01 11:04 AM Page 18
Page 20 of 100

3-4
INSTRUMENT AND CONTROL FUNCTIONS
1
23
4
5
6
7
8
9 the “TRIP” button for at least one
second. The tripmeter can be used
together with the fuel gauge to esti-
mate the distance that can be trav-
eled with a full tank of fuel. This infor-
mation will enable you to plan future
fuel stops.
12
EAU02950
Fuel gaugeThe fuel gauge indicates the amount
of fuel in the fuel tank. The needle
moves towards “E” (Empty) as the
fuel level decreases. When the nee-
dle reaches the red line, refuel as
soon as possible.NOTE:
Do not allow the fuel tank to empty
itself completely.1. Fuel gauge
2. Red line
2
1
1. Coolant temperature gauge
2. Red mark
EAU03124
Coolant temperature gaugeThis gauge indicates the coolant tem-
perature when the main switch is on.
The engine operating temperature
will vary with changes in weather and
engine load. If the needle points to
the red mark, stop your scooter and
let the engine cool. (See page
6-38 for details.)
EC000002
cCDo not operate the engine if it is
overheated.
5GJ-9-EV 5/26/01 11:04 AM Page 19
Page 21 of 100
3-5
INSTRUMENT AND CONTROL FUNCTIONS
1
23
4
5
6
7
8
9
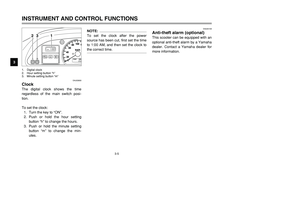
1 23
1. Digital clock
2. Hour setting button “h”
3. Minute setting button “m”
EAU03800
ClockThe digital clock shows the time
regardless of the main switch posi-
tion.
To set the clock:
1. Turn the key to “ON”.
2. Push or hold the hour setting
button “h” to change the hours.
3. Push or hold the minute setting
button “m” to change the min-
utes.
NOTE:
To set the clock after the power
source has been cut, first set the time
to 1:00 AM, and then set the clock to
the correct time.
EAU00109
Anti-theft alarm (optional)This scooter can be equipped with an
optional anti-theft alarm by a Yamaha
dealer. Contact a Yamaha dealer for
more information.
5GJ-9-EV 5/26/01 11:04 AM Page 20
Page 22 of 100

3-6
INSTRUMENT AND CONTROL FUNCTIONS
1
23
4
5
6
7
8
9
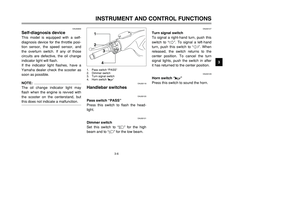
12
34
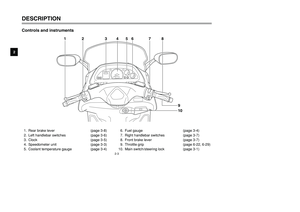
EAU00118
Handlebar switches
EAU00120
Pass switch “PASS”
Press this switch to flash the head-
light.
EAU00121
Dimmer switch
Set this switch to “&” for the high
beam and to “%” for the low beam.1. Pass switch “PASS”
2. Dimmer switch
3. Turn signal switch
4. Horn switch “*”
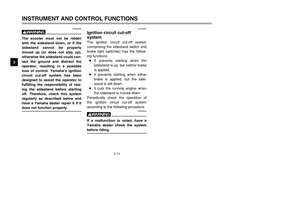
EAU03840
Self-diagnosis deviceThis model is equipped with a self-
diagnosis device for the throttle posi-
tion sensor, the speed sensor, and
the overturn switch. If any of those
circuits are defective, the oil change
indicator light will flash.
If the indicator light flashes, have a
Yamaha dealer check the scooter as
soon as possible.NOTE:
The oil change indicator light may
flash when the engine is revved with
the scooter on the centerstand, but
this does not indicate a malfunction.
EAU00127
Turn signal switch
To signal a right-hand turn, push this
switch to “6”. To signal a left-hand
turn, push this switch to “4”. When
released, the switch returns to the
center position. To cancel the turn
signal lights, push the switch in after
it has returned to the center position.
EAU00129
Horn switch “*”
Press this switch to sound the horn.
5GJ-9-EV 5/26/01 11:04 AM Page 21
Page 23 of 100
3-7
INSTRUMENT AND CONTROL FUNCTIONS
1
23
4
5
6
7
8
9
123
EAU00138
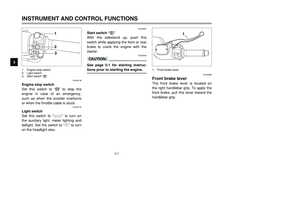
Engine stop switch
Set this switch to “$” to stop the
engine in case of an emergency,
such as when the scooter overturns
or when the throttle cable is stuck.
EAU00134
Light switch
Set this switch to “
'
” to turn on
the auxiliary light, meter lighting and
taillight. Set the switch to “:” to turn
on the headlight also.
1. Engine stop switch
2. Light switch
3. Start switch “,”
EAU03801
Start switch “,”
With the sidestand up, push this
switch while applying the front or rear
brake to crank the engine with the
starter.
EC000005
cCSee page 5-1 for starting instruc-
tions prior to starting the engine.
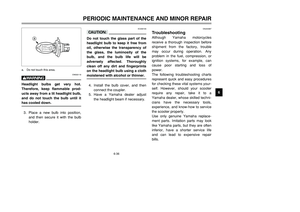
1
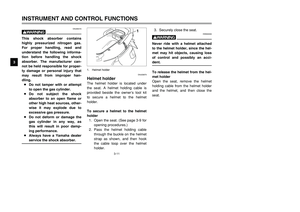
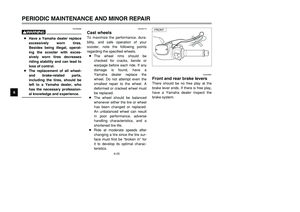
1. Front brake lever
EAU03882
Front brake leverThe front brake lever is located on
the right handlebar grip. To apply the
front brake, pull this lever toward the
handlebar grip.
5GJ-9-EV 5/26/01 11:04 AM Page 22
Page 24 of 100
3-8
INSTRUMENT AND CONTROL FUNCTIONS
1
23
4
5
6
7
8
9
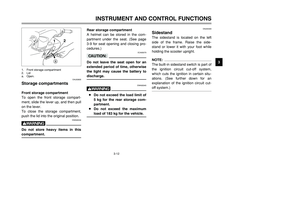
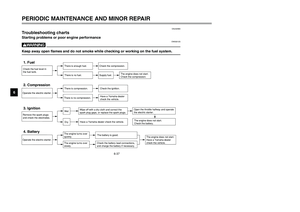
1
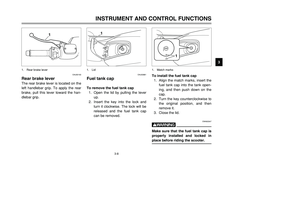
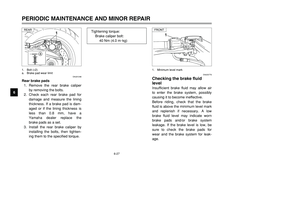
1. Rear brake lever
EAU00163
Rear brake leverThe rear brake lever is located on the
left handlebar grip. To apply the rear
brake, pull this lever toward the han-
dlebar grip.
1
EAU03881
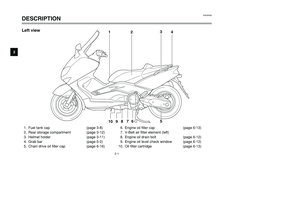
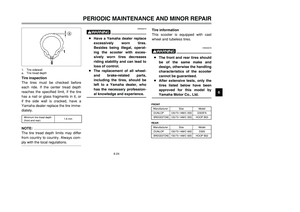
Fuel tank capTo remove the fuel tank cap
1. Open the lid by pulling the lever
up.
2. Insert the key into the lock and
turn it clockwise. The lock will be
released and the fuel tank cap
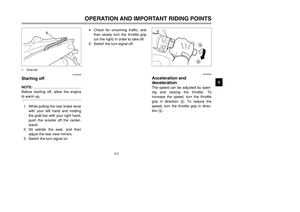
can be removed.1. Lid
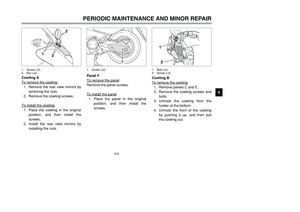
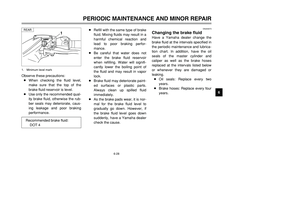
To install the fuel tank cap
1. Align the match marks, insert the
fuel tank cap into the tank open-
ing, and then push down on the
cap.
2. Turn the key counterclockwise to
the original position, and then
remove it.
3. Close the lid.
EWA00047
wMake sure that the fuel tank cap is
properly installed and locked in
place before riding the scooter.
1
1. Match marks
5GJ-9-EV 5/26/01 11:04 AM Page 23