Page 2684 of 4323
A09152
Connect
± ENGINE MECHANICALENGINE UNIT (4WD)
EM±97
2676 Author�: Date�:
2005 SEQUOIA (RM1146U)
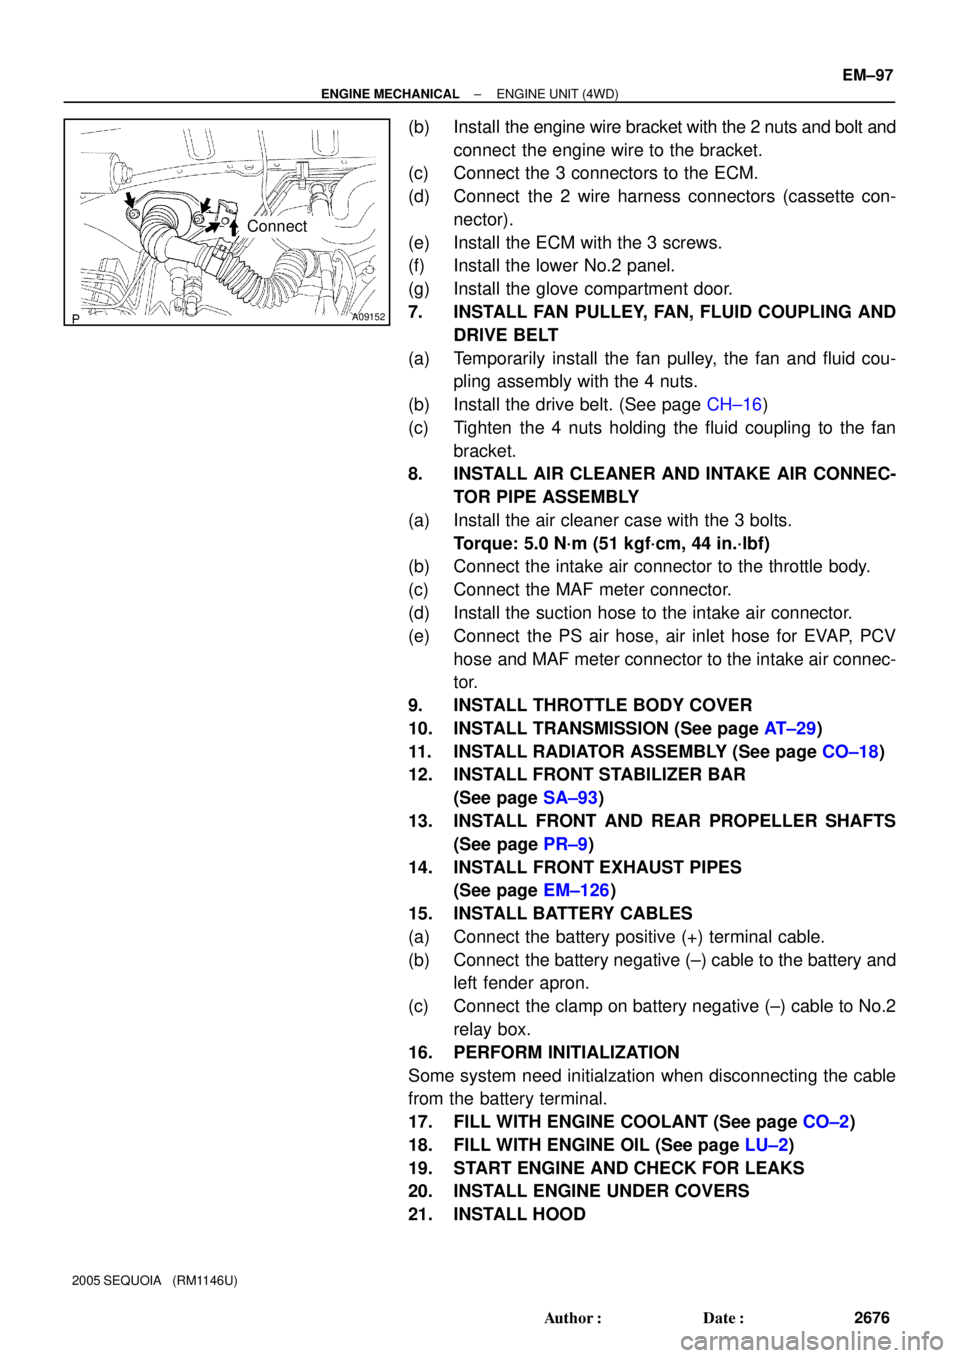
(b) Install the engine wire bracket with the 2 nuts and bolt and
connect the engine wire to the bracket.
(c) Connect the 3 connectors to the ECM.
(d) Connect the 2 wire harness connectors (cassette con-
nector).
(e) Install the ECM with the 3 screws.
(f) Install the lower No.2 panel.
(g) Install the glove compartment door.
7. INSTALL FAN PULLEY, FAN, FLUID COUPLING AND
DRIVE BELT
(a) Temporarily install the fan pulley, the fan and fluid cou-
pling assembly with the 4 nuts.
(b) Install the drive belt. (See page CH±16)
(c) Tighten the 4 nuts holding the fluid coupling to the fan
bracket.
8. INSTALL AIR CLEANER AND INTAKE AIR CONNEC-
TOR PIPE ASSEMBLY
(a) Install the air cleaner case with the 3 bolts.
Torque: 5.0 N´m (51 kgf´cm, 44 in.´lbf)
(b) Connect the intake air connector to the throttle body.
(c) Connect the MAF meter connector.
(d) Install the suction hose to the intake air connector.
(e) Connect the PS air hose, air inlet hose for EVAP, PCV
hose and MAF meter connector to the intake air connec-
tor.
9. INSTALL THROTTLE BODY COVER
10. INSTALL TRANSMISSION (See page AT±29)
11. INSTALL RADIATOR ASSEMBLY (See page CO±18)
12. INSTALL FRONT STABILIZER BAR
(See page SA±93)
13. INSTALL FRONT AND REAR PROPELLER SHAFTS
(See page PR±9)
14. INSTALL FRONT EXHAUST PIPES
(See page EM±126)
15. INSTALL BATTERY CABLES
(a) Connect the battery positive (+) terminal cable.
(b) Connect the battery negative (±) cable to the battery and
left fender apron.
(c) Connect the clamp on battery negative (±) cable to No.2
relay box.
16. PERFORM INITIALIZATION
Some system need initialzation when disconnecting the cable
from the battery terminal.
17. FILL WITH ENGINE COOLANT (See page CO±2)
18. FILL WITH ENGINE OIL (See page LU±2)
19. START ENGINE AND CHECK FOR LEAKS
20. INSTALL ENGINE UNDER COVERS
21. INSTALL HOOD
Page 2685 of 4323
EM±98
± ENGINE MECHANICALENGINE UNIT (4WD)
2677 Author�: Date�:
2005 SEQUOIA (RM1146U)
22. PERFORM ROAD TEST
Check for abnormal noise, shock, slippage, correct shift points
and smooth operation.
23. RECHECK ENGINE COOLANT AND OIL LEVELS
Page 2689 of 4323
A05086
Pry
A05100
A05104
A05105
EM±102
± ENGINE MECHANICALCYLINDER BLOCK
2681 Author�: Date�:
2005 SEQUOIA (RM1146U)
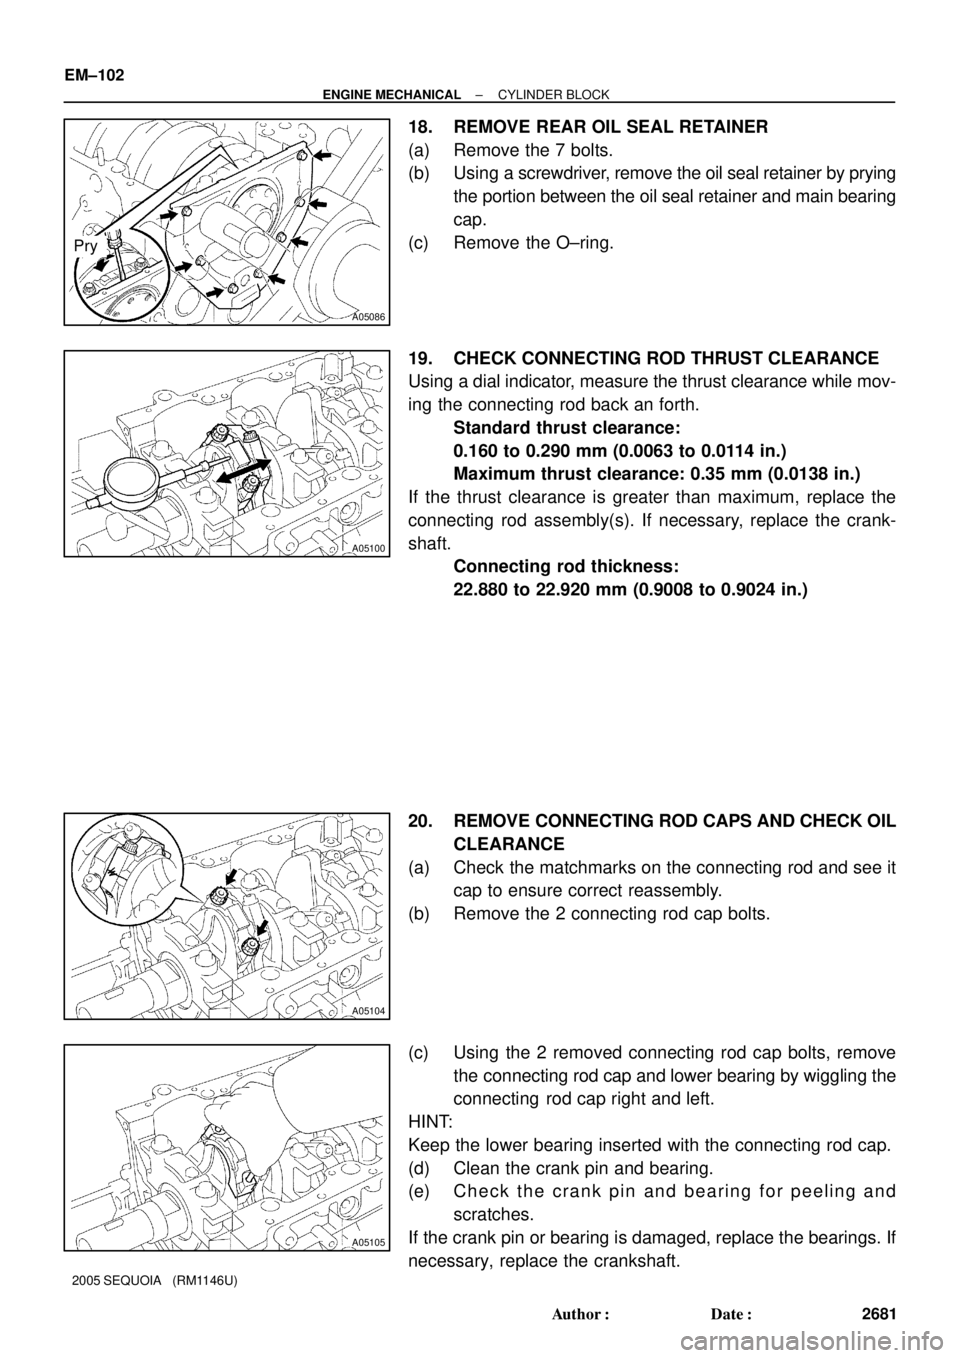
18. REMOVE REAR OIL SEAL RETAINER
(a) Remove the 7 bolts.
(b) Using a screwdriver, remove the oil seal retainer by prying
the portion between the oil seal retainer and main bearing
cap.
(c) Remove the O±ring.
19. CHECK CONNECTING ROD THRUST CLEARANCE
Using a dial indicator, measure the thrust clearance while mov-
ing the connecting rod back an forth.
Standard thrust clearance:
0.160 to 0.290 mm (0.0063 to 0.0114 in.)
Maximum thrust clearance: 0.35 mm (0.0138 in.)
If the thrust clearance is greater than maximum, replace the
connecting rod assembly(s). If necessary, replace the crank-
shaft.
Connecting rod thickness:
22.880 to 22.920 mm (0.9008 to 0.9024 in.)
20. REMOVE CONNECTING ROD CAPS AND CHECK OIL
CLEARANCE
(a) Check the matchmarks on the connecting rod and see it
cap to ensure correct reassembly.
(b) Remove the 2 connecting rod cap bolts.
(c) Using the 2 removed connecting rod cap bolts, remove
the connecting rod cap and lower bearing by wiggling the
connecting rod cap right and left.
HINT:
Keep the lower bearing inserted with the connecting rod cap.
(d) Clean the crank pin and bearing.
(e) Check the crank pin and bearing for peeling and
scratches.
If the crank pin or bearing is damaged, replace the bearings. If
necessary, replace the crankshaft.
Page 2691 of 4323
A04852
Ridge
Reamer
A05096
A05095
1
2
4
8
6
3
5
97
10 EM±104
± ENGINE MECHANICALCYLINDER BLOCK
2683 Author�: Date�:
2005 SEQUOIA (RM1146U)
Reference
Connecting rod big end inside diameter:
Mark º1º55.000 to 55.006 mm (2.1654 to 2.1656 in.)
Mark º2º55.006 to 55.012 mm (2.1656 to 2.1658 in.)
Mark º3º55.012 to 55.018 mm (2.1658 to 2.1661 in.)
Mark º4º55.018 to 55.024 mm (2.1661 to 2.1663 in.)
Crankshaft crank pin diameter:
Mark º1º51.994 to 52.000 mm (2.0470 to 2.0472 in.)
Mark º2º51.988 to 51.994 mm (2.0468 to 2.0470 in.)
Mark º3º51.982 to 51.988 mm (2.0465 to 2.0468 in.)
Standard sized bearing center wall thickness:
Mark º2º1.487 to 1.490 mm (0.0585 to 0.0587 in.)
Mark º3º1.490 to 1.493 mm (0.0587 to 0.0588 in.)
Mark º4º1.493 to 1.496 mm (0.0588 to 0.0589 in.)
Mark º5º1.496 to 1.499 mm (0.0589 to 0.0590 in.)
Mark º6º1.499 to 1.502 mm (0.0590 to 0.0591 in.)
Mark º7º1.502 to 1.505 mm (0.0591 to 0.0593 in.)
(j) Completely remove the Plastigage.
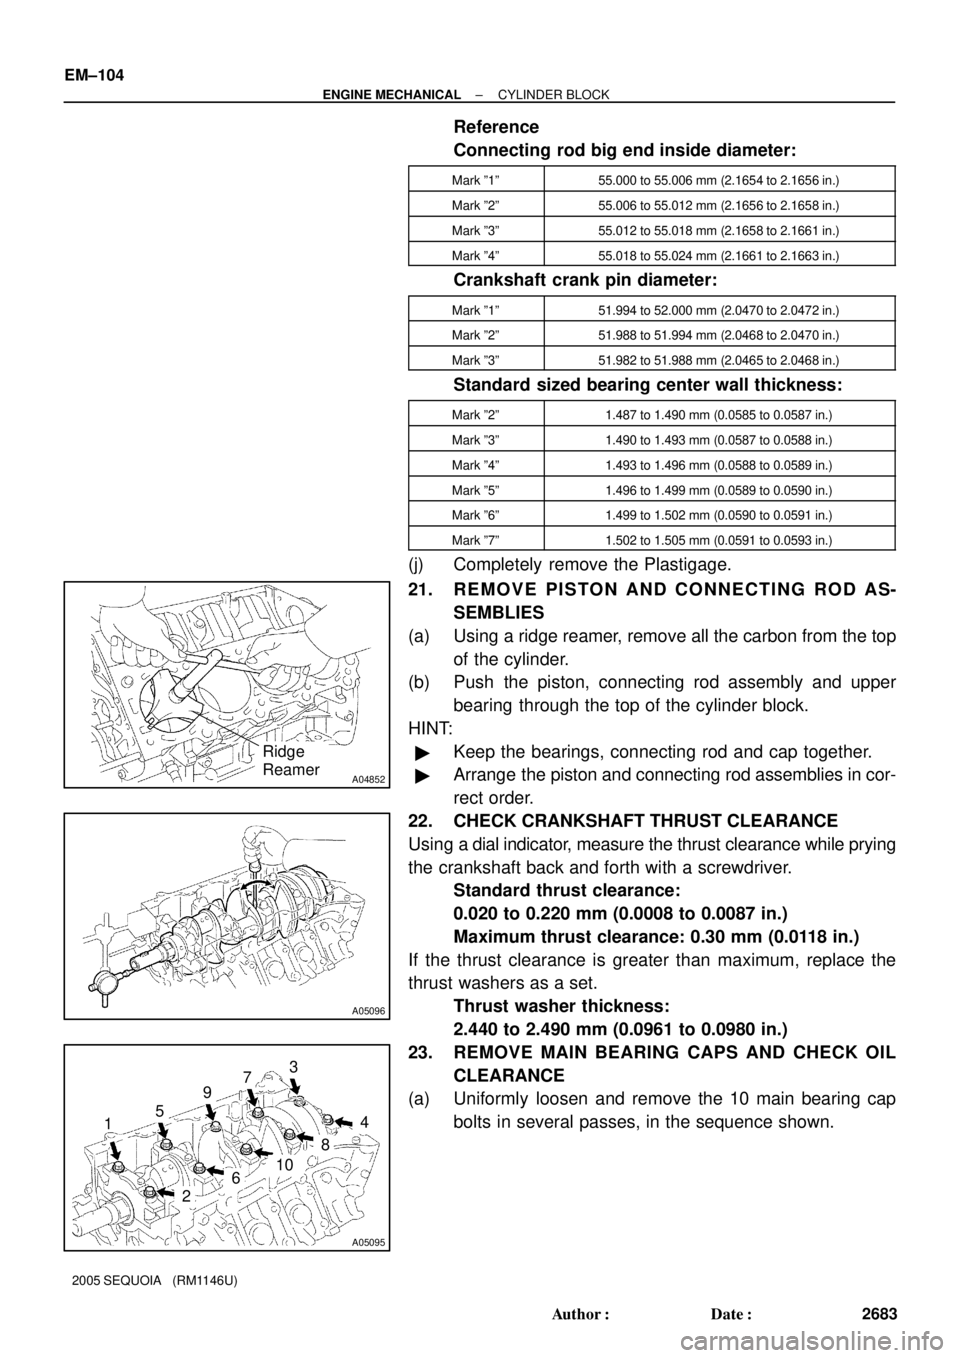
21. REMOVE PISTON AND CONNECTING ROD AS-
SEMBLIES
(a) Using a ridge reamer, remove all the carbon from the top
of the cylinder.
(b) Push the piston, connecting rod assembly and upper
bearing through the top of the cylinder block.
HINT:
�Keep the bearings, connecting rod and cap together.
�Arrange the piston and connecting rod assemblies in cor-
rect order.
22. CHECK CRANKSHAFT THRUST CLEARANCE
Using a dial indicator, measure the thrust clearance while prying
the crankshaft back and forth with a screwdriver.
Standard thrust clearance:
0.020 to 0.220 mm (0.0008 to 0.0087 in.)
Maximum thrust clearance: 0.30 mm (0.0118 in.)
If the thrust clearance is greater than maximum, replace the
thrust washers as a set.
Thrust washer thickness:
2.440 to 2.490 mm (0.0961 to 0.0980 in.)
23. REMOVE MAIN BEARING CAPS AND CHECK OIL
CLEARANCE
(a) Uniformly loosen and remove the 10 main bearing cap
bolts in several passes, in the sequence shown.
Page 2692 of 4323
A05093
A05097
Plastigage
A05095
A05098
± ENGINE MECHANICALCYLINDER BLOCK
EM±105
2684 Author�: Date�:
2005 SEQUOIA (RM1146U)
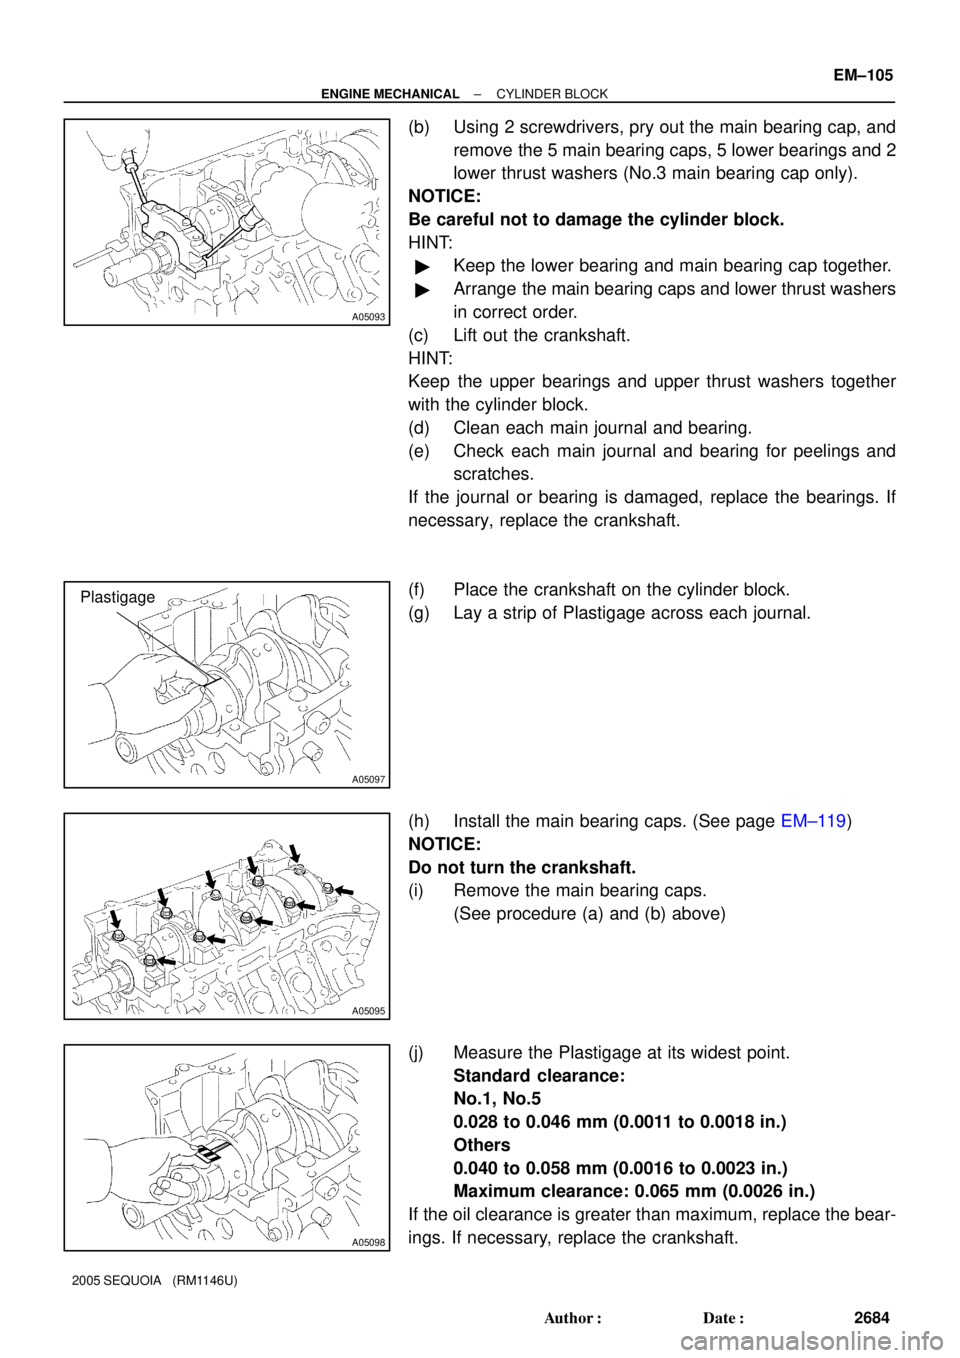
(b) Using 2 screwdrivers, pry out the main bearing cap, and
remove the 5 main bearing caps, 5 lower bearings and 2
lower thrust washers (No.3 main bearing cap only).
NOTICE:
Be careful not to damage the cylinder block.
HINT:
�Keep the lower bearing and main bearing cap together.
�Arrange the main bearing caps and lower thrust washers
in correct order.
(c) Lift out the crankshaft.
HINT:
Keep the upper bearings and upper thrust washers together
with the cylinder block.
(d) Clean each main journal and bearing.
(e) Check each main journal and bearing for peelings and
scratches.
If the journal or bearing is damaged, replace the bearings. If
necessary, replace the crankshaft.
(f) Place the crankshaft on the cylinder block.
(g) Lay a strip of Plastigage across each journal.
(h) Install the main bearing caps. (See page EM±119)
NOTICE:
Do not turn the crankshaft.
(i) Remove the main bearing caps.
(See procedure (a) and (b) above)
(j) Measure the Plastigage at its widest point.
Standard clearance:
No.1, No.5
0.028 to 0.046 mm (0.0011 to 0.0018 in.)
Others
0.040 to 0.058 mm (0.0016 to 0.0023 in.)
Maximum clearance: 0.065 mm (0.0026 in.)
If the oil clearance is greater than maximum, replace the bear-
ings. If necessary, replace the crankshaft.
Page 2694 of 4323
A04862
± ENGINE MECHANICALCYLINDER BLOCK
EM±107
2686 Author�: Date�:
2005 SEQUOIA (RM1146U)Mark º15º
72.015 mm (2.8352 in.)
Mark º16º72.016 mm (2.8353 in.)
Crankshaft main journal diameter (B):
Mark º00º67.000 mm (2.6378 in.)
Mark º01º66.999 mm (2.6378 in.)
Mark º02º66.998 mm (2.6377 in.)
Mark º03º66.997 mm (2.6377 in.)
Mark º04º66.996 mm (2.6376 in.)
Mark º05º66.995 mm (2.6376 in.)
Mark º06º66.994 mm (2.6376 in.)
Mark º07º66.993 mm (2.6375 in.)
Mark º08º66.992 mm (2.6375 in.)
Mark º09º66.991 mm (2.6374 in.)
Mark º10º66.990 mm (2.6374 in.)
Mark º11º66.989 mm (2.6374 in.)
Mark º12º66.988 mm (2.6373 in.)
Standard bearing center wall thickness:
No.1 and No.5
Mark º3º2.487 to 2.490 mm (0.0979 ± 0.0980 in.)
Mark º4º2.490 to 2.493 mm (0.0980 ± 0.0981 in.)
Mark º5º2.493 to 2.496 mm (0.0981 ± 0.0983 in.)
Mark º6º2.496 to 2.499 mm (0.0983 ± 0.0984 in.)
Mark º7º2.499 to 2.502 mm (0.0984 ± 0.0985 in.)
Others
Mark º1º2.481 to 2.484 mm (0.0977 ± 0.0978 in.)
Mark º2º2.484 to 2.487 mm (0.0978 ± 0.0979 in.)
Mark º3º2.487 to 2.490 mm (0.0979 ± 0.0980 in.)
Mark º4º2.490 to 2.493 mm (0.0980 ± 0.0981 in.)
Mark º5º2.493 to 2.496 mm (0.0981 ± 0.0983 in.)
(k) Completely remove the Plastigage.
24. REMOVE CRANKSHAFT
(a) Lift up the crankshaft.
(b) Remove the 5 upper main bearings and 2 upper thrust
washers from the cylinder block.
HINT:
Arrange the main bearing caps, bearings and thrust washers in
correct order.
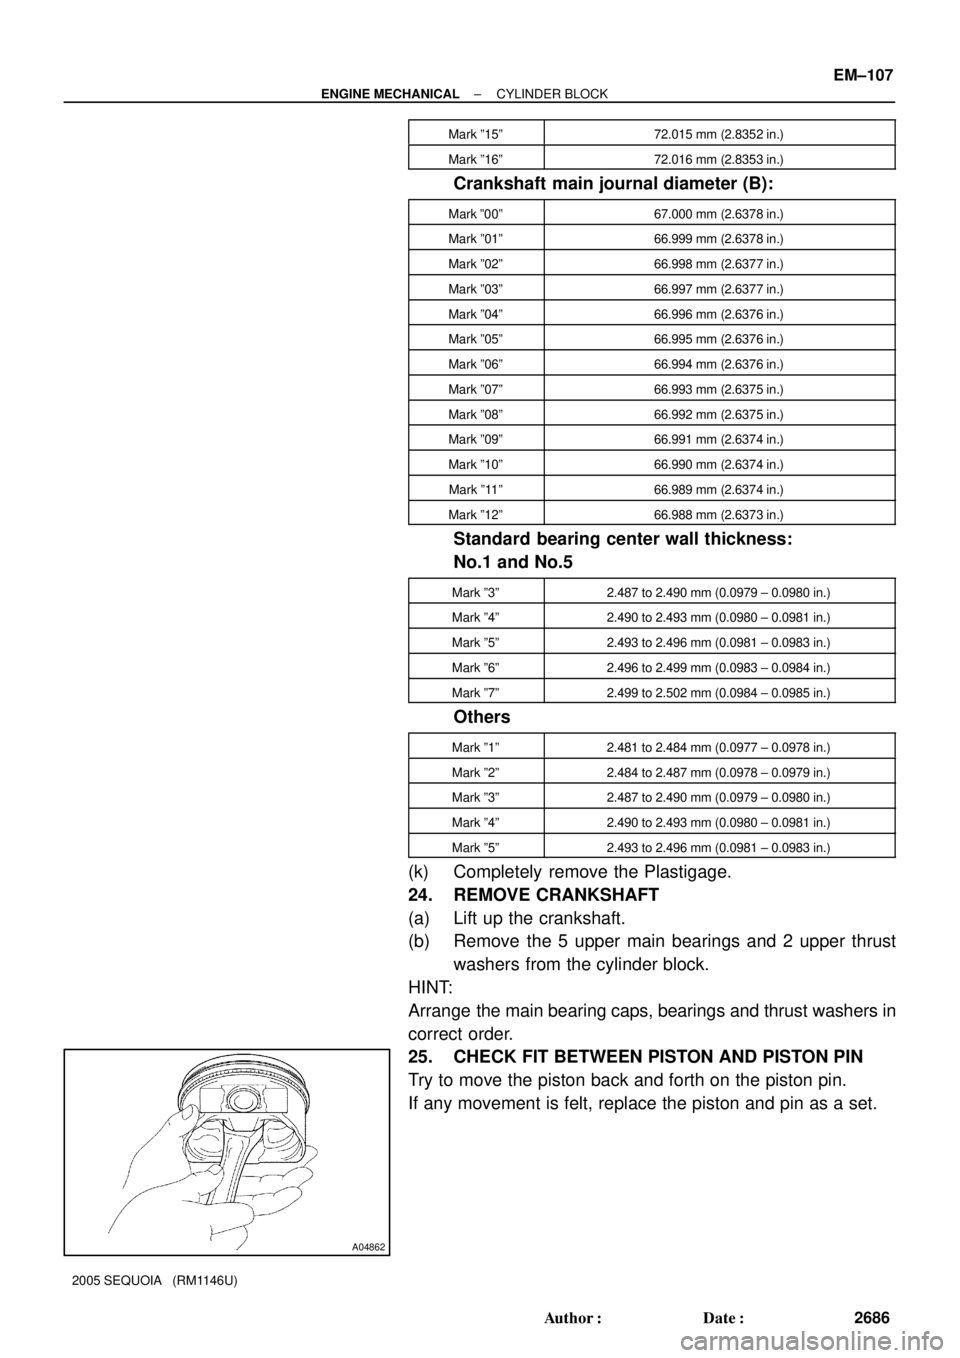
25. CHECK FIT BETWEEN PISTON AND PISTON PIN
Try to move the piston back and forth on the piston pin.
If any movement is felt, replace the piston and pin as a set.
Page 2696 of 4323
EM0EB±17
A04849
A04850A04210A04212A05178
Cylinder Block Side
Main Bearing Cap Side
A04853
± ENGINE MECHANICALCYLINDER BLOCK
EM±109
2688 Author�: Date�:
2005 SEQUOIA (RM1146U)
INSPECTION
1. CLEAN CYLINDER BLOCK
(a) Using a gasket scraper, remove all the gasket material
from the top surface of the cylinder block.
(b) Using a soft brush and solvent, thoroughly clean the cylin-
der block.
2. INSPECT CYLINDER BLOCK
(a) Inspect for flatness.
Using a precision straight edge and feeler gauge, mea-
sure the surfaces contacting the cylinder head and main
bearing cap for warpage.
Maximum warpage: 0.07 mm (0.0028 in.)
If warpage is greater than maximum, replace the cylinder block.
(b) Visually check the cylinder for vertical scratches.
If deep scratches are present, rebore all the 8 cylinders and re-
place all the 8 pistons. (See page EM±116) If necessary, re-
place the cylinder block.
Page 2700 of 4323
A04872
105 mm
EM7639
A04048
60°C
Z14454
± ENGINE MECHANICALCYLINDER BLOCK
EM±113
2692 Author�: Date�:
2005 SEQUOIA (RM1146U)
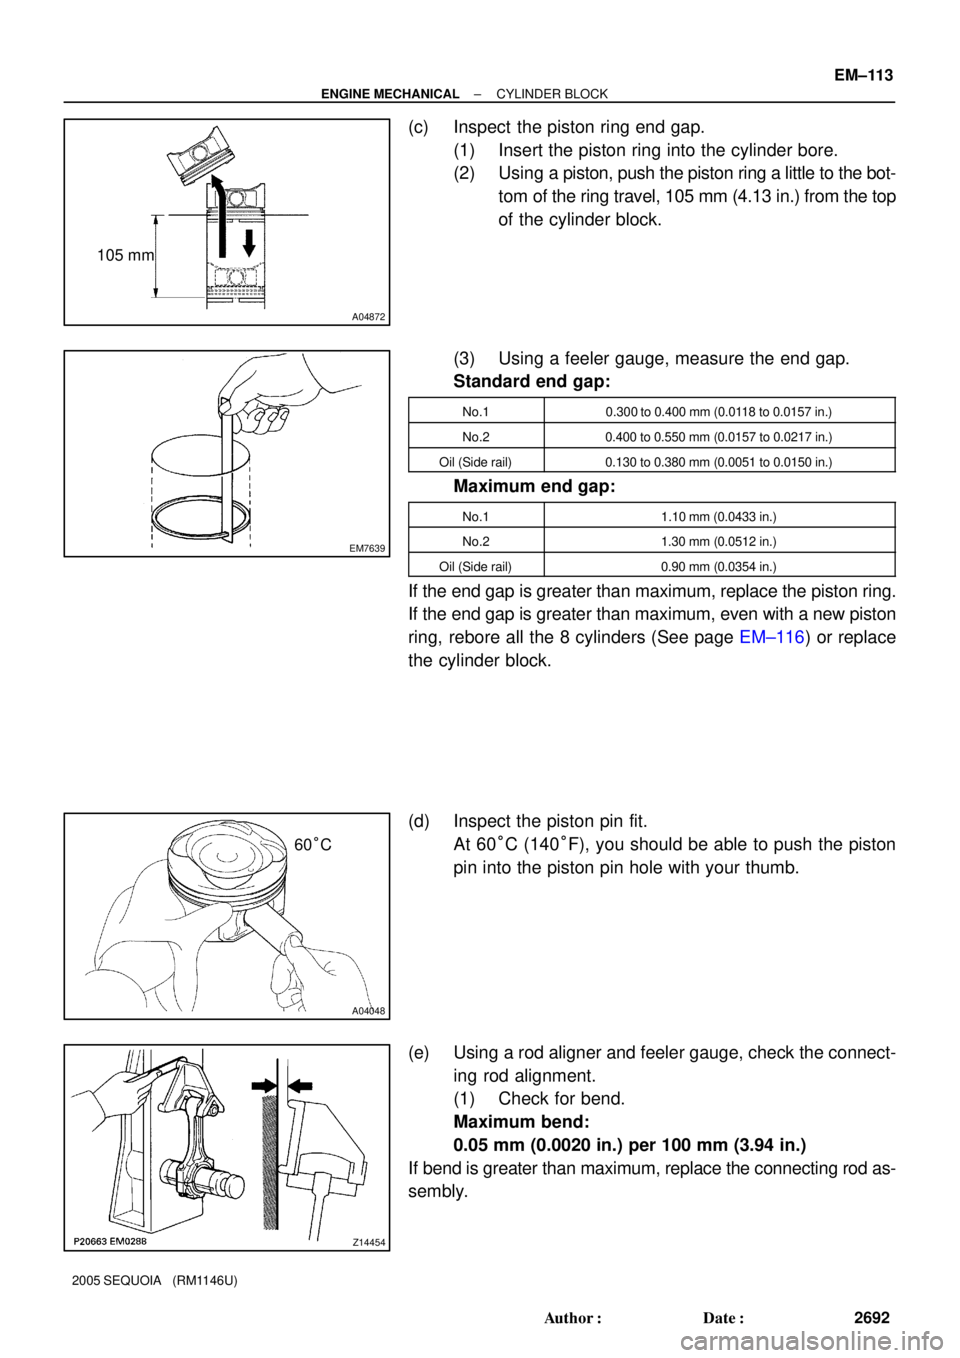
(c) Inspect the piston ring end gap.
(1) Insert the piston ring into the cylinder bore.
(2) Using a piston, push the piston ring a little to the bot-
tom of the ring travel, 105 mm (4.13 in.) from the top
of the cylinder block.
(3) Using a feeler gauge, measure the end gap.
Standard end gap:
No.10.300 to 0.400 mm (0.0118 to 0.0157 in.)
No.20.400 to 0.550 mm (0.0157 to 0.0217 in.)
Oil (Side rail)0.130 to 0.380 mm (0.0051 to 0.0150 in.)
Maximum end gap:
No.11.10 mm (0.0433 in.)
No.21.30 mm (0.0512 in.)
Oil (Side rail)0.90 mm (0.0354 in.)
If the end gap is greater than maximum, replace the piston ring.
If the end gap is greater than maximum, even with a new piston
ring, rebore all the 8 cylinders (See page EM±116) or replace
the cylinder block.
(d) Inspect the piston pin fit.
At 60°C (140°F), you should be able to push the piston
pin into the piston pin hole with your thumb.
(e) Using a rod aligner and feeler gauge, check the connect-
ing rod alignment.
(1) Check for bend.
Maximum bend:
0.05 mm (0.0020 in.) per 100 mm (3.94 in.)
If bend is greater than maximum, replace the connecting rod as-
sembly.