Page 1 of 1897
AC2GH-01
I12960
I12956
I12969
Instrument Panel Register
Bracket
Radio
Bucket seat type:
Flash Receptacle
Bracket
A/C Control AssemblyBench seat type:
Instrument Lower Cover
A/C Amplifier
A/C Control Panel
Bulb (LCD Lighting)Bulb (Panel Lighting) Bulb (Panel Lighting)
HolderA/C Control Panel Case
- AIR CONDITIONINGAIR CONDITIONING CONTROL ASSEMBLY (Auto A/C)
AC-73
1995 Author�: Date�:
2001 AVALON (RM808U)
AIR CONDITIONING CONTROL ASSEMBLY (Auto A/C)
COMPONENTS
Page 67 of 1897
AC2GO-01
I12961I12955I12970
Instrument Panel Register
RadioBracket
Bucket seat type:
Flash Receptacle
Bench seat type:
Instrument Lower Cover
Heater Control Assembly Bracket
Heater Control Cover
Bulb
Air Conditioning Panel
Air Mix Damper Control Cable
(Color: Blue) Heater Control Housing Air Mix Damper Control Cable
(Color: Black)
Heater Control Name Sheet
Bulb
Knobs
- AIR CONDITIONINGHEATER CONTROL ASSEMBLY (Manual A/C)
AC-81
2003 Author�: Date�:
2001 AVALON (RM808U)
COMPONENTS
Page 107 of 1897
AX0KB-01
D07772
Radio Assembly with Heater Control & Accessory Assembly Except Taiwan Spec.:
Lower Instrument Panel
Sub-assembly
Lower No. 4 Instrument
Panel Sub-assembly
Hood Lock
Release Lever
Radio Tuner Opening
Covers with Heater
Console & Accessory
Assembly Taiwan Spec.:Taiwan Spec.:
Center Instrument Cluster Finish Panel
Sub-assemblyNo. 2 Instrument Panel
Under Cover Sub-assembly
Front Ash Receptacle Assembly
Upper Console Panel
Sub-assembly
Console Box Plate
Front Console Box
Assembly
Upper Rear Console
Panel Sub-assembly
Clip
Shift Control
Cable
Floor Shift Lever Assembly
12 (120,9)
Rear Console Box Assembly
RH Cowl Side Trim
RH Scuff Plate
N´m (kgf´cm, ft´lbf) : Specified torqueRH Cowl Side Trim
RH Scuff Plate
AX-20
- AUTOMATIC TRANSAXLEFLOOR SHIFT ASSEMBLY
1310 Author�: Date�:
2001 AVALON (RM808U)
FLOOR SHIFT ASSEMBLY
COMPONENTS
Page 118 of 1897

AX0KC-01
D07218
AX-22
- AUTOMATIC TRANSAXLEFLOOR SHIFT ASSEMBLY
1312 Author�: Date�:
2001 AVALON (RM808U)
REMOVAL
1. REMOVE UPPER REAR CONSOLE PANEL SUB-AS-
SEMBLY (See page BO-90)
2. REMOVE FRONT ASH RECEPTACLE ASSEMBLY
(See page BO-90)
3. REMOVE UPPER CONSOLE PANEL SUB- AS-
SEMBLY (See page BO-90)
4. REMOVE CONSOLE BOX PLATE (See page BO-90)
5. REMOVE REAR CONSOLE BOX ASSEMBLY
(See page BO-90)
6. REMOVE LH AND RH SCUFF PLATES
(See page BO-90)
7. REMOVE LH AND RH COWL SIDE TRIMS
(See page BO-90)
8. REMOVE LOWER NO.4 INSTRUMENT PANEL SUB-
ASSEMBLY (See page BO-90)
9. REMOVE NO.2 INSTRUMENT PANEL UNDER COVER
SUB-ASSEMBL Y (See page BO-90)
10. REMOVE LOWER INSTRUMENT PANEL SUB- AS-
SEMBLY (See page BO-90)
11. Taiwan Spec.:
REMOVE CENTER INSTRUMENT CLUSTER FINISH
PANEL SUB-ASSEMBLY (See page BO-90)
12. Taiwan Spec.:
REMOVE RADIO TUNER OPENING COVERS WITH
HEATER CONSOLE & ACCESSORY ASSEMBLY
(See page BO-90)
13. Except Taiwan spec.:
REMOVE RADIO ASSEMBLY WITH HEATER CON-
SOLE & ACCESSORY ASSEMBLY
(See page BO-90)
14. REMOVE FRONT CONSOLE BOX ASSEMBLY
(See page BO-90)
15. w/ Rear Heater:
REMOVE REAR CONSOLE NO.1 BOX ASSEMBLY
CONSOLE BOX DUCT
Remove the clip and duct.
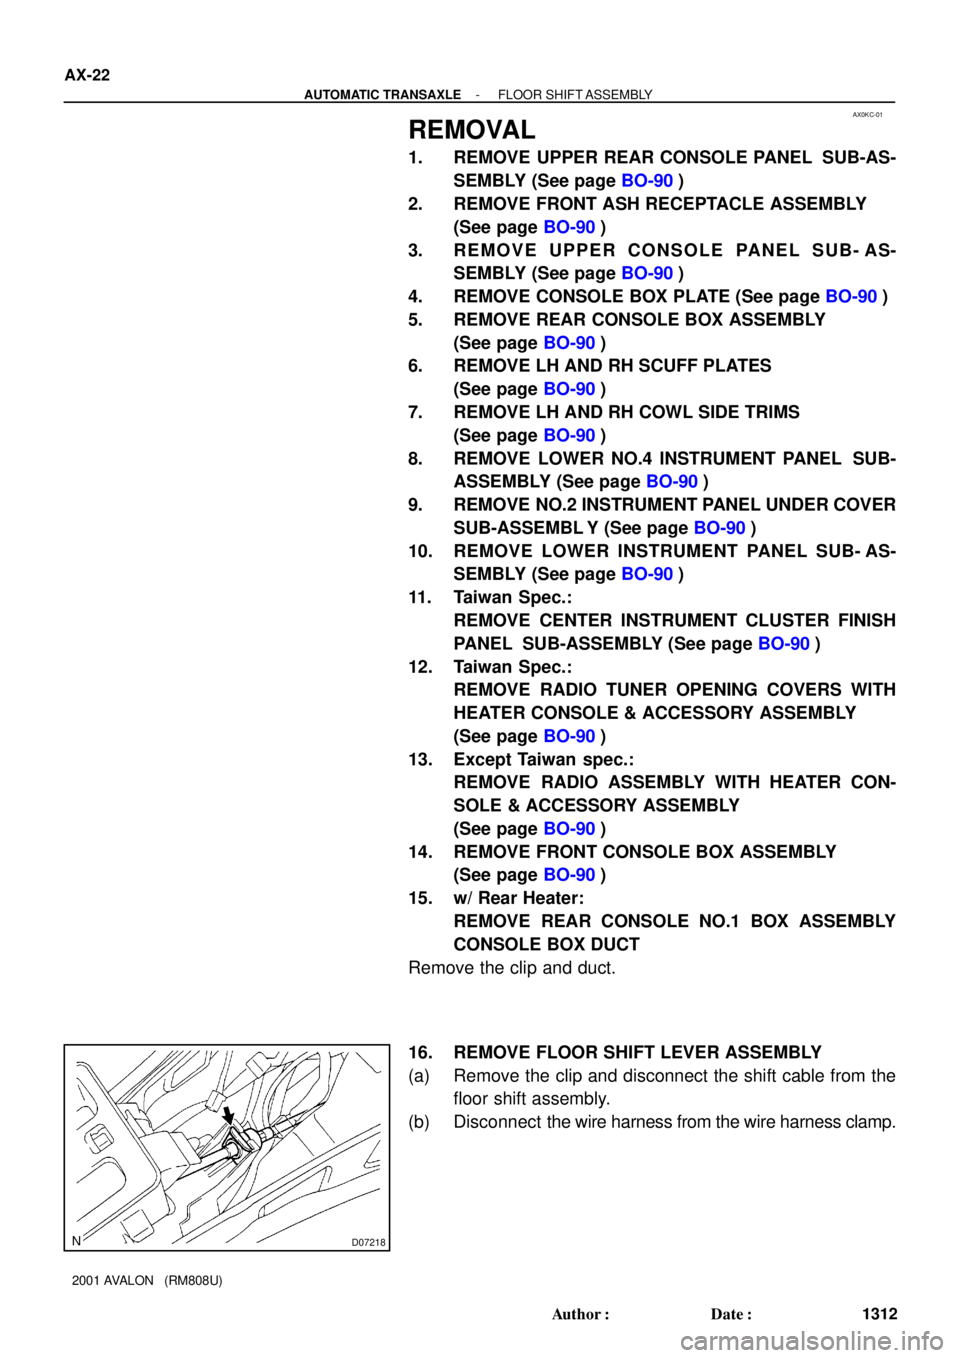
16. REMOVE FLOOR SHIFT LEVER ASSEMBLY
(a) Remove the clip and disconnect the shift cable from the
floor shift assembly.
(b) Disconnect the wire harness from the wire harness clamp.
Page 120 of 1897
AX0KB-01
D07772
Radio Assembly with Heater Control & Accessory Assembly Except Taiwan Spec.:
Lower Instrument Panel
Sub-assembly
Lower No. 4 Instrument
Panel Sub-assembly
Hood Lock
Release Lever
Radio Tuner Opening
Covers with Heater
Console & Accessory
Assembly Taiwan Spec.:Taiwan Spec.:
Center Instrument Cluster Finish Panel
Sub-assemblyNo. 2 Instrument Panel
Under Cover Sub-assembly
Front Ash Receptacle Assembly
Upper Console Panel
Sub-assembly
Console Box Plate
Front Console Box
Assembly
Upper Rear Console
Panel Sub-assembly
Clip
Shift Control
Cable
Floor Shift Lever Assembly
12 (120,9)
Rear Console Box Assembly
RH Cowl Side Trim
RH Scuff Plate
N´m (kgf´cm, ft´lbf) : Specified torqueRH Cowl Side Trim
RH Scuff Plate
AX-20
- AUTOMATIC TRANSAXLEFLOOR SHIFT ASSEMBLY
1310 Author�: Date�:
2001 AVALON (RM808U)
FLOOR SHIFT ASSEMBLY
COMPONENTS
Page 131 of 1897

AX0KC-01
D07218
AX-22
- AUTOMATIC TRANSAXLEFLOOR SHIFT ASSEMBLY
1312 Author�: Date�:
2001 AVALON (RM808U)
REMOVAL
1. REMOVE UPPER REAR CONSOLE PANEL SUB-AS-
SEMBLY (See page BO-90)
2. REMOVE FRONT ASH RECEPTACLE ASSEMBLY
(See page BO-90)
3. REMOVE UPPER CONSOLE PANEL SUB- AS-
SEMBLY (See page BO-90)
4. REMOVE CONSOLE BOX PLATE (See page BO-90)
5. REMOVE REAR CONSOLE BOX ASSEMBLY
(See page BO-90)
6. REMOVE LH AND RH SCUFF PLATES
(See page BO-90)
7. REMOVE LH AND RH COWL SIDE TRIMS
(See page BO-90)
8. REMOVE LOWER NO.4 INSTRUMENT PANEL SUB-
ASSEMBLY (See page BO-90)
9. REMOVE NO.2 INSTRUMENT PANEL UNDER COVER
SUB-ASSEMBL Y (See page BO-90)
10. REMOVE LOWER INSTRUMENT PANEL SUB- AS-
SEMBLY (See page BO-90)
11. Taiwan Spec.:
REMOVE CENTER INSTRUMENT CLUSTER FINISH
PANEL SUB-ASSEMBLY (See page BO-90)
12. Taiwan Spec.:
REMOVE RADIO TUNER OPENING COVERS WITH
HEATER CONSOLE & ACCESSORY ASSEMBLY
(See page BO-90)
13. Except Taiwan spec.:
REMOVE RADIO ASSEMBLY WITH HEATER CON-
SOLE & ACCESSORY ASSEMBLY
(See page BO-90)
14. REMOVE FRONT CONSOLE BOX ASSEMBLY
(See page BO-90)
15. w/ Rear Heater:
REMOVE REAR CONSOLE NO.1 BOX ASSEMBLY
CONSOLE BOX DUCT
Remove the clip and duct.
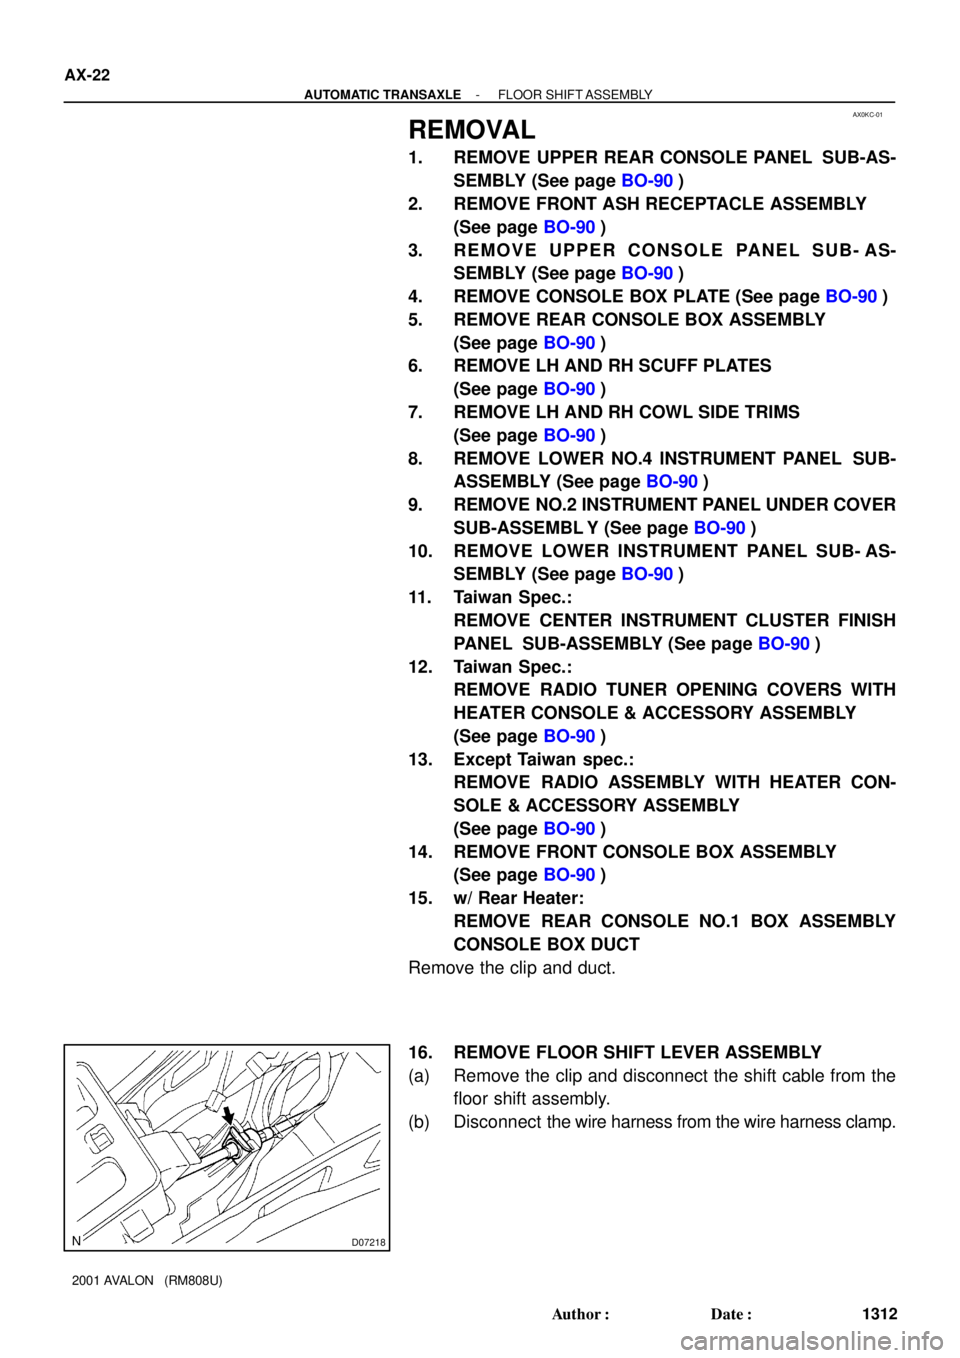
16. REMOVE FLOOR SHIFT LEVER ASSEMBLY
(a) Remove the clip and disconnect the shift cable from the
floor shift assembly.
(b) Disconnect the wire harness from the wire harness clamp.
Page 150 of 1897

BE214-01
I10058
Radio Receiver Assembly Power Amplifier CD Auto Changer BE-126
- BODY ELECTRICALAUDIO SYSTEM
1730 Author�: Date�:
2001 AVALON (RM808U)
AUDIO SYSTEM
DESCRIPTION
OUTLINE OF AVC-LAN
(a) What is AVC-LAN?
AVC-LAN is the abbreviation, which stands for Audio Visual Communication-Local Area Network.
This is a unified standard co-developed by 6 audio manufactures associated with Toyota Motor Corpo-
ration.
The Unified standard covers signals, such as audio signal, visual signal, signal for switch indication
and communication signal.
(b) Objectives
Recently the car audio system has been rapidly developed and functions have been changed drasti-
cally. The conventional system has been switched to the multi-media type such as a navigation sys-
tem. At the same time the level of customers needs to audio system has been upgraded. This lies be-
hind this standardization.
The concrete objectives are explained below.
(1) When products by different manufactures were combined together, there used to be a case that
malfunction occurred such as sound did not come out. This problem has been resolved by stan-
dardization of signals.
(2) Various types of after market products have been able to add or replace freely.
(3) Because of the above (2), each manufacture has become able to concentrate on developing
products in their strongest field. This has enabled many types of products provided inexpensive-
ly.
(4) Conventionally, a new product developed by a manufacture could not be used due to a lack of
compatibility with other manufactures products. Because of this new standard, users can enjoy
compatible products provided for them timely.
(c) The above descriptions are the objectives to introduce AVC-LAN. By this standardization, develop-
ment of new products will no longer cause systematic errors. Thus, this is very effective standard for
a product in the future.
HINT:
�When +B short or GND short is detected in AVC-LAN circuit, communication stops. Accordingly the
audio system does not function normally.
�When audio system is not equipped with a navigation system, audio head unit is the master unit. (When
audio system is equipped with a navigation system, radio receiver is the master unit.)
�The car audio system using AVC-LAN circuit has a diagnosis function.
�Each product has its own specified numbers called physical address. Numbers are also allotted to
each function in one product, which are called logical address.
Page 151 of 1897

BE16M-03
e162AI14592
Connector ºAº
Connector ºBº Power amplifier side
1 2 3 4 5 6
7 8 14 13 12 11 10 9
- BODY ELECTRICALAUDIO SYSTEM
BE-161
1765 Author�: Date�:
2001 AVALON (RM808U)
INSPECTION
1. INSPECT POWER AMPLIFIER CIRCUIT
Connect the connector from power amplifier and inspect the
connector on the wire harness side.
Tester connectionConditionSpecified condition
A1 - Ground
(FR+)Audio sounding5 - 7 V
A2 - Ground
(FL+)Audio sounding5 - 7 V
A3 - Ground
(RR+)Audio sounding5 - 7 V
A4 - Ground
(Rl+)Audio sounding5 - 7 V
A5 - Ground
(WFl+)Audio sounding5 - 7 V
A7 - Ground
(+B)ConstantBattery positive voltage
A8 - Ground
(FR-)Audio sounding5 - 7 V
A9 - Ground
(FL-)Audio sounding5 - 7 V
A10 - Ground
(RR-)Audio sounding5 - 7 V
A11 - Ground
(RL-)Audio sounding5 - 7 V
A13 - Ground
(GND)ConstantContinuity
A14 - Ground
(WFL-)Audio sounding5 - 7 V
B1 - Ground
(AMP+)Radio power switch ONBattery positive voltage
B2 - Ground
(ACC)Ignition switch ONBattery positive voltage
B4 - Ground
(BEEP)Audio sounding-
B5 - Ground
(FLIN)Audio sounding5 - 7 V
B6 - Ground
(FRIN)Audio sounding5 - 7 V