2001 NISSAN X-TRAIL check oil
[x] Cancel search: check oilPage 3422 of 3833
ATC-146
REFRIGERANT LINES
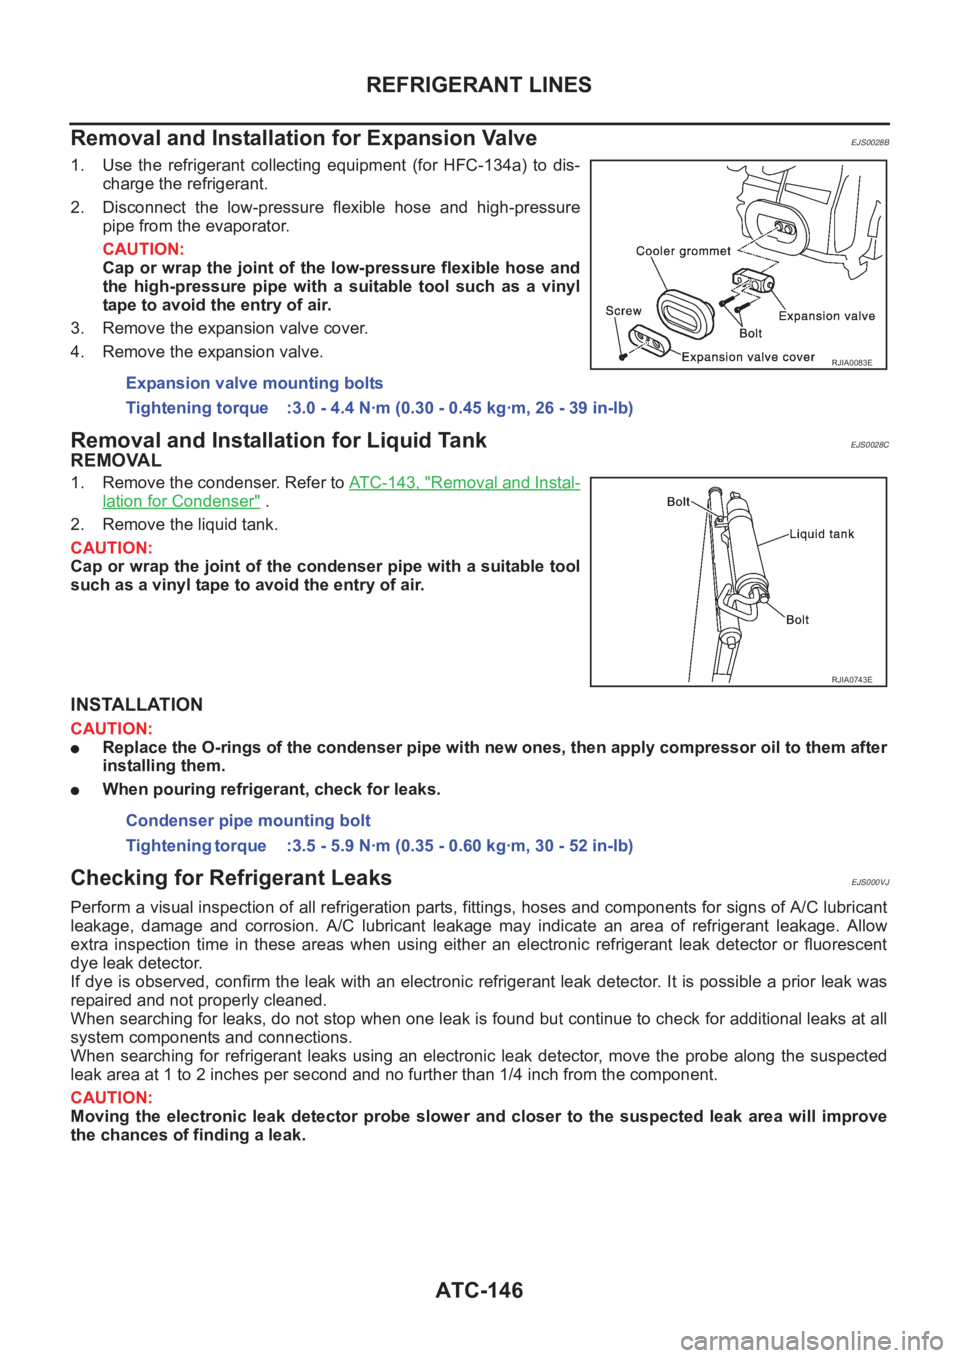
Removal and Installation for Expansion Valve
EJS0028B
1. Use the refrigerant collecting equipment (for HFC-134a) to dis-
charge the refrigerant.
2. Disconnect the low-pressure flexible hose and high-pressure
pipe from the evaporator.
CAUTION:
Cap or wrap the joint of the low-pressure flexible hose and
the high-pressure pipe with a suitable tool such as a vinyl
tape to avoid the entry of air.
3. Remove the expansion valve cover.
4. Remove the expansion valve.
Removal and Installation for Liquid TankEJS0028C
REMOVAL
1. Remove the condenser. Refer to ATC-143, "Removal and Instal-
lation for Condenser" .
2. Remove the liquid tank.
CAUTION:
Cap or wrap the joint of the condenser pipe with a suitable tool
such as a vinyl tape to avoid the entry of air.
INSTALLATION
CAUTION:
●Replace the O-rings of the condenser pipe with new ones, then apply compressor oil to them after
installing them.
●When pouring refrigerant, check for leaks.
Checking for Refrigerant LeaksEJS000VJ
Perform a visual inspection of all refrigeration parts, fittings, hoses and components for signs of A/C lubricant
leakage, damage and corrosion. A/C lubricant leakage may indicate an area of refrigerant leakage. Allow
extra inspection time in these areas when using either an electronic refrigerant leak detector or fluorescent
dye leak detector.
If dye is observed, confirm the leak with an electronic refrigerant leak detector. It is possible a prior leak was
repaired and not properly cleaned.
When searching for leaks, do not stop when one leak is found but continue to check for additional leaks at all
system components and connections.
When searching for refrigerant leaks using an electronic leak detector, move the probe along the suspected
leak area at 1 to 2 inches per second and no further than 1/4 inch from the component.
CAUTION:
Moving the electronic leak detector probe slower and closer to the suspected leak area will improve
the chances of finding a leak.Expansion valve mounting bolts
Tightening torque :3.0 - 4.4 N·m (0.30 - 0.45 kg·m, 26 - 39 in-lb)
RJIA0083E
RJIA0743E
Condenser pipe mounting bolt
Tightening torque :3.5 - 5.9 N·m (0.35 - 0.60 kg·m, 30 - 52 in-lb)
Page 3423 of 3833
REFRIGERANT LINES
ATC-147
C
D
E
F
G
H
I
K
L
MA
B
AT C
Checking System for Leaks Using the Fluorescent Leak DetectorEJS000VK
1. Check A/C system for leaks using the UV lamp and safety goggles (J-42220) in a low sunlight area (area
without windows preferable). Illuminate all components, fittings and lines. The dye will appear as a bright
green/yellow area at the point of leakage. Fluorescent dye observed at the evaporator drain opening indi-
cates an evaporator core assembly (tubes, core or expansion valve) leak.
2. If the suspected area is difficult to see, use an adjustable mirror or wipe the area with a clean shop rag or
cloth, with the UV lamp for dye residue.
3. After the leak is repaired, remove any residual dye using dye cleaner (J-43872) to prevent future misdiag-
nosis.
4. Perform a system performance check and verify the leak repair with an approved electronic refrigerant
leak detector.
NOTE:
Other gases in the work area or substances on the A/C components, for example, anti-freeze, windshield
washer fluid, solvents and lubricants, may falsely trigger the leak detector. Make sure the surfaces to be
checked are clean.
Clean with a dry cloth or blow off with shop air.
Do not allow the sensor tip of the detector to contact with any substance. This can also cause false readings
and may damage the detector.
Dye InjectionEJS000VL
(This procedure is only necessary when recharging the system or when the compressor has seized and was
replaced.)
1. Check A/C system static (at rest) pressure. Pressure must be at least 345 kPa (50 psi).
2. Pour one bottle (1/4 ounce / 7.4 cc) of the A/C refrigerant dye into the injector tool (J-41459).
3. Connect the injector tool to the A/C LOW PRESSURE side service fitting.
4. Start engine and switch A/C ON.
5. When the A/C operating (compressor running), inject one bottle (1/4 ounce / 7.4 cc) of fluorescent dye
through the low-pressure service valve using dye injector tool J-41459 (refer to the manufacture's operat-
ing instructions).
6. With the engine still running, disconnect the injector tool from the service fitting.
CAUTION:
Be careful the A/C system or replacing a component, pour the dye directly into the open system con-
nection and proceed with the service procedures.
7. Operate the A/C system for a minimum of 20 minutes to mix the dye with the system oil. Depending on the
leak size, operating conditions and location of the leak, it may take from minutes to days for the dye to
penetrate a leak and become visible.
Electronic Refrigerant Leak DetectorEJS000VM
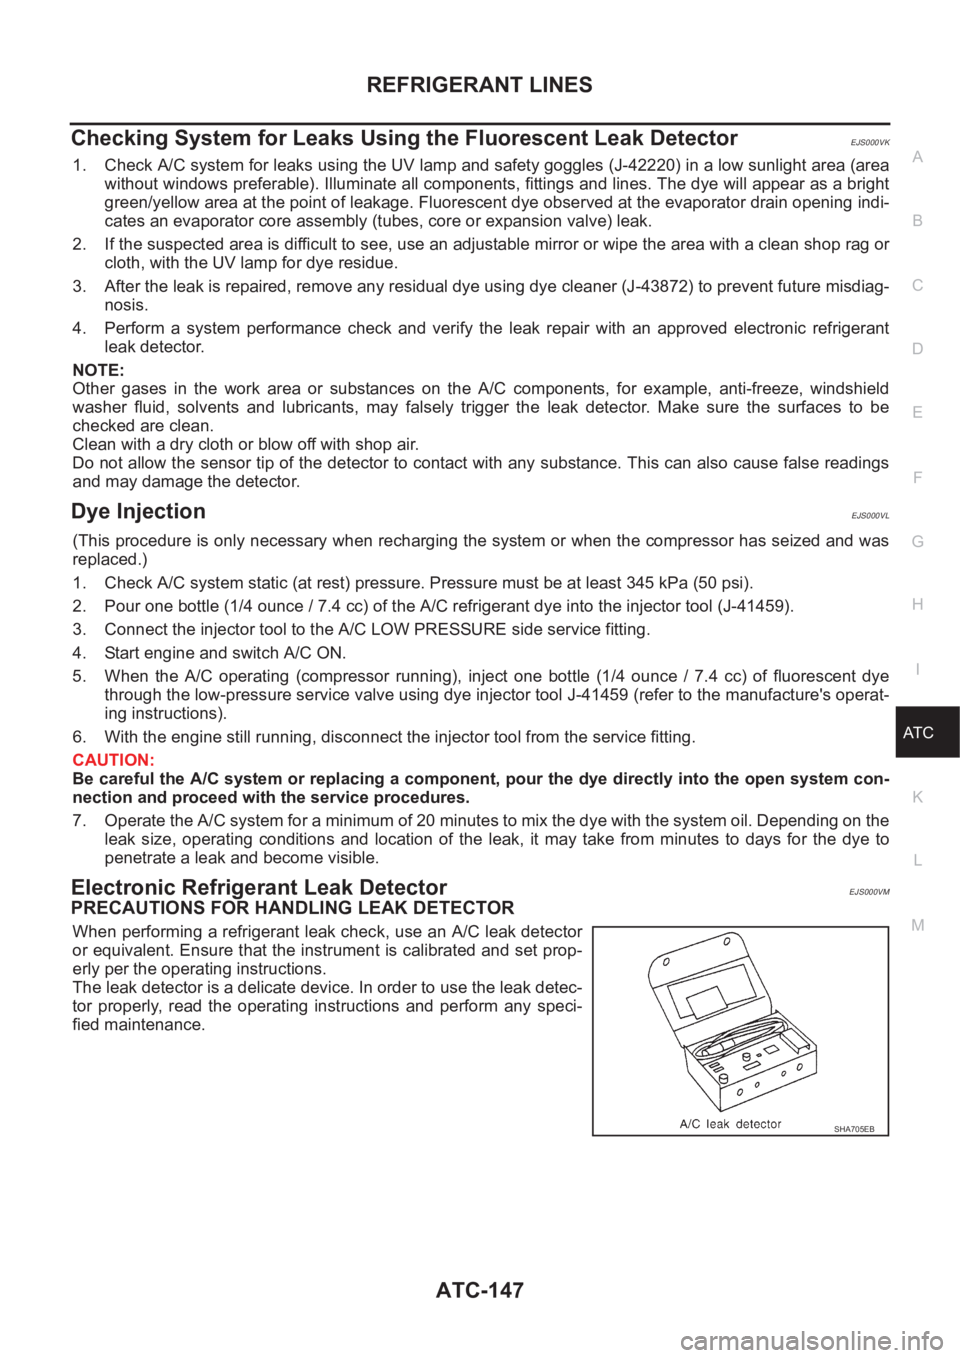
PRECAUTIONS FOR HANDLING LEAK DETECTOR
When performing a refrigerant leak check, use an A/C leak detector
or equivalent. Ensure that the instrument is calibrated and set prop-
erly per the operating instructions.
The leak detector is a delicate device. In order to use the leak detec-
tor properly, read the operating instructions and perform any speci-
fied maintenance.
SHA705EB
Page 3470 of 3833
SC-14
CHARGING SYSTEM
Trouble Diagnoses
EKS00319
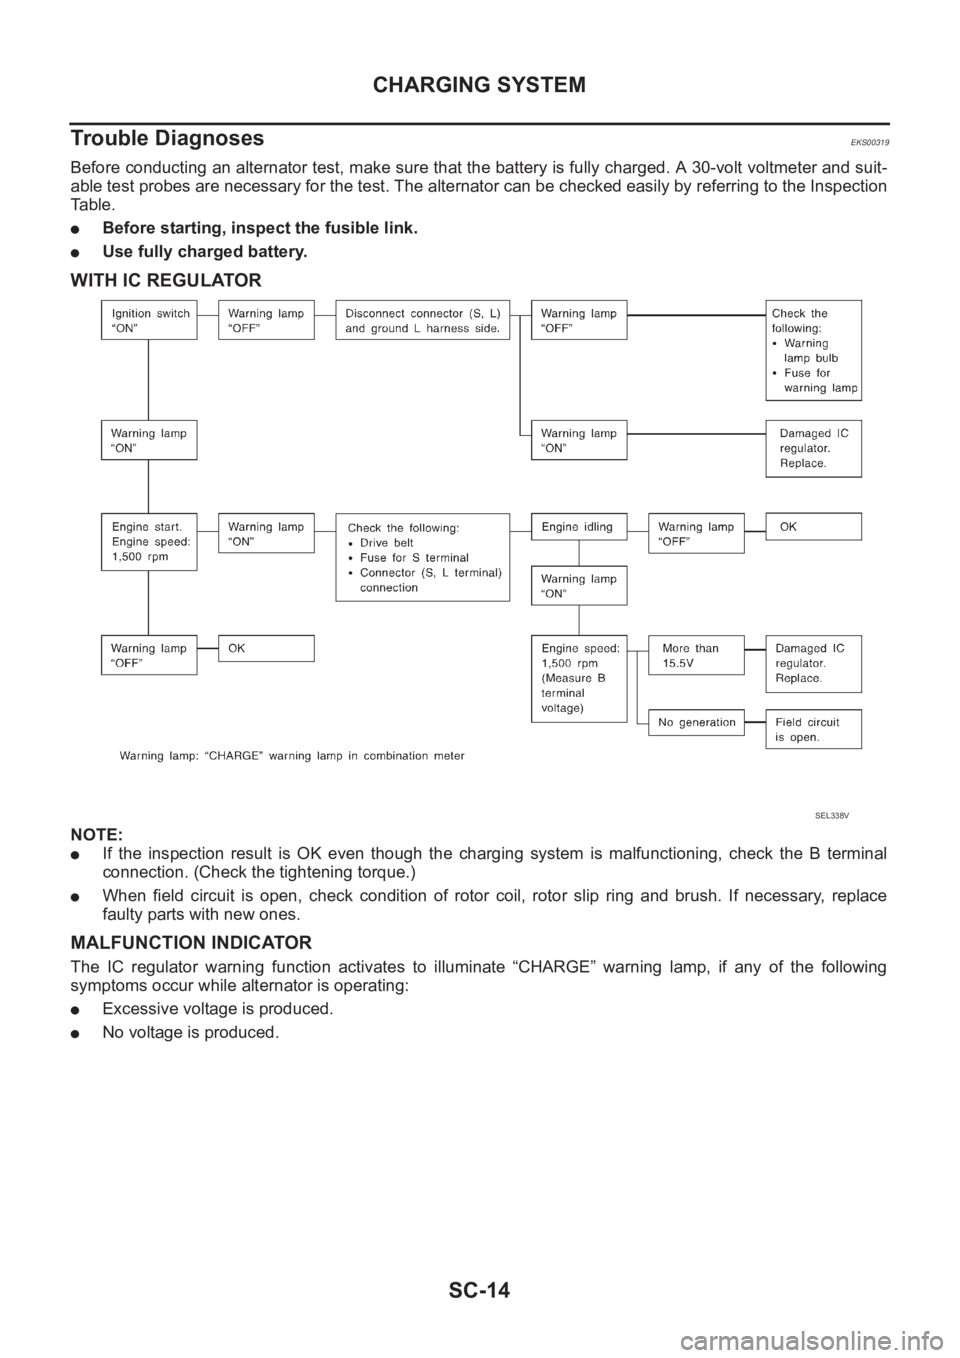
Before conducting an alternator test, make sure that the battery is fully charged. A 30-volt voltmeter and suit-
able test probes are necessary for the test. The alternator can be checked easily by referring to the Inspection
Ta b l e .
●Before starting, inspect the fusible link.
●Use fully charged battery.
WITH IC REGULATOR
NOTE:
●If the inspection result is OK even though the charging system is malfunctioning, check the B terminal
connection. (Check the tightening torque.)
●When field circuit is open, check condition of rotor coil, rotor slip ring and brush. If necessary, replace
faulty parts with new ones.
MALFUNCTION INDICATOR
The IC regulator warning function activates to illuminate “CHARGE” warning lamp, if any of the following
symptoms occur while alternator is operating:
●Excessive voltage is produced.
●No voltage is produced.
SEL338V
Page 3496 of 3833
LT-6
HEADLAMP
Trouble Diagnoses
EKS003CF
Aiming Adjustment EKS003CG
When performing headlamp aiming adjustment, use an aiming machine, aiming wall screen or headlamp
tester. Aimers should be in good repair, calibrated and operated in accordance with respective operation man-
uals.
If any aimer is not available, aiming adjustment can be done as follows:
For details, refer to the regulations in your own country.
●Keep all tires inflated to correct pressures.
●Place vehicle and tester on one and same flat surface.
●See that there is no-load in vehicle (coolant, engine oil filled up to correct level and full fuel tank) other
than the driver (or equivalent weight placed in driver's position).
Symptom Possible cause Repair order
Headlamp LH do not operate.1. Bulb
2. Grounds E24 and E50
3. 15A fuse
4. Lighting switch1. Check bulb.
2. Check grounds E24 and E50.
3. Check 15A fuse (No. 40, located in fuse
and fusible link box). Verify battery posi-
tive voltage is present at terminal 8 of
lighting switch.
4. Check lighting switch.
Headlamp RH do not operate.1. Bulb
2. Grounds E24 and E50
3. 15A fuse
4. Lighting switch1. Check bulb.
2. Check grounds E24 and E50.
3. Check 15A fuse (No. 41, located in fuse
and fusible link box). Verify battery posi-
tive voltage is present at terminal 5 of
lighting switch.
4. Check lighting switch.
High beam LH do not operate, but low
beam LH operates.1. Bulb
2. Open in high beam LH circuit
3. Lighting switch1. Check bulbs.
2. Check the wire between lighting switch
terminal 9 and headlamp LH terminal 1
for an open circuit.
3. Check lighting switch.
Low beam LH does not operate, but high
beam LH operates.1. Bulb
2. Open in low beam LH circuit
3. Lighting switch1. Check bulb.
2. Check the wire between lighting switch
terminal 10 and headlamp LH terminal 3
for an open circuit.
3. Check lighting switch.
High beam RH do not operate, but low
beam RH operates.1. Bulb
2. Open in high beam RH circuit
3. Lighting switch1. Check bulbs.
2. Check the wire between lighting switch
terminal 6 and headlamp RH terminal 1
for an open circuit.
3. Check lighting switch.
Low beam RH does not operate, but high
beam RH operates.1. Bulb
2. Open in low beam RH circuit
3. Lighting switch1. Check bulb.
2. Check the wire between lighting switch
terminal 7 and headlamp RH terminal 3
for an open circuit.
3. Check lighting switch.
High beam indicator does not work.1. Bulb
2. Grounds M27 and M70
3. Open in high beam circuit1. Check bulb in combination meter.
2. Check grounds M27 and M70.
3. Check the wire between lighting switch
terminal 9 and combination meter termi-
nal 61(LHD models) or 50(RHD models)
for an open circuit.
Page 3560 of 3833
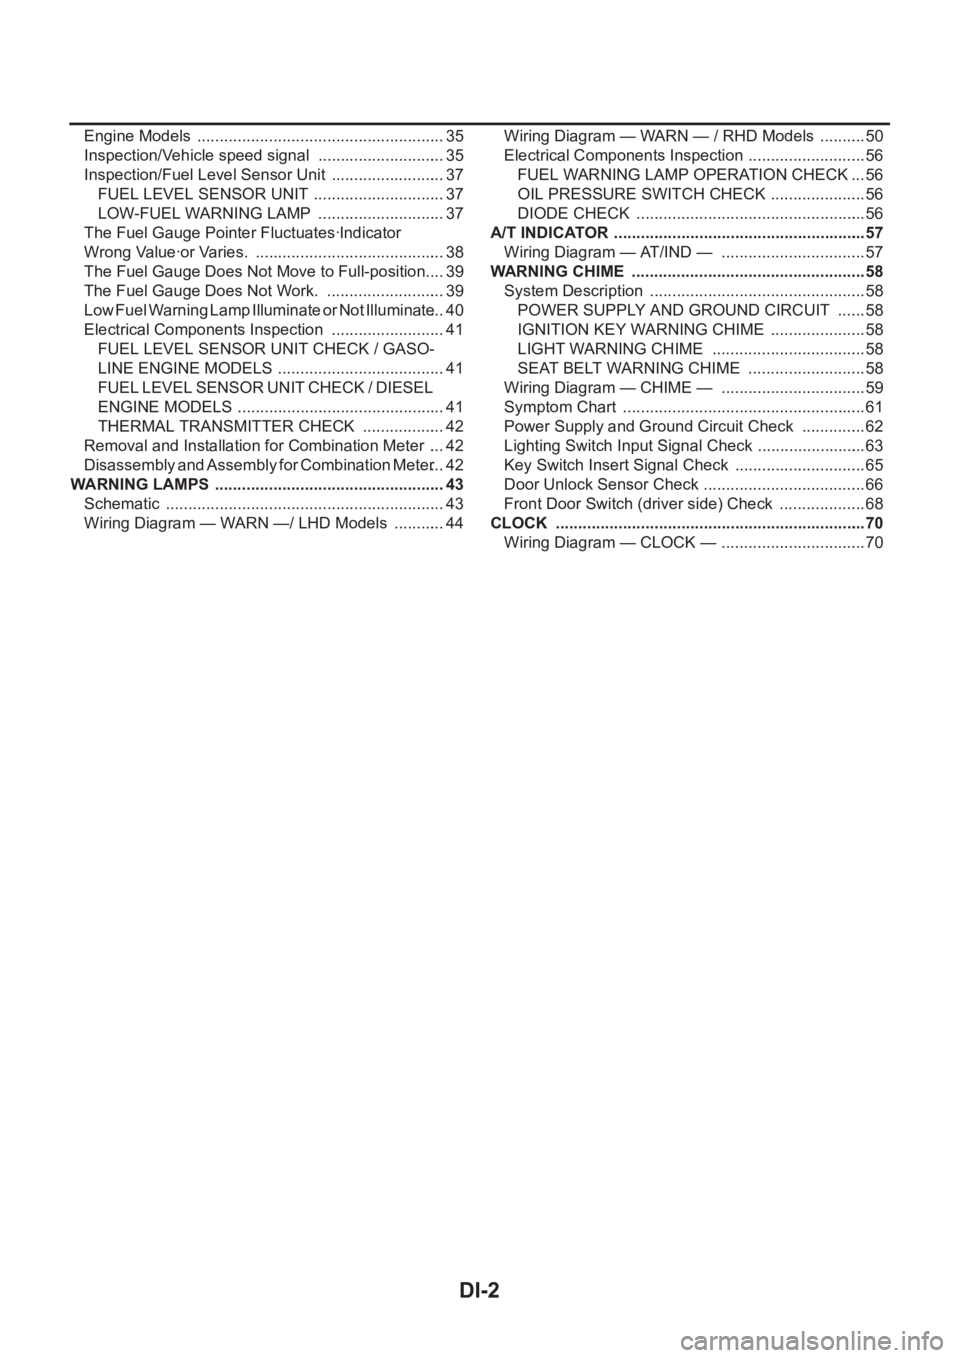
DI-2
Engine Models ........................................................ 35
Inspection/Vehicle speed signal ............................. 35
Inspection/Fuel Level Sensor Unit .......................... 37
FUEL LEVEL SENSOR UNIT .............................. 37
LOW-FUEL WARNING LAMP ............................. 37
The Fuel Gauge Pointer Fluctuates·Indicator
Wrong Value·or Varies. ........................................... 38
The Fuel Gauge Does Not Move to Full-position. ... 39
The Fuel Gauge Does Not Work. ........................... 39
Low Fuel Warning Lamp Illuminate or Not Illuminate ... 40
Electrical Components Inspection .......................... 41
FUEL LEVEL SENSOR UNIT CHECK / GASO-
LINE ENGINE MODELS ...................................... 41
FUEL LEVEL SENSOR UNIT CHECK / DIESEL
ENGINE MODELS ............................................... 41
THERMAL TRANSMITTER CHECK ................... 42
Removal and Installation for Combination Meter .... 42
Disassembly and Assembly for Combination Meter ... 42
WARNING LAMPS .................................................... 43
Schematic ............................................................... 43
Wiring Diagram — WARN —/ LHD Models ............ 44Wiring Diagram — WARN — / RHD Models ........... 50
Electrical Components Inspection ........................... 56
FUEL WARNING LAMP OPERATION CHECK ... 56
OIL PRESSURE SWITCH CHECK ...................... 56
DIODE CHECK .................................................... 56
A/T INDICATOR ......................................................... 57
Wiring Diagram — AT/IND — ................................. 57
WARNING CHIME .................................................. ... 58
System Description ................................................. 58
POWER SUPPLY AND GROUND CIRCUIT ....... 58
IGNITION KEY WARNING CHIME ...................... 58
LIGHT WARNING CHIME ................................... 58
SEAT BELT WARNING CHIME ........................... 58
Wiring Diagram — CHIME — ................................. 59
Symptom Chart ....................................................... 61
Power Supply and Ground Circuit Check ............... 62
Lighting Switch Input Signal Check ......................... 63
Key Switch Insert Signal Check .............................. 65
Door Unlock Sensor Check ..................................... 66
Front Door Switch (driver side) Check .................... 68
CLOCK ...................................................................... 70
Wiring Diagram — CLOCK — ................................. 70
Page 3614 of 3833
DI-56
WARNING LAMPS
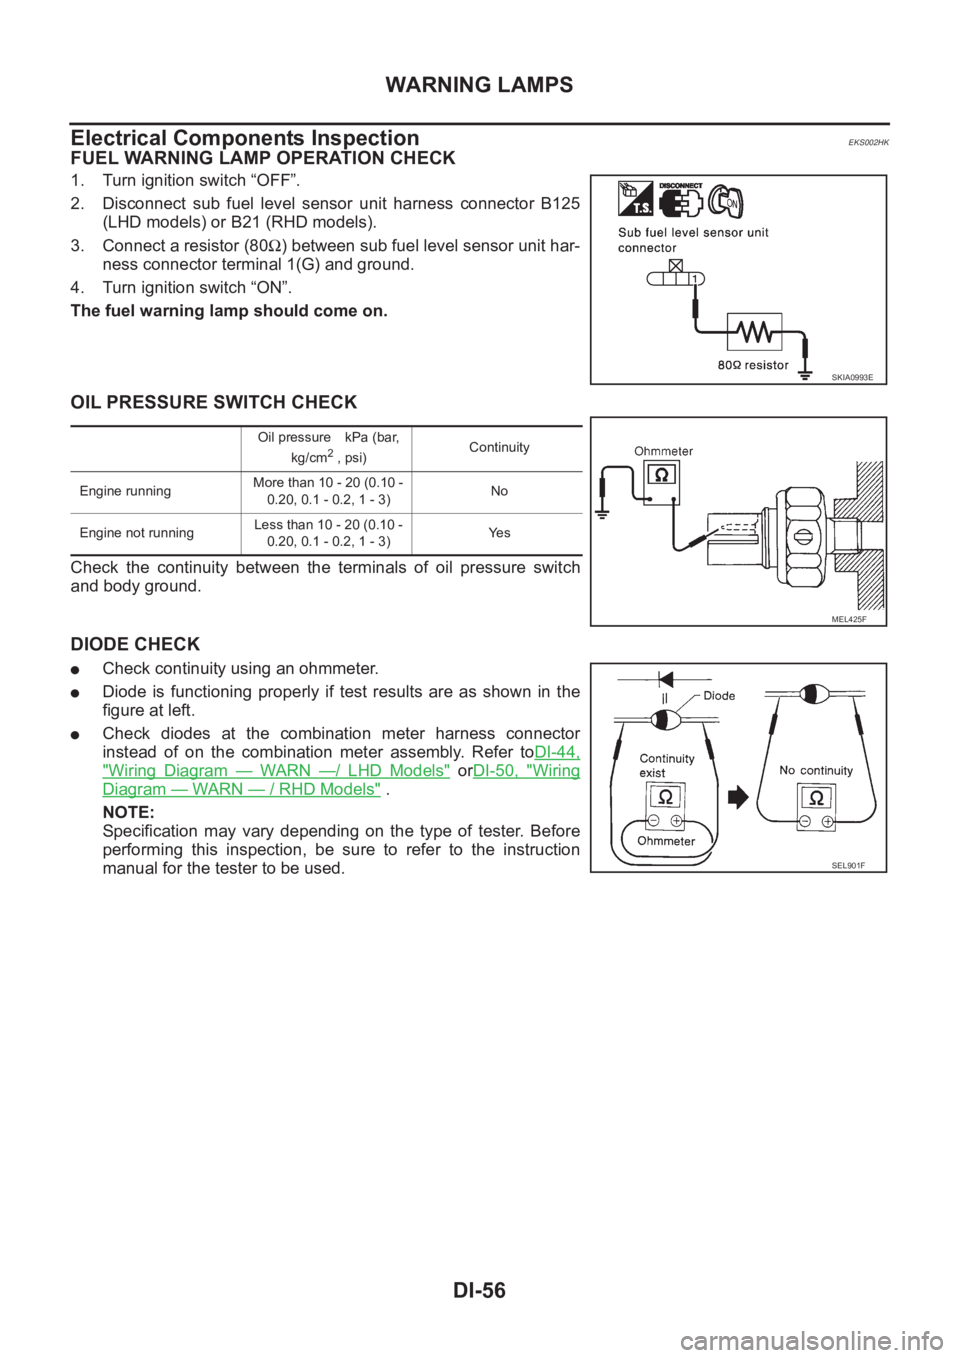
Electrical Components Inspection
EKS002HK
FUEL WARNING LAMP OPERATION CHECK
1. Turn ignition switch “OFF”.
2. Disconnect sub fuel level sensor unit harness connector B125
(LHD models) or B21 (RHD models).
3. Connect a resistor (80Ω) between sub fuel level sensor unit har-
ness connector terminal 1(G) and ground.
4. Turn ignition switch “ON”.
The fuel warning lamp should come on.
OIL PRESSURE SWITCH CHECK
Check the continuity between the terminals of oil pressure switch
and body ground.
DIODE CHECK
●Check continuity using an ohmmeter.
●Diode is functioning properly if test results are as shown in the
figure at left.
●Check diodes at the combination meter harness connector
instead of on the combination meter assembly. Refer toDI-44,
"Wiring Diagram — WARN —/ LHD Models" orDI-50, "Wiring
Diagram — WARN — / RHD Models" .
NOTE:
Specification may vary depending on the type of tester. Before
performing this inspection, be sure to refer to the instruction
manual for the tester to be used.
SKIA0993E
Oil pressure kPa (bar,
kg/cm2 , psi)Continuity
Engine runningMore than 10 - 20 (0.10 -
0.20, 0.1 - 0.2, 1 - 3)No
Engine not runningLess than 10 - 20 (0.10 -
0.20, 0.1 - 0.2, 1 - 3)Ye s
MEL425F
SEL901F
Page 3700 of 3833
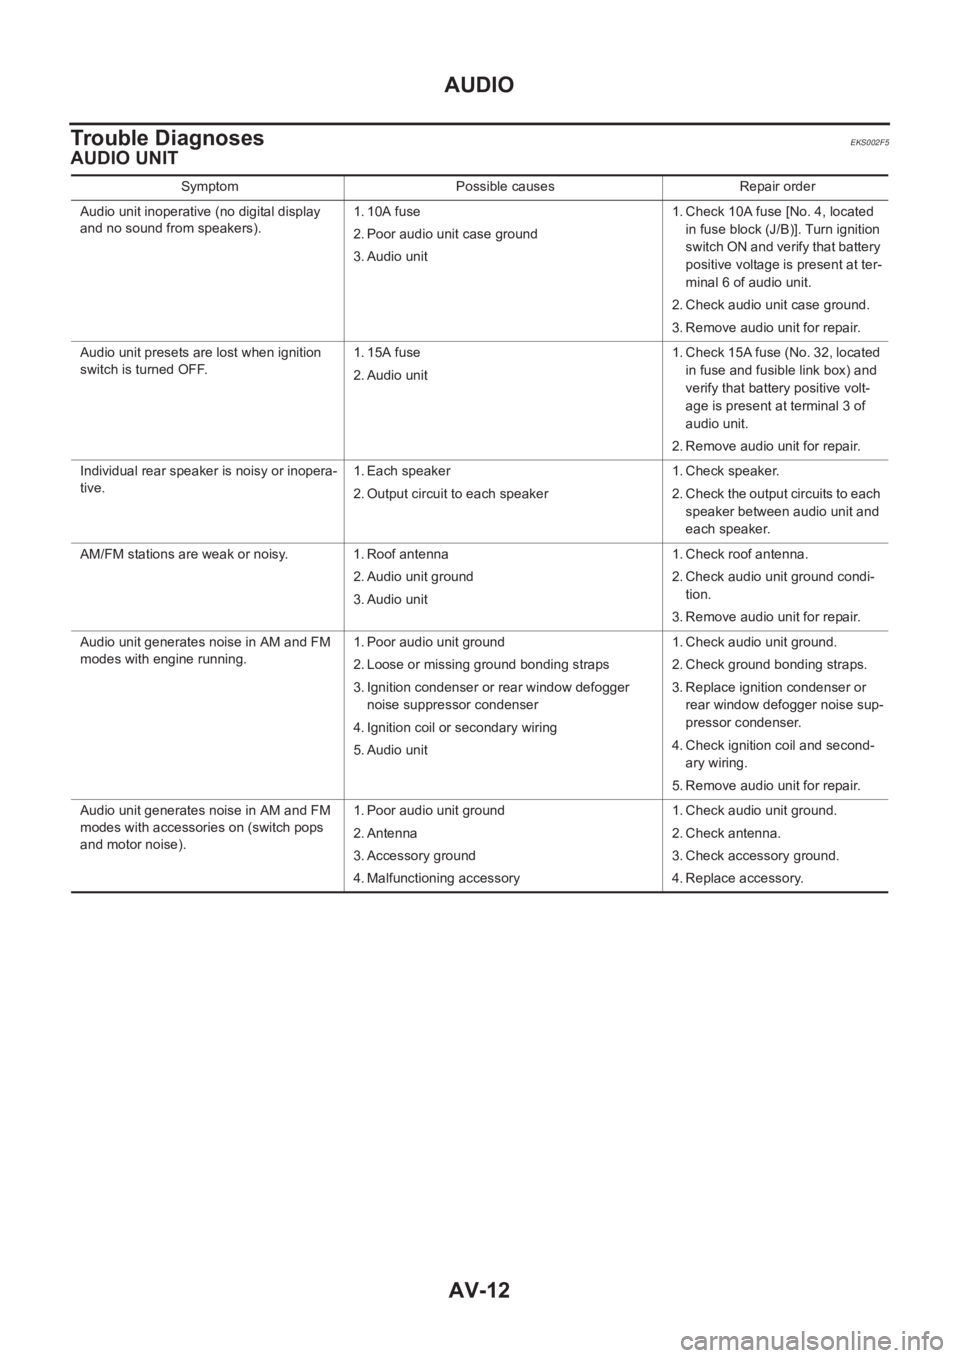
AV-12
AUDIO
Trouble Diagnoses
EKS002F5
AUDIO UNIT
Symptom Possible causes Repair order
Audio unit inoperative (no digital display
and no sound from speakers).1. 10A fuse
2. Poor audio unit case ground
3. Audio unit1. Check 10A fuse [No. 4, located
in fuse block (J/B)]. Turn ignition
switch ON and verify that battery
positive voltage is present at ter-
minal 6 of audio unit.
2. Check audio unit case ground.
3. Remove audio unit for repair.
Audio unit presets are lost when ignition
switch is turned OFF.1. 15A fuse
2. Audio unit1. Check 15A fuse (No. 32, located
in fuse and fusible link box) and
verify that battery positive volt-
age is present at terminal 3 of
audio unit.
2. Remove audio unit for repair.
Individual rear speaker is noisy or inopera-
tive.1. Each speaker
2. Output circuit to each speaker1. Check speaker.
2. Check the output circuits to each
speaker between audio unit and
each speaker.
AM/FM stations are weak or noisy. 1. Roof antenna
2. Audio unit ground
3. Audio unit1. Check roof antenna.
2. Check audio unit ground condi-
tion.
3. Remove audio unit for repair.
Audio unit generates noise in AM and FM
modes with engine running.1. Poor audio unit ground
2. Loose or missing ground bonding straps
3. Ignition condenser or rear window defogger
noise suppressor condenser
4. Ignition coil or secondary wiring
5. Audio unit1. Check audio unit ground.
2. Check ground bonding straps.
3. Replace ignition condenser or
rear window defogger noise sup-
pressor condenser.
4. Check ignition coil and second-
ary wiring.
5. Remove audio unit for repair.
Audio unit generates noise in AM and FM
modes with accessories on (switch pops
and motor noise).1. Poor audio unit ground
2. Antenna
3. Accessory ground
4. Malfunctioning accessory1. Check audio unit ground.
2. Check antenna.
3. Check accessory ground.
4. Replace accessory.
Page 3781 of 3833
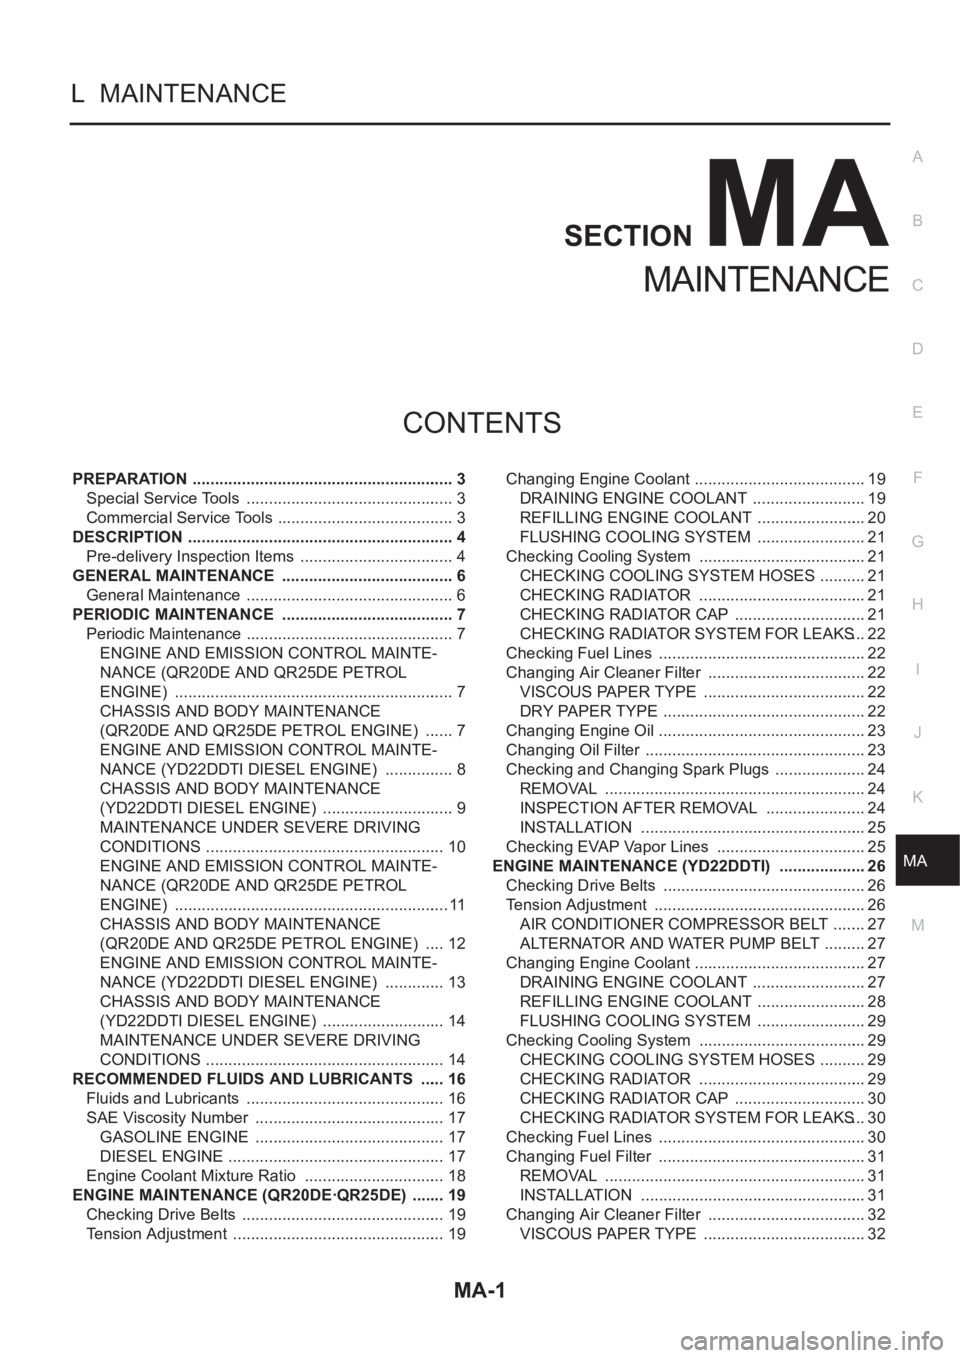
MA-1
MAINTENANCE
L MAINTENANCE
CONTENTS
C
D
E
F
G
H
I
J
K
M
SECTION
A
B
MA
MAINTENANCE
PREPARATION ........................................................... 3
Special Service Tools ............................................... 3
Commercial Service Tools ........................................ 3
DESCRIPTION ............................................................ 4
Pre-delivery Inspection Items ................................... 4
GENERAL MAINTENANCE ....................................... 6
General Maintenance ............................................... 6
PERIODIC MAINTENANCE ....................................... 7
Periodic Maintenance ............................................... 7
ENGINE AND EMISSION CONTROL MAINTE-
NANCE (QR20DE AND QR25DE PETROL
ENGINE) ............................................................... 7
CHASSIS AND BODY MAINTENANCE
(QR20DE AND QR25DE PETROL ENGINE) ....... 7
ENGINE AND EMISSION CONTROL MAINTE-
NANCE (YD22DDTI DIESEL ENGINE) ................ 8
CHASSIS AND BODY MAINTENANCE
(YD22DDTI DIESEL ENGINE) .............................. 9
MAINTENANCE UNDER SEVERE DRIVING
CONDITIONS ...................................................... 10
ENGINE AND EMISSION CONTROL MAINTE-
NANCE (QR20DE AND QR25DE PETROL
ENGINE) .............................................................. 11
CHASSIS AND BODY MAINTENANCE
(QR20DE AND QR25DE PETROL ENGINE) ..... 12
ENGINE AND EMISSION CONTROL MAINTE-
NANCE (YD22DDTI DIESEL ENGINE) .............. 13
CHASSIS AND BODY MAINTENANCE
(YD22DDTI DIESEL ENGINE) ............................ 14
MAINTENANCE UNDER SEVERE DRIVING
CONDITIONS ...................................................... 14
RECOMMENDED FLUIDS AND LUBRICANTS ...... 16
Fluids and Lubricants ............................................. 16
SAE Viscosity Number ........................................... 17
GASOLINE ENGINE ........................................... 17
DIESEL ENGINE ................................................. 17
Engine Coolant Mixture Ratio ................................ 18
ENGINE MAINTENANCE (QR20DE·QR25DE) ........ 19
Checking Drive Belts .............................................. 19
Tension Adjustment ................................................ 19Changing Engine Coolant ....................................... 19
DRAINING ENGINE COOLANT .......................... 19
REFILLING ENGINE COOLANT ......................... 20
FLUSHING COOLING SYSTEM ......................... 21
Checking Cooling System ...................................... 21
CHECKING COOLING SYSTEM HOSES ........... 21
CHECKING RADIATOR ...................................... 21
CHECKING RADIATOR CAP .............................. 21
CHECKING RADIATOR SYSTEM FOR LEAKS ... 22
Checking Fuel Lines ............................................ ... 22
Changing Air Cleaner Filter .................................... 22
VISCOUS PAPER TYPE ..................................... 22
DRY PAPER TYPE .............................................. 22
Changing Engine Oil ............................................ ... 23
Changing Oil Filter .................................................. 23
Checking and Changing Spark Plugs ..................... 24
REMOVAL ........................................................... 24
INSPECTION AFTER REMOVAL ....................... 24
INSTALLATION ................................................... 25
Checking EVAP Vapor Lines .................................. 25
ENGINE MAINTENANCE (YD22DDTI) .................... 26
Checking Drive Belts .............................................. 26
Tension Adjustment ............................................. ... 26
AIR CONDITIONER COMPRESSOR BELT ........ 27
ALTERNATOR AND WATER PUMP BELT .......... 27
Changing Engine Coolant ....................................... 27
DRAINING ENGINE COOLANT .......................... 27
REFILLING ENGINE COOLANT ......................... 28
FLUSHING COOLING SYSTEM ......................... 29
Checking Cooling System ...................................... 29
CHECKING COOLING SYSTEM HOSES ........... 29
CHECKING RADIATOR ...................................... 29
CHECKING RADIATOR CAP .............................. 30
CHECKING RADIATOR SYSTEM FOR LEAKS ... 30
Checking Fuel Lines ............................................ ... 30
Changing Fuel Filter ............................................... 31
REMOVAL ........................................................... 31
INSTALLATION ................................................... 31
Changing Air Cleaner Filter .................................... 32
VISCOUS PAPER TYPE ..................................... 32