Page 1997 of 3833
TRANSAXLE ASSEMBLY
MT-21
D
E
F
G
H
I
J
K
L
MA
B
MT
FINAL DRIVE COMPONENTS
1. Differential side bearing outer race 2. Differential side bearing 3. Differential case
4. Final gear 5. Differential side bearing 6. Differential side bearing outer race
7. Differential side bearing adjusting
shim8. Pinion mate shaft 9. Side gear
10. Side gear thrust washer 11. Pinion mate gear 12. Pinion mate gear washer
13. Retaining pin
SCIA0388E
Page 1998 of 3833
MT-22
TRANSAXLE ASSEMBLY
Component Parts (RS6F51A)
ECS008BZ
CASE AND HOUSING COMPONENTS
1. Clutch housing 2. Input shaft oil seal 3. Oil channel
4. Magnet 5. Differential oil seal 6. Ball pin
7. Washer 8. Transaxle case 9. Welch plug
10. Bore plug 11. Differential oil seal 12. Park/Neutral position switch
13. Oil gutter 14. Back-up lamp switch 15. Air breather tube
16. Baffle plate 17. Filler plug 18. Gasket
19. Drain plug 20. Gasket
SCIA1112E
Page 2002 of 3833
MT-26
TRANSAXLE ASSEMBLY
FINAL DRIVE COMPONENTS
Disassembly and Assembly (RS5F51A)ECS008C0
DISASSEMBLY
1. Remove drain plug and filler plug.
2. Remove park/neutral position switch and back-up lamp switch.
3. After removing shift check and stopper bolt, remove control
assembly.
1. Differential side bearing outer race 2. Differential side bearing 3. Differential case
4. Final gear 5. Differential side bearing 6. Differential side bearing outer race
7. Differential side bearing adjusting shim 8. Pinion mate shaft 9.Side gear
10. Side gear thrust washer 11. Pinion mate gear 12. Pinion mate gear washer
13. Retaining pin
SCIA0388E
SCIA0389E
Page 2003 of 3833
TRANSAXLE ASSEMBLY
MT-27
D
E
F
G
H
I
J
K
L
MA
B
MT
4. Remove check plugs (3 pieces), check springs (3 pieces), check
balls (3 pieces) and shift check sleeve (1 piece).
5. Remove transaxle case fixing bolts.
6. Remove bore plug.
CAUTION:
Be careful not to damage transaxle case.
7. While spreading the snap ring of mainshaft rear bearing located
at bore plug hole, remove transaxle case.
8. Remove oil gutter, baffle plate.
9. Remove snap ring, mainshaft rear bearing adjusting shim and
input shaft rear bearing adjusting shim from transaxle case.
10. Remove differential side bearing outer race (transaxle case
side) and then adjust shim.
11. Remove welch plug.
12. Remove differential oil seal (tansaxle case side).
13. Remove magnet from clutch housing.
SCIA0396E
SCIA0983E
SCIA0897E
SCIA0402E
SCIA0397E
Page 2005 of 3833
TRANSAXLE ASSEMBLY
MT-29
D
E
F
G
H
I
J
K
L
MA
B
MT
28. Remove gear components from clutch housing in the following
procedure.
a. While tapping input shaft with plastic hammer, remove input
shaft assembly, mainshaft assembly and reverse idler gear
assembly as a set.
CAUTION:
Always withdraw mainshaft straight out. Failure to do so
can damage resin oil channel on clutch housing side.
b. Remove final drive assembly.
29. Remove bearing retainer and then mainshaft front bearing.
30. Remove oil channel on mainshaft side.
31. Remove differential oil seal (clutch housing side).
32. Remove differential side bearing outer race (clutch housing
side).
33. Remove input shaft oil seal.
CAUTION:
Be careful not to damage clutch housing.
SCIA0395E
SCIA1077J
SCIA1068J
SCIA1069J
SCIA0398E
Page 2006 of 3833
MT-30
TRANSAXLE ASSEMBLY
ASSEMBLY
1. Using a drift, install input shaft oil seal from clutch housing end
of side to the depth of 1.8 to 2.8 mm (0.071 to 0.110 in).
CAUTION:
Do not reuse oil seals.
2. Using a drift, install differential oil seal until the face is flush with
clutch housing.
CAUTION:
Do not reuse oil seals.
3. Install oil channel on mainshaft side.
CAUTION:
Be careful with orientation of installation.
4. Using a drift, install mainshaft front bearing.
CAUTION:
Be careful with orientation of installation.
SCIA0399E
SCIA1070J
SCIA0986E
SCIA0401E
Page 2007 of 3833
TRANSAXLE ASSEMBLY
MT-31
D
E
F
G
H
I
J
K
L
MA
B
MT
5. Install bearing retainer.
CAUTION:
Install with punched surface facing up.
6. Install differential side bearing outer race.
7. Install final drive assembly into clutch housing.
8. Install input shaft assembly, mainshaft assembly, and reverse
idler gear assembly into clutch housing.
CAUTION:
Be sure not to damage input shaft oil seal.
9. Install 1st-2nd fork rod bracket onto 1st-2nd fork rod, and then
install retaining pin.
CAUTION:
Do not reuse retaining pins.
SCIA0400E
SCIA0987E
SCIA0888E
SCIA0395E
SCIA0889E
Page 2009 of 3833

TRANSAXLE ASSEMBLY
MT-33
D
E
F
G
H
I
J
K
L
MA
B
MT
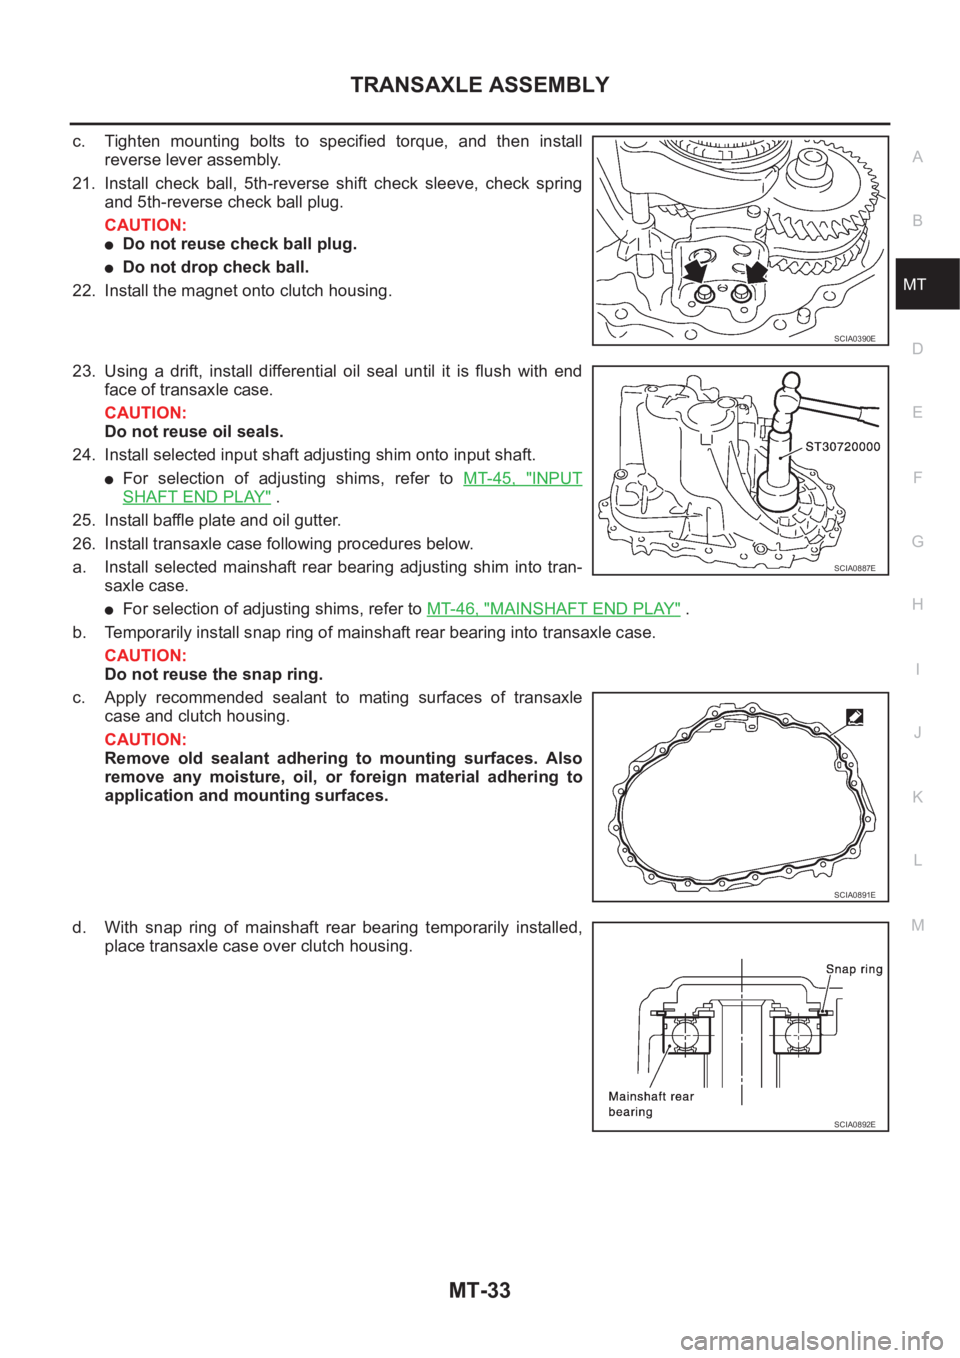
c. Tighten mounting bolts to specified torque, and then install
reverse lever assembly.
21. Install check ball, 5th-reverse shift check sleeve, check spring
and 5th-reverse check ball plug.
CAUTION:
●Do not reuse check ball plug.
●Do not drop check ball.
22. Install the magnet onto clutch housing.
23. Using a drift, install differential oil seal until it is flush with end
face of transaxle case.
CAUTION:
Do not reuse oil seals.
24. Install selected input shaft adjusting shim onto input shaft.
●For selection of adjusting shims, refer to MT-45, "INPUT
SHAFT END PLAY" .
25. Install baffle plate and oil gutter.
26. Install transaxle case following procedures below.
a. Install selected mainshaft rear bearing adjusting shim into tran-
saxle case.
●For selection of adjusting shims, refer to MT-46, "MAINSHAFT END PLAY" .
b. Temporarily install snap ring of mainshaft rear bearing into transaxle case.
CAUTION:
Do not reuse the snap ring.
c. Apply recommended sealant to mating surfaces of transaxle
case and clutch housing.
CAUTION:
Remove old sealant adhering to mounting surfaces. Also
remove any moisture, oil, or foreign material adhering to
application and mounting surfaces.
d. With snap ring of mainshaft rear bearing temporarily installed,
place transaxle case over clutch housing.
SCIA0390E
SCIA0887E
SCIA0891E
SCIA0892E