Page 354 of 4284

Symptom:
CABIN HEATER CONTROL CIRCUIT OPEN (ACTIVE)
When Monitored and Set Condition:
CABIN HEATER CONTROL CIRCUIT OPEN (ACTIVE)
When Monitored: When the DCHA system is off
Set Condition: The DCHA Low Side Driver inside the FCM expects to see a system
voltage of 13.8 volts through the DCHA relay coil when the DCHA system is off. This DTC
will set if the FCM sees a voltage below 3.5 volts on the Cabin Heater Assist Control circuit
during this time.
POSSIBLE CAUSES
NO RESPONSE FROM CABIN HEATER MODULE
CABIN HEATER ASSIST CONTROL CIRCUIT OPEN TO IPM
IPM, OPEN CIRCUIT
FCM, OPEN CIRCUIT
FCM FAULT
CABIN HEATER ASSIST CONTROL CIRCUIT SHORTED TO THE GROUND CIRCUIT
CABIN HEATER ASSIST CONTROL CIRCUIT SHORTED TO GROUND
CABIN HEATER ASSIST CONTROL CIRCUIT OPEN
DCHA CONTROL UNIT FAULT
TEST ACTION APPLICABILITY
1WARNING: DO NOT OPERATE THE DCHA IN AN ENCLOSED AREA SUCH
AS A GARAGE THAT DOES NOT HAVE EXHAUST VENTILATION FACILI-
TIES. ALWAYS VENT THE DCHA's EXHAUST WHEN OPERATING THE
DCHA. FAILURE TO FOLLOW THESE INSTRUCTIONS MAY RESULT IN
PERSONAL INJURY OR DEATH.
Turn the ignition on.
With the DRBIIIt, attempt to communicate with the Cabin Heater Module.
Does the DRBIIItdisplay: No Response From Cabin Heater Module?All
Ye s®Refer to Communication for the related symptom.
Perform CABIN HEATER VERIFICATION TEST - VER 1.
No®Go To 2
325
CABIN HEATER
Page 387 of 4284
Symptom:
LEFT PSD MESSAGES NOT RECEIVED
When Monitored and Set Condition:
LEFT PSD MESSAGES NOT RECEIVED
When Monitored: When the Body Control Module is awake.
Set Condition: The BCM does not sense a response from the Left Power Sliding Door
Module.
POSSIBLE CAUSES
ATTEMPT TO COMMUNICATE WITH THE LEFT SLIDING DOOR CONTROL MODULE
BODY CONTROL MODULE
TEST ACTION APPLICABILITY
1 Turn the ignition on.
With the DRB, attempt to communicate with the Left Sliding Door Control Module.
Was the DRB able to I/D or communicate with the Left Sliding Door Control Module?All
Ye s®Go To 2
No®Refer to the Communication category for the related symptom(s).
Perform BODY VERIFICATION TEST - VER 1.
2 With the DRB, erase DTC's.
Cycle the ignition switch from off to on and wait approximately 1 minute.
With the DRB, read DTC's.
Did this DTC reset?All
Ye s®Replace the Body Control Module.
Perform BODY VERIFICATION TEST - VER 1.
No®Test Complete.
358
COMMUNICATION
Page 388 of 4284
Symptom:
LIFTGATE MODULE MESSAGES NOT RECEIVED
When Monitored and Set Condition:
LIFTGATE MODULE MESSAGES NOT RECEIVED
When Monitored: When the Body Control Module is awake.
Set Condition: The BCM does not sense a response from the Power Liftgate Control
Module.
POSSIBLE CAUSES
ATTEMPT TO COMMUNICATE WITH THE POWER LIFTGATE MODULE
BODY CONTROL MODULE
TEST ACTION APPLICABILITY
1 Turn the ignition on.
With the DRB, attempt to communicate with the Power Liftgate Module.
Was the DRB able to I/D or communicate with the Power Liftgate Module?All
Ye s®Go To 2
No®Refer to the Communication category for the related symptom(s).
Perform BODY VERIFICATION TEST - VER 1.
2 With the DRB, erase DTC's.
Cycle the ignition switch from off to on and wait approximately 1 minute.
With the DRB, read DTC's.
Did this DTC reset?All
Ye s®Replace the Body Control Module.
Perform BODY VERIFICATION TEST - VER 1.
No®Test Complete.
359
COMMUNICATION
Page 398 of 4284
Symptom:
RIGHT PSD MESSAGES NOT RECEIVED
When Monitored and Set Condition:
RIGHT PSD MESSAGES NOT RECEIVED
When Monitored: When the Body Control Module is awake.
Set Condition: The BCM does not sense a response from the Right Power Sliding Door
Module.
POSSIBLE CAUSES
ATTEMPT TO COMMUNICATE WITH THE RIGHT SLIDING DOOR CONTROL MODULE
BODY CONTROL MODULE
TEST ACTION APPLICABILITY
1 Turn the ignition on.
With the DRB, attempt to communicate with the Right Sliding Door Control Module.
Was the DRB able to I/D or communicate with the Right Sliding Door Control
Module?All
Ye s®Go To 2
No®Refer to the Communication category for the related symptom(s).
Perform BODY VERIFICATION TEST - VER 1.
2 With the DRB, erase DTC's.
Cycle the ignition switch from off to on and wait approximately 1 minute.
With the DRB, read DTC's.
Did this DTC reset?All
Ye s®Replace the Body Control Module.
Perform BODY VERIFICATION TEST - VER 1.
No®Test Complete.
369
COMMUNICATION
Page 408 of 4284

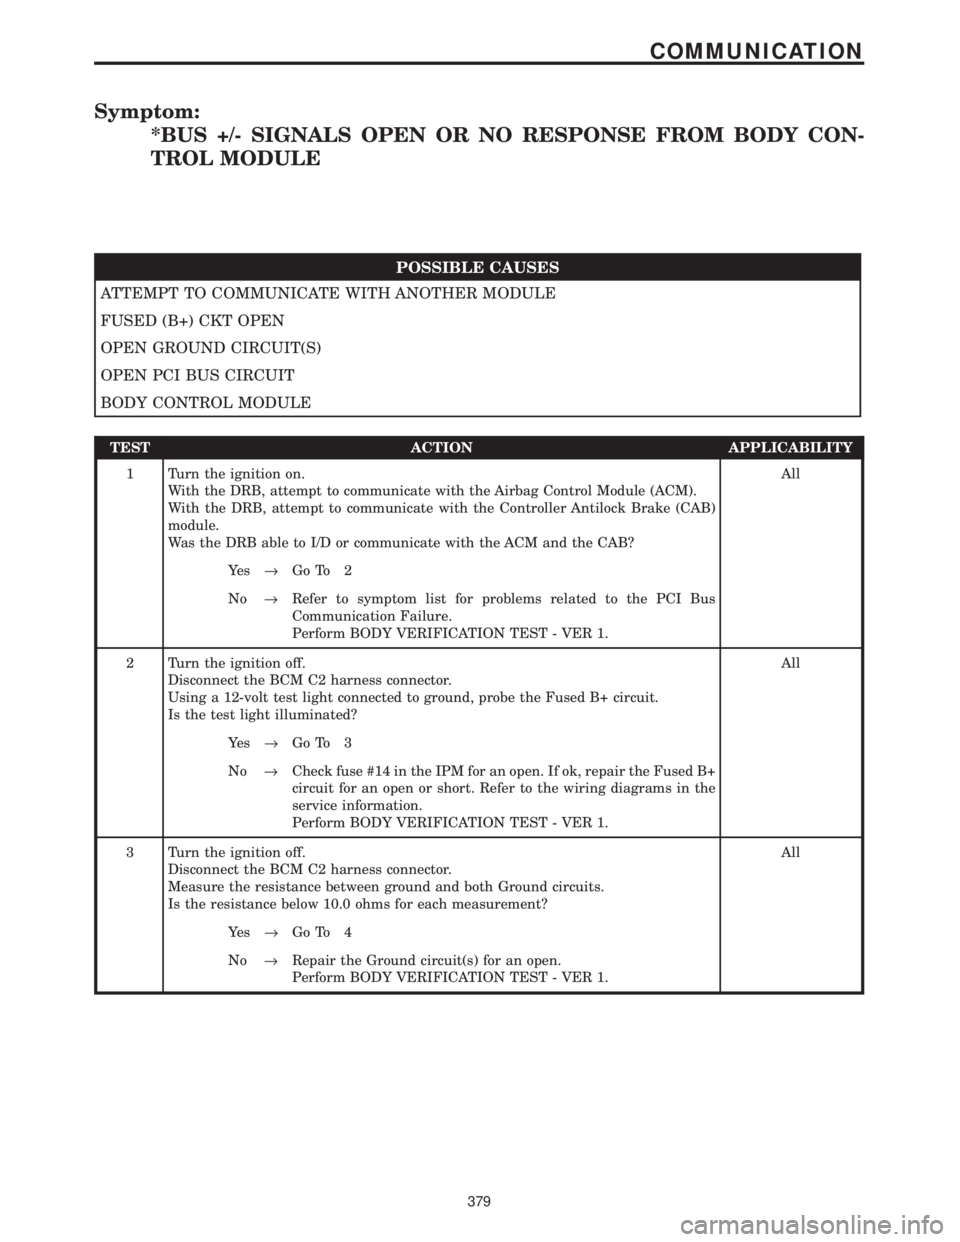
Symptom:
*BUS +/- SIGNALS OPEN OR NO RESPONSE FROM BODY CON-
TROL MODULE
POSSIBLE CAUSES
ATTEMPT TO COMMUNICATE WITH ANOTHER MODULE
FUSED (B+) CKT OPEN
OPEN GROUND CIRCUIT(S)
OPEN PCI BUS CIRCUIT
BODY CONTROL MODULE
TEST ACTION APPLICABILITY
1 Turn the ignition on.
With the DRB, attempt to communicate with the Airbag Control Module (ACM).
With the DRB, attempt to communicate with the Controller Antilock Brake (CAB)
module.
Was the DRB able to I/D or communicate with the ACM and the CAB?All
Ye s®Go To 2
No®Refer to symptom list for problems related to the PCI Bus
Communication Failure.
Perform BODY VERIFICATION TEST - VER 1.
2 Turn the ignition off.
Disconnect the BCM C2 harness connector.
Using a 12-volt test light connected to ground, probe the Fused B+ circuit.
Is the test light illuminated?All
Ye s®Go To 3
No®Check fuse #14 in the IPM for an open. If ok, repair the Fused B+
circuit for an open or short. Refer to the wiring diagrams in the
service information.
Perform BODY VERIFICATION TEST - VER 1.
3 Turn the ignition off.
Disconnect the BCM C2 harness connector.
Measure the resistance between ground and both Ground circuits.
Is the resistance below 10.0 ohms for each measurement?All
Ye s®Go To 4
No®Repair the Ground circuit(s) for an open.
Perform BODY VERIFICATION TEST - VER 1.
379
COMMUNICATION
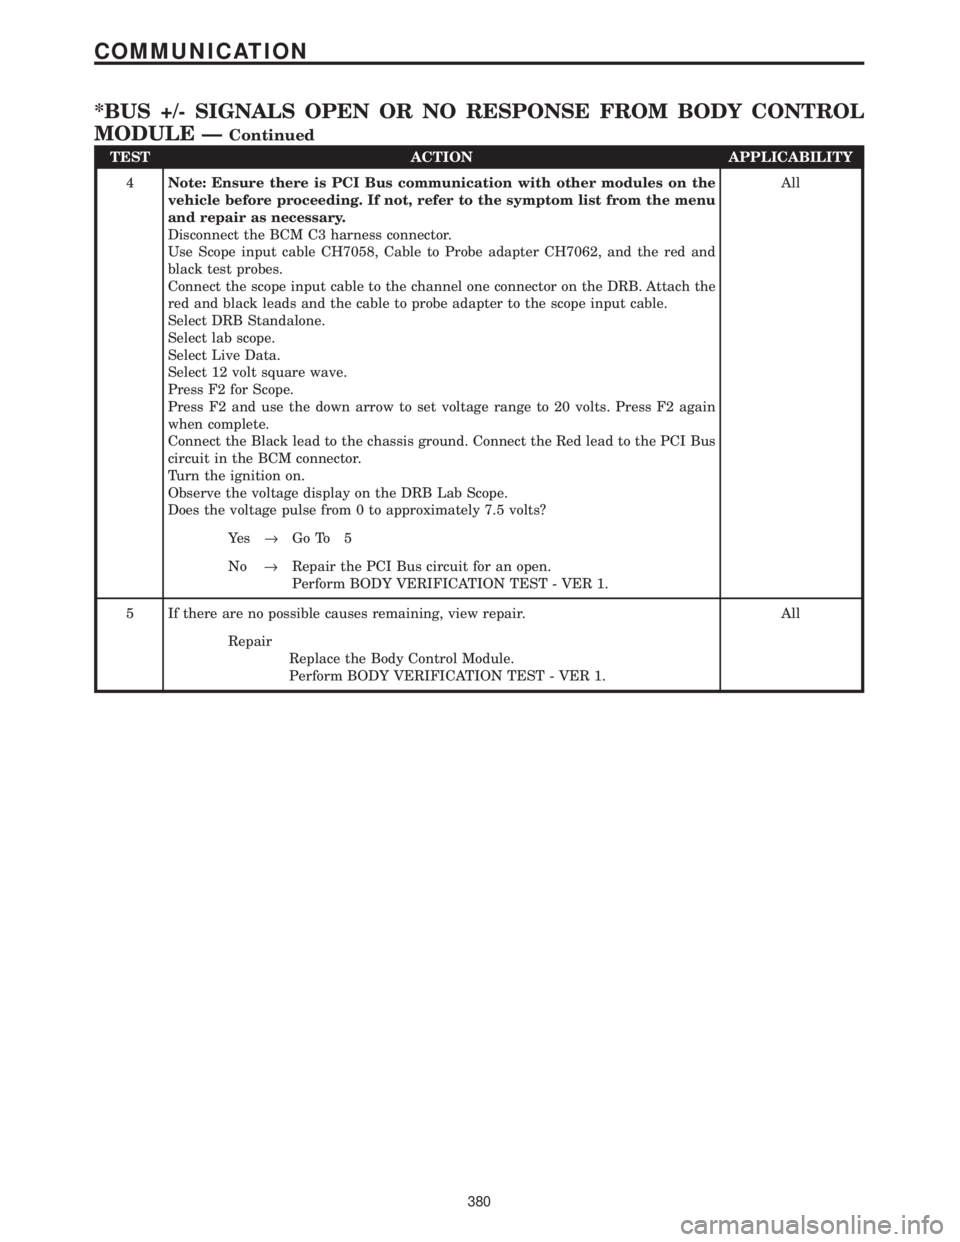
Page 409 of 4284

TEST ACTION APPLICABILITY
4Note: Ensure there is PCI Bus communication with other modules on the
vehicle before proceeding. If not, refer to the symptom list from the menu
and repair as necessary.
Disconnect the BCM C3 harness connector.
Use Scope input cable CH7058, Cable to Probe adapter CH7062, and the red and
black test probes.
Connect the scope input cable to the channel one connector on the DRB. Attach the
red and black leads and the cable to probe adapter to the scope input cable.
Select DRB Standalone.
Select lab scope.
Select Live Data.
Select 12 volt square wave.
Press F2 for Scope.
Press F2 and use the down arrow to set voltage range to 20 volts. Press F2 again
when complete.
Connect the Black lead to the chassis ground. Connect the Red lead to the PCI Bus
circuit in the BCM connector.
Turn the ignition on.
Observe the voltage display on the DRB Lab Scope.
Does the voltage pulse from 0 to approximately 7.5 volts?All
Ye s®Go To 5
No®Repair the PCI Bus circuit for an open.
Perform BODY VERIFICATION TEST - VER 1.
5 If there are no possible causes remaining, view repair. All
Repair
Replace the Body Control Module.
Perform BODY VERIFICATION TEST - VER 1.
380
COMMUNICATION
*BUS +/- SIGNALS OPEN OR NO RESPONSE FROM BODY CONTROL
MODULE Ð
Continued
Page 410 of 4284

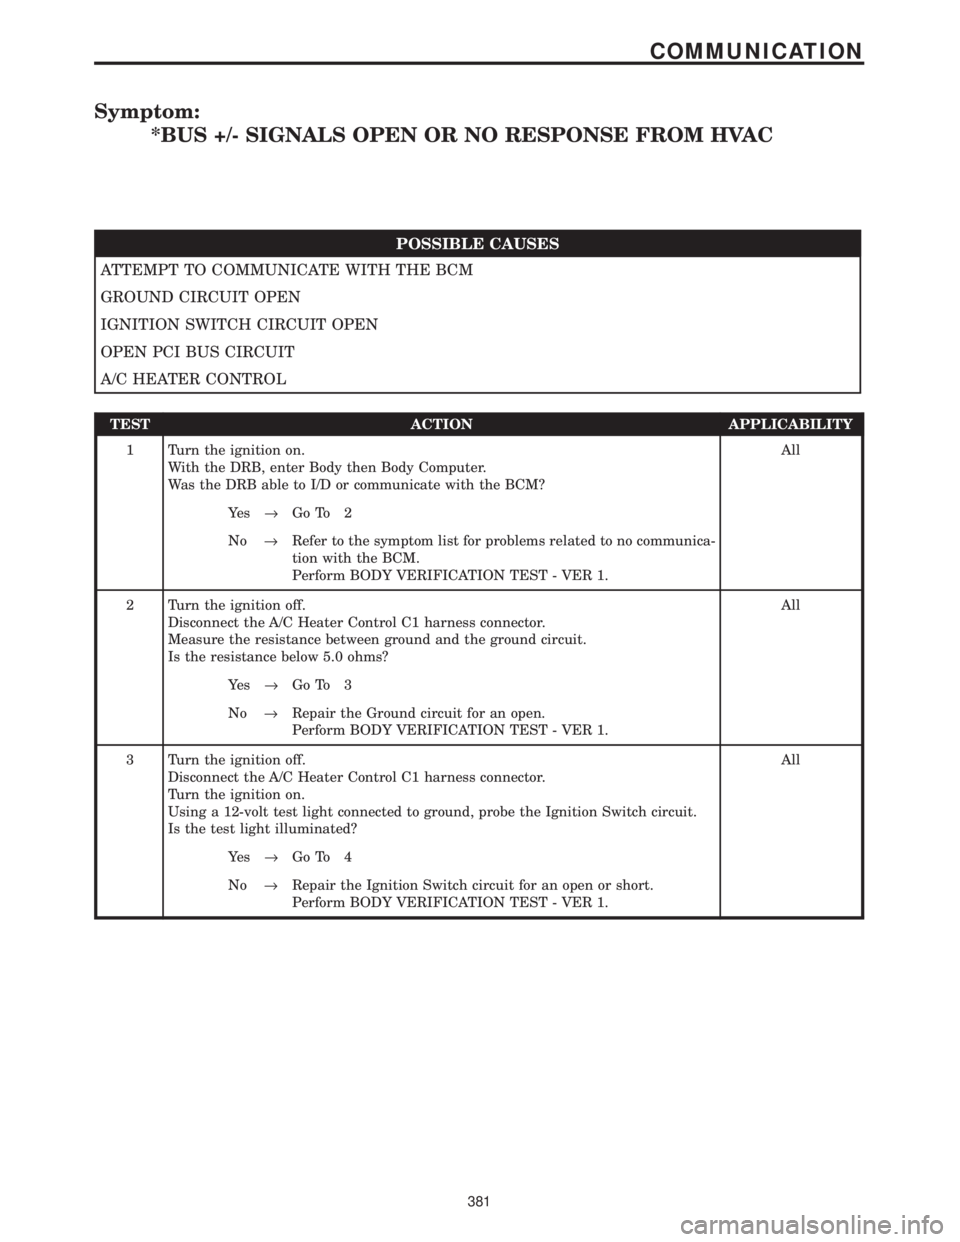
Symptom:
*BUS +/- SIGNALS OPEN OR NO RESPONSE FROM HVAC
POSSIBLE CAUSES
ATTEMPT TO COMMUNICATE WITH THE BCM
GROUND CIRCUIT OPEN
IGNITION SWITCH CIRCUIT OPEN
OPEN PCI BUS CIRCUIT
A/C HEATER CONTROL
TEST ACTION APPLICABILITY
1 Turn the ignition on.
With the DRB, enter Body then Body Computer.
Was the DRB able to I/D or communicate with the BCM?All
Ye s®Go To 2
No®Refer to the symptom list for problems related to no communica-
tion with the BCM.
Perform BODY VERIFICATION TEST - VER 1.
2 Turn the ignition off.
Disconnect the A/C Heater Control C1 harness connector.
Measure the resistance between ground and the ground circuit.
Is the resistance below 5.0 ohms?All
Ye s®Go To 3
No®Repair the Ground circuit for an open.
Perform BODY VERIFICATION TEST - VER 1.
3 Turn the ignition off.
Disconnect the A/C Heater Control C1 harness connector.
Turn the ignition on.
Using a 12-volt test light connected to ground, probe the Ignition Switch circuit.
Is the test light illuminated?All
Ye s®Go To 4
No®Repair the Ignition Switch circuit for an open or short.
Perform BODY VERIFICATION TEST - VER 1.
381
COMMUNICATION
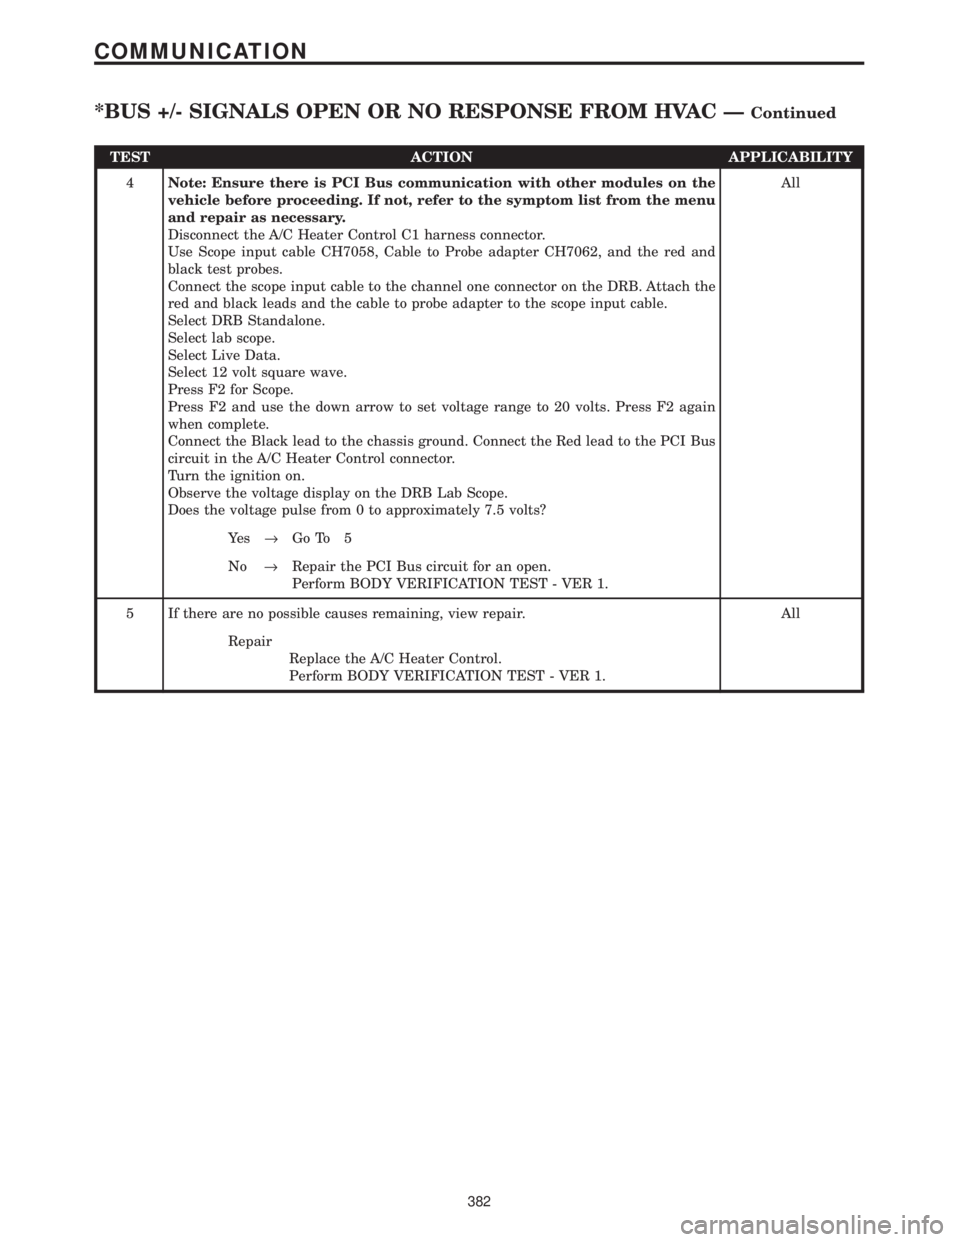
Page 411 of 4284

TEST ACTION APPLICABILITY
4Note: Ensure there is PCI Bus communication with other modules on the
vehicle before proceeding. If not, refer to the symptom list from the menu
and repair as necessary.
Disconnect the A/C Heater Control C1 harness connector.
Use Scope input cable CH7058, Cable to Probe adapter CH7062, and the red and
black test probes.
Connect the scope input cable to the channel one connector on the DRB. Attach the
red and black leads and the cable to probe adapter to the scope input cable.
Select DRB Standalone.
Select lab scope.
Select Live Data.
Select 12 volt square wave.
Press F2 for Scope.
Press F2 and use the down arrow to set voltage range to 20 volts. Press F2 again
when complete.
Connect the Black lead to the chassis ground. Connect the Red lead to the PCI Bus
circuit in the A/C Heater Control connector.
Turn the ignition on.
Observe the voltage display on the DRB Lab Scope.
Does the voltage pulse from 0 to approximately 7.5 volts?All
Ye s®Go To 5
No®Repair the PCI Bus circuit for an open.
Perform BODY VERIFICATION TEST - VER 1.
5 If there are no possible causes remaining, view repair. All
Repair
Replace the A/C Heater Control.
Perform BODY VERIFICATION TEST - VER 1.
382
COMMUNICATION
*BUS +/- SIGNALS OPEN OR NO RESPONSE FROM HVAC ÐContinued