2001 CHRYSLER VOYAGER key
[x] Cancel search: keyPage 1021 of 4284
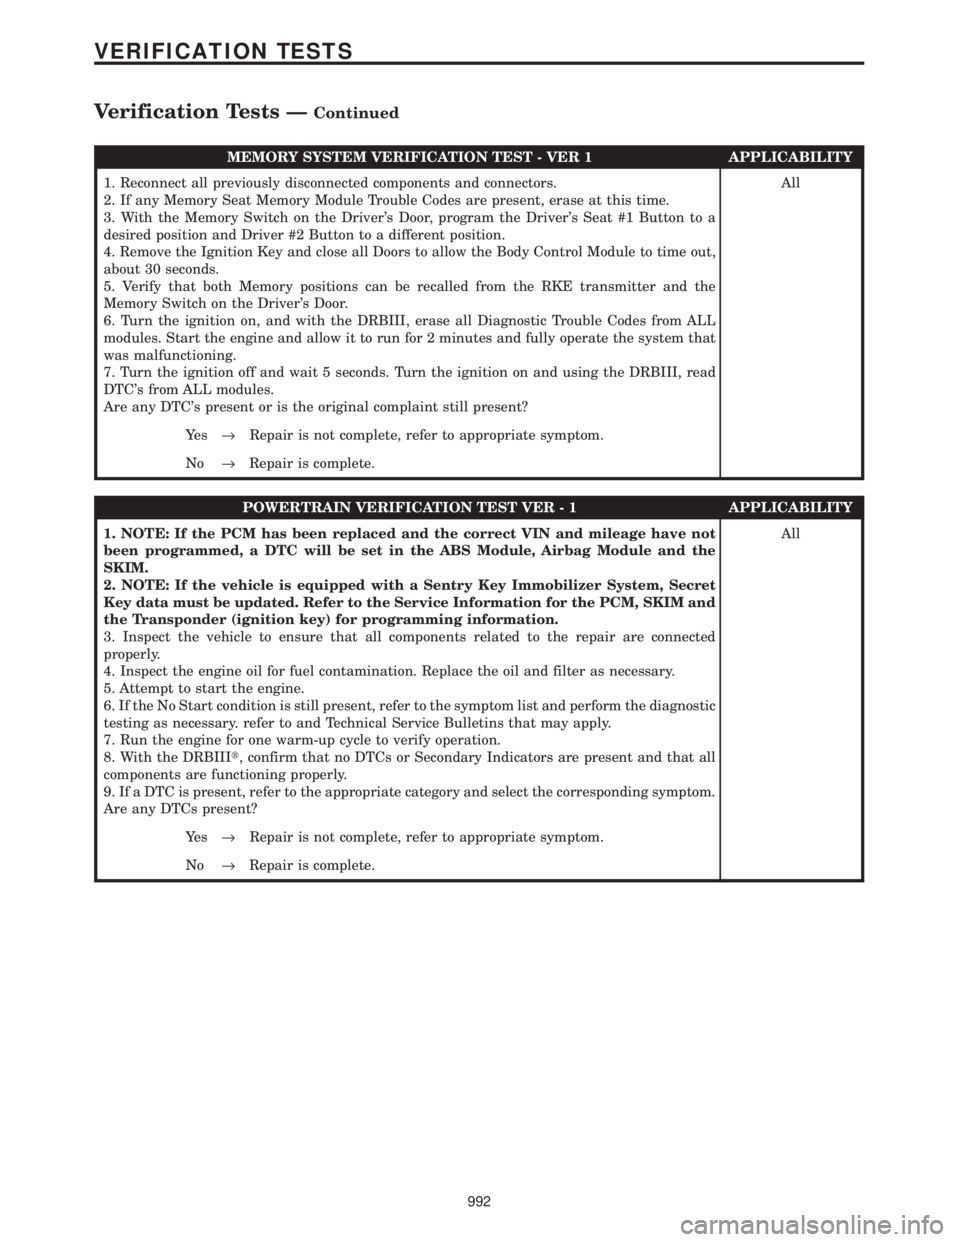
MEMORY SYSTEM VERIFICATION TEST - VER 1 APPLICABILITY
1. Reconnect all previously disconnected components and connectors.
2. If any Memory Seat Memory Module Trouble Codes are present, erase at this time.
3. With the Memory Switch on the Driver's Door, program the Driver's Seat #1 Button to a
desired position and Driver #2 Button to a different position.
4. Remove the Ignition Key and close all Doors to allow the Body Control Module to time out,
about 30 seconds.
5. Verify that both Memory positions can be recalled from the RKE transmitter and the
Memory Switch on the Driver's Door.
6. Turn the ignition on, and with the DRBIII, erase all Diagnostic Trouble Codes from ALL
modules. Start the engine and allow it to run for 2 minutes and fully operate the system that
was malfunctioning.
7. Turn the ignition off and wait 5 seconds. Turn the ignition on and using the DRBIII, read
DTC's from ALL modules.
Are any DTC's present or is the original complaint still present?All
Ye s®Repair is not complete, refer to appropriate symptom.
No®Repair is complete.
POWERTRAIN VERIFICATION TEST VER - 1 APPLICABILITY
1. NOTE: If the PCM has been replaced and the correct VIN and mileage have not
been programmed, a DTC will be set in the ABS Module, Airbag Module and the
SKIM.
2. NOTE: If the vehicle is equipped with a Sentry Key Immobilizer System, Secret
Key data must be updated. Refer to the Service Information for the PCM, SKIM and
the Transponder (ignition key) for programming information.
3. Inspect the vehicle to ensure that all components related to the repair are connected
properly.
4. Inspect the engine oil for fuel contamination. Replace the oil and filter as necessary.
5. Attempt to start the engine.
6. If the No Start condition is still present, refer to the symptom list and perform the diagnostic
testing as necessary. refer to and Technical Service Bulletins that may apply.
7. Run the engine for one warm-up cycle to verify operation.
8. With the DRBIIIt, confirm that no DTCs or Secondary Indicators are present and that all
components are functioning properly.
9. If a DTC is present, refer to the appropriate category and select the corresponding symptom.
Are any DTCs present?All
Ye s®Repair is not complete, refer to appropriate symptom.
No®Repair is complete.
992
VERIFICATION TESTS
Verification Tests ÐContinued
Page 1022 of 4284
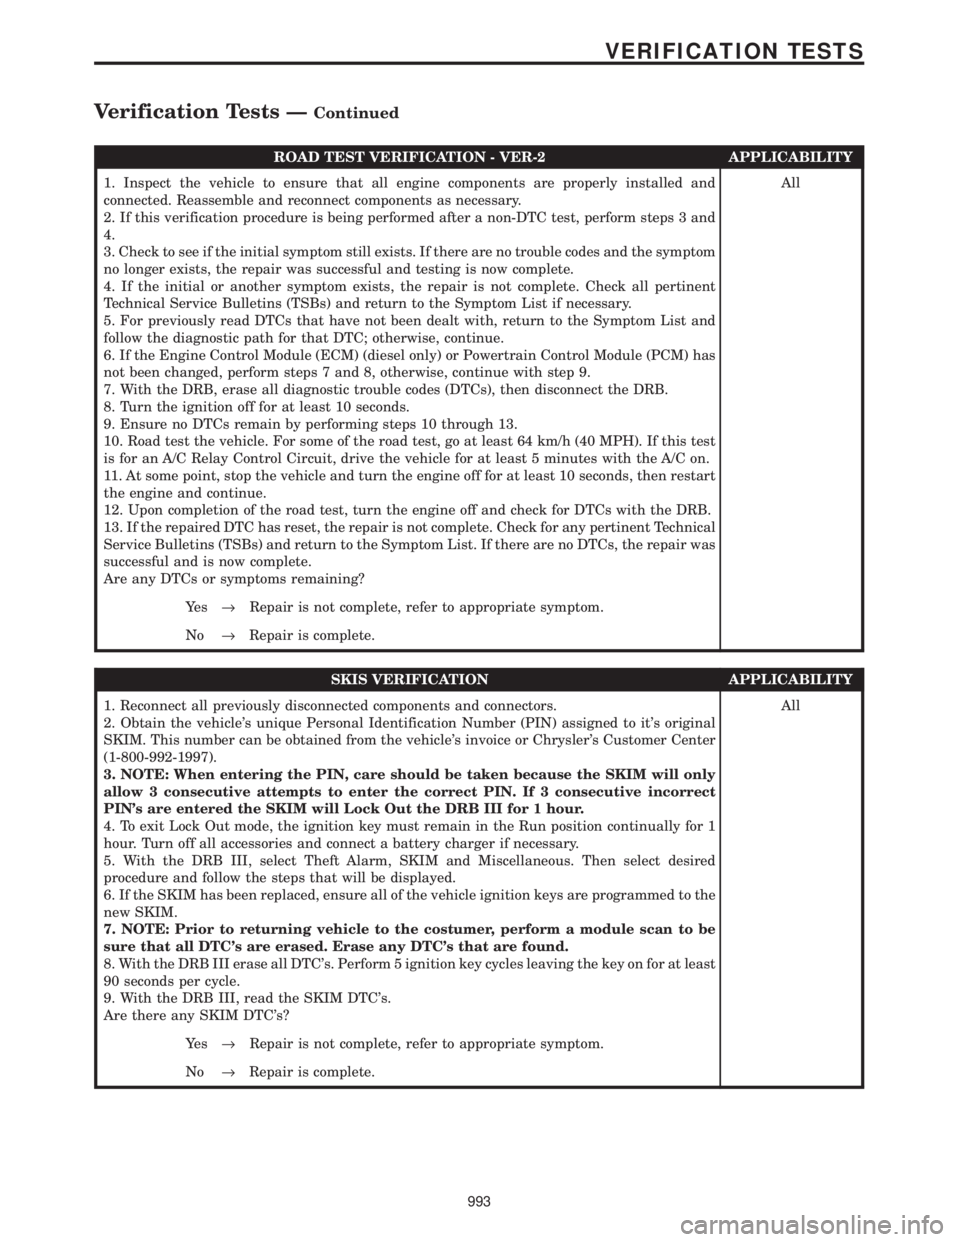
ROAD TEST VERIFICATION - VER-2 APPLICABILITY
1. Inspect the vehicle to ensure that all engine components are properly installed and
connected. Reassemble and reconnect components as necessary.
2. If this verification procedure is being performed after a non-DTC test, perform steps 3 and
4.
3. Check to see if the initial symptom still exists. If there are no trouble codes and the symptom
no longer exists, the repair was successful and testing is now complete.
4. If the initial or another symptom exists, the repair is not complete. Check all pertinent
Technical Service Bulletins (TSBs) and return to the Symptom List if necessary.
5. For previously read DTCs that have not been dealt with, return to the Symptom List and
follow the diagnostic path for that DTC; otherwise, continue.
6. If the Engine Control Module (ECM) (diesel only) or Powertrain Control Module (PCM) has
not been changed, perform steps 7 and 8, otherwise, continue with step 9.
7. With the DRB, erase all diagnostic trouble codes (DTCs), then disconnect the DRB.
8. Turn the ignition off for at least 10 seconds.
9. Ensure no DTCs remain by performing steps 10 through 13.
10. Road test the vehicle. For some of the road test, go at least 64 km/h (40 MPH). If this test
is for an A/C Relay Control Circuit, drive the vehicle for at least 5 minutes with the A/C on.
11. At some point, stop the vehicle and turn the engine off for at least 10 seconds, then restart
the engine and continue.
12. Upon completion of the road test, turn the engine off and check for DTCs with the DRB.
13. If the repaired DTC has reset, the repair is not complete. Check for any pertinent Technical
Service Bulletins (TSBs) and return to the Symptom List. If there are no DTCs, the repair was
successful and is now complete.
Are any DTCs or symptoms remaining?All
Ye s®Repair is not complete, refer to appropriate symptom.
No®Repair is complete.
SKIS VERIFICATION APPLICABILITY
1. Reconnect all previously disconnected components and connectors.
2. Obtain the vehicle's unique Personal Identification Number (PIN) assigned to it's original
SKIM. This number can be obtained from the vehicle's invoice or Chrysler's Customer Center
(1-800-992-1997).
3. NOTE: When entering the PIN, care should be taken because the SKIM will only
allow 3 consecutive attempts to enter the correct PIN. If 3 consecutive incorrect
PIN's are entered the SKIM will Lock Out the DRB III for 1 hour.
4. To exit Lock Out mode, the ignition key must remain in the Run position continually for 1
hour. Turn off all accessories and connect a battery charger if necessary.
5. With the DRB III, select Theft Alarm, SKIM and Miscellaneous. Then select desired
procedure and follow the steps that will be displayed.
6. If the SKIM has been replaced, ensure all of the vehicle ignition keys are programmed to the
new SKIM.
7. NOTE: Prior to returning vehicle to the costumer, perform a module scan to be
sure that all DTC's are erased. Erase any DTC's that are found.
8. With the DRB III erase all DTC's. Perform 5 ignition key cycles leaving the key on for at least
90 seconds per cycle.
9. With the DRB III, read the SKIM DTC's.
Are there any SKIM DTC's?All
Ye s®Repair is not complete, refer to appropriate symptom.
No®Repair is complete.
993
VERIFICATION TESTS
Verification Tests ÐContinued
Page 1023 of 4284
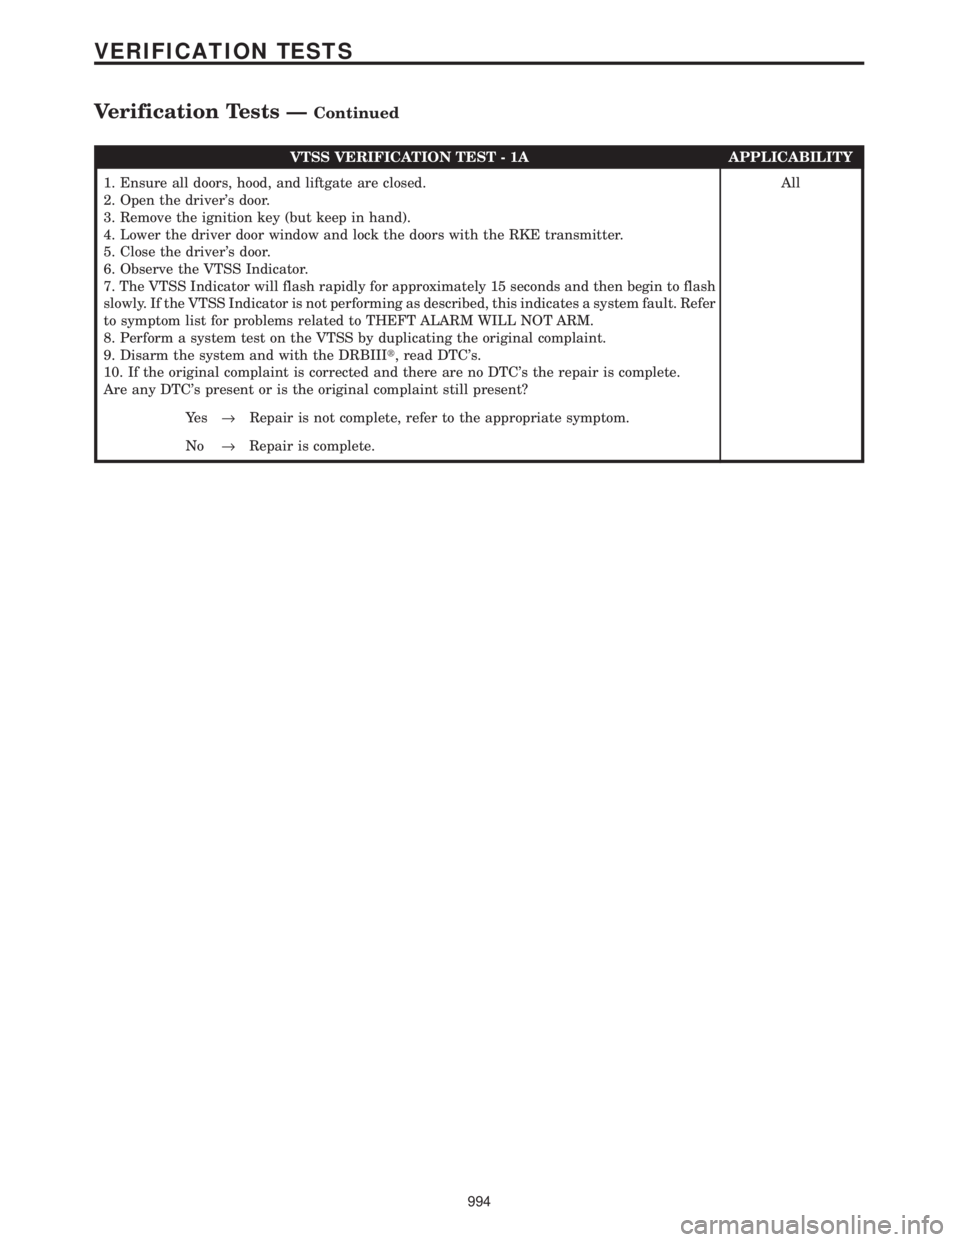
VTSS VERIFICATION TEST - 1A APPLICABILITY
1. Ensure all doors, hood, and liftgate are closed.
2. Open the driver's door.
3. Remove the ignition key (but keep in hand).
4. Lower the driver door window and lock the doors with the RKE transmitter.
5. Close the driver's door.
6. Observe the VTSS Indicator.
7. The VTSS Indicator will flash rapidly for approximately 15 seconds and then begin to flash
slowly. If the VTSS Indicator is not performing as described, this indicates a system fault. Refer
to symptom list for problems related to THEFT ALARM WILL NOT ARM.
8. Perform a system test on the VTSS by duplicating the original complaint.
9. Disarm the system and with the DRBIIIt, read DTC's.
10. If the original complaint is corrected and there are no DTC's the repair is complete.
Are any DTC's present or is the original complaint still present?All
Ye s®Repair is not complete, refer to the appropriate symptom.
No®Repair is complete.
994
VERIFICATION TESTS
Verification Tests ÐContinued
Page 1035 of 4284
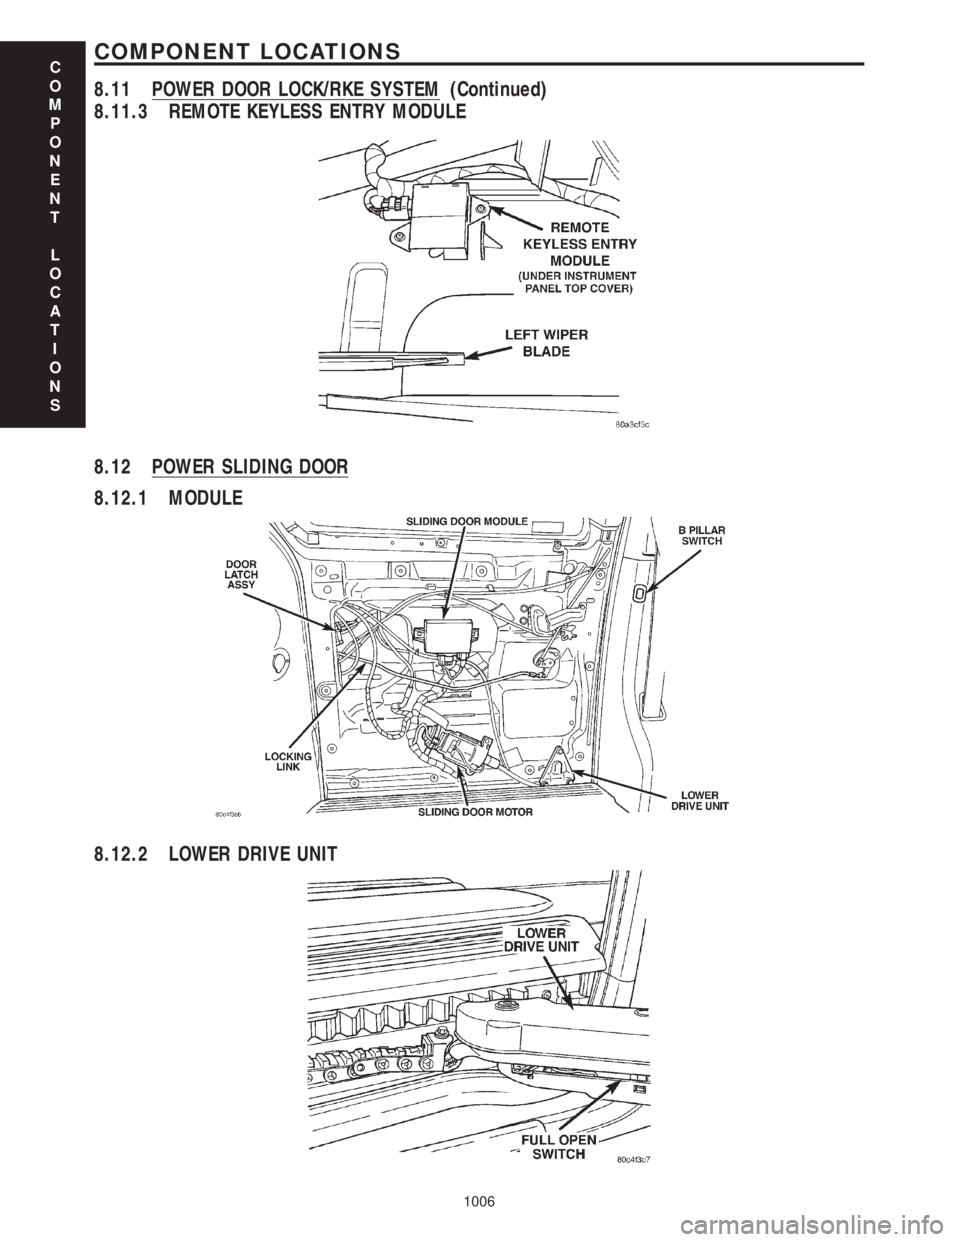
8.11.3 REMOTE KEYLESS ENTRY MODULE
8.12 POWER SLIDING DOOR
8.12.1 MODULE
8.12.2 LOWER DRIVE UNIT
C
O
M
P
O
N
E
N
T
L
O
C
A
T
I
O
N
S
1006
COMPONENT LOCATIONS
8.11 POWER DOOR LOCK/RKE SYSTEM (Continued)
Page 1045 of 4284
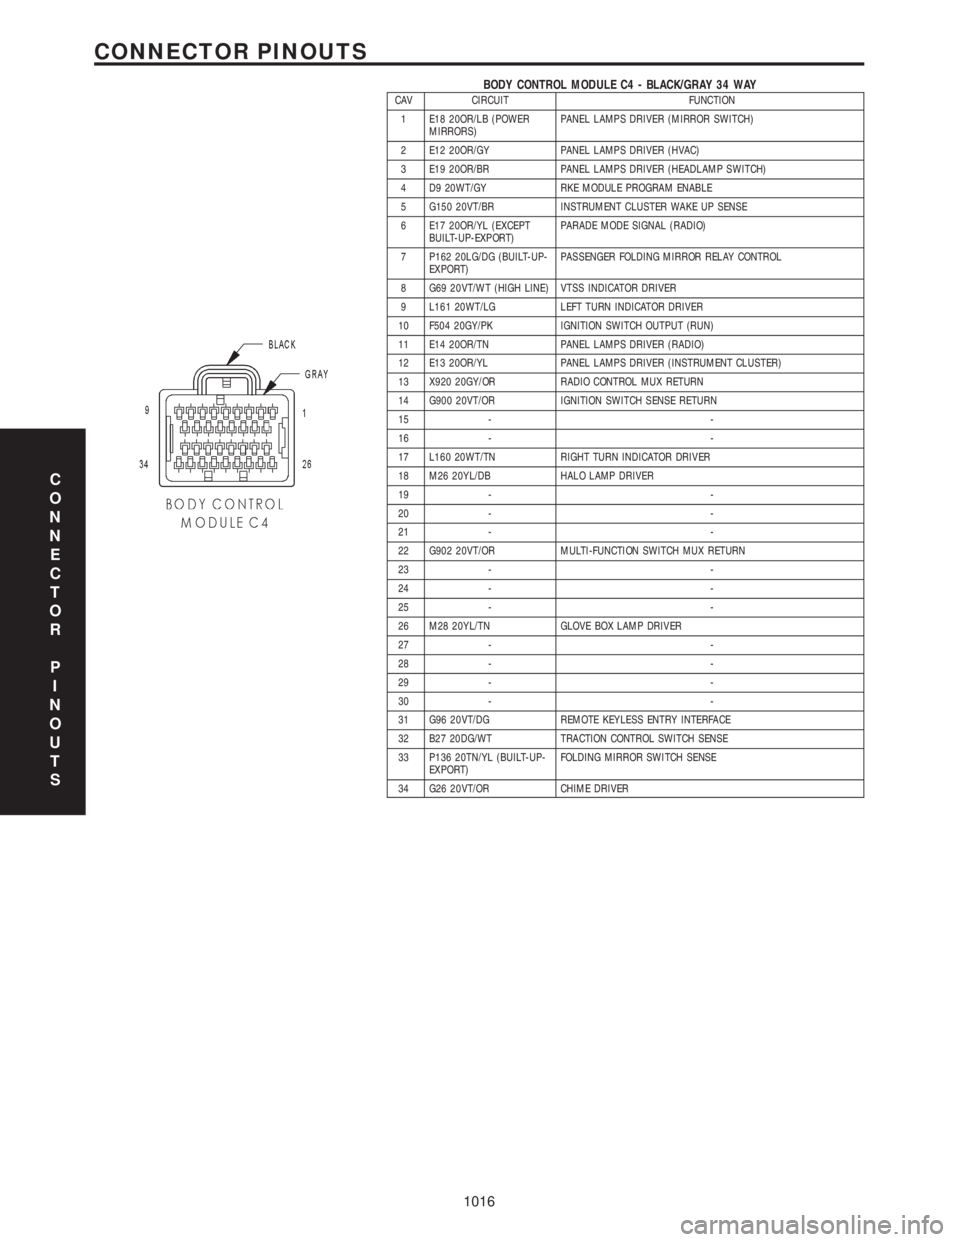
BODY CONTROL MODULE C4 - BLACK/GRAY 34 WAYCAV CIRCUIT FUNCTION
1 E18 20OR/LB (POWER
MIRRORS)PANEL LAMPS DRIVER (MIRROR SWITCH)
2 E12 20OR/GY PANEL LAMPS DRIVER (HVAC)
3 E19 20OR/BR PANEL LAMPS DRIVER (HEADLAMP SWITCH)
4 D9 20WT/GY RKE MODULE PROGRAM ENABLE
5 G150 20VT/BR INSTRUMENT CLUSTER WAKE UP SENSE
6 E17 20OR/YL (EXCEPT
BUILT-UP-EXPORT)PARADE MODE SIGNAL (RADIO)
7 P162 20LG/DG (BUILT-UP-
EXPORT)PASSENGER FOLDING MIRROR RELAY CONTROL
8 G69 20VT/WT (HIGH LINE) VTSS INDICATOR DRIVER
9 L161 20WT/LG LEFT TURN INDICATOR DRIVER
10 F504 20GY/PK IGNITION SWITCH OUTPUT (RUN)
11 E14 20OR/TN PANEL LAMPS DRIVER (RADIO)
12 E13 20OR/YL PANEL LAMPS DRIVER (INSTRUMENT CLUSTER)
13 X920 20GY/OR RADIO CONTROL MUX RETURN
14 G900 20VT/OR IGNITION SWITCH SENSE RETURN
15 - -
16 - -
17 L160 20WT/TN RIGHT TURN INDICATOR DRIVER
18 M26 20YL/DB HALO LAMP DRIVER
19 - -
20 - -
21 - -
22 G902 20VT/OR MULTI-FUNCTION SWITCH MUX RETURN
23 - -
24 - -
25 - -
26 M28 20YL/TN GLOVE BOX LAMP DRIVER
27 - -
28 - -
29 - -
30 - -
31 G96 20VT/DG REMOTE KEYLESS ENTRY INTERFACE
32 B27 20DG/WT TRACTION CONTROL SWITCH SENSE
33 P136 20TN/YL (BUILT-UP-
EXPORT)FOLDING MIRROR SWITCH SENSE
34 G26 20VT/OR CHIME DRIVER
C
O
N
N
E
C
T
O
R
P
I
N
O
U
T
S
1016
CONNECTOR PINOUTS
Page 1106 of 4284
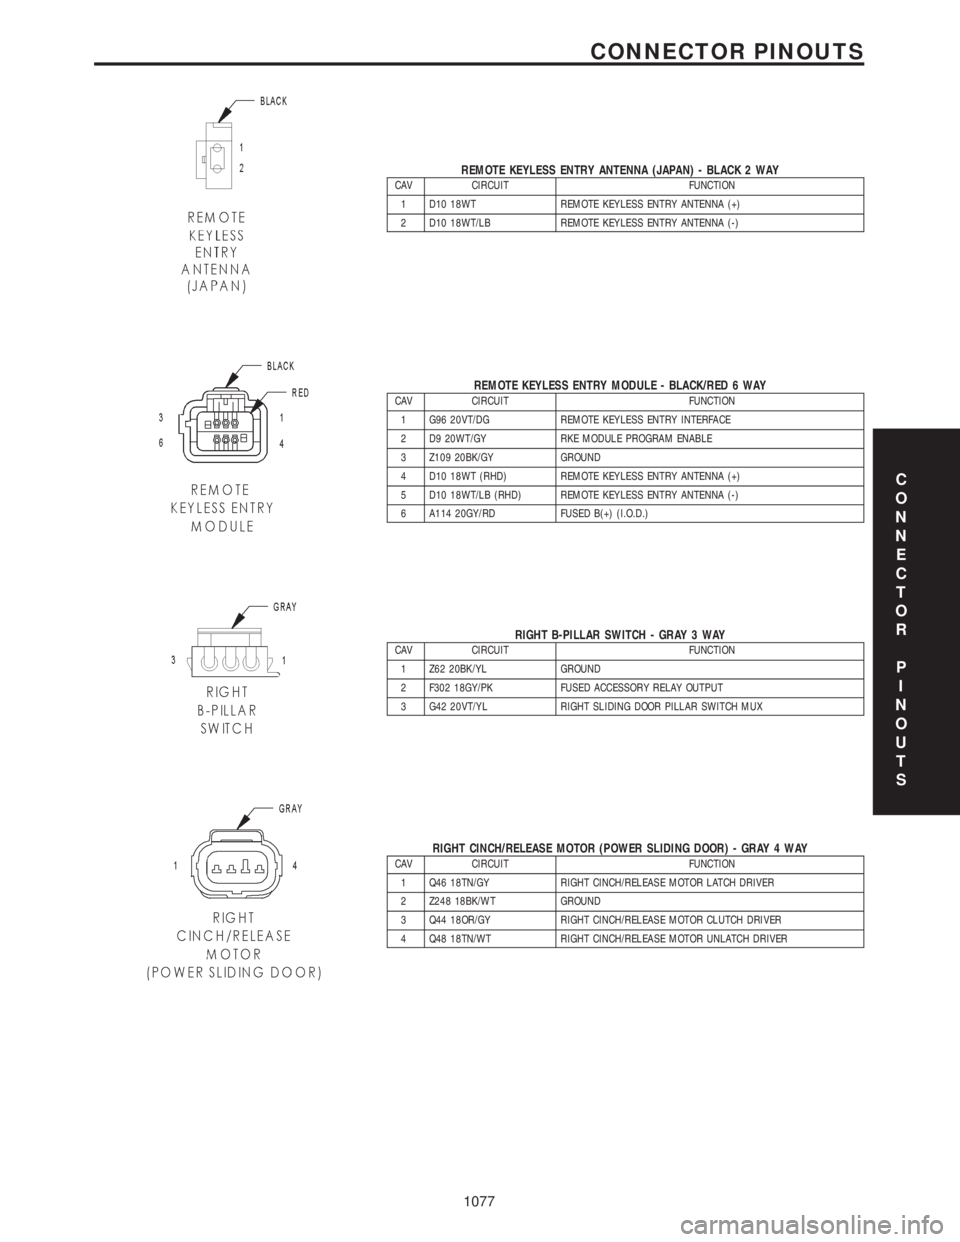
REMOTE KEYLESS ENTRY ANTENNA (JAPAN) - BLACK 2 WAYCAV CIRCUIT FUNCTION
1 D10 18WT REMOTE KEYLESS ENTRY ANTENNA (+)
2 D10 18WT/LB REMOTE KEYLESS ENTRY ANTENNA (-)
REMOTE KEYLESS ENTRY MODULE - BLACK/RED 6 WAYCAV CIRCUIT FUNCTION
1 G96 20VT/DG REMOTE KEYLESS ENTRY INTERFACE
2 D9 20WT/GY RKE MODULE PROGRAM ENABLE
3 Z109 20BK/GY GROUND
4 D10 18WT (RHD) REMOTE KEYLESS ENTRY ANTENNA (+)
5 D10 18WT/LB (RHD) REMOTE KEYLESS ENTRY ANTENNA (-)
6 A114 20GY/RD FUSED B(+) (I.O.D.)
RIGHT B-PILLAR SWITCH - GRAY 3 WAYCAV CIRCUIT FUNCTION
1 Z62 20BK/YL GROUND
2 F302 18GY/PK FUSED ACCESSORY RELAY OUTPUT
3 G42 20VT/YL RIGHT SLIDING DOOR PILLAR SWITCH MUX
RIGHT CINCH/RELEASE MOTOR (POWER SLIDING DOOR) - GRAY 4 WAYCAV CIRCUIT FUNCTION
1 Q46 18TN/GY RIGHT CINCH/RELEASE MOTOR LATCH DRIVER
2 Z248 18BK/WT GROUND
3 Q44 18OR/GY RIGHT CINCH/RELEASE MOTOR CLUTCH DRIVER
4 Q48 18TN/WT RIGHT CINCH/RELEASE MOTOR UNLATCH DRIVER
C
O
N
N
E
C
T
O
R
P
I
N
O
U
T
S
1077
CONNECTOR PINOUTS
Page 1112 of 4284
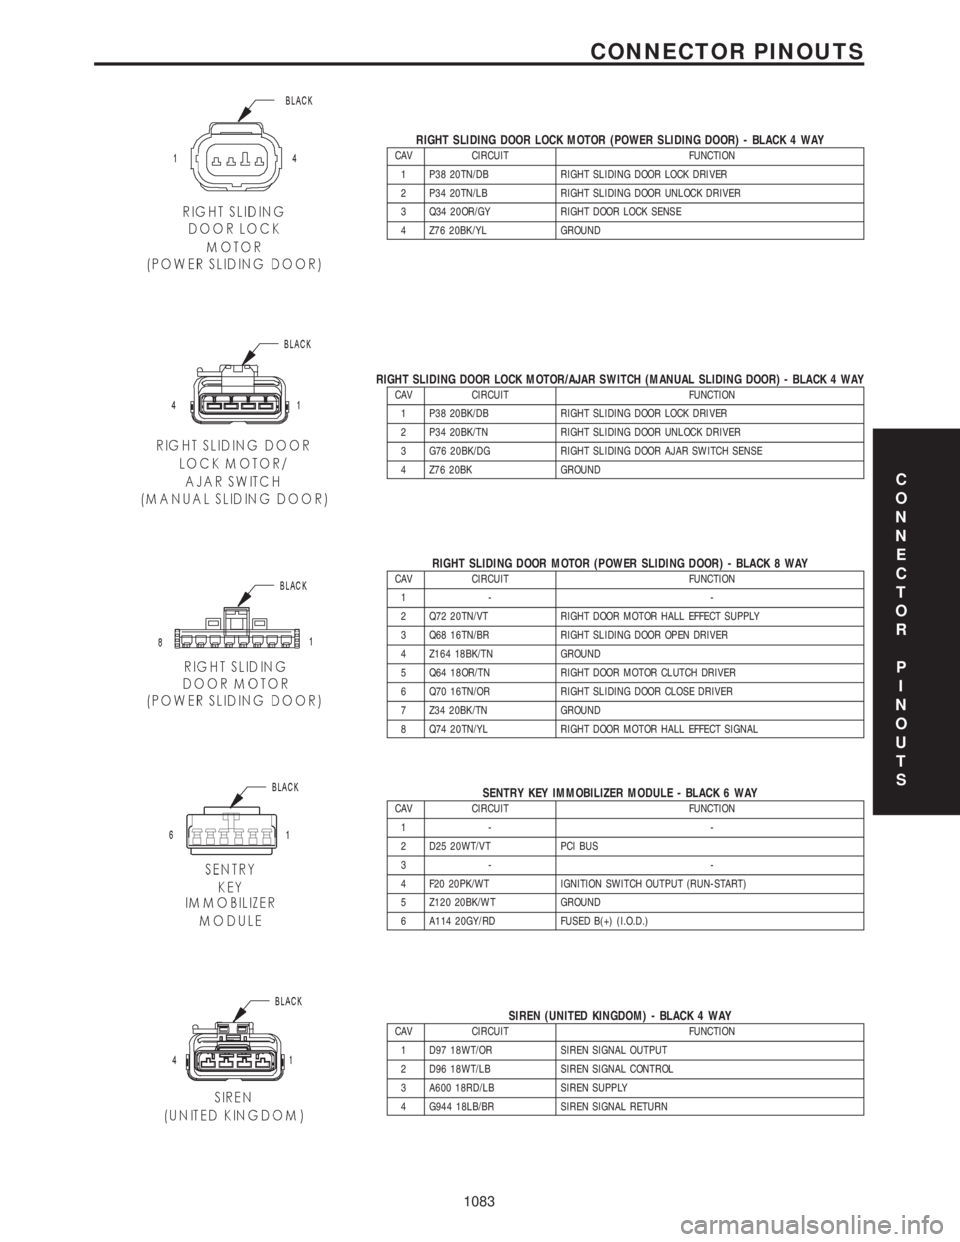
RIGHT SLIDING DOOR LOCK MOTOR (POWER SLIDING DOOR) - BLACK 4 WAYCAV CIRCUIT FUNCTION
1 P38 20TN/DB RIGHT SLIDING DOOR LOCK DRIVER
2 P34 20TN/LB RIGHT SLIDING DOOR UNLOCK DRIVER
3 Q34 20OR/GY RIGHT DOOR LOCK SENSE
4 Z76 20BK/YL GROUND
RIGHT SLIDING DOOR LOCK MOTOR/AJAR SWITCH (MANUAL SLIDING DOOR) - BLACK 4 WAYCAV CIRCUIT FUNCTION
1 P38 20BK/DB RIGHT SLIDING DOOR LOCK DRIVER
2 P34 20BK/TN RIGHT SLIDING DOOR UNLOCK DRIVER
3 G76 20BK/DG RIGHT SLIDING DOOR AJAR SWITCH SENSE
4 Z76 20BK GROUND
RIGHT SLIDING DOOR MOTOR (POWER SLIDING DOOR) - BLACK 8 WAYCAV CIRCUIT FUNCTION
1- -
2 Q72 20TN/VT RIGHT DOOR MOTOR HALL EFFECT SUPPLY
3 Q68 16TN/BR RIGHT SLIDING DOOR OPEN DRIVER
4 Z164 18BK/TN GROUND
5 Q64 18OR/TN RIGHT DOOR MOTOR CLUTCH DRIVER
6 Q70 16TN/OR RIGHT SLIDING DOOR CLOSE DRIVER
7 Z34 20BK/TN GROUND
8 Q74 20TN/YL RIGHT DOOR MOTOR HALL EFFECT SIGNAL
SENTRY KEY IMMOBILIZER MODULE - BLACK 6 WAYCAV CIRCUIT FUNCTION
1- -
2 D25 20WT/VT PCI BUS
3- -
4 F20 20PK/WT IGNITION SWITCH OUTPUT (RUN-START)
5 Z120 20BK/WT GROUND
6 A114 20GY/RD FUSED B(+) (I.O.D.)
SIREN (UNITED KINGDOM) - BLACK 4 WAYCAV CIRCUIT FUNCTION
1 D97 18WT/OR SIREN SIGNAL OUTPUT
2 D96 18WT/LB SIREN SIGNAL CONTROL
3 A600 18RD/LB SIREN SUPPLY
4 G944 18LB/BR SIREN SIGNAL RETURN
C
O
N
N
E
C
T
O
R
P
I
N
O
U
T
S
1083
CONNECTOR PINOUTS
Page 1159 of 4284
The cycling of the build and decay valves is
similar to the ABS except that they work to control
wheel spin by applying brakes. ABS function is to
control wheel skid by releasing brakes.
Two pressure relief valves allow excess fluid vol-
ume to return to the reservoir when not used by the
build/decay cycles. These are required because the
pump supplies more volume than the traction con-
trol system requires.
If at any time the brake pedal is applied during a
traction control cycle, the brake lamp switch will
trigger the CAB to switch off the traction control.
The traction control system will be enabled at
each ignition cycle. It may be turned off by depress-
ing the Traction Control Switch. The traction con-
trol system function lamp will illuminate ªTRAC
OFFº immediately upon depressing the traction
control switch button. Only the ªTRACº portion of
the ªTRAC OFFº indicator will illuminate during a
traction control event. If the CAB calculates that
the brake temperatures are high, the traction con-
trol system will become inoperative until a time-out
period has elapsed. When in this thermal protection
mode, the traction control ªTRAC OFFº lamp will
illuminate; however, a fault will not be registered.
3.3 SYSTEM COMPONENTS
²controller antilock brake (CAB)
²vacuum booster
²master cylinder
²ABS integrated electronic control module/
hydraulic control unit (HCU), valve block assem-
bly: 8 valve solenoids (4 inlet valves, 4 outlet
valves, 2 accumulators) 1 motor, 2 pump
²ABS integrated electronic control module with
traction control same as above but has 10 valve
solenoids.
²4 wheel speed sensor/tone wheel assemblies
²ABS warning indicator
²fuses and wiring harness
²fluid reservoir
²TRAC/TRAC OFF indicator
3.3.1 ABS AND BRAKE WARNING
INDICATORS
The amber ABS warning indicator is located in
the instrument cluster. It is used to inform the
driver that the antilock function has been turned
off. The ABS warning indicator is controlled by the
CAB. The CAB controls the lamp with a command
over the PCI bus.
The ABS Warning Indicator will remain lit during
every key cycle until a circuit or component fault is
repaired and the CAB no longer detects the fault.After repair of a sensor signal fault or a pump motor
fault, the CAB must sense all four wheels at 25
km/h (15 mph) before it will extinguish the ABS and
TRAC OFF Indicators.
The Instrument Cluster will illuminate the ABS
Warning Indicator if it loses communication with
the CAB.
The red BRAKE warning indicator is also located
in the instrument cluster. It can be activated in
several ways. Application of the parking brake or a
low fluid signal from the fluid level switch located in
the master cylinder reservoir will cause the indica-
tor to come on.
3.3.2 CONTROLLER ANTILOCK BRAKE
(CAB)
The Controller Antilock Brake (CAB) is a
microprocessor-based device that monitors wheel
speeds and controls the antilock functions. The
CAB contains two microprocessors that receive
identical sensor signals and then independently
process the information. The results are then com-
pared to make sure that they agree. Otherwise, the
CAB will turn off the antilock and turn on the ABS
amber warning indicator.
The primary functions of the CAB are to:
²detect wheel locking tendencies
²control fluid pressure modulation to the brakes
during antilock stop
²monitor the system for proper operation
²manage traction control functions
²provide communication to the DRBIIItwhile in
diagnostic mode
²store diagnostic information in non-volatile memory
The CAB continuously monitors the speed of each
wheel. When a wheel locking tendency is detected,
the CAB will command the appropriate valve to
modulate brake fluid pressure in its hydraulic unit.
Brake pedal position is maintained during an an-
tilock stop by being a closed system with the use of
2 accumulators. The CAB continues to control pres-
sure in individual hydraulic circuits until a wheel
locking tendency is no longer present. The CAB
turns on the pump motor during an antilock stop.
The antilock brake system is constantly moni-
tored by the CAB for proper operation. If the CAB
detects a system malfunction, it can disable the
antilock system and turn on the ABS warning
indicator. If the antilock function is disabled, the
system will revert to standard base brake system
operation.
The CAB inputs include the following:
²diagnostic communication
²four wheel speed sensors
2
GENERAL INFORMATION