Page 57 of 99
PERIODIC MAINTENANCE AND MINOR REPAIR
6-11
6
NOTE:@ l
If water is added, have a Yamaha
dealer check the antifreeze con-
tent of the coolant as soon as pos-
sible.
l
The radiator fan operation is com-
pletely automatic. It is switched on
or off according to the coolant tem-
perature in the radiator.
@5. If your motorcycle overheats, see
page 6-34 for details.
EAU01176*
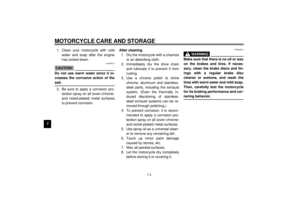
Changing the coolant1. Put the motorcycle on a level
place.
2. Remove cowling B. (See page 6-5
for cowling removal and installa-
tion procedures.)
3. Place a container under the en-
gine.
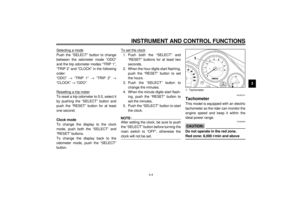
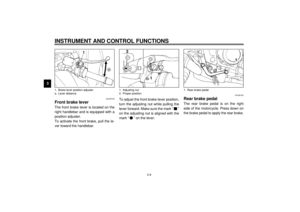
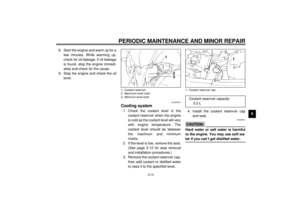
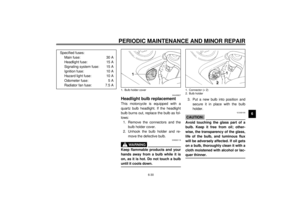
4. Remove the radiator cap stopper
bolt and radiator cap.
EW000067
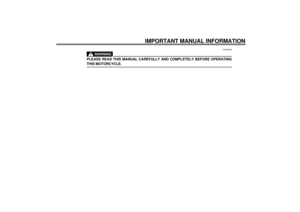
WARNING
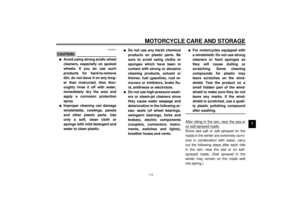
@ Do not remove the radiator cap
when the engine is hot. @
5. Remove the water pump drain bolt
and cylinder drain bolt.
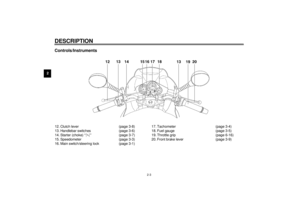
1. Radiator cap stopper bolt
2. Radiator cap
1. Water pump drain bolt
2. Cylinder drain bolt
E_4tx_Periodic.fm Page 11 Saturday, October 16, 1999 9:37 AM
Page 58 of 99

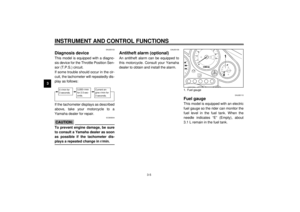
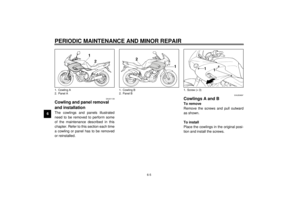
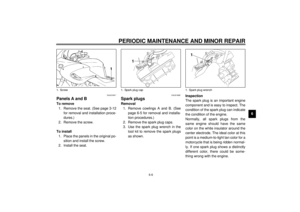
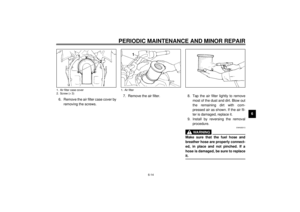
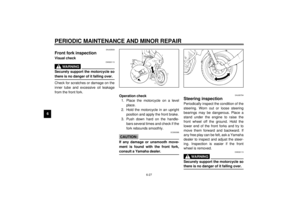
7. Remove the coolant reservoir by
removing the bolts.
8. Remove the")
PERIODIC MAINTENANCE AND MINOR REPAIR
6-12
6 6. Remove the seat. (See page 3-12
for seat removal and installation
procedures.)
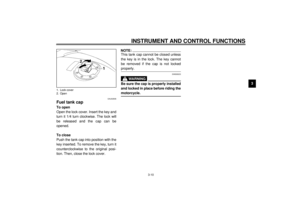
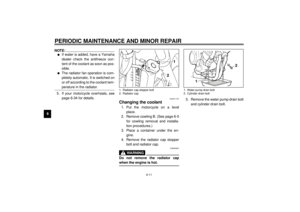
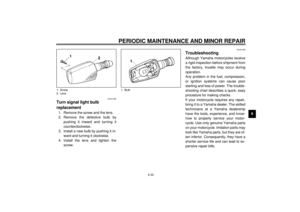
7. Remove the coolant reservoir by
removing the bolts.
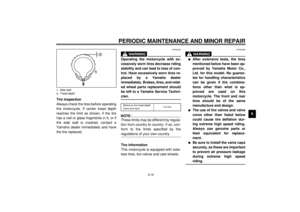
8. Remove the coolant reservoir
hose clamp and disconnect the
hose.
9. Drain the coolant from the coolant
reservoir by turning it upside
down.
10. Install the hose and connect the
coolant reservoir hose clamp. 11. Drain the coolant completely and
thoroughly flush the cooling sys-
tem with clean tap water.
12. If the washers are damaged, re-
place them. Tighten the water
pump drain bolt and cylinder drain
bolt to the specified torques.
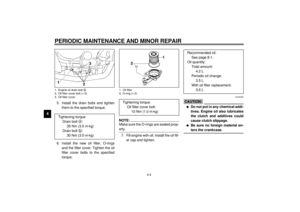
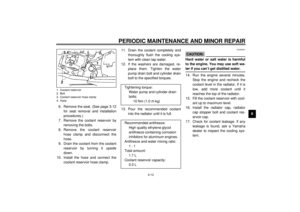
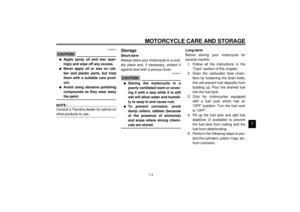
13. Pour the recommended coolant
into the radiator until it is full.
ECA00041
CAUTION:@ Hard water or salt water is harmful
to the engine. You may use soft wa-
ter if you can’t get distilled water. @14. Run the engine several minutes.
Stop the engine and recheck the
coolant level in the radiator. If it is
low, add more coolant until it
reaches the top of the radiator.
15. Fill the coolant reservoir with cool-
ant up to maximum level.
16. Install the radiator cap, radiator
cap stopper bolt and coolant res-
ervoir cap.
17. Check for coolant leakage. If any
leakage is found, ask a Yamaha
dealer to inspect the cooling sys-
tem.
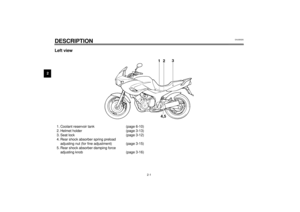
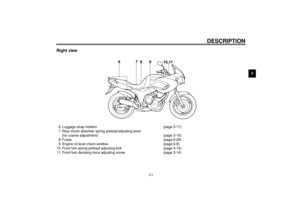
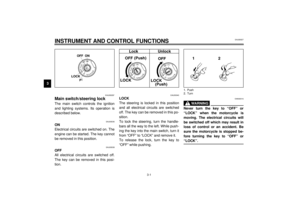
1. Coolant reservoir
2. Bolt
3. Coolant reservoir hose clamp
4. Hose
Tightening torque:
Water pump and cylinder drain
bolts:
10 Nm (1.0 m·kg)
Recommended antifreeze:
High quality ethylene glycol
antifreeze containing corrosion
inhibitors for aluminum engines.
Antifreeze and water mixing ratio:
1 : 1
Total amount:
1.7 L
Coolant reservoir capacity:
0.3 L
E_4tx_Periodic.fm Page 12 Saturday, October 16, 1999 9:37 AM
Page 59 of 99
PERIODIC MAINTENANCE AND MINOR REPAIR
6-13
6
EAU01769*
Air filterThe air filter should be cleaned at the
specified intervals. It should be cleaned
more frequently if you are riding in un-
usually wet or dusty areas.
1. Remove the seat. (See page 3-12
for seat removal and installation
procedures.)
2. Remove cowlings A and B and
panels A and B. (See pages 6-5
~
6-6 for removal and installation
procedures.)
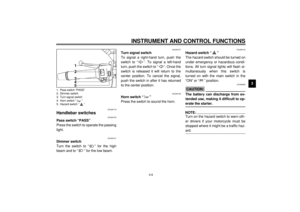
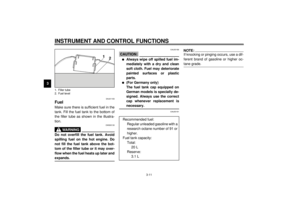
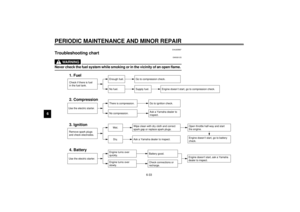
3. Remove the fuel tank holding
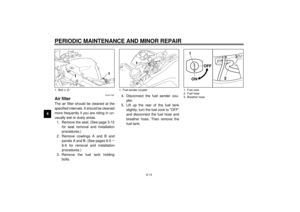
bolts.4. Disconnect the fuel sender cou-
pler.
5. Lift up the rear of the fuel tank
slightly, turn the fuel cock to “OFF”
and disconnect the fuel hose and
breather hose. Then remove the
fuel tank.
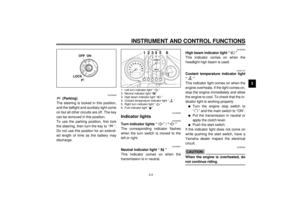
1. Bolt (´ 2)
1. Fuel sender coupler
1. Fuel cock
2. Fuel hose
3. Breather hose
E_4tx_Periodic.fm Page 13 Saturday, October 16, 1999 9:37 AM
Page 60 of 99
PERIODIC MAINTENANCE AND MINOR REPAIR
6-14
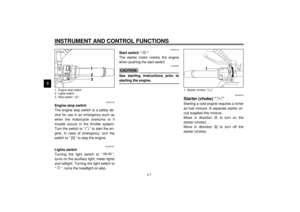
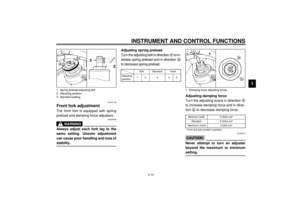
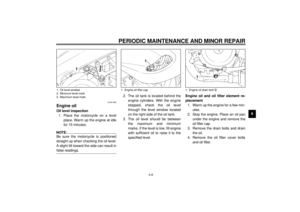
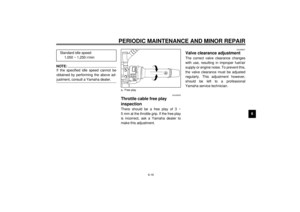
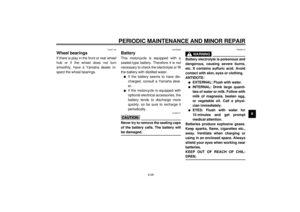
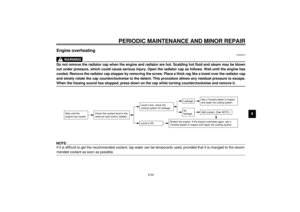
6 6. Remove the air filter case cover by
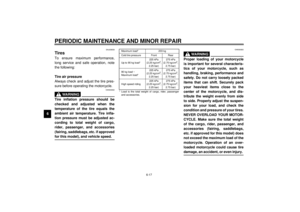
removing the screws.7. Remove the air filter. 8. Tap the air filter lightly to remove
most of the dust and dirt. Blow out
the remaining dirt with com-
pressed air as shown. If the air fil-
ter is damaged, replace it.
9. Install by reversing the removal
procedure.
EWA00013
WARNING
@ Make sure that the fuel hose and
breather hose are properly connect-
ed, in place and not pinched. If a
hose is damaged, be sure to replace
it. @
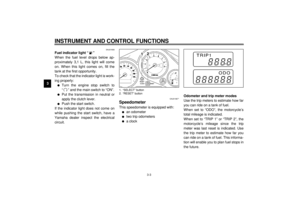
1. Air filter case cover
2. Screw (´ 3)
1. Air filter
E_4tx_Periodic.fm Page 14 Saturday, October 16, 1999 9:37 AM
Page 61 of 99

PERIODIC MAINTENANCE AND MINOR REPAIR
6-15
6
EC000082
CAUTION:@ l
Make sure the air filter is prop-
erly seated in the air filter case.
l
The engine should never be run
without the air filter installed.
Excessive piston and/or cylin-
der wear may result.
@
EAU00630
Carburetor adjustmentThe carburetors are important parts of
the engine and require very sophisti-
cated adjustment. Most adjustments
should be left to a Yamaha dealer who
has the professional knowledge and
experience to do so. However, the idle
speed may be adjusted by the owner
as part of routine maintenance.
EC000095
CAUTION:@ The carburetors were set at the
Yamaha factory after many tests. If
they are changed, poor engine per-
formance and damage may result. @
EAU00632
Idle speed adjustment1. Start the engine and warm it up for
a few minutes at approximately
1,000 to 2,000 r/min. Occasionally
rev the engine to 4,000 to
5,000 r/min. The engine is warm
when it quickly responds to the
throttle.
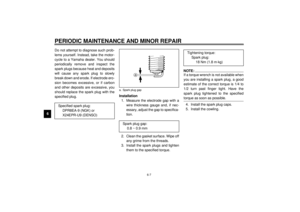
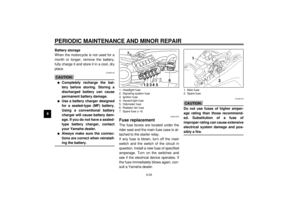
2. Set the idle to the specified engine
speed by adjusting the throttle
stop screw. Turn the screw in di-
rection
a to increase engine
speed and in direction
b to de-
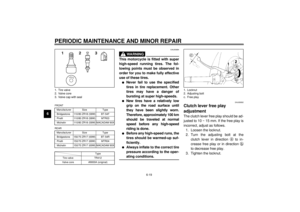
crease engine speed.1. Throttle stop screw
E_4tx_Periodic.fm Page 15 Saturday, October 16, 1999 9:37 AM
Page 62 of 99
PERIODIC MAINTENANCE AND MINOR REPAIR
6-16
6
NOTE:@ If the specified idle speed cannot be
obtained by performing the above ad-
justment, consult a Yamaha dealer. @
EAU00635
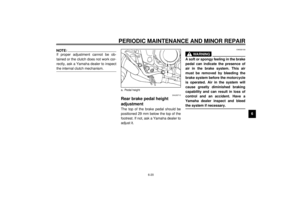
Throttle cable free play
inspectionThere should be a free play of 3 ~
5 mm at the throttle grip. If the free play
is incorrect, ask a Yamaha dealer to
make this adjustment.
EAU00637
Valve clearance adjustmentThe correct valve clearance changes
with use, resulting in improper fuel/air
supply or engine noise. To prevent this,
the valve clearance must be adjusted
regularly. This adjustment however,
should be left to a professional
Yamaha service technician. Standard idle speed:
1,050 ~ 1,250 r/min
a. Free play
E_4tx_Periodic.fm Page 16 Saturday, October 16, 1999 9:37 AM
Page 63 of 99

PERIODIC MAINTENANCE AND MINOR REPAIR
6-17
6
EAU00658
TiresTo ensure maximum performance,
long service and safe operation, note
the following:
Tire air pressure
Always check and adjust the tire pres-
sure before operating the motorcycle.
EW000082
WARNING
@ Tire inflation pressure should be
checked and adjusted when the
temperature of the tire equals the
ambient air temperature. Tire infla-
tion pressure must be adjusted ac-
cording to total weight of cargo,
rider, passenger, and accessories
(fairing, saddlebags, etc. if approved
for this model), and vehicle speed. @
CE-33EEW000083
WARNING
@ Proper loading of your motorcycle
is important for several characteris-
tics of your motorcycle, such as
handling, braking, performance and
safety. Do not carry loosely packed
items that can shift. Securely pack
your heaviest items close to the
center of the motorcycle, and dis-
tribute the weight evenly from side
to side. Properly adjust the suspen-
sion for your load, and check the
condition and pressure of your tires.
NEVER OVERLOAD YOUR MOTOR-
CYCLE. Make sure the total weight
of the cargo, rider, passenger, and
accessories (fairing, saddlebags,
etc. if approved for this model) does
not exceed the maximum load of the
motorcycle. Operation of an over-
loaded motorcycle could cause tire
damage, an accident, or even injury. @
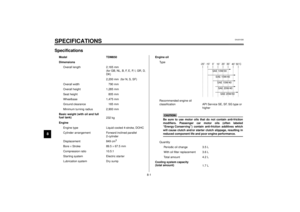
Maximum load* 203 kg
Cold tire pressure Front Rear
Up to 90 kg load*225 kPa
(2.25 kg/cm
2,
2.25 bar)275 kPa
(2.75 kg/cm
2,
2.75 bar)
90 kg load ~
Maximum load*225 kPa
(2.25 kg/cm
2,
2.25 bar)275 kPa
(2.75 kg/cm
2,
2.75 bar)
High speed riding225 kPa
(2.25 kg/cm
2,
2.25 bar)275 kPa
(2.75 kg/cm
2,
2.75 bar)
* Load is the total weight of cargo, rider, passenger
and accessories.
E_4tx_Periodic.fm Page 17 Saturday, October 16, 1999 9:37 AM
Page 64 of 99

PERIODIC MAINTENANCE AND MINOR REPAIR
6-18
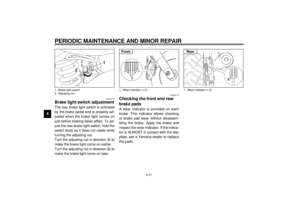
6 Tire inspection
Always check the tires before operating
the motorcycle. If center tread depth
reaches the limit as shown, if the tire
has a nail or glass fragments in it, or if
the side wall is cracked, contact a
Yamaha dealer immediately and have
the tire replaced.
EW000095
WARNING
@ Operating the motorcycle with ex-
cessively worn tires decrease riding
stability and can lead to loss of con-
trol. Have excessively worn tires re-
placed by a Yamaha dealer
immediately. Brakes, tires, and relat-
ed wheel parts replacement should
be left to a Yamaha Service Techni-
cian. @CE-26ENOTE:@ These limits may be different by regula-
tion from country to country. If so, con-
form to the limits specified by the
regulations of your own country. @Tire information
This motorcycle is equipped with tube-
less tires, tire valves and cast wheels.
EW000080
WARNING
@ l
After extensive tests, the tires
mentioned below have been ap-
proved by Yamaha Motor Co.,
Ltd. for this model. No guaran-
tee for handling characteristics
can be given if tire combina-
tions other than what is ap-
proved are used on this
motorcycle. The front and rear
tires should be of the same
manufacture and design.
l
The use of tire valves and valve
cores other than listed below
could cause tire deflation dur-
ing extreme high speed riding.
Always use genuine parts or
their equivalent for replace-
ment.
l
Be sure to install the valve caps
securely, as these are important
to prevent air pressure leakage
during extreme high speed
riding.
@
1. Side wall
a. Tread depth
Minimum tire tread depth
(front and rear)1.6 mm
E_4tx_Periodic.fm Page 18 Saturday, October 16, 1999 9:37 AM