2000 YAMAHA TDM 850 torque
[x] Cancel search: torquePage 30 of 99

INSTRUMENT AND CONTROL FUNCTIONS
3-16
3 3. Tighten the locknut to the speci-
fied torque.
EC000018
CAUTION:@ Always tighten the locknut against
the spring adjusting nut and tighten
the locknut to the specified torque. @
Damping force adjustment
Turn the adjusting knob in direction
a
to increase damping force and in direc-
tion
b to decrease damping force.CI-29E
EC000015CAUTION:@ Never attempt to turn an adjuster
beyond the maximum or minimum
setting. @
EAU00315
WARNING
@ This shock absorber contains high-
ly pressurized nitrogen gas. Read
and understand the following infor-
mation before handling the shock
absorber. The manufacturer cannot
be held responsible for property
damage or personal injury that may
result from improper handling.l
Do not tamper with or attempt to
open the cylinder assembly.
l
Do not subject the shock ab-
sorber to an open flame or other
high heat source. This may
cause the unit to explode due to
excessive gas pressure.
l
Do not deform or damage the
cylinder in any way. Cylinder
damage will result in poor
damping performance.
l
Take your shock absorber to a
Yamaha dealer for any service.
@
Tightening torque:
Locknut:
70 Nm (7.0 m·kg)
1. Adjusting knobMinimum (soft) 20 clicks out*
Standard 10 clicks out*
Maximum (hard) 0 click out*
* From the fully turned-in position
E_4tx_Functions.fm Page 16 Saturday, October 16, 1999 9:36 AM
Page 47 of 99

6-1
6
EAU00462
6-PERIODIC MAINTENANCE AND MINOR REPAIR
EAU00464
Periodic inspection, adjustment and lu-
brication will keep your motorcycle in
the safest and most efficient condition
possible. Safety is an obligation of the
motorcycle owner. The maintenance
and lubrication schedule chart should
be considered strictly as a guide to
general maintenance and lubrication
intervals. YOU MUST TAKE INTO
CONSIDERATION THAT WEATHER,
TERRAIN, GEOGRAPHICAL LOCA-
TIONS, AND A VARIETY OF INDIVID-
UAL USES ALL TEND TO DEMAND
THAT EACH OWNER ALTER THIS
TIME SCHEDULE TO SHORTER IN-
TERVALS TO MATCH THE ENVI-
RONMENT. The most important points
of motorcycle inspection, adjustment,
and lubrication are explained in the fol-
lowing pages.
EW000060
WARNING
@ If you are not familiar with motor-
cycle service, this work should be
done by a Yamaha dealer. @
EAU01299
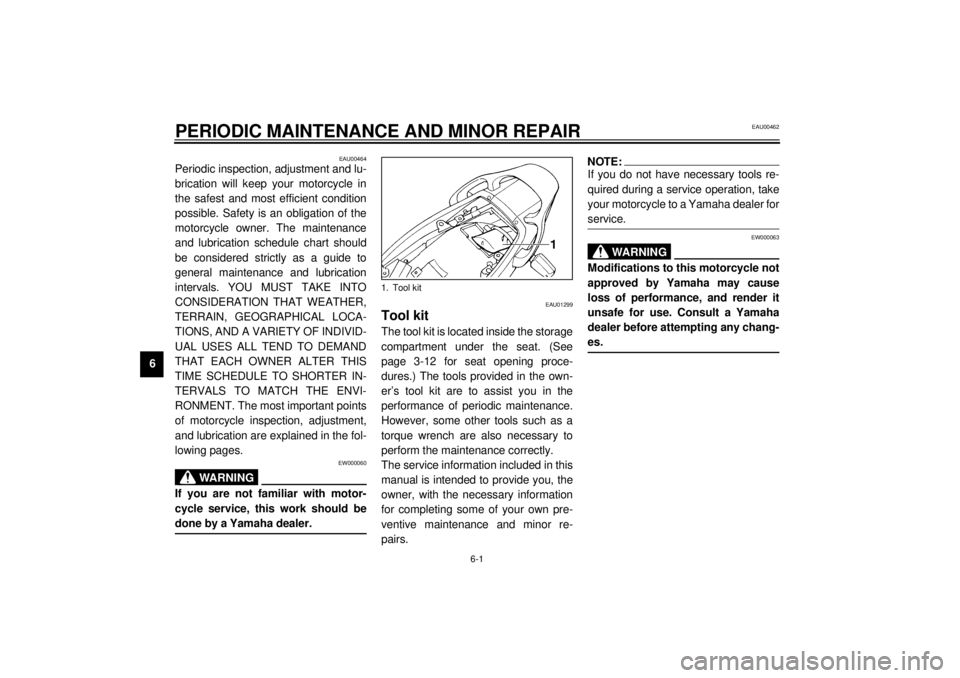
Tool kitThe tool kit is located inside the storage
compartment under the seat. (See
page 3-12 for seat opening proce-
dures.) The tools provided in the own-
er’s tool kit are to assist you in the
performance of periodic maintenance.
However, some other tools such as a
torque wrench are also necessary to
perform the maintenance correctly.
The service information included in this
manual is intended to provide you, the
owner, with the necessary information
for completing some of your own pre-
ventive maintenance and minor re-
pairs.
NOTE:@ If you do not have necessary tools re-
quired during a service operation, take
your motorcycle to a Yamaha dealer for
service. @
EW000063
WARNING
@ Modifications to this motorcycle not
approved by Yamaha may cause
loss of performance, and render it
unsafe for use. Consult a Yamaha
dealer before attempting any chang-
es. @
1. Tool kit
E_4tx_Periodic.fm Page 1 Saturday, October 16, 1999 9:37 AM
Page 53 of 99

PERIODIC MAINTENANCE AND MINOR REPAIR
6-7
6Do not attempt to diagnose such prob-
lems yourself. Instead, take the motor-
cycle to a Yamaha dealer. You should
periodically remove and inspect the
spark plugs because heat and deposits
will cause any spark plug to slowly
break down and erode. If electrode ero-
sion becomes excessive, or if carbon
and other deposits are excessive, you
should replace the spark plug with the
specified plug.Installation
1. Measure the electrode gap with a
wire thickness gauge and, if nec-
essary, adjust the gap to specifica-
tion.
2. Clean the gasket surface. Wipe off
any grime from the threads.
3. Install the spark plugs and tighten
them to the specified torque.
NOTE:@ If a torque wrench is not available when
you are installing a spark plug, a good
estimate of the correct torque is 1/4 to
1/2 turn past finger tight. Have the
spark plug tightened to the specified
torque as soon as possible. @4. Install the spark plug caps.
5. Install the cowling. Specified spark plug:
DPR8EA-9 (NGK) or
X24EPR-U9 (DENSO)
a. Spark plug gap
Spark plug gap:
0.8 ~ 0.9 mm
Tightening torque:
Spark plug:
18 Nm (1.8 m·kg)
E_4tx_Periodic.fm Page 7 Saturday, October 16, 1999 9:37 AM
Page 55 of 99

PERIODIC MAINTENANCE AND MINOR REPAIR
6-9
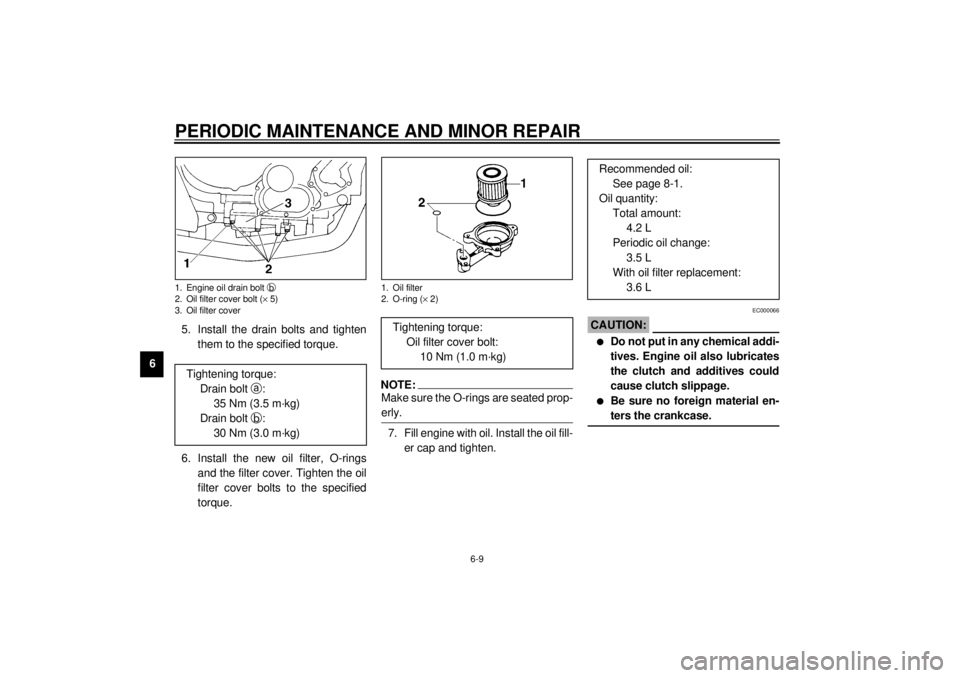
65. Install the drain bolts and tighten
them to the specified torque.
6. Install the new oil filter, O-rings
and the filter cover. Tighten the oil
filter cover bolts to the specified
torque.
NOTE:@ Make sure the O-rings are seated prop-
erly. @7. Fill engine with oil. Install the oil fill-
er cap and tighten.
EC000066
CAUTION:@ l
Do not put in any chemical addi-
tives. Engine oil also lubricates
the clutch and additives could
cause clutch slippage.
l
Be sure no foreign material en-
ters the crankcase.
@
1. Engine oil drain bolt b
2. Oil filter cover bolt (´ 5)
3. Oil filter coverTightening torque:
Drain bolt
a:
35 Nm (3.5 m·kg)
Drain bolt
b:
30 Nm (3.0 m·kg)
1. Oil filter
2. O-ring (´ 2)
Tightening torque:
Oil filter cover bolt:
10 Nm (1.0 m·kg)
Recommended oil:
See page 8-1.
Oil quantity:
Total amount:
4.2 L
Periodic oil change:
3.5 L
With oil filter replacement:
3.6 L
E_4tx_Periodic.fm Page 9 Saturday, October 16, 1999 9:37 AM
Page 58 of 99

PERIODIC MAINTENANCE AND MINOR REPAIR
6-12
6 6. Remove the seat. (See page 3-12
for seat removal and installation
procedures.)
7. Remove the coolant reservoir by
removing the bolts.
8. Remove the coolant reservoir
hose clamp and disconnect the
hose.
9. Drain the coolant from the coolant
reservoir by turning it upside
down.
10. Install the hose and connect the
coolant reservoir hose clamp. 11. Drain the coolant completely and
thoroughly flush the cooling sys-
tem with clean tap water.
12. If the washers are damaged, re-
place them. Tighten the water
pump drain bolt and cylinder drain
bolt to the specified torques.
13. Pour the recommended coolant
into the radiator until it is full.
ECA00041
CAUTION:@ Hard water or salt water is harmful
to the engine. You may use soft wa-
ter if you can’t get distilled water. @14. Run the engine several minutes.
Stop the engine and recheck the
coolant level in the radiator. If it is
low, add more coolant until it
reaches the top of the radiator.
15. Fill the coolant reservoir with cool-
ant up to maximum level.
16. Install the radiator cap, radiator
cap stopper bolt and coolant res-
ervoir cap.
17. Check for coolant leakage. If any
leakage is found, ask a Yamaha
dealer to inspect the cooling sys-
tem.
1. Coolant reservoir
2. Bolt
3. Coolant reservoir hose clamp
4. Hose
Tightening torque:
Water pump and cylinder drain
bolts:
10 Nm (1.0 m·kg)
Recommended antifreeze:
High quality ethylene glycol
antifreeze containing corrosion
inhibitors for aluminum engines.
Antifreeze and water mixing ratio:
1 : 1
Total amount:
1.7 L
Coolant reservoir capacity:
0.3 L
E_4tx_Periodic.fm Page 12 Saturday, October 16, 1999 9:37 AM
Page 70 of 99

PERIODIC MAINTENANCE AND MINOR REPAIR
6-24
6
EC000096
CAUTION:@ Too little chain slack will overload
the engine and other vital parts.
Keep the slack within the specified
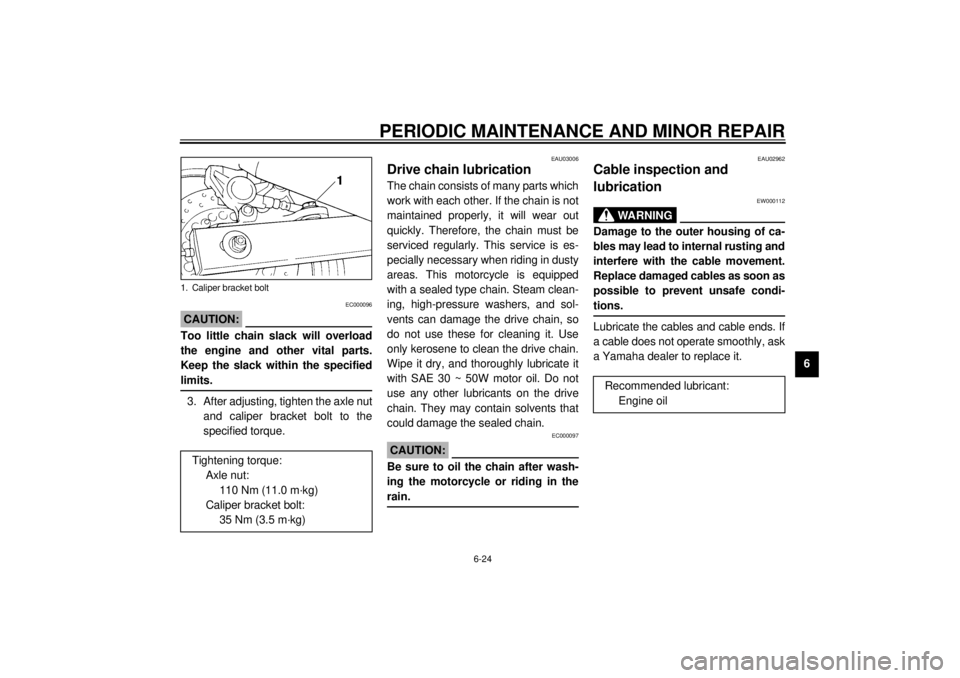
limits. @3. After adjusting, tighten the axle nut
and caliper bracket bolt to the
specified torque.
EAU03006
Drive chain lubricationThe chain consists of many parts which
work with each other. If the chain is not
maintained properly, it will wear out
quickly. Therefore, the chain must be
serviced regularly. This service is es-
pecially necessary when riding in dusty
areas. This motorcycle is equipped
with a sealed type chain. Steam clean-
ing, high-pressure washers, and sol-
vents can damage the drive chain, so
do not use these for cleaning it. Use
only kerosene to clean the drive chain.
Wipe it dry, and thoroughly lubricate it
with SAE 30 ~ 50W motor oil. Do not
use any other lubricants on the drive
chain. They may contain solvents that
could damage the sealed chain.
EC000097
CAUTION:@ Be sure to oil the chain after wash-
ing the motorcycle or riding in the
rain. @
EAU02962
Cable inspection and
lubrication
EW000112
WARNING
@ Damage to the outer housing of ca-
bles may lead to internal rusting and
interfere with the cable movement.
Replace damaged cables as soon as
possible to prevent unsafe condi-
tions. @Lubricate the cables and cable ends. If
a cable does not operate smoothly, ask
a Yamaha dealer to replace it.
1. Caliper bracket bolt
Tightening torque:
Axle nut:
110 Nm (11.0 m·kg)
Caliper bracket bolt:
35 Nm (3.5 m·kg)
Recommended lubricant:
Engine oil
E_4tx_Periodic.fm Page 24 Saturday, October 16, 1999 9:37 AM
Page 93 of 99

SPECIFICATIONS
8-5
8
EAU01064
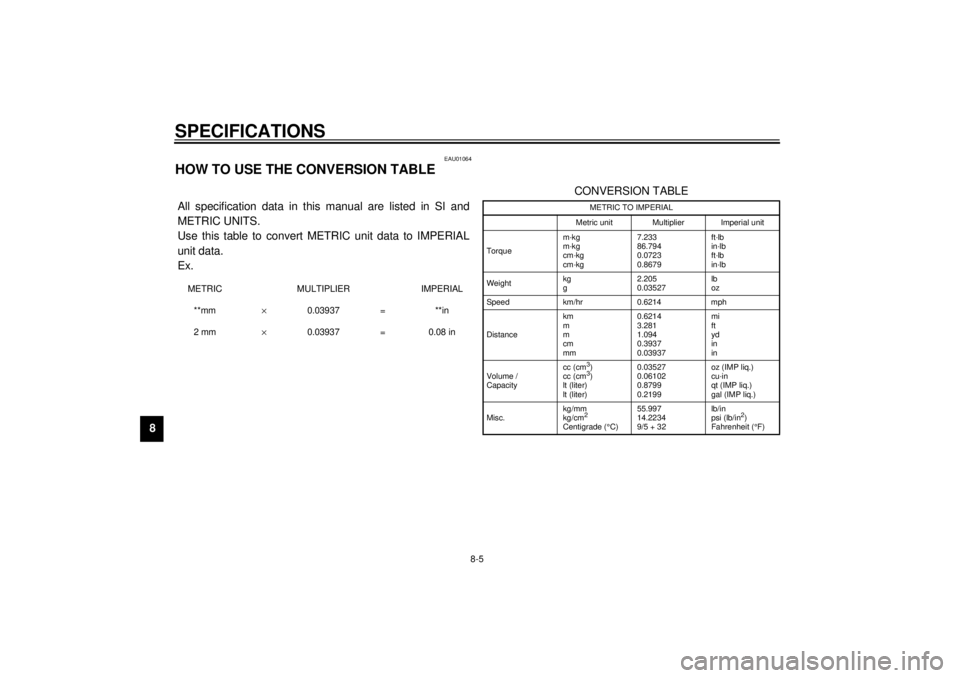
HOW TO USE THE CONVERSION TABLECS-02E All specification data in this manual are listed in SI and
METRIC UNITS.
Use this table to convert METRIC unit data to IMPERIAL
unit data.
Ex.METRIC MULTIPLIER IMPERIAL
**mm´ 0.03937 = **in
2 mm´ 0.03937 = 0.08 in
CONVERSION TABLE
METRIC TO IMPERIAL
Metric unit Multiplier Imperial unit
Torquem·kg
m·kg
cm·kg
cm·kg7.233
86.794
0.0723
0.8679ft·lb
in·lb
ft·lb
in·lb
Weightkg
g2.205
0.03527lb
oz
Speed km/hr 0.6214 mph
Distancekm
m
m
cm
mm0.6214
3.281
1.094
0.3937
0.03937mi
ft
yd
in
in
Volume /
Capacitycc (cm3)
cc (cm3)
lt (liter)
lt (liter)0.03527
0.06102
0.8799
0.2199oz (IMP liq.)
cu·in
qt (IMP liq.)
gal (IMP liq.)
Misc.kg/mm
kg/cm2
Centigrade (°
C)55.997
14.2234
9/5 + 32 lb/in
psi (lb/in
2)
Fahrenheit (°
F)
E_4tx_Spec.fm Page 5 Saturday, October 16, 1999 9:38 AM