Page 174 of 4770
(h) Recheck that the punch marks of the balance shafts
are aligned with the grooves of No.2 housing.
8. CHECK AND ADJUST BACKLASH OF
CRANKSHAFT GEAR AND NO.1 BALANCE SHAFT
GEAR (See page EG1±94) (c) Wipe clean the installation surface of the spacer.
(d) Place the spacers on the cylinder block.
HINT: When replacing the crankshaft and/or balance
shaft, use the thickest spacers.
(e) Place the engine balancer on the cylinder block.
(f) Check that punch marks shown in the illustration of
the balance shafts are align with the grooves of the
No.2 housing.
(g) While pulling the center part of the engine balancer
in the direction of the arrow, uniformly tighten the
6
bolts in several passes, in the sequence shown.
Torque: 49 N±m (500 kgf±cm, 36 ft±lbf)
9. INSTALL REAR OIL SEAL RETAINER
Install a new gasket and the retainer with the 6 bolts.
Torque: 9.3 N±m (95 kgf±cm, 82 in.±lbf)
± 5S±FE ENGINEENGINE MECHANICALEG1±124
Page 175 of 4770
2. w/ OIL COOLER:
INSTALL OIL COOLER
3. INSTALL OIL FILTER
4. INSTALL OIL PUMP AND OIL PAN
5. INSTALL WATER PUMP AND GENERATOR
ADJUSTING BAR
6. INSTALL CYLINDER HEAD
7. INSTALL PULLEYS AND TIMING BELT
POST ASSEMBLY
1. INSTALL KNOCK SENSOR
Using SST, install the knock sensor.
SST 09816±30010
Torque: 37 N±m (380 kgf±cm. 27 ft±lbf)
8. INSTALL PS PUMP BRACKET
Install the PS pump bracket with 3 bolts.
Torque: 43 N±m (440 kgf±cm, 32 ft±lbf)
9. INSTALL GENERATOR
10. INSTALL DISTRIBUTOR
11. REMOVE ENGINE STAND
12. INSTALL REAR END PLATE
Torque: 9.3 N±m (95 kgf±cm, 82 in.±lbf)
± 5S±FE ENGINEENGINE MECHANICALEG1±125
Page 182 of 4770
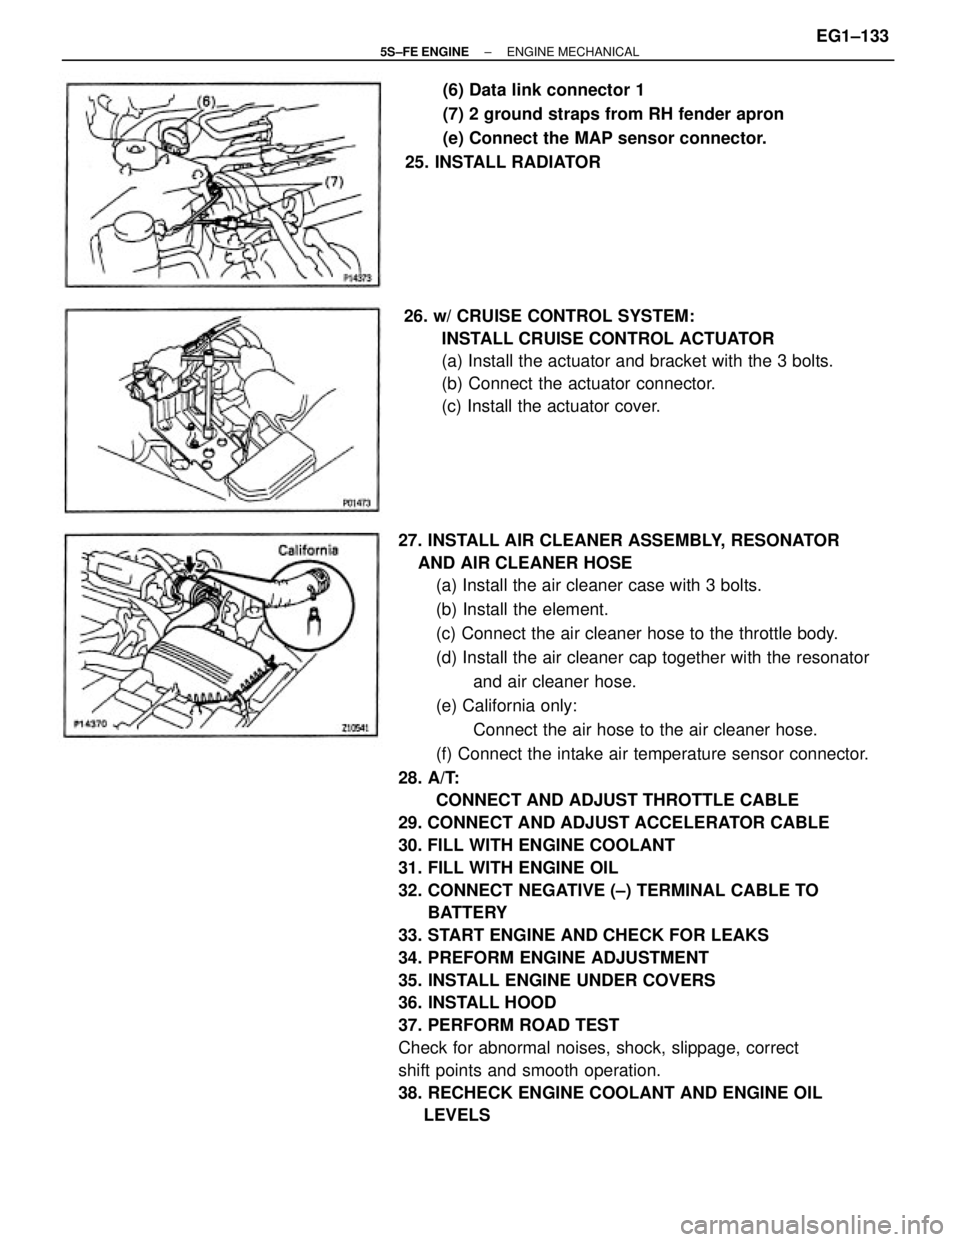
(d) Connect the following connectors:
(1) Igniter connector
(2) California only:
Ignition coil connector
(3) Noise filter connector
(4) 2 ground straps from LH fender apron
(5) Connector from LH fender apron 24. CONNECT WIRES AND CONNECTORS
(a) Connect the 5 connectors to the relay box.
(b) Connectors from LH fender apron.
(c) Install the engine relay box. 21. CONNECT FUEL INLET HOSE
Torque: 29 N±m (300 kgf±cm, 22 ft±lbf)
22. CONNECT FUEL RETURN HOSE
23. CONNECT HEATER HOSES
± 5S±FE ENGINEENGINE MECHANICALEG1±132
Page 183 of 4770

27. INSTALL AIR CLEANER ASSEMBLY, RESONATOR
AND AIR CLEANER HOSE
(a) Install the air cleaner case with 3 bolts.
(b) Install the element.
(c) Connect the air cleaner hose to the throttle body.
(d) Install the air cleaner cap together with the resonator
and air cleaner hose.
(e) California only:
Connect the air hose to the air cleaner hose.
(f) Connect the intake air temperature sensor connector.
28. A/T:
CONNECT AND ADJUST THROTTLE CABLE
29. CONNECT AND ADJUST ACCELERATOR CABLE
30. FILL WITH ENGINE COOLANT
31. FILL WITH ENGINE OIL
32. CONNECT NEGATIVE (±) TERMINAL CABLE TO
BATTERY
33. START ENGINE AND CHECK FOR LEAKS
34. PREFORM ENGINE ADJUSTMENT
35. INSTALL ENGINE UNDER COVERS
36. INSTALL HOOD
37. PERFORM ROAD TEST
Check for abnormal noises, shock, slippage, correct
shift points and smooth operation.
38. RECHECK ENGINE COOLANT AND ENGINE OIL
LEVELS26. w/ CRUISE CONTROL SYSTEM:
INSTALL CRUISE CONTROL ACTUATOR
(a) Install the actuator and bracket with the 3 bolts.
(b) Connect the actuator connector.
(c) Install the actuator cover.(6) Data link connector 1
(7) 2 ground straps from RH fender apron
(e) Connect the MAP sensor connector.
25. INSTALL RADIATOR
± 5S±FE ENGINEENGINE MECHANICALEG1±133
Page 190 of 4770
Warpage
Cylinder block side
Manifold side
Valve seat
Refacing angle
Contacting angle
Contacting width
SERVICE SPECIFICATIONS
SERVICE DATA
Deviation
Free length
Installed tension et 34.7 mm (1.366 in.) Free length
Installed load at 50.5 mm (1.988 in.)
Inside diameter
Outside diameter (for repair part)
Lifter diameter
Lifter bore diameter
Oil clearance Difference of pressure between each cylinder
Vale face angle
Stem diameter Idler pulley
tension spring Intake
manifold
vacuum
Compression
pressure
Valve guide
bushing
Valve overall length
Stem oil clearance
Margin thickness
Cylinder
head
at idle speed
Valve springet 250 rpm Idle speed
Valve lifter
Warpage Manifold Valve
± 5S±FE ENGINEENGINE MECHANICALEG1±140
Page 191 of 4770
Cylinder head surface warpage
Cylinder bore diameterJournal diameter
Circle runout
Cam lobe height
Camshaft gear spring end free distance
Piston ring groove clearanceCamshaft gear backlash
Piston and
piston ring
Piston ring end gapJournal oil clearance
Piston oil clearanceThrust clearance
Piston diameter Cylinder blockCamshaft
± 5S±FE ENGINEENGINE MECHANICALEG1±141
Page 192 of 4770
Rod bend
Rod twist
Bushing inside diameter
Piston pin diameter
Piston pin oil clearance
Connecting rod bolt outside diameter
Circle runout
Main journal taper and out±of±round
Crank pin taper and out±of±round Connecting rod bearing center wall thickness
(Reference)
Main bearing center wall thickness (Reference) Thrust washer thickness
Main journal oil clearanceConnecting rod oil clearance
Main journal diameter Connecting
rod
Crank pin diameter Thrust clearance
Thrust clearance Crankshaft
± 5S±FE ENGINEENGINE MECHANICALEG1±142
Page 193 of 4770
Backlash
Crankshaft x No. 1 balance shaft
Off±vehicle
On±vehicle
No. 1 balance shaft x No.2 balance shaft
at D mark
at E mark
at F mark
Spacer thickness
Engine moving control rod x No. 2 engine mounting bracketCamshaft timing pulley x Camshaft (For use with SST)
TORQUE SPECIFICATIONS
No. 2 engine mounting bracket x Cylinder blockBalance shaft housing bolt outer diameter
Engine moving control rod X Fender apronOil pump pulley x Oil pump drive 'shaft Cylinder head cover x Cylinder head
Cylinder head x Cylinder block (1 styCamshaft timing pulley x Camshaft No. 2 idler pulley x Cylinder block
No. 1 idler pulley x Cylinder heedCrankshaft pulley x Crankshaft Spark plug x Cylinder headEngine
balancerThrust clearance
Part tightened
± 5S±FE ENGINEENGINE MECHANICALEG1±143