2000 NISSAN QUEST ECU
[x] Cancel search: ECUPage 203 of 292
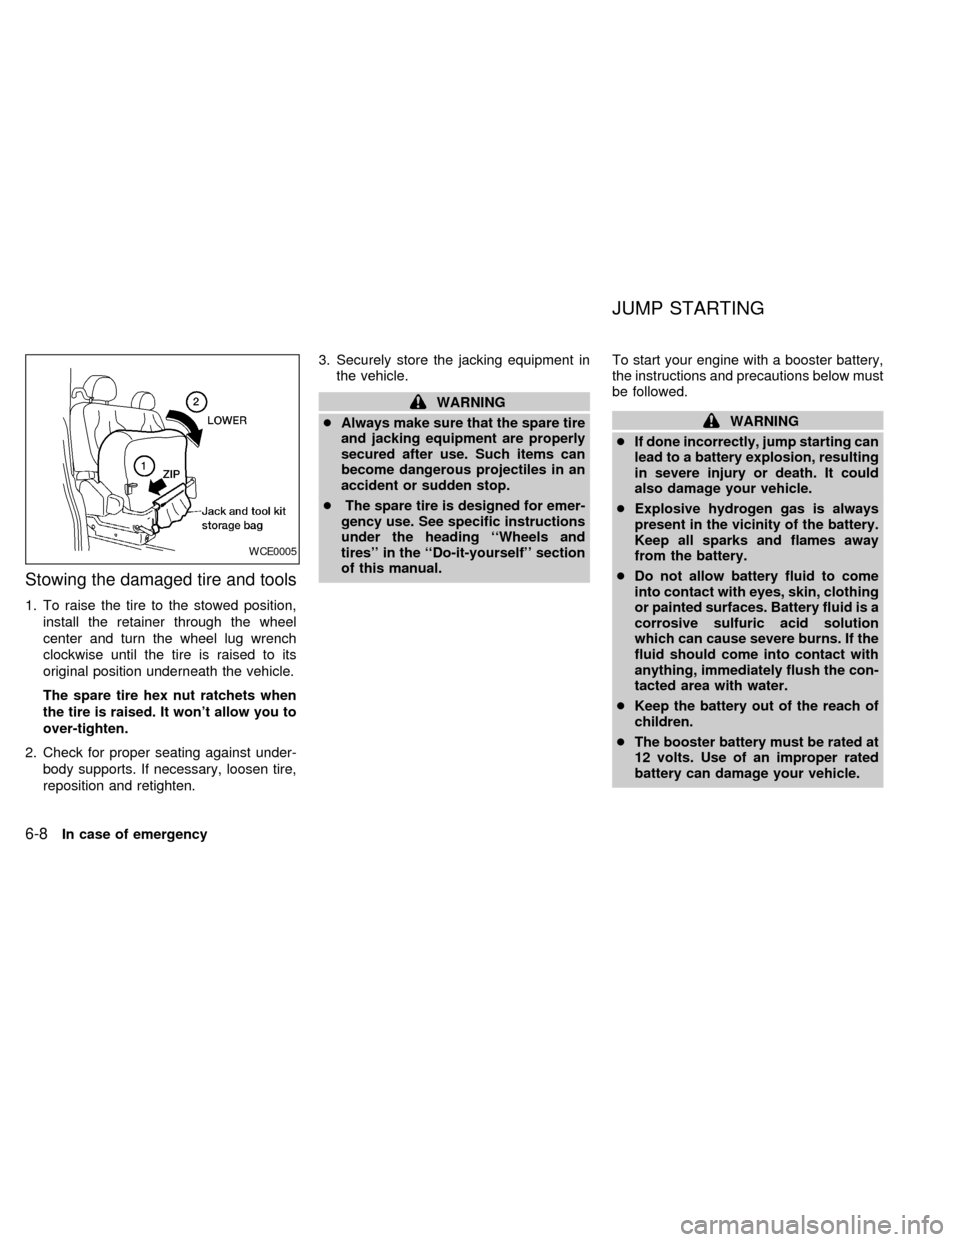
Stowing the damaged tire and tools
1. To raise the tire to the stowed position,
install the retainer through the wheel
center and turn the wheel lug wrench
clockwise until the tire is raised to its
original position underneath the vehicle.
The spare tire hex nut ratchets when
the tire is raised. It won't allow you to
over-tighten.
2. Check for proper seating against under-
body supports. If necessary, loosen tire,
reposition and retighten.3. Securely store the jacking equipment in
the vehicle.
WARNING
cAlways make sure that the spare tire
and jacking equipment are properly
secured after use. Such items can
become dangerous projectiles in an
accident or sudden stop.
cThe spare tire is designed for emer-
gency use. See specific instructions
under the heading ``Wheels and
tires'' in the ``Do-it-yourself'' section
of this manual.To start your engine with a booster battery,
the instructions and precautions below must
be followed.
WARNING
cIf done incorrectly, jump starting can
lead to a battery explosion, resulting
in severe injury or death. It could
also damage your vehicle.
cExplosive hydrogen gas is always
present in the vicinity of the battery.
Keep all sparks and flames away
from the battery.
cDo not allow battery fluid to come
into contact with eyes, skin, clothing
or painted surfaces. Battery fluid is a
corrosive sulfuric acid solution
which can cause severe burns. If the
fluid should come into contact with
anything, immediately flush the con-
tacted area with water.
cKeep the battery out of the reach of
children.
cThe booster battery must be rated at
12 volts. Use of an improper rated
battery can damage your vehicle.
WCE0005
JUMP STARTING
6-8In case of emergency
ZX
Page 207 of 292
1. Turn the key in the ignition to OFF.
2. Check under the vehicle for leaking fuel.
3. If you do not see or smell fuel, push down
the red reset button on the inertia fuel
shut-off switch.
4. Turn the ignition key ON for a few sec-
onds, then turn it OFF.
5. Check under the vehicle again for leaking
fuel. If you see or smell fuel, do not start
your vehicle again. If no fuel is detected,
try to start your vehicle again.
WARNING
If you see or smell fuel, do not reset the
switch or try to start your vehicle. You
could injure yourself or others. Have all
the passengers get out of the vehicle
and call the local fire department or a
towing service.When towing your vehicle, U.S. States, Ca-
nadian Provinces and local regulations for
towing must be followed. Incorrect towing
equipment could damage your vehicle.
Towing instructions are available from an
authorized NISSAN dealer. Local service
operators are generally familiar with the
applicable laws and procedures for towing.
To assure proper towing and to prevent
accidental damage to your vehicle, NISSAN
recommends that you have a service opera-
tor tow your vehicle. It is advisable to have
the service operator carefully read the fol-
lowing precautions.
WARNING
cNever ride in a vehicle that is being
towed.
cNever get under your vehicle after it
has been lifted by a tow truck.
CAUTION
cWhen towing, make sure that the
transmission, axles, steering system
and powertrain are in working con-
dition. If any unit is damaged, dollies
must be used.
cNever use a tow bar that attaches to
the bumper when you tow your ve-
hicle. It may damage the bumper and
cause damage to the transmission.
cWhen towing with the front wheels
on dollies:
Turn the ignition key to the OFF
position and secure the steering
wheel in a straight-ahead position
with a rope or similar device. Never
place the ignition key in the LOCK
position. This will result in damage
to the steering lock mechanism.
Move the gearshift lever to the N
(Neutral) position.
cWhen towing front wheel drive, auto-
matic transmission models with the
rear wheels on the ground (if you do
not use towing dollies), release the
parking brake.
cAlways attach safety chains before
towing.
TOWING YOUR VEHICLE
6-12In case of emergency
ZX
Page 217 of 292
When performing any inspection or mainte-
nance work on your vehicle, always take
care to prevent serious accidental injury to
yourself or damage to the vehicle. The
following are general precautions which
should be closely observed.
WARNING
cPark the vehicle on a level surface,
apply the parking brake securely and
block the wheels to prevent the ve-
hicle from moving. Move the gear-
shift lever to P (park).
cBe sure the ignition key is in the OFF
or Lock position when performing
any parts replacement or repairs.
cYour vehicle is equipped with an
automatic engine cooling fan. It may
come on at any time without warn-
ing, even if the ignition key is in the
OFF position and the engine is not
running. To avoid injury, always dis-
connect the negative battery cable
before working near the fan.
c
If you must work with the engine run-
ning, keep your hands, clothing, hair
and tools away from moving fans,
belts and any other moving parts.
cIt is advisable to secure or remove
any loose clothing and remove any
jewelry, such as rings, watches, etc.
before working on your vehicle.
cAlways wear eye protection when-
ever you work on your vehicle.
cIf you must run the engine in an
enclosed space such as a garage, be
sure there is proper ventilation for
exhaust gases to escape.
cNever get under the vehicle while it
is supported only by a jack. If it is
necessary to work under the vehicle,
support it with safety stands.
cKeep smoking materials, flame and
sparks away from the fuel tank and
battery.
cOn gasoline engine models with the
multiport fuel injection (MFI) system,
the fuel filter or fuel lines should be
serviced by an authorized NISSAN
dealer because the fuel lines are
under high pressure even when the
engine is off.CAUTION
cDo not work under the hood while
the engine is hot. Turn off the engine
and wait until it cools down.
cNever connect or disconnect the bat-
tery or any transistorized compo-
nent while the ignition switch is in
the ON position.
cAvoid contact with used engine oil.
Improperly disposed motor oil and/
or other vehicle fluids can damage
the environment. Always conform to
local regulations for disposal of ve-
hicle fluid.
This ``Do-it-yourself'' section gives instruc-
tions regarding only those items which are
relatively easy for an owner to perform.
You should be aware that incomplete or
improper servicing may result in operating
difficulties or excessive emissions, and
could affect your warranty coverage.If in
doubt about any servicing, have it done
by an authorized NISSAN dealer.
MAINTENANCE
PRECAUTIONS
8-2Do-it-yourself
ZX
Page 221 of 292
CAUTION
Oil level should be checked regularly.
Operating with an insufficient amount
of oil can damage the engine, and such
damage is not covered by warranty.
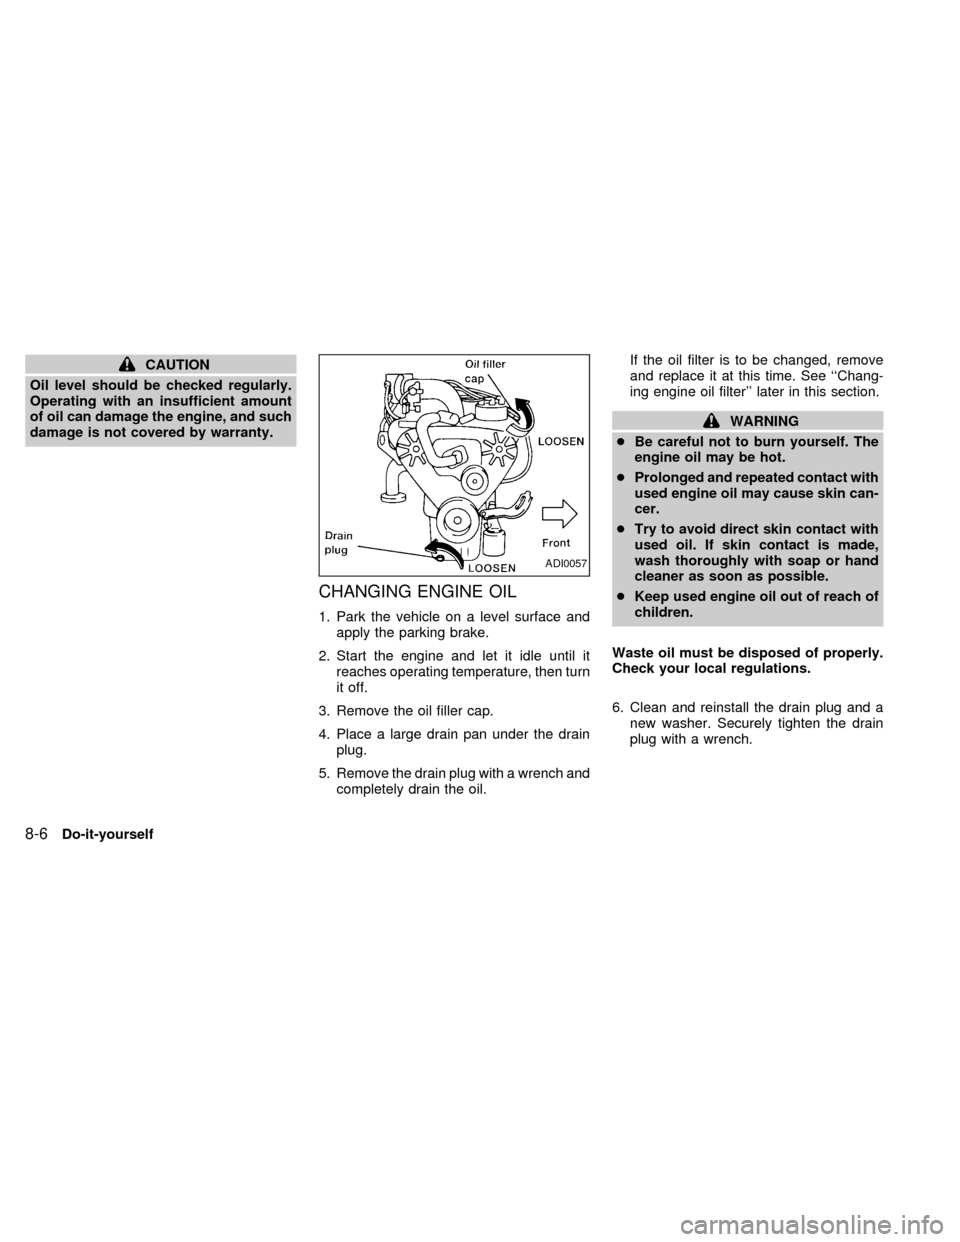
CHANGING ENGINE OIL
1. Park the vehicle on a level surface and
apply the parking brake.
2. Start the engine and let it idle until it
reaches operating temperature, then turn
it off.
3. Remove the oil filler cap.
4. Place a large drain pan under the drain
plug.
5. Remove the drain plug with a wrench and
completely drain the oil.If the oil filter is to be changed, remove
and replace it at this time. See ``Chang-
ing engine oil filter'' later in this section.
WARNING
cBe careful not to burn yourself. The
engine oil may be hot.
cProlonged and repeated contact with
used engine oil may cause skin can-
cer.
cTry to avoid direct skin contact with
used oil. If skin contact is made,
wash thoroughly with soap or hand
cleaner as soon as possible.
cKeep used engine oil out of reach of
children.
Waste oil must be disposed of properly.
Check your local regulations.
6. Clean and reinstall the drain plug and a
new washer. Securely tighten the drain
plug with a wrench.
ADI0057
8-6Do-it-yourself
ZX
Page 222 of 292
Drain plug tightening torque:
22 to 29 ft-lb
(29 to 39 Nzm)
Do not use excessive force.
7. Refill the engine with a recommended oil
through the oil filler opening then install
the oil filler cap securely.
See the ``Technical and consumer infor-
mation'' section for drain and refill capac-
ity.
The drain and refill capacity depends on
the oil temperature and drain time. Use
these specifications for reference only.
Always use the dipstick to determine
when the proper amount of oil is in the
engine.
8. Start the engine. Check for leakage
around the drain plug. Correct as re-
quired.
9. Turn the engine off and wait several
minutes. Check the oil level with the
dipstick. Add engine oil if necessary.
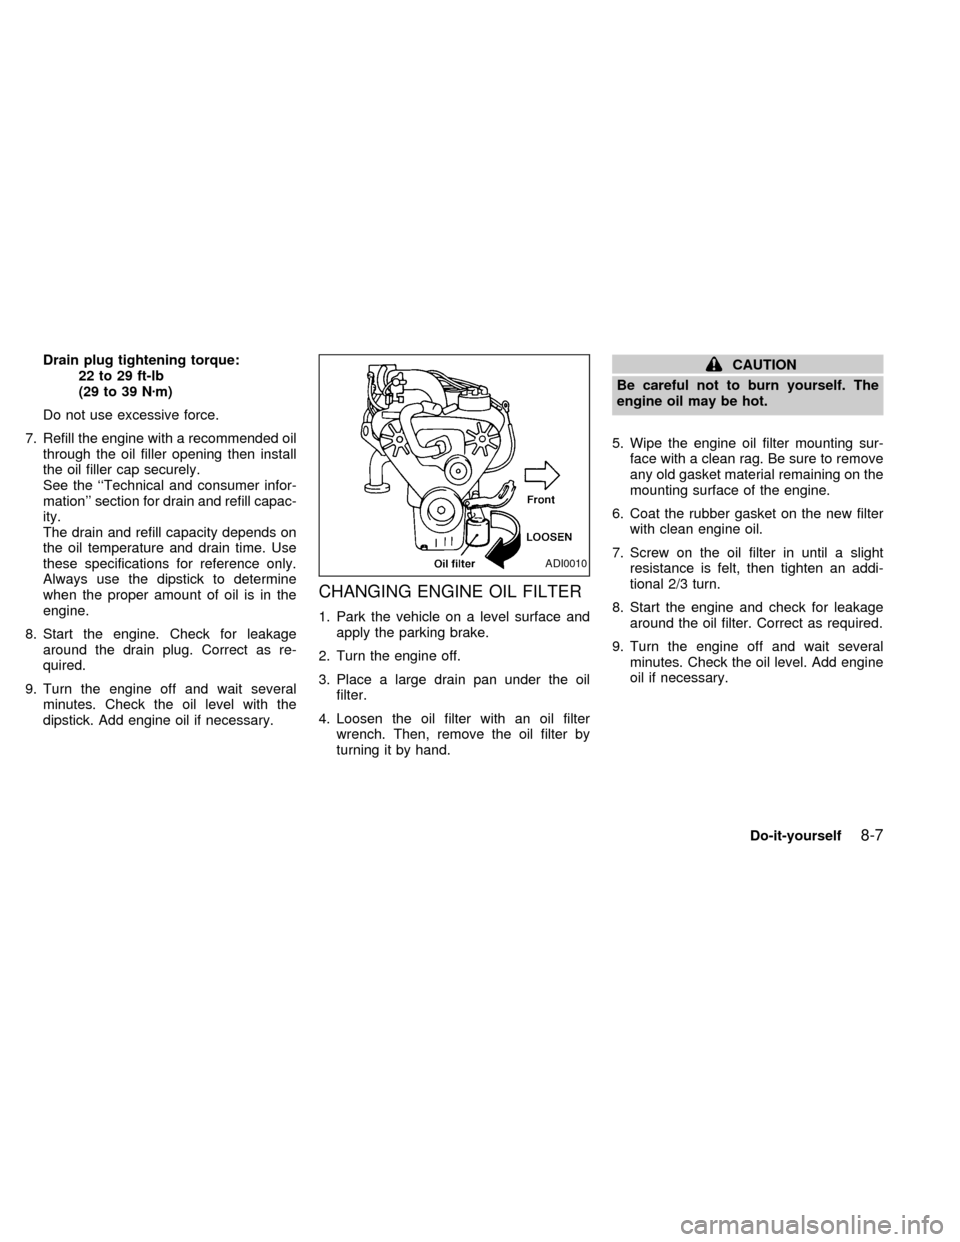
CHANGING ENGINE OIL FILTER
1. Park the vehicle on a level surface and
apply the parking brake.
2. Turn the engine off.
3. Place a large drain pan under the oil
filter.
4. Loosen the oil filter with an oil filter
wrench. Then, remove the oil filter by
turning it by hand.
CAUTION
Be careful not to burn yourself. The
engine oil may be hot.
5. Wipe the engine oil filter mounting sur-
face with a clean rag. Be sure to remove
any old gasket material remaining on the
mounting surface of the engine.
6. Coat the rubber gasket on the new filter
with clean engine oil.
7. Screw on the oil filter in until a slight
resistance is felt, then tighten an addi-
tional 2/3 turn.
8. Start the engine and check for leakage
around the oil filter. Correct as required.
9. Turn the engine off and wait several
minutes. Check the oil level. Add engine
oil if necessary.
ADI0010
Do-it-yourself8-7
ZX
Page 225 of 292
WARNING
Use only new fluid from a sealed con-
tainer. Old, inferior, or contaminated
fluid may damage the brake system.
The use of improper fluids can damage
the brake system and affect the vehi-
cle's stopping ability.
CAUTION
Do not spill the fluid on painted sur-
faces. This will damage the paint. If
fluid is spilled, wash with water.
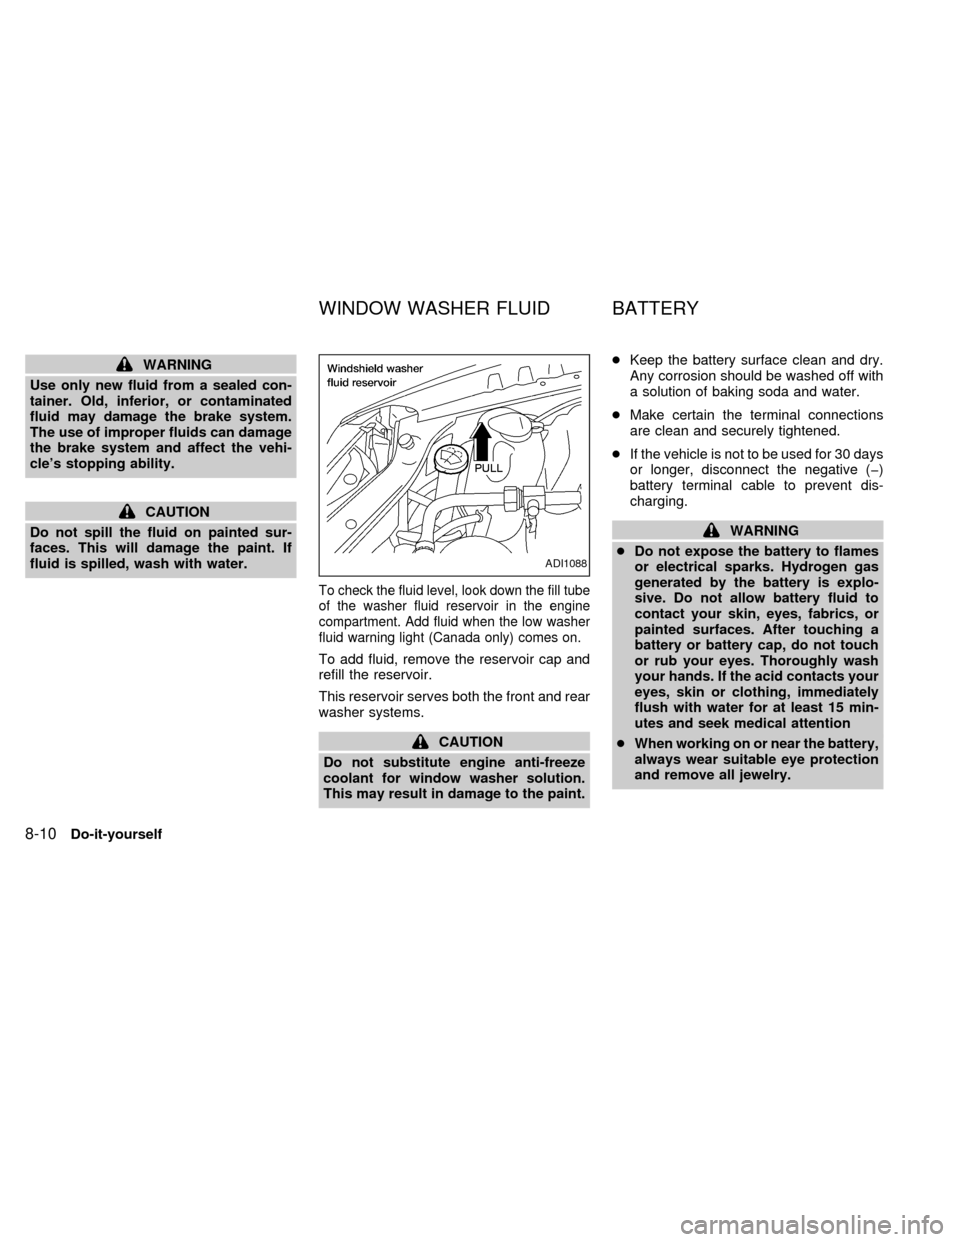
To check the fluid level, look down the fill tube
of the washer fluid reservoir in the engine
compartment. Add fluid when the low washer
fluid warning light (Canada only) comes on.
To add fluid, remove the reservoir cap and
refill the reservoir.
This reservoir serves both the front and rear
washer systems.
CAUTION
Do not substitute engine anti-freeze
coolant for window washer solution.
This may result in damage to the paint.cKeep the battery surface clean and dry.
Any corrosion should be washed off with
a solution of baking soda and water.
cMake certain the terminal connections
are clean and securely tightened.
cIf the vehicle is not to be used for 30 days
or longer, disconnect the negative (þ)
battery terminal cable to prevent dis-
charging.
WARNING
cDo not expose the battery to flames
or electrical sparks. Hydrogen gas
generated by the battery is explo-
sive. Do not allow battery fluid to
contact your skin, eyes, fabrics, or
painted surfaces. After touching a
battery or battery cap, do not touch
or rub your eyes. Thoroughly wash
your hands. If the acid contacts your
eyes, skin or clothing, immediately
flush with water for at least 15 min-
utes and seek medical attention
cWhen working on or near the battery,
always wear suitable eye protection
and remove all jewelry.
ADI1088
WINDOW WASHER FLUID BATTERY
8-10Do-it-yourself
ZX
Page 227 of 292
WARNING
Be sure the ignition key is in the OFF or
LOCK position. The engine could rotate
unexpectedly.
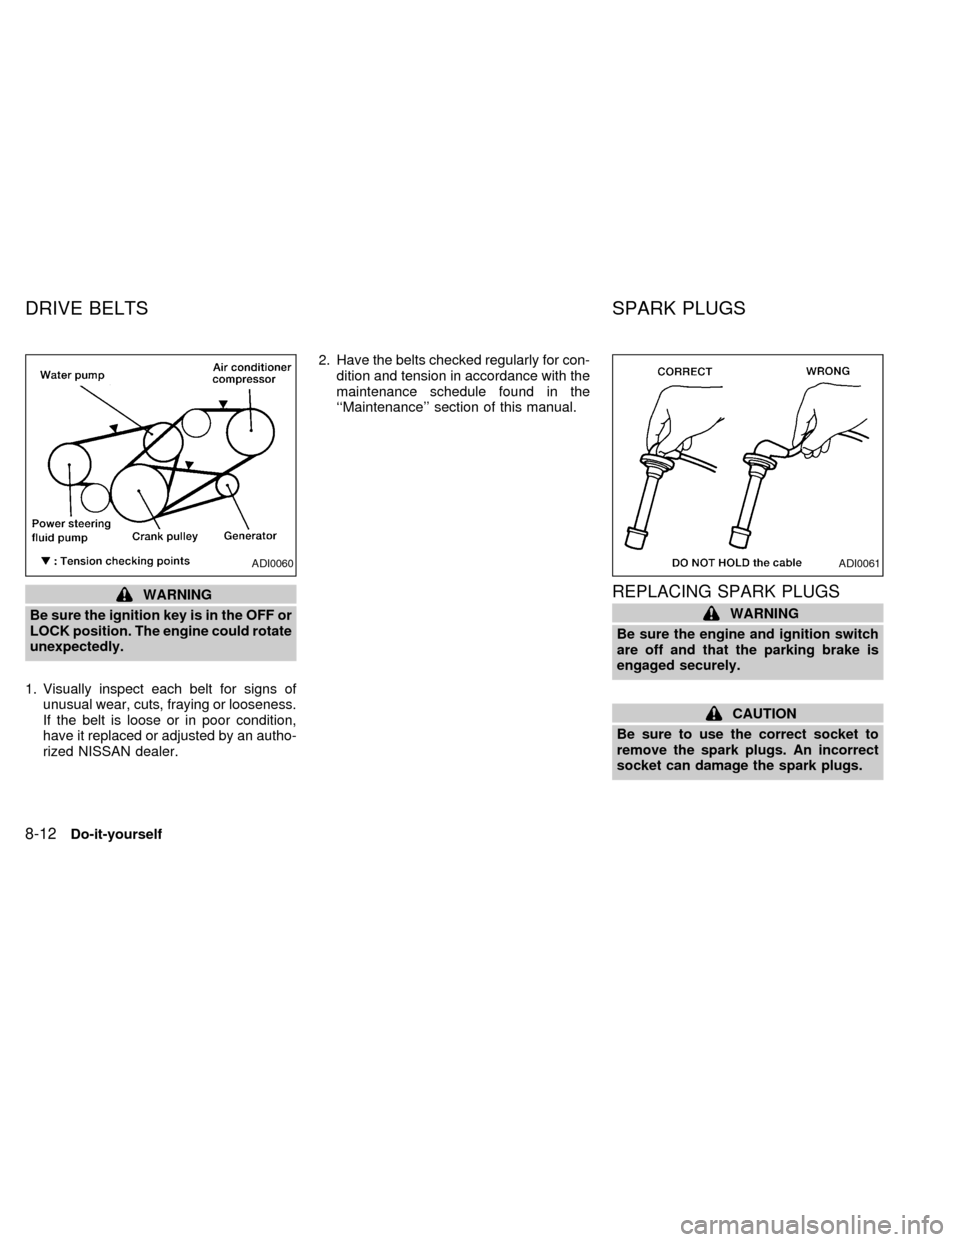
1. Visually inspect each belt for signs of
unusual wear, cuts, fraying or looseness.
If the belt is loose or in poor condition,
have it replaced or adjusted by an autho-
rized NISSAN dealer.2. Have the belts checked regularly for con-
dition and tension in accordance with the
maintenance schedule found in the
``Maintenance'' section of this manual.REPLACING SPARK PLUGS
WARNING
Be sure the engine and ignition switch
are off and that the parking brake is
engaged securely.
CAUTION
Be sure to use the correct socket to
remove the spark plugs. An incorrect
socket can damage the spark plugs.
ADI0060ADI0061
DRIVE BELTS SPARK PLUGS
8-12Do-it-yourself
ZX
Page 237 of 292

Replace the battery as follows:
1. Open the lid using a coin.
2. Replace the battery with a new one.
Insert the batteries as illustrated above.
Recommended battery: Panasonic
CR2025, 3V or equivalent.
3. Close the lid securely.
4. Press the
button, then thebutton
two or three times to check the multi-
remote controller operation.
If the batteries are removed for any reason
other than replacement, perform step 4.
cAn improperly disposed battery can
hurt the environment. Always conform
to local regulations for battery disposal.
cThe multi-remote controller is water-
resistant; however, if it does get wet,
immediately wipe completely dry.
cThe operational range of the multi-
remote controller extends to approxi-
mately 30 ft (10 m) from the vehicle.
This range may vary with conditions.
FCC Notice:
Changes or modifications not expressly
approved by the manufacturer for com-
pliance could void the user's authority to
operate the equipment.
This device complies with part 15 of the FCC
Rules and RSS-210 of Industry Canada.
Operation is subject to the following two
conditions: (1) This device may not
cause harmful interference, and (2) this
device must accept any interference re-
ceived, including interference that may
cause undesired operation of the device.APD1087
MULTI-REMOTE CONTROLLER
BATTERY REPLACEMENT
8-22Do-it-yourself
ZX