2000 NISSAN QUEST automatic transmission
[x] Cancel search: automatic transmissionPage 95 of 292
1.Check the brake fluid level. Add brake fluid
as necessary. See ``Brake fluid'' in the
``Do-it-yourself'' section of this manual.
2. If the brake fluid level is correct, have the
warning system checked by an autho-
rized NISSAN dealer.
WARNING
cYour brake system may not be work-
ing properly if the warning light is
on. Driving could be dangerous. If
you judge it to be safe, drive care-
fully to the nearest service station
for repairs. Otherwise, have your ve-
hicle towed because driving it could
be dangerous.
cPressing the brake pedal with the
engine stopped and/or low brake
fluid level may increase your stop-
ping distance and braking will re-
quire greater pedal effort as well as
pedal travel.
cIf the brake fluid level is below the
MINIMUM or MIN mark on the brake
fluid reservoir, do not drive until the
brake system has been checked at a
NISSAN dealer.
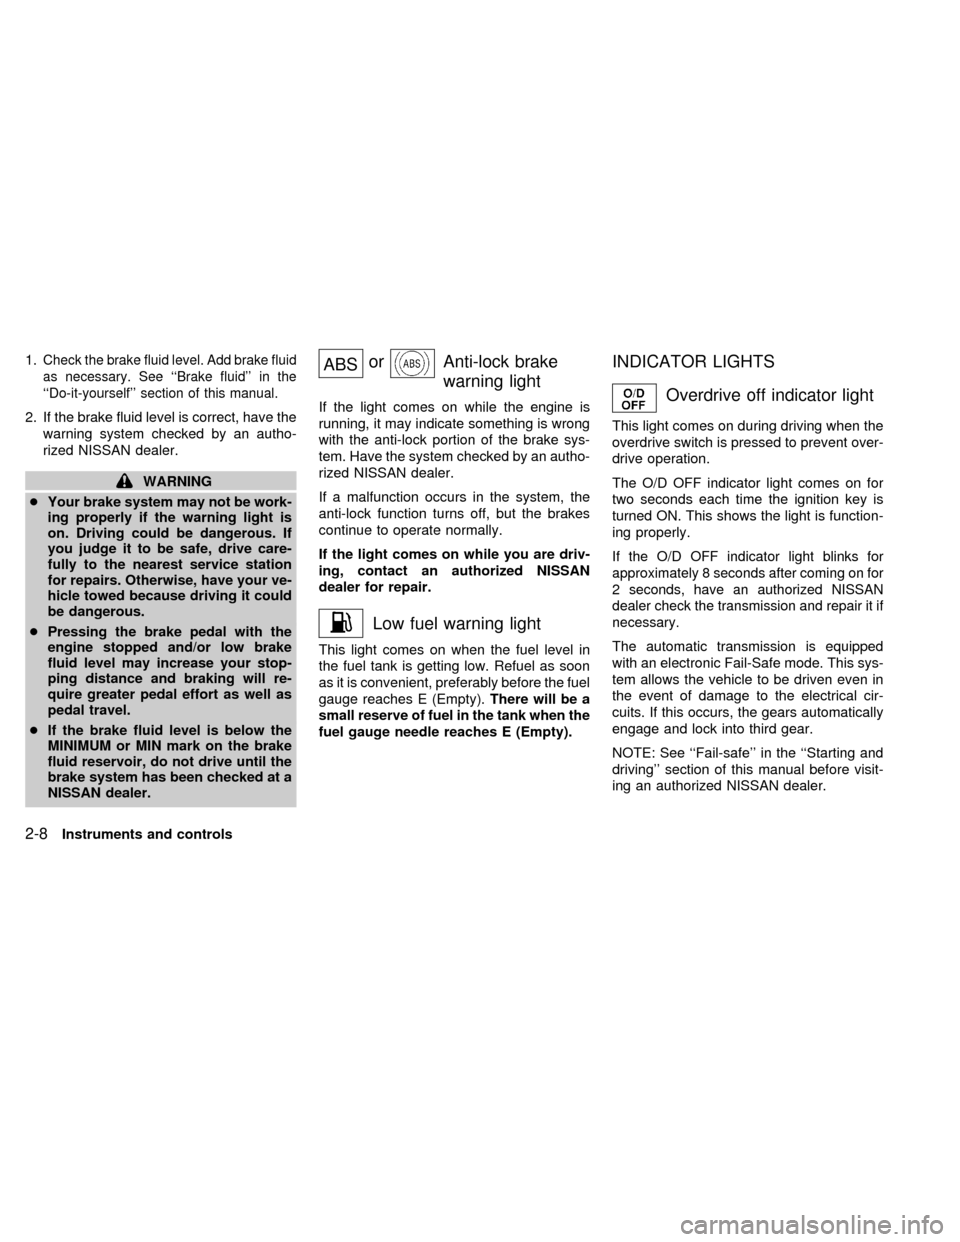
ABSorAnti-lock brake
warning light
If the light comes on while the engine is
running, it may indicate something is wrong
with the anti-lock portion of the brake sys-
tem. Have the system checked by an autho-
rized NISSAN dealer.
If a malfunction occurs in the system, the
anti-lock function turns off, but the brakes
continue to operate normally.
If the light comes on while you are driv-
ing, contact an authorized NISSAN
dealer for repair.
Low fuel warning light
This light comes on when the fuel level in
the fuel tank is getting low. Refuel as soon
as it is convenient, preferably before the fuel
gauge reaches E (Empty).There will be a
small reserve of fuel in the tank when the
fuel gauge needle reaches E (Empty).
INDICATOR LIGHTS
Overdrive off indicator light
This light comes on during driving when the
overdrive switch is pressed to prevent over-
drive operation.
The O/D OFF indicator light comes on for
two seconds each time the ignition key is
turned ON. This shows the light is function-
ing properly.
If the O/D OFF indicator light blinks for
approximately 8 seconds after coming on for
2 seconds, have an authorized NISSAN
dealer check the transmission and repair it if
necessary.
The automatic transmission is equipped
with an electronic Fail-Safe mode. This sys-
tem allows the vehicle to be driven even in
the event of damage to the electrical cir-
cuits. If this occurs, the gears automatically
engage and lock into third gear.
NOTE: See ``Fail-safe'' in the ``Starting and
driving'' section of this manual before visit-
ing an authorized NISSAN dealer.
2-8Instruments and controls
ZX
Page 183 of 292
WARNING
cDo not depress the accelerator pedal
while shifting from P (Park) or N
(Neutral) to: R (Reverse), D (Drive),
2 or 1. Always depress the brake
pedal until shifting is completed.
Failure to do so could cause you to
lose control and have an accident.
cCold engine idle speed is high, so
use caution when shifting into a for-
ward or reverse gear before the en-
gine has warmed up.
cNever shift to P (Park) or R (Reverse)
while the vehicle is moving. This
could cause an accident.
CAUTION
cWhen stopping the vehicle on an
uphill grade, do not hold the vehicle
by depressing the accelerator pedal.
The foot brakes should be used for
this purpose.cDo not downshift abruptly on slip-
pery roads. This may cause a loss of
control.
The automatic transmission in your vehicle
is electronically controlled by a transmission
control module to produce maximum power
and smooth operation.
Shown on the following pages are the rec-
ommended operating procedures for this
transmission. Follow these procedures for
maximum vehicle performance and driving
enjoyment.
Starting the vehicle
cAfter starting the engine, fully depress the
brake pedal before shifting the selector
lever to the R (Reverse), N (Neutral), D
(Drive), 2 or 1 position. Be sure the
vehicle is at a complete stop before at-
tempting to shift the selector lever.
This automatic transmission is designed
so the brake pedal MUST be depressed
before shifting from P (Park) to any other
position while the ignition switch is ON.The selector lever cannot be moved out
of P (Park) and into any of the other gear
positions if the ignition key is turned to
LOCK, or if the key is removed from the
switch.
The shift lever can be moved if the igni-
tion switch is in the ACC position. This
allows the vehicle to be moved if the
battery is discharged.
1. Keep the brake pedal depressed and
shift into a driving gear.
2. Release the parking brake and brake
pedal, then gradually start the vehicle in
motion.
DRIVING THE VEHICLE
5-6Starting and driving
ZX
Page 185 of 292

Accelerator downshift--
In D position--
For rapid passing or hill climbing, fully depress
the accelerator pedal to the floor. This shifts the
transmission down into third gear, second gear
or first gear, depending on the vehicle speed.
Fail-safe
When the Fail-safe operation occurs, the
next time the key is turned to the ON
position, the O/D OFF light blinks for ap-
proximately 8 seconds after coming on for 2
seconds. While the vehicle can be driven
under these circumstances, please note
that the transmission will remain in 3rd gear.
NOTE: If the vehicle is driven under extreme
conditions, such as excessive wheel spinning
and subsequent hard braking, the Fail-safe
system may be activated. This will occur even
if all electrical circuits are functioning properly.
In this case, turn the ignition key OFF and wait
for 3 seconds. Then turn the key back to the
ON position. The vehicle should return to its
normal operating condition. If it does not re-
turn to its normal operating condition, have an
authorized NISSAN dealer check the trans-
mission and repair, if necessary.
Overdrive switch
Each time your vehicle is started, the trans-
mission is automatically ``reset'' to overdrive
ON.
ON: For normal driving the overdrive
switch is engaged. The transmission
is upshifted into overdrive as the
vehicle speed increases.
The overdrive does not engage until the
engine has reached operating tempera-
ture.
OFF: For driving up and down long slopes
where engine braking is necessary,push the overdrive switch once. The
O/D OFF indicator light illuminates at
this time.
When cruising at a low speed or climbing a
gentle slope, you may feel uncomfortable
shift shocks as the transmission shifts be-
tween 3rd gear and overdrive repeatedly. In
this case, press the overdrive switch.
When driving conditions change, press the
overdrive switch to turn the overdrive on.
The O/D OFF indicator light goes out.
Remember not to drive at high speeds for
extended periods of time with the O/D OFF
light illuminated. This reduces the fuel
economy.
ASD0561
5-8Starting and driving
ZX
Page 197 of 292
CHANGING A FLAT TIRE
If you have a flat tire, follow the instructions
below:
Stopping the vehicle
1. Safely move the vehicle off the road and
away from traffic.
2. Turn on the hazard warning flashers.
3. Park on a level surface and apply the
parking brake. Move the gearshift lever
to the P (Park) position.
4. Turn off the engine.
5. Raise the hood to warn other traffic, and
to signal professional road assistance
personnel that you need assistance.
6. Have all passengers get out of the ve-
hicle and stand in a safe place, away
from traffic and clear of the vehicle.
WARNING
cMake sure the parking brake is se-
curely applied and the automatic
transmission is shifted into P (Park).
cNever change tires when the vehicle
is on a slope, ice or slippery areas.
This is hazardous.cNever change tires if oncoming traf-
fic is close to your vehicle. Wait for
professional road assistance.
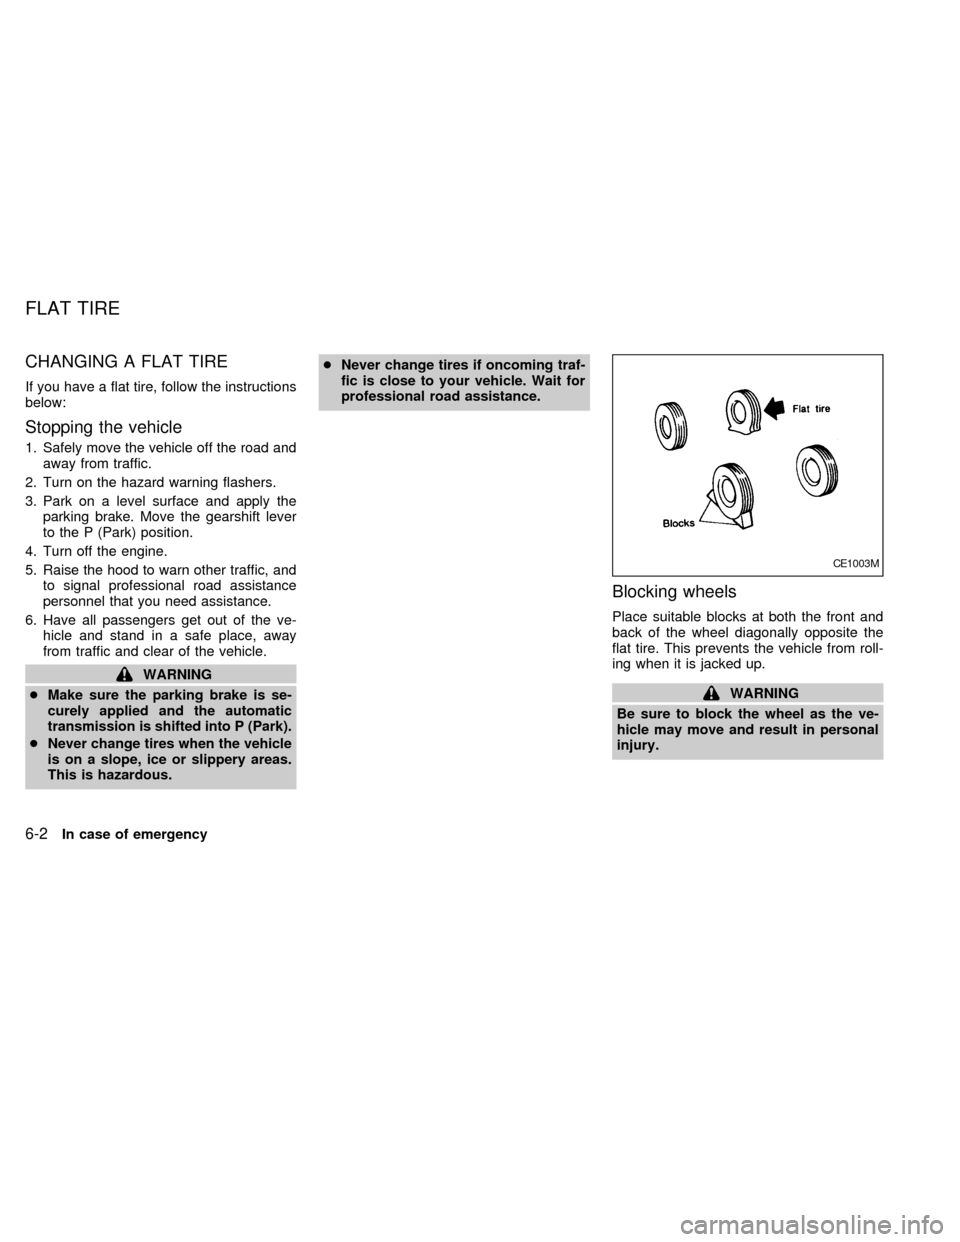
Blocking wheels
Place suitable blocks at both the front and
back of the wheel diagonally opposite the
flat tire. This prevents the vehicle from roll-
ing when it is jacked up.
WARNING
Be sure to block the wheel as the ve-
hicle may move and result in personal
injury.
CE1003M
FLAT TIRE
6-2In case of emergency
ZX
Page 205 of 292
cMake sure the jumper cables do not
touch moving parts in the engine
compartment and that the clamps do
not contact any other metal.
5. Start the engine of the other vehicle and
let it run for a few minutes.
6. Keep the engine speed of the other ve-
hicle at about 2,000 RPM, and start the
engine of the vehicle being jump started.
CAUTION
Do not keep the starter motor engaged
for more than 10 seconds. If the engine
does not start right away, turn the key
off and wait 3 to 4 seconds before
trying again.
7. After starting your engine, carefully dis-
connect the negative cable and then the
positive cable.
8. Replace the vent caps (if so equipped).
Be sure to dispose of the cloth used to
cover the vent holes as it may be con-
taminated with corrosive acid.
CAUTION
Automatic transmission models cannot
be push or tow started. This may cause
transmission or other vehicle damage.If your vehicle is overheating (indicated by
an extremely high temperature gauge read-
ing), or if you feel a lack of engine power,
detect abnormal noise, etc., take the follow-
ing steps:
WARNING
cDo not continue to drive if your ve-
hicle overheats. Doing so could
cause a vehicle fire.
cTo avoid the danger of being
scalded, never remove the radiator
cap while the engine is still hot.
When the radiator cap is removed,
pressurized hot water will spurt out,
possibly causing serious injury.
cDo not open the hood if steam is
coming out.
1. Move the vehicle safely off the road,
apply the parking brake and move the
gearshift lever to the P (Park) position.
Do not stop the engine.
2. Turn off the air conditioner switch. Open
all the windows, move the temperature
control dial to warm and fan control dial
to four.
PUSH STARTING IF YOUR VEHICLE
OVERHEATS
6-10In case of emergency
ZX
Page 209 of 292
CAUTION
cNever tow the vehicle with the front
wheels on the ground, as this may
cause serious and expensive dam-
age to the transmission. If it is nec-
essary to tow the vehicle with the
rear wheels raised, always use tow-
ing dollies under the front wheels.
cNever tow automatic transmission
models with all four wheels on the
ground. This may cause serious and
expensive damage to the transmis-
sion.
cDo not tow with a sling type truck,
either from the front or the rear. It
may cause body damage.
cNever utilize the rear tie down brack-
ets or slots to tow another vehicle as
this may cause body damage.
VEHICLE RECOVERY (Freeing a
stuck vehicle)
cTow chains or cables must only be at-
tached to the main structual members of
the vehicle.
cPulling devices should be routed so theydo not touch any part of the suspension,
steering, brake or cooling systems.
cAlways pull the cable straight out from
the front or rear of the vehicle. Never pull
the vehicle at an angle.
cPulling devices such as ropes or canvas
straps are not recommended for use in
vehicle towing or recovery.
cStand clear of a stuck vehicle.
WARNING
Do not spin your tires at high speed.
This could cause them to explode and
result in serious injury. Parts of your
vehicle could also overheat and be
damaged.
6-14In case of emergency
ZX
Page 216 of 292

8 Do-it-yourself
Maintenance precautions .......................................8-2
Engine compartment check locations ....................8-3
Engine cooling system ...........................................8-4
Checking engine coolant level ...............................8-4
Changing engine coolant .......................................8-5
Engine oil ...............................................................8-5
Checking engine oil level .......................................8-5
Changing engine oil ...............................................8-6
Changing engine oil filter .......................................8-7
Automatic transmission fluid ..................................8-8
Temperature conditions for checking .....................8-8
Power steering fluid................................................8-9
Brake fluid ..............................................................8-9
Window washer fluid ............................................8-10
Battery ..................................................................8-10
Jump starting ........................................................8-11
Drive belts ............................................................8-12
Spark plugs ..........................................................8-12
Replacing spark plugs ..........................................8-12
Air cleaner ............................................................8-13Cabin air filter .......................................................8-14
Windshield wiper blades ......................................8-17
Cleaning ...............................................................8-17
Replacing .............................................................8-17
Parking brake and brake pedal ............................8-19..........................................8-19
Checking parking brake .......................................8-19
Checking brake pedal ..........................................8-19
Brake booster .......................................................8-20
Fuses ....................................................................8-20
Engine compartment ............................................8-20
Passenger compartment ......................................8-21
Multi-remote controller battery replacement ........8-22
Lights ....................................................................8-23
Headlights ............................................................8-23
Exterior and interior lights ....................................8-24
Wheels and tires ..................................................8-28
Tire pressure ........................................................8-28
Types of tires........................................................8-29
Tire chains ............................................................8-30
Changing tires and wheels...................................8-30
ZX
Page 223 of 292
WARNING
cWhen the engine is running, keep
hands, jewelry and clothing away
from any moving parts such as the
cooling fan and drive belts.
cAutomatic transmission fluid is poi-
sonous and should be stored care-
fully in marked containers out of the
reach of children.
TEMPERATURE CONDITIONS
FOR CHECKING
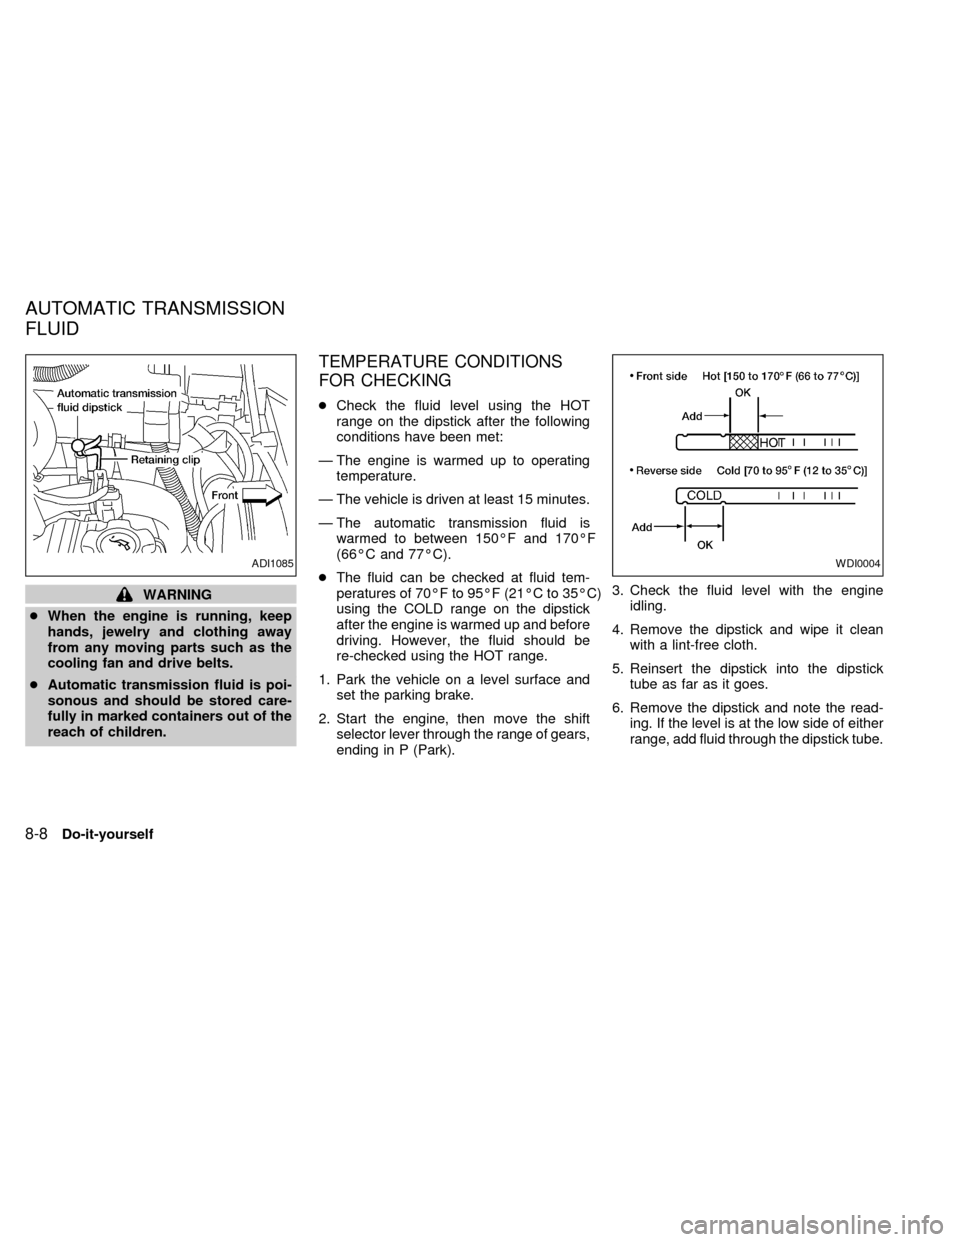
cCheck the fluid level using the HOT
range on the dipstick after the following
conditions have been met:
Ð The engine is warmed up to operating
temperature.
Ð The vehicle is driven at least 15 minutes.
Ð The automatic transmission fluid is
warmed to between 150ÉF and 170ÉF
(66ÉC and 77ÉC).
cThe fluid can be checked at fluid tem-
peratures of 70ÉF to 95ÉF (21ÉC to 35ÉC)
using the COLD range on the dipstick
after the engine is warmed up and before
driving. However, the fluid should be
re-checked using the HOT range.
1. Park the vehicle on a level surface and
set the parking brake.
2. Start the engine, then move the shift
selector lever through the range of gears,
ending in P (Park).3. Check the fluid level with the engine
idling.
4. Remove the dipstick and wipe it clean
with a lint-free cloth.
5. Reinsert the dipstick into the dipstick
tube as far as it goes.
6. Remove the dipstick and note the read-
ing. If the level is at the low side of either
range, add fluid through the dipstick tube.
WDI0004ADI1085
AUTOMATIC TRANSMISSION
FLUID
8-8Do-it-yourself
ZX