2000 NISSAN QUEST ECU
[x] Cancel search: ECUPage 114 of 292
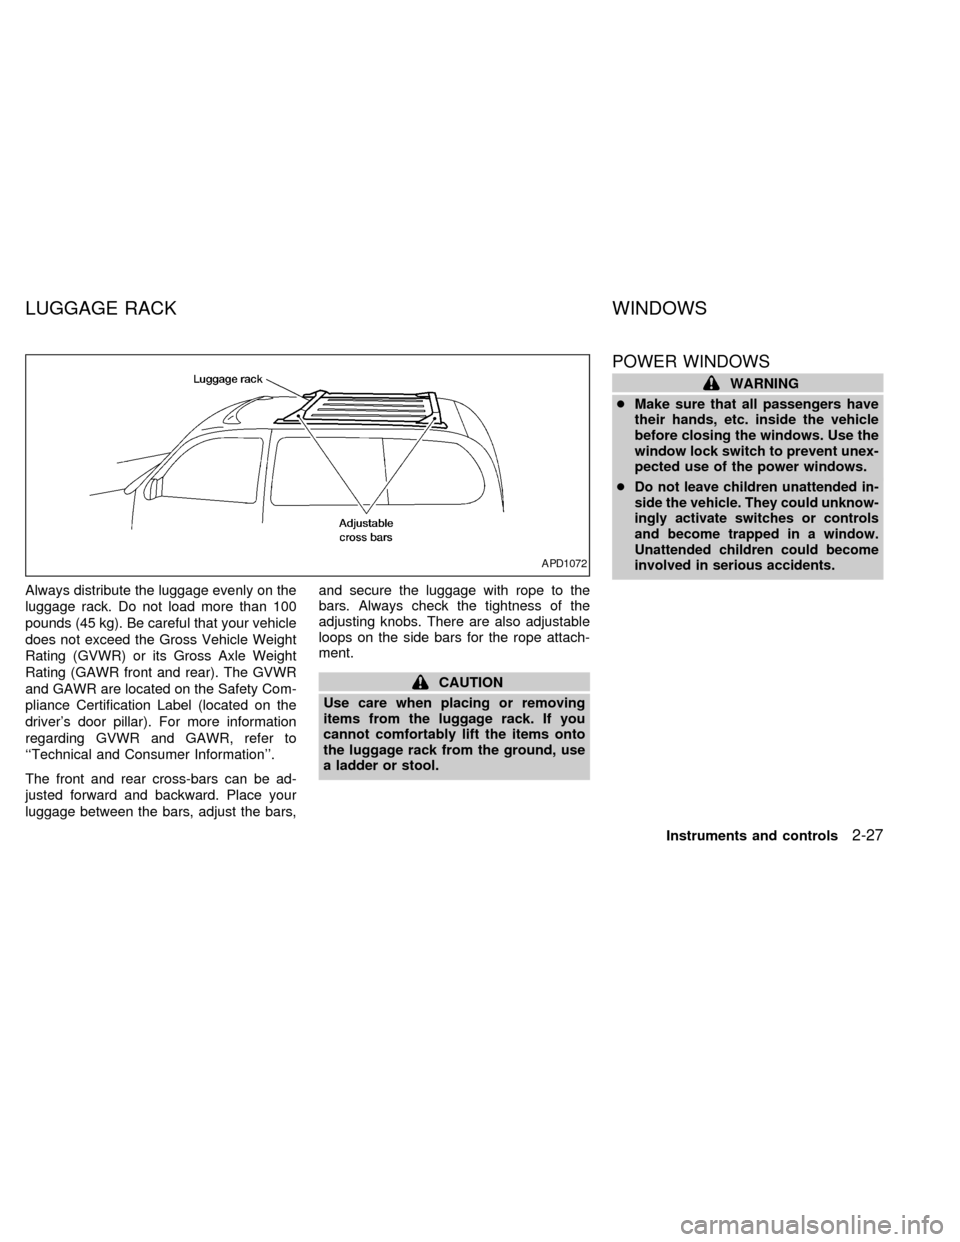
Always distribute the luggage evenly on the
luggage rack. Do not load more than 100
pounds (45 kg). Be careful that your vehicle
does not exceed the Gross Vehicle Weight
Rating (GVWR) or its Gross Axle Weight
Rating (GAWR front and rear). The GVWR
and GAWR are located on the Safety Com-
pliance Certification Label (located on the
driver's door pillar). For more information
regarding GVWR and GAWR, refer to
``Technical and Consumer Information''.
The front and rear cross-bars can be ad-
justed forward and backward. Place your
luggage between the bars, adjust the bars,and secure the luggage with rope to the
bars. Always check the tightness of the
adjusting knobs. There are also adjustable
loops on the side bars for the rope attach-
ment.
CAUTION
Use care when placing or removing
items from the luggage rack. If you
cannot comfortably lift the items onto
the luggage rack from the ground, use
a ladder or stool.
POWER WINDOWS
WARNING
cMake sure that all passengers have
their hands, etc. inside the vehicle
before closing the windows. Use the
window lock switch to prevent unex-
pected use of the power windows.
c
Do not leave children unattended in-
side the vehicle. They could unknow-
ingly activate switches or controls
and become trapped in a window.
Unattended children could become
involved in serious accidents.
APD1072
LUGGAGE RACK WINDOWS
Instruments and controls2-27
ZX
Page 119 of 292
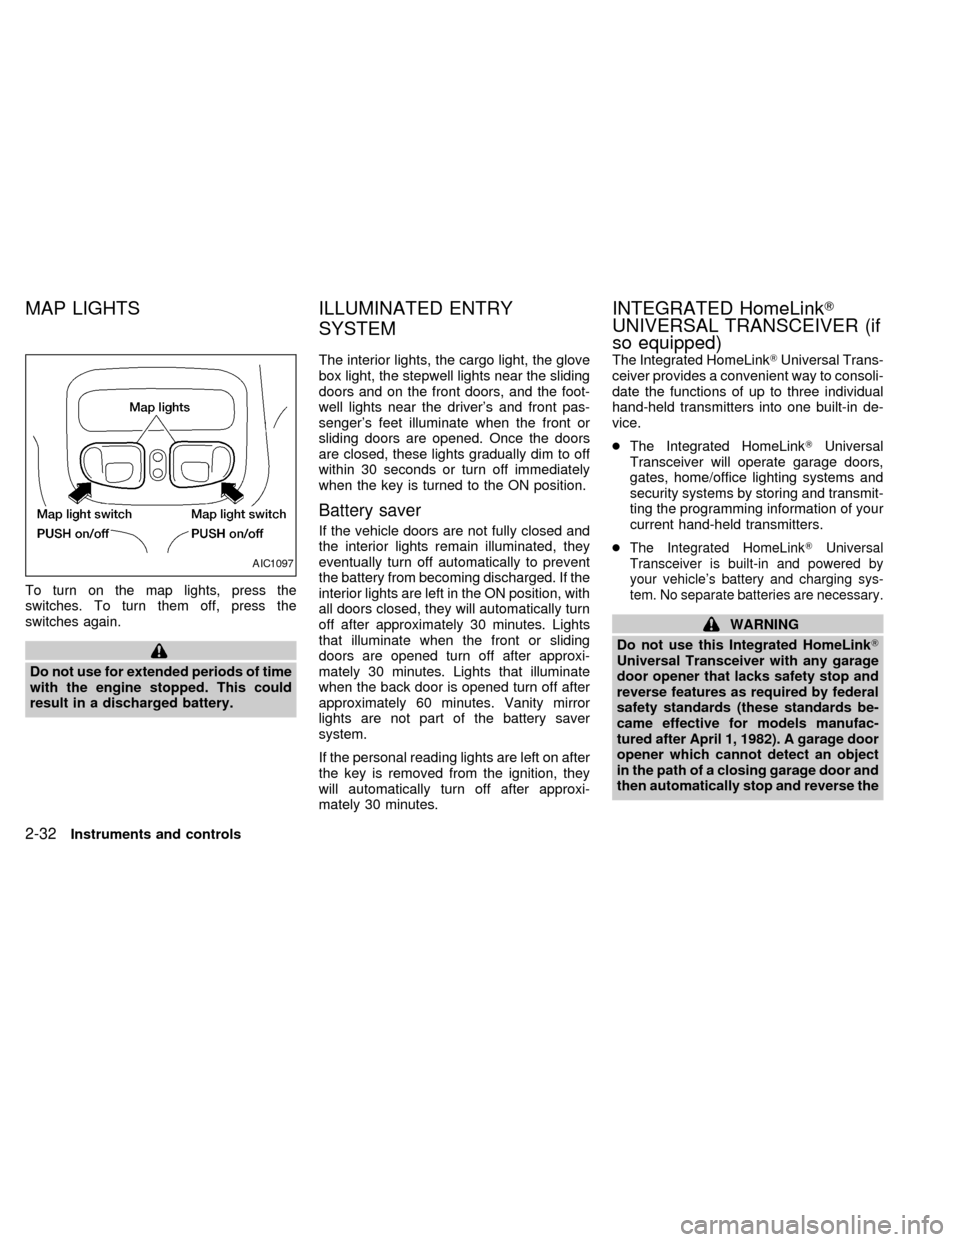
To turn on the map lights, press the
switches. To turn them off, press the
switches again.
Do not use for extended periods of time
with the engine stopped. This could
result in a discharged battery.The interior lights, the cargo light, the glove
box light, the stepwell lights near the sliding
doors and on the front doors, and the foot-
well lights near the driver's and front pas-
senger's feet illuminate when the front or
sliding doors are opened. Once the doors
are closed, these lights gradually dim to off
within 30 seconds or turn off immediately
when the key is turned to the ON position.
Battery saver
If the vehicle doors are not fully closed and
the interior lights remain illuminated, they
eventually turn off automatically to prevent
the battery from becoming discharged. If the
interior lights are left in the ON position, with
all doors closed, they will automatically turn
off after approximately 30 minutes. Lights
that illuminate when the front or sliding
doors are opened turn off after approxi-
mately 30 minutes. Lights that illuminate
when the back door is opened turn off after
approximately 60 minutes. Vanity mirror
lights are not part of the battery saver
system.
If the personal reading lights are left on after
the key is removed from the ignition, they
will automatically turn off after approxi-
mately 30 minutes.The Integrated HomeLinkTUniversal Trans-
ceiver provides a convenient way to consoli-
date the functions of up to three individual
hand-held transmitters into one built-in de-
vice.
cThe Integrated HomeLinkTUniversal
Transceiver will operate garage doors,
gates, home/office lighting systems and
security systems by storing and transmit-
ting the programming information of your
current hand-held transmitters.
c
The Integrated HomeLinkTUniversal
Transceiver is built-in and powered by
your vehicle's battery and charging sys-
tem. No separate batteries are necessary.
WARNING
Do not use this Integrated HomeLinkT
Universal Transceiver with any garage
door opener that lacks safety stop and
reverse features as required by federal
safety standards (these standards be-
came effective for models manufac-
tured after April 1, 1982). A garage door
opener which cannot detect an object
in the path of a closing garage door and
then automatically stop and reverse the
AIC1097
MAP LIGHTS ILLUMINATED ENTRY
SYSTEMINTEGRATED HomeLinkT
UNIVERSAL TRANSCEIVER (if
so equipped)
2-32Instruments and controls
ZX
Page 120 of 292
door, does not meet current federal
safety standards. Using a garage door
opener without these features in-
creases the risk of serious injury or
death.
PROGRAMMING HomeLinkT
WARNING
During the programming procedure
your garage door or security gate will
open and close (if the transmitter is
within range). Make sure that people or
objects are clear of the garage door,
gate, etc. that you are programming.Your vehicle's engine should be turned
off while programming your transmit-
ter. The Integrated HomeLinkTUniver-
sal Transceiver may not work with
older garage door openers that do not
meet current Federal Consumer Safety
Standards.
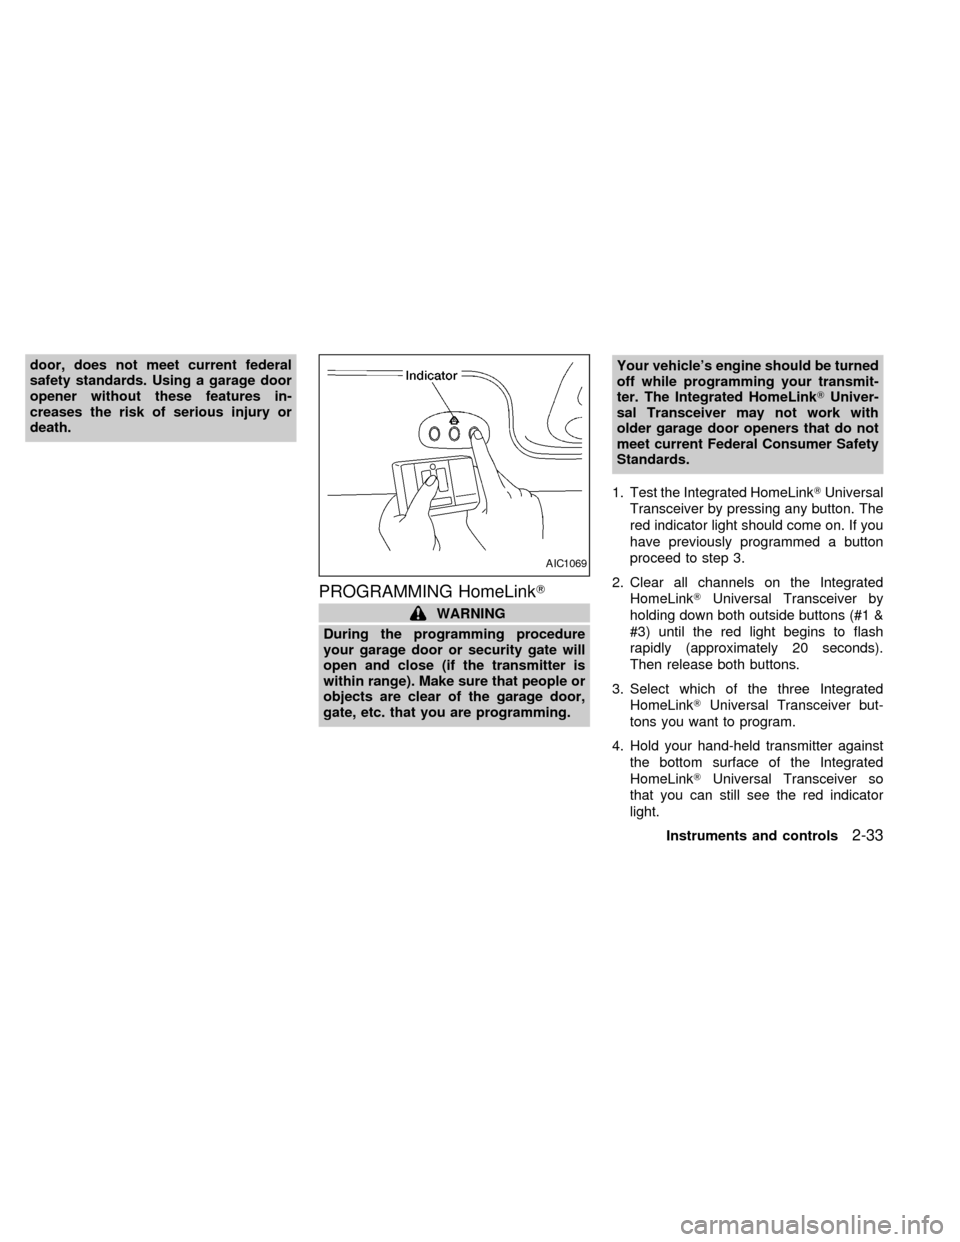
1. Test the Integrated HomeLinkTUniversal
Transceiver by pressing any button. The
red indicator light should come on. If you
have previously programmed a button
proceed to step 3.
2. Clear all channels on the Integrated
HomeLinkTUniversal Transceiver by
holding down both outside buttons (#1 &
#3) until the red light begins to flash
rapidly (approximately 20 seconds).
Then release both buttons.
3. Select which of the three Integrated
HomeLinkTUniversal Transceiver but-
tons you want to program.
4. Hold your hand-held transmitter against
the bottom surface of the Integrated
HomeLinkTUniversal Transceiver so
that you can still see the red indicator
light.
AIC1069
Instruments and controls2-33
ZX
Page 133 of 292

BATTERY REPLACEMENT
Replace the battery as follows:
1. Open the lid using a coin.
2. Replace the battery with a new one.
Insert the batteries as illustrated above.
Recommended battery: Panasonic
CR2025, 3V or equivalent.
3. Close the lid securely.
4. Press the
button, then thebutton
two or three times to check the multi-remote controller operation.
If the batteries are removed for any reason
other than replacement, perform step 4.
cAn improperly disposed battery can
hurt the environment. Always conform
to local regulations for battery disposal.
cThe multi-remote controller is water-
resistant; however, if it does get wet,
immediately wipe completely dry.
cThe operational range of the multi-
remote controller extends to approxi-
mately 30 ft (10 m) from the vehicle.
This range may vary with conditions.
FCC Notice:
Changes or modifications not expressly
approved by the manufacturer for com-
pliance could void the user's authority to
operate the equipment.
This device complies with part 15 of the
FCC Rules and RSS-210 of Industry
Canada.
Operation is subject to the following two
conditions: (1) This device may not
cause harmful interference, and (2) this
device must accept any interference re-
ceived, including interference that may
cause undesired operation of the device.
APD1087
BATTERY REPLACEMENT
3-8Pre-driving checks and adjustments
ZX
Page 135 of 292
WARNING
cMake sure the hood is completely
closed and latched before driving.
Failure to do so could cause the
hood to fly open and result in an
accident.
cIf you see steam or smoke coming
from the engine compartment, to
avoid injury do not open the hood.
Key operation
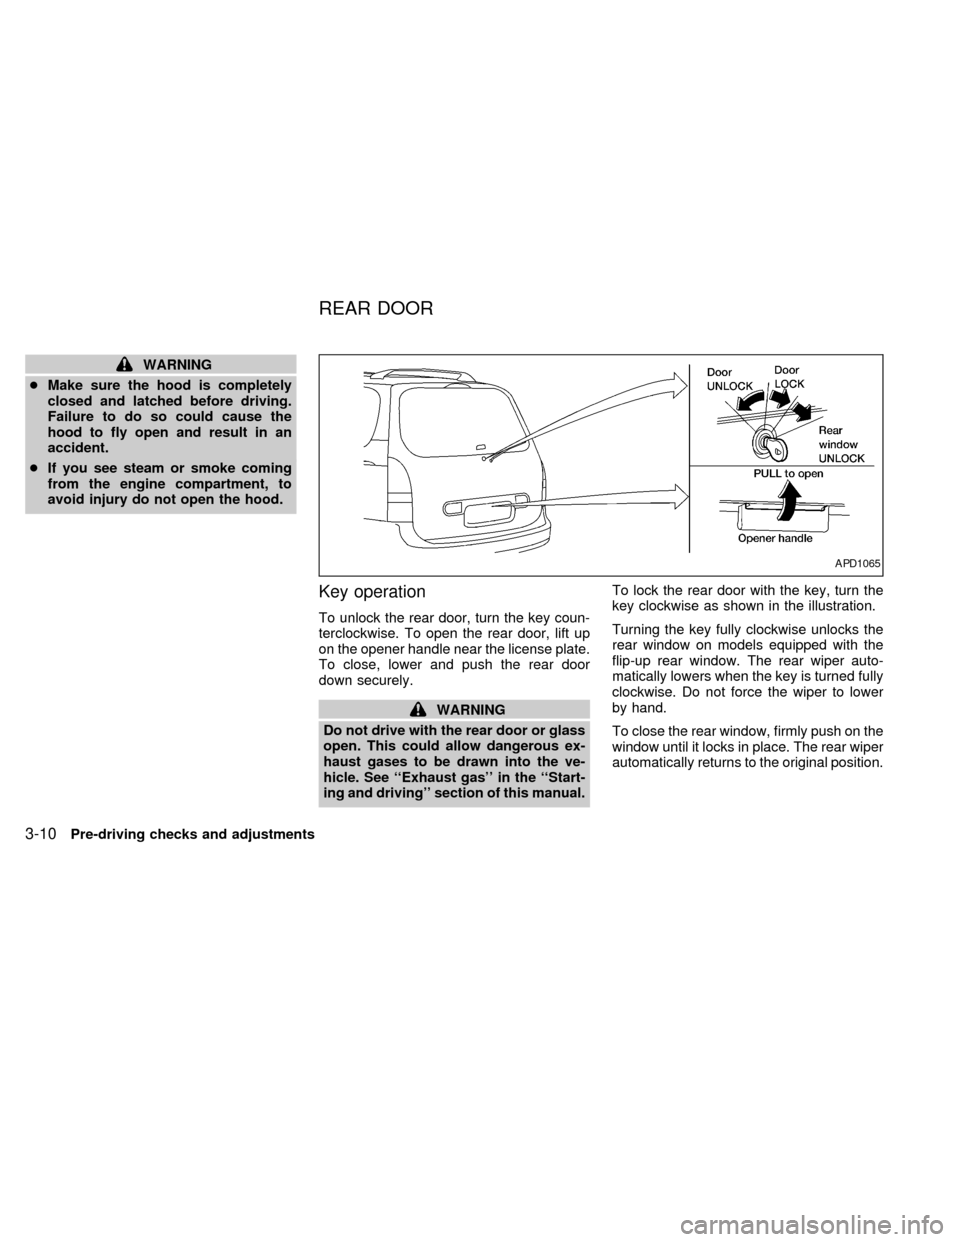
To unlock the rear door, turn the key coun-
terclockwise. To open the rear door, lift up
on the opener handle near the license plate.
To close, lower and push the rear door
down securely.
WARNING
Do not drive with the rear door or glass
open. This could allow dangerous ex-
haust gases to be drawn into the ve-
hicle. See ``Exhaust gas'' in the ``Start-
ing and driving'' section of this manual.To lock the rear door with the key, turn the
key clockwise as shown in the illustration.
Turning the key fully clockwise unlocks the
rear window on models equipped with the
flip-up rear window. The rear wiper auto-
matically lowers when the key is turned fully
clockwise. Do not force the wiper to lower
by hand.
To close the rear window, firmly push on the
window until it locks in place. The rear wiper
automatically returns to the original position.
APD1065
REAR DOOR
3-10Pre-driving checks and adjustments
ZX
Page 194 of 292
chain manufacturer's suggestions. In ad-
dition, drive at a reduced speed, other-
wise, your vehicle may be damaged
and/or vehicle handling and performance
may be adversely affected.
Use of tire chains may be prohibited accord-
ing to location. Check the local laws before
installing tire chains. When installing tire
chains, make sure they are of proper size
for the tires on your vehicle and are installed
according to the chain manufacturer's sug-
gestions.Use only SAE Class ``S'' chains.
Other types may damage your vehicle. Use
chain tensioners when recommended by
the tire chain manufacturer to ensure a tight
fit. Loose end links of the tire chain must be
secured or removed to prevent the possibil-
ity of whipping action damage to the fenders
or undercarriage. If possible, avoid fully
loading your vehicle when using tire chains.
In addition, drive at a reduced speed. Do not
exceed the maximum speed suggested by
the tire chain manufacturer. Otherwise, your
vehicle may be damaged and/or vehicle
handling and performance may be ad-
versely affected.Never install tire chains on TEMPORARY
USE ONLY and small size spare tires. Do
not use tire chains on dry roads.
SPECIAL WINTER EQUIPMENT
It is recommended that the following items
be carried in the vehicle during winter:
1. A scraper and stiff-bristled brush to re-
move ice and snow from the windows
and wiper blades.
2. A sturdy, flat board to be placed under
the jack to give it firm support.
3. A shovel to dig the vehicle out of snow-
drifts.
4. Extra window washer fluid to refill the
reservoir tank.
DRIVING ON SNOW OR ICE
WARNING
cWet ice (32ÉF, 0ÉC and freezing rain),
very cold snow or ice can be slick
and very hard to drive on. The ve-
hicle will have much less traction or
``grip'' under these conditions. Try to
avoid driving on wet ice until the
road is salted or sanded.cWhatever the condition, drive with
caution. Accelerate and slow down
with care. If accelerating or down-
shifting too fast, the drive wheels
will lose even more traction.
cAllow more stopping distance under
these conditions. Braking should be
started sooner than on dry pave-
ment.
cAllow greater following distances on
slippery roads.
cWatch for slippery spots (glare ice).
These may appear on an otherwise
clear road in shaded areas. If a patch
of ice is seen ahead, brake before
reaching it. Try not to brake while on
the ice, and avoid any sudden steer-
ing maneuvers.
cDo not use the cruise control on
slippery roads.
cSnow can trap dangerous exhaust
gases under your vehicle. Keep
snow clear of the exhaust pipe and
from around your vehicle.
Starting and driving
5-17
ZX
Page 201 of 292

2. Place the jack directly under the jack-up
point as illustrated above so the top of
the jack contacts the vehicle at the
jack-up point. Align the center of both the
jack head and the notch at the jack-up
point as shown. Also fit the notched
portion of the vehicle in the groove of the
jack head as shown.
The jack should be used on level, firm
ground.
3. Carefully raise the vehicle until the tire
clears the ground. To lift the vehicle,
securely hold the jack lever and rod with
both hands as shown above. Remove
the wheel nuts, and then remove the tire.
ACE1031
6-6In case of emergency
ZX
Page 202 of 292
Installing the spare tire
The spare tire is designed for emergency
use. See specific instructions under the
heading ``Wheels and tires'' in the ``Do-
it-yourself'' section of this manual.
1. Clean any mud or dirt from the surface
between the wheel and hub.
2. Carefully put the wheel on and tighten
the lug nuts finger tight.
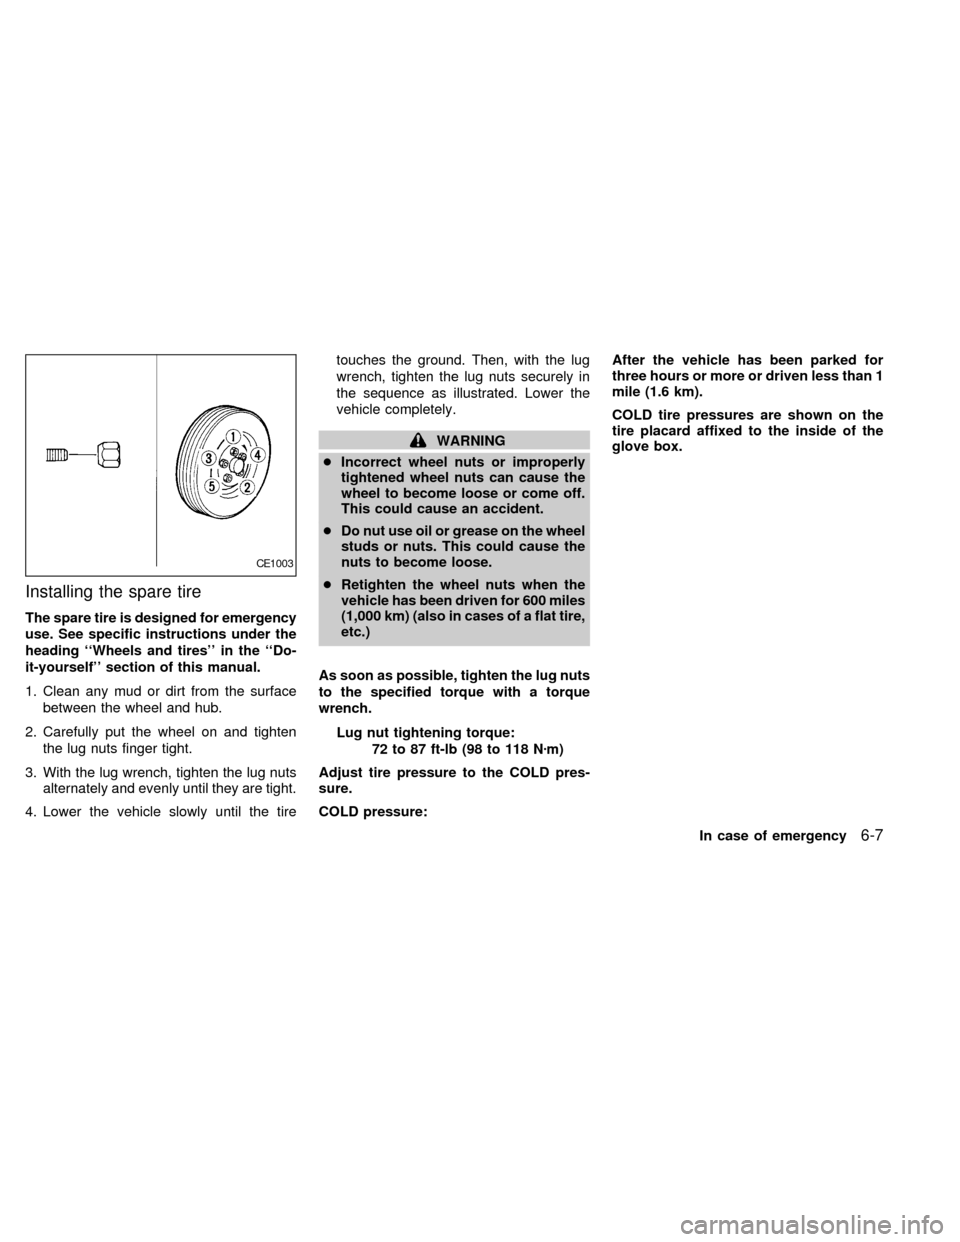
3. With the lug wrench, tighten the lug nuts
alternately and evenly until they are tight.
4. Lower the vehicle slowly until the tiretouches the ground. Then, with the lug
wrench, tighten the lug nuts securely in
the sequence as illustrated. Lower the
vehicle completely.
WARNING
cIncorrect wheel nuts or improperly
tightened wheel nuts can cause the
wheel to become loose or come off.
This could cause an accident.
cDo nut use oil or grease on the wheel
studs or nuts. This could cause the
nuts to become loose.
cRetighten the wheel nuts when the
vehicle has been driven for 600 miles
(1,000 km) (also in cases of a flat tire,
etc.)
As soon as possible, tighten the lug nuts
to the specified torque with a torque
wrench.
Lug nut tightening torque:
72 to 87 ft-lb (98 to 118 Nzm)
Adjust tire pressure to the COLD pres-
sure.
COLD pressure:After the vehicle has been parked for
three hours or more or driven less than 1
mile (1.6 km).
COLD tire pressures are shown on the
tire placard affixed to the inside of the
glove box.
CE1003
In case of emergency6-7
ZX