2000 NISSAN QUEST ECU
[x] Cancel search: ECUPage 83 of 292
7.Place the left shoulder harness over the
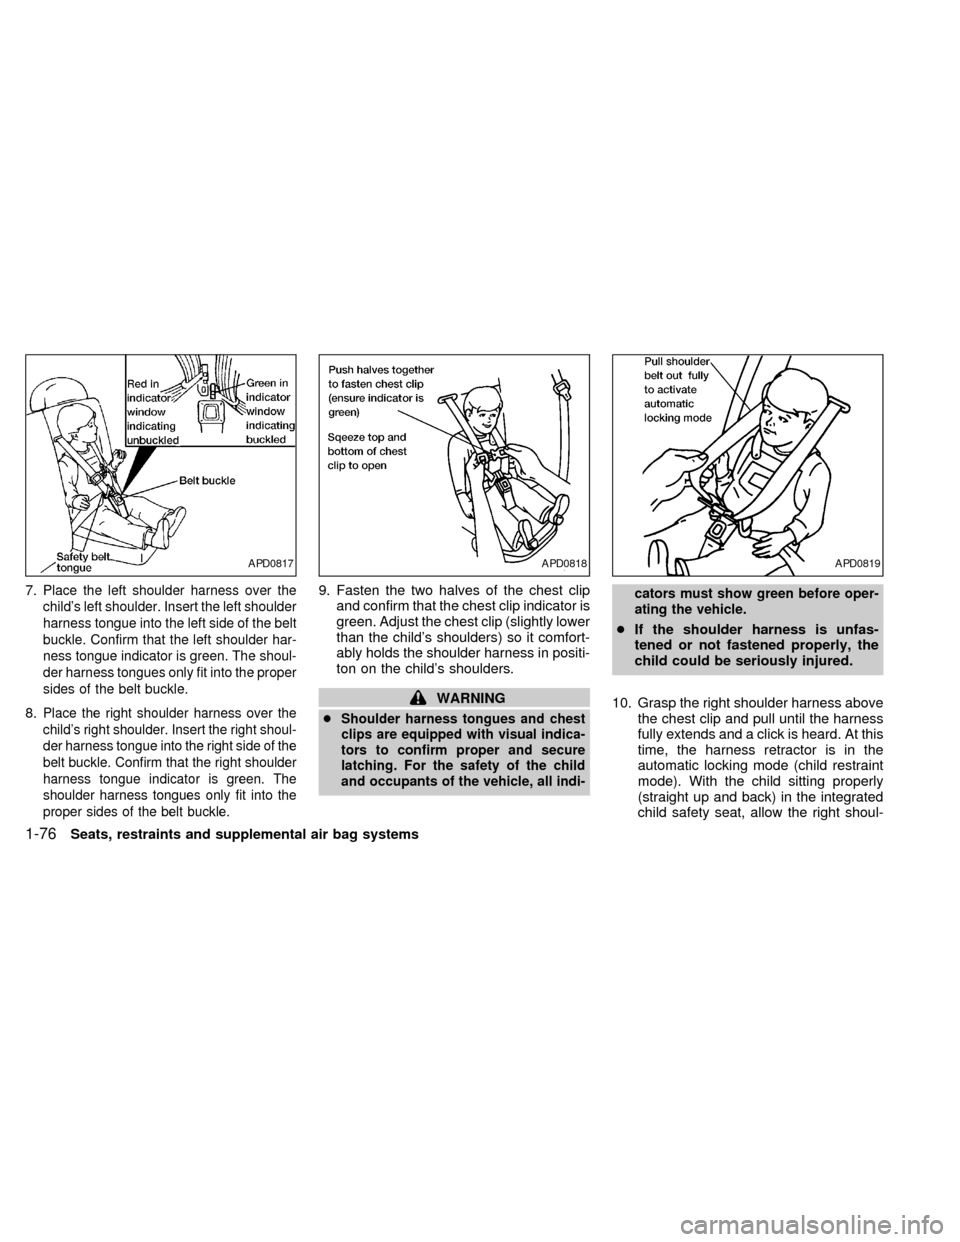
child's left shoulder. Insert the left shoulder
harness tongue into the left side of the belt
buckle. Confirm that the left shoulder har-
ness tongue indicator is green. The shoul-
der harness tongues only fit into the proper
sides of the belt buckle.
8.Place the right shoulder harness over the
child's right shoulder. Insert the right shoul-
der harness tongue into the right side of the
belt buckle. Confirm that the right shoulder
harness tongue indicator is green. The
shoulder harness tongues only fit into the
proper sides of the belt buckle.
9. Fasten the two halves of the chest clip
and confirm that the chest clip indicator is
green. Adjust the chest clip (slightly lower
than the child's shoulders) so it comfort-
ably holds the shoulder harness in positi-
ton on the child's shoulders.
WARNING
cShoulder harness tongues and chest
clips are equipped with visual indica-
tors to confirm proper and secure
latching. For the safety of the child
and occupants of the vehicle, all indi-cators must show green before oper-
ating the vehicle.
cIf the shoulder harness is unfas-
tened or not fastened properly, the
child could be seriously injured.
10. Grasp the right shoulder harness above
the chest clip and pull until the harness
fully extends and a click is heard. At this
time, the harness retractor is in the
automatic locking mode (child restraint
mode). With the child sitting properly
(straight up and back) in the integrated
child safety seat, allow the right shoul-
APD0817APD0818APD0819
1-76Seats, restraints and supplemental air bag systems
ZX
Page 84 of 292
der harness to retract over the right
shoulder and securely restrain the child.
A clicking sound is heard as the har-
ness retracts, indicating that the retrac-
tor is in the automatic locking mode. Be
sure the left shoulder harness is also
properly positioned over the child's left
shoulder.
11. Check that the shoulder harness is in
the automatic locking mode by trying to
pull the shoulder harness out of the
retractor. If you cannot pull any of the
shoulder harness webbing out of the
retractor, the shoulder harness is in the
automatic locking mode. If the shoulder
harness is not locked, repeat step 10. If,
after repeated attempts, the integrated
child safety seat shoulder harness can-
not be placed in the automatic locking
mode, do not use the integrated child
safety seat and have it inspected by an
authorized NISSAN dealer.
To cancel the automatic locking mode, un-
buckle the chest clip and both shoulder
harness tongues. Allow the shoulder har-
nesses to retract completely. The automatic
locking mode is now canceled and theshoulder harness retractor is in the emer-
gency locking mode.
WARNING
The automatic locking mode (child re-
straint mode) must be reactivated each
time you place a child in the integrated
child safety seats.
In addition to the automatic locking retrac-
tors, the integrated child safety seat shoul-
der harnesses are equipped with emer-
gency locking retractors. The automatic
locking mode is best to use, especially for
children who need help staying properly
positioned in the seat and its harnesses (for
example, children who are younger and
smaller), because the belts are always
locked. In the emergency locking mode, the
shoulder belts only lock in a sudden stop or
accident, allowing a child more freedom of
movement. Use the emergency locking
mode only if you judge your child able to
remain properly positioned in the integrated
child safety seat.
Removing the child
1. Release the chest clip.
2. Release the left and right shoulder har-ness tongues from the belt buckle by
pressing the red belt buckle button.
3. Move the left and right shoulder har-
nesses aside and assist the child from
the integrated child safety seat.
Storing the Integrated Child Safety
Seat
1. Be sure the shoulder harnesses are fully
retracted and resting inside the inte-
grated child safety seat recess. It is not
necessary to reconnect the shoulder har-
nesses and belt buckle prior to storing
the integrated child safety seat.
2. While holding onto, but not pulling, the
cushion release strap, rotate the cushion
upward until it fits flush with the second
row seat back cushion and locks into
position.
3. Be sure the integrated child safety seat is
locked in the stowed position by grasping
the safety seat cushion and attempting to
lower it without pulling the cushion re-
lease strap. If the integrated child safety
seat is not locked in the stowed position,
repeat steps one through three.
Seats, restraints and supplemental air bag systems
1-77
ZX
Page 94 of 292
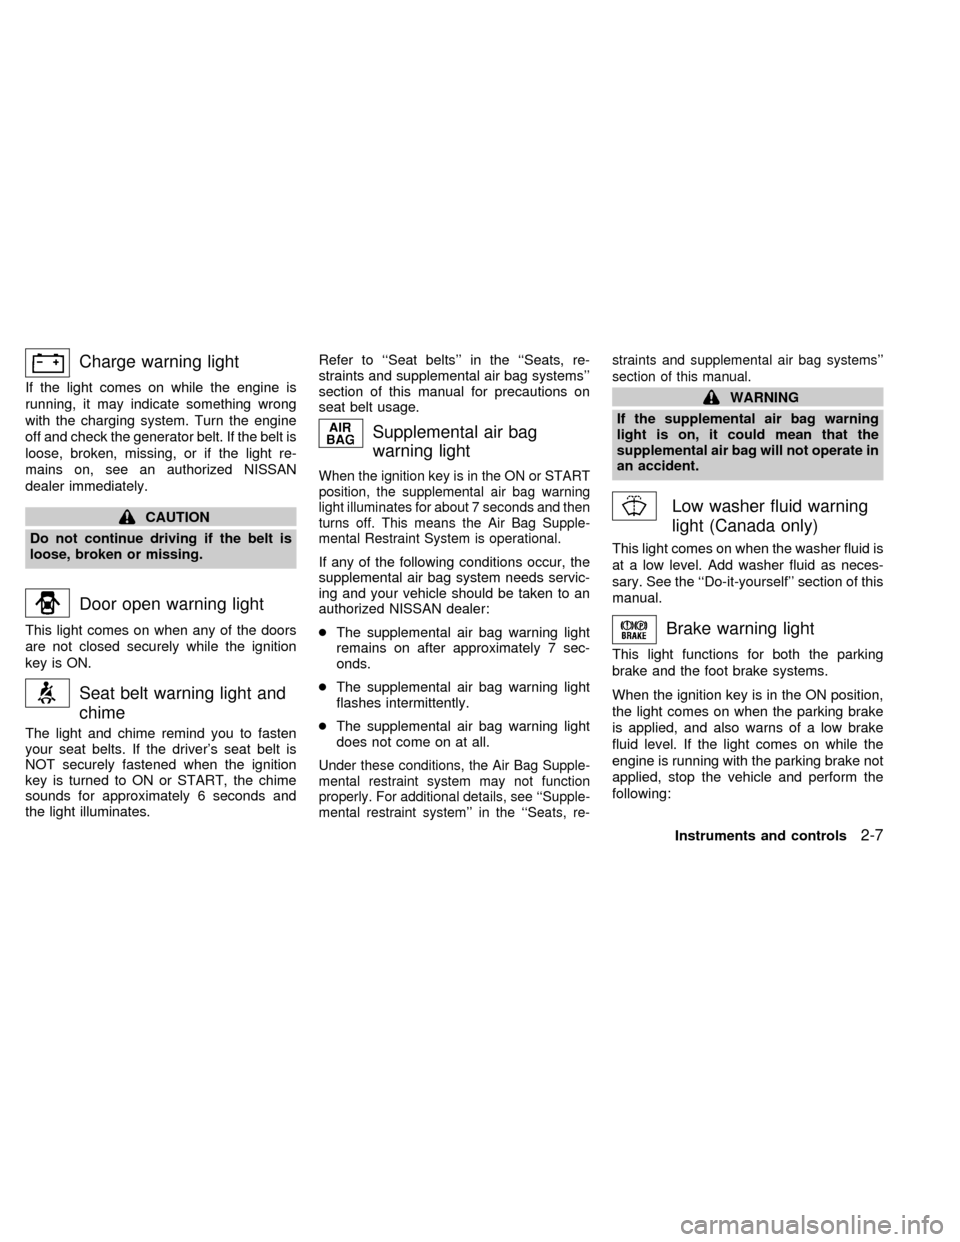
Charge warning light
If the light comes on while the engine is
running, it may indicate something wrong
with the charging system. Turn the engine
off and check the generator belt. If the belt is
loose, broken, missing, or if the light re-
mains on, see an authorized NISSAN
dealer immediately.
CAUTION
Do not continue driving if the belt is
loose, broken or missing.
Door open warning light
This light comes on when any of the doors
are not closed securely while the ignition
key is ON.
Seat belt warning light and
chime
The light and chime remind you to fasten
your seat belts. If the driver's seat belt is
NOT securely fastened when the ignition
key is turned to ON or START, the chime
sounds for approximately 6 seconds and
the light illuminates.Refer to ``Seat belts'' in the ``Seats, re-
straints and supplemental air bag systems''
section of this manual for precautions on
seat belt usage.
Supplemental air bag
warning light
When the ignition key is in the ON or START
position, the supplemental air bag warning
light illuminates for about 7 seconds and then
turns off. This means the Air Bag Supple-
mental Restraint System is operational.
If any of the following conditions occur, the
supplemental air bag system needs servic-
ing and your vehicle should be taken to an
authorized NISSAN dealer:
cThe supplemental air bag warning light
remains on after approximately 7 sec-
onds.
cThe supplemental air bag warning light
flashes intermittently.
cThe supplemental air bag warning light
does not come on at all.
Under these conditions, the Air Bag Supple-
mental restraint system may not function
properly. For additional details, see ``Supple-
mental restraint system'' in the ``Seats, re-straints and supplemental air bag systems''
section of this manual.
WARNING
If the supplemental air bag warning
light is on, it could mean that the
supplemental air bag will not operate in
an accident.
Low washer fluid warning
light (Canada only)
This light comes on when the washer fluid is
at a low level. Add washer fluid as neces-
sary. See the ``Do-it-yourself'' section of this
manual.
Brake warning light
This light functions for both the parking
brake and the foot brake systems.
When the ignition key is in the ON position,
the light comes on when the parking brake
is applied, and also warns of a low brake
fluid level. If the light comes on while the
engine is running with the parking brake not
applied, stop the vehicle and perform the
following:
Instruments and controls
2-7
ZX
Page 97 of 292

CHIMES
Key reminder chime
The chime sounds if the driver's door is
opened while the key is left in the ignition
switch. Remove the key and take it with you
when leaving the vehicle.
Light reminder chime
A chime sounds when the driver's door is
opened with the headlight control switch on
(ignition switch is turned OFF).
The chime will not sound when the Auto-
lamp (if so equipped) shut-off delay is acti-
vated. Refer to the ``Autolamp Switch'' in-
structions later in this section.
Turn the headlight control switch to OFF
when you leave the vehicle.
Brake pad wear warning
The disc brake pads have audible wear
warnings. When a brake pad requires re-
placement, it makes a high pitched scraping
sound when the vehicle is in motion whether
or not the brake pedal is depressed. Have
the brakes checked as soon as possible if
the warning sound is heard.The theft warning system provides audio
and visual alarm signals if parts of the
vehicle are disturbed.
Security indicator light
This light will illuminate for the theft warning
system.
This light blinks whenever the ignition
switch is in the LOCK, OFF, or ACC posi-
tion. This function indicates the security
systems equipped on the vehicle are opera-
tional.
IC0005LIC0004
THEFT WARNING
(if so equipped)
2-10Instruments and controls
ZX
Page 98 of 292

How to activate the theft warning
system
1. Close all windows.(The system can be
activated even if the windows are
open).
2. Remove the key from the ignition switch.
3. Close all doors and the hood.
4. Push the
button on the multi-remote
controller. All doors lock. The hazard
lights flash twice and the horn beeps
once to indicate all doors are locked.
cWhen the
button is pushed with all
doors locked, the hazard lights flash
twice and the horn beeps once as a
reminder that the doors are already
locked.
The horn may or may not beep once.
Refer to ``silencing the horn beep fea-
ture'' later in this section for details.
5. Confirm that the SECURITY indicator
light comes on. The SECURITY light
glows for about 30 seconds and then
begins to flash once every three seconds.
The system is now activated. If, during
this 30-second time period, the door is
unlocked by the key or the multi-remotecontroller, or the ignition key is turned to
ACC or ON, the system will not activate.
If the key is turned slowly when locking
the door, the system may not activate.
Furthermore, if the key is turned exces-
sively to the unlock position, the system
may be deactivated when the key is re-
moved. If the indicator light fails to glow
for 30 seconds, unlock the door once
and lock it again.
Even when the driver and/or passengers
are in the vehicle, the system will acti-
vate with all doors, hood and rear door
closed with the ignition key in the OFF
position.
Theft warning system operation
The theft warning system emits the follow-
ing alarm:
cThe headlights and tail lights flash and
the horn sounds intermittently. In addi-
tion, the starter motor does not operate.
cThe alarm automatically turns off after
two to three minutes. However, the alarm
reactivates if the vehicle is tampered with
again. The alarm can be shut off by
unlocking a door with the key or bypressing the
button on the multi-
remote controller.
The alarm is activated when:
ca door is unlocked or opened without
using the key or the multi-remote control-
ler. This includes unlocking the doors
with the inside door lock switch.
cthe hood is opened.
cthe ignition is placed into the ACC, ON,
or START position without the key in the
ignition.
How to stop the alarm
The alarm stops only by unlocking a door
with the key or by pressing the
button on
the multi-remote controller.
The alarm does not stop if the ignition
key is turned to the ACC or ON position.
Instruments and controls
2-11
ZX
Page 111 of 292
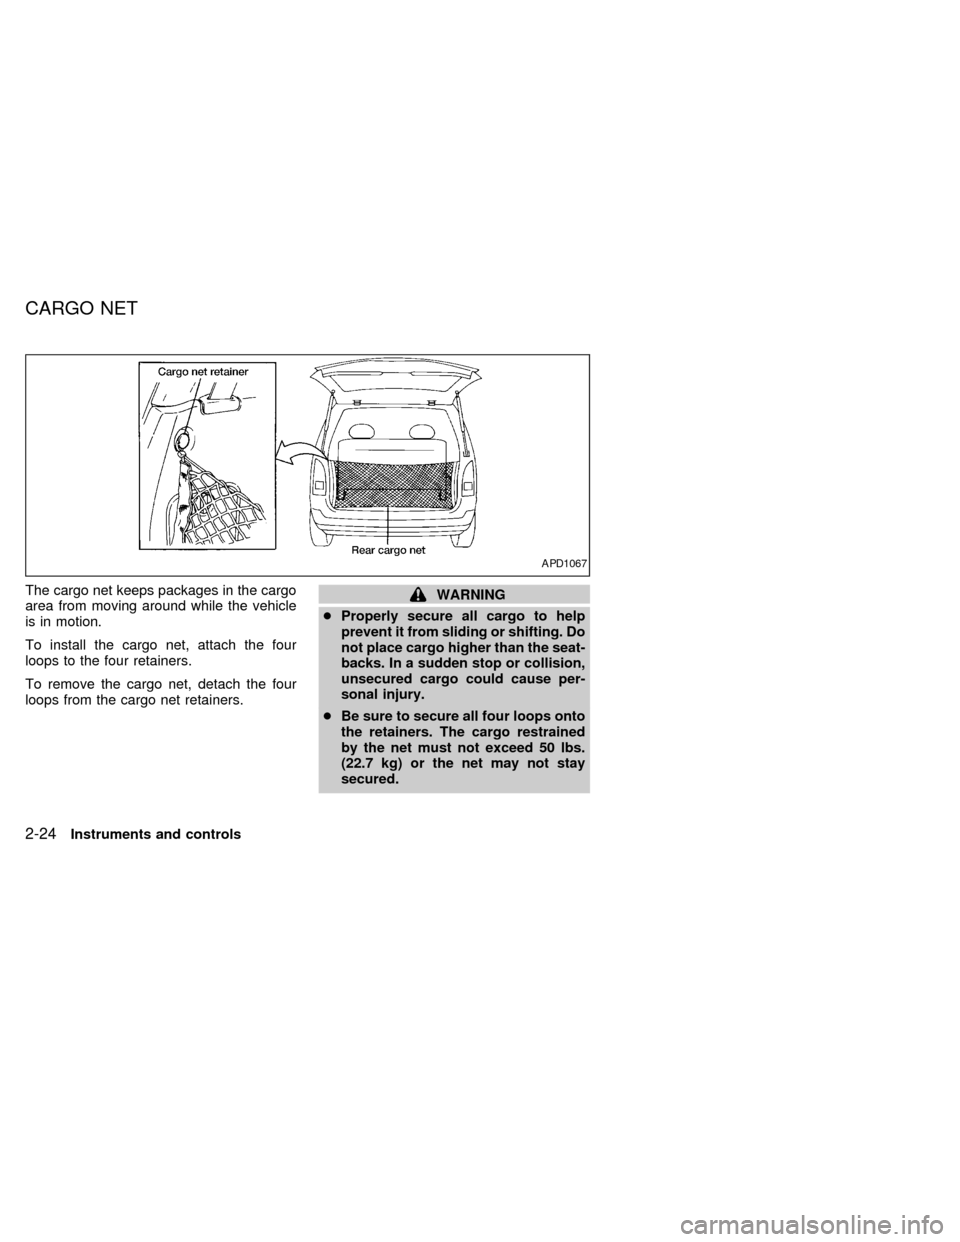
The cargo net keeps packages in the cargo
area from moving around while the vehicle
is in motion.
To install the cargo net, attach the four
loops to the four retainers.
To remove the cargo net, detach the four
loops from the cargo net retainers.WARNING
cProperly secure all cargo to help
prevent it from sliding or shifting. Do
not place cargo higher than the seat-
backs. In a sudden stop or collision,
unsecured cargo could cause per-
sonal injury.
cBe sure to secure all four loops onto
the retainers. The cargo restrained
by the net must not exceed 50 lbs.
(22.7 kg) or the net may not stay
secured.
APD1067
CARGO NET
2-24Instruments and controls
ZX
Page 112 of 292
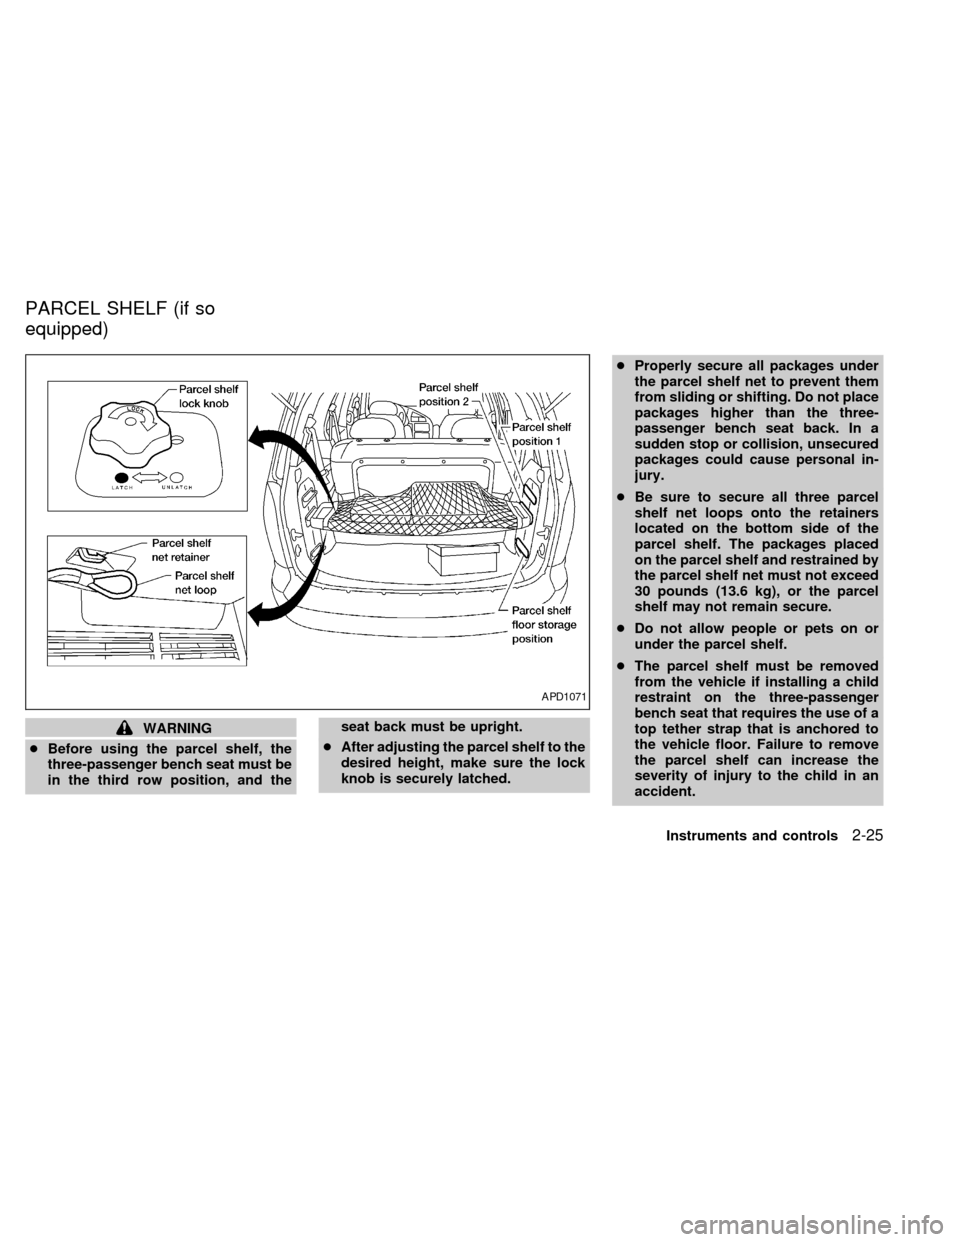
WARNING
cBefore using the parcel shelf, the
three-passenger bench seat must be
in the third row position, and theseat back must be upright.
cAfter adjusting the parcel shelf to the
desired height, make sure the lock
knob is securely latched.cProperly secure all packages under
the parcel shelf net to prevent them
from sliding or shifting. Do not place
packages higher than the three-
passenger bench seat back. In a
sudden stop or collision, unsecured
packages could cause personal in-
jury.
cBe sure to secure all three parcel
shelf net loops onto the retainers
located on the bottom side of the
parcel shelf. The packages placed
on the parcel shelf and restrained by
the parcel shelf net must not exceed
30 pounds (13.6 kg), or the parcel
shelf may not remain secure.
cDo not allow people or pets on or
under the parcel shelf.
cThe parcel shelf must be removed
from the vehicle if installing a child
restraint on the three-passenger
bench seat that requires the use of a
top tether strap that is anchored to
the vehicle floor. Failure to remove
the parcel shelf can increase the
severity of injury to the child in an
accident.
APD1071
PARCEL SHELF (if so
equipped)
Instruments and controls2-25
ZX
Page 113 of 292

The parcel shelf allows for additional stor-
age for packages.
Do not load more than 30 pounds (13.6 kg)
on the parcel shelf. The parcel shelf can be
installed at two different heights and in a
storage position.
To install the parcel shelf:
c
Position the right side of the parcel shelf
in to one of the shelf positions on the right
side luggage compartment trim panel.
cPosition the left side of the parcel shelf
into the matching position (same height)
on the left side luggage compartment trim
panel.
cSlide the parcel shelf lock knob fully to
the left side (latch in green dot position).
cTurn the parcel shelf lock knob clock-
wise until securely locked.
The parcel shelf is also equipped with a
parcel shelf net to keep packages on the
parcel shelf from moving around while the
vehicle is in motion.
The parcel shelf net is permanently at-
tached to the back side of the parcel shelf.
Pull the parcel shelf net over the packagesand attach the three loops to the three
retainers on the bottom side of the parcel
shelf. Make sure the parcel shelf is securely
locked before covering the packages with
the parcel shelf net.
To remove the parcel shelf:
cUnlock the parcel shelf net.
cRemove all packages from the parcel
shelf.
cTurn the parcel shelf lock knob counter
clockwise until loose (maximum two
turns).
cSlide the parcel shelf lock knob fully to
the right side (unlatch in red dot posi-
tion).
cRemove the parcel shelf from the left
side luggage compartment trim panel,
then the right side luggage compartment
trim panel and reposition the parcel shelf
where desired.Put the parcel shelf in the floor storage
position when the parcel shelf is not used or
required.
APD1073
2-26Instruments and controls
ZX