2000 AUDI ALLROAD display
[x] Cancel search: displayPage 147 of 306
CONT
ROLS AND EQUIPMENT---------------------
Trip computer
This feature generates much helpful infor
mation by simple touch control. For the driv
er's convenience, the computer's memory
display window is integrated in the instru
ment cluster.
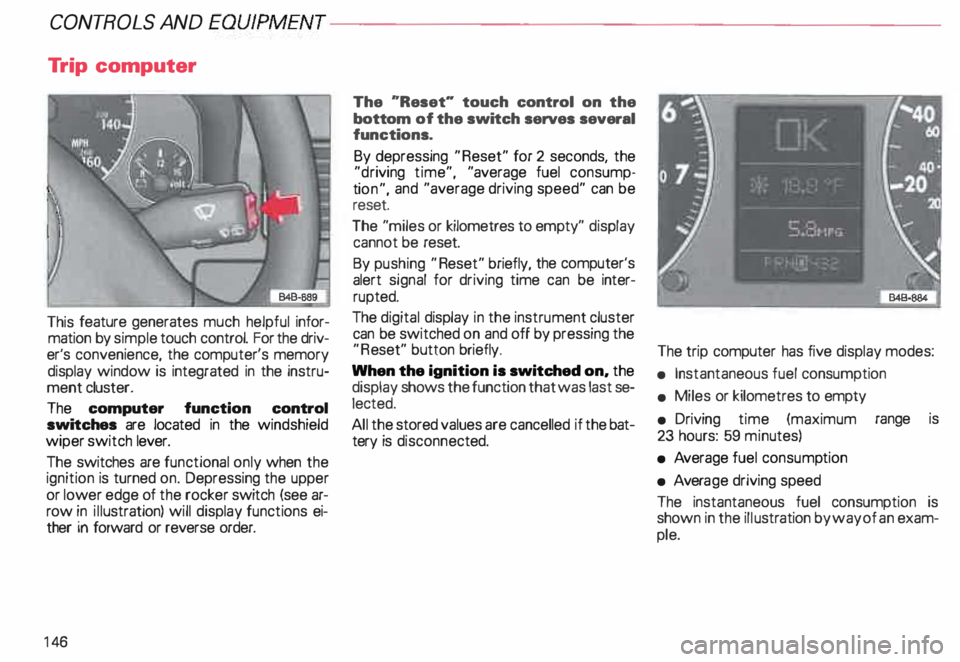
The computer function control
switches are located in the windshield
wiper switch lever.
The switches are functional only when the
ignition is turned on. Depressing the upper
or lower edge of the rocker switch (see ar
row in illustration) will display functions ei
ther in forward or reverse order.
14 6 The
"Reset" touch control on the
bottom of the switch serves several
functions.
By depressing "Reset" for 2 seconds, the
"d riving time", "average fuel consump
ti on", and "average driving speed" can be
reset.
The "miles or kilometres to empty" display
cannot be reset.
By pushing "Reset" briefly, the computer's
alert signal for driving time can be inter
rupted.
The digital display in the instrument cluster
can be switched on and off by pressing the
"R eset" button briefly.
When the ignition is switched on, the
display shows the function that was last se
lected.
All the stored values are cancelled if the bat
tery is disconne cted. The
trip computer has five display modes:
• Instantaneous fuel consumption
• Miles or kilometres to empty
• Driving time (maximum range is
23 hours: 59 minutes)
• Average fuel consump tion
• Avera ge driving speed
The instantaneous fuel consumption is
shown in the illustration by way of an exam
ple.
Page 148 of 306
---------------------CONTROLS AND
EQUIPMEN T
USA models:
computer calculations are displayed in the
USA measuring system
Canada models:
computer calculations are displayed in the
metric system
1/1 00 km -Instantaneous
(MPG) fuel
consumption
Fuel consumed instantaneously IS mea
sured every 1 00 feet or 30 meters and dis
played in units of miles per gallon (MPG) or
liters per 100 kilometres (1/1 OOkm). When
this function is selected right after engine
start -up, the display will show the average
fuel consump tion figure for the first 100
feet or 30 meters. When the vehicle is sta
tionar y, the last unit measured will be dis
played.
km -Kilome tres or miles to
{Mi) empty
The displa yed information (indicated in
stages of 5 miles or 1 0 kilometres) is based
on the average fuel consumption computed
during the last 20 miles or 30 kilometers. This
feature informs the driver how many
miles or kilometres of normal and smooth
driving can be covered with whatever
amount of fuel remains in the tank. Fuel
economy is the result of good driving habits.
h Driving time
Driving time elapsed will remain in storage,
even pfter the ignition is turned off. Further
driving time will be added automat ically af
ter engine restart. Maximum storage and
display range is 23 hours: 59 minutes. To
keep track of driving time between points,
depress "Reset" for zero.
Driving time alert
While driving, the computer will automati
cally switch to the "driving time" display ev
ery two hours. The indicator "2:00" (or
"4:00", "6:00", "8:00" etc.) will blink in the
display window to alert the driver to take a
break. The blinker can be turned off briefly
by pushing "Reset'' or either side of the
switch. If the
ignition is off more than ten minu tes,
the driving time alert counter will automati
cally start again from zero. If the ignition is
off less than ten minutes, the display will
blink again every two hours.
0 I (MPG) -Ave rage fuel
100 km
consumption
The display will show the computed aver
age since the last "Reset". When the igni
tion is turned off, the computed average re
mains in storage. When driving is resumed,
the computation continues automatically.
To delete stored data, push "Reset".
0 km/h -Average driving
(MPH) speed
The display will show the computed aver
age of driving speed variations since the last
"R eset". When the ignition is turned off,
the computed average remains in stora ge.
When driving is resumed, the computation
continues automatically. To delete stored
data, push "Reset"
147
Page 150 of 306
Front
fog lights
�D
Do not try to turn the light switch toward the
front fog light symbol.
With ignition on, the fog lights can be
switched on in combination with low
beams.
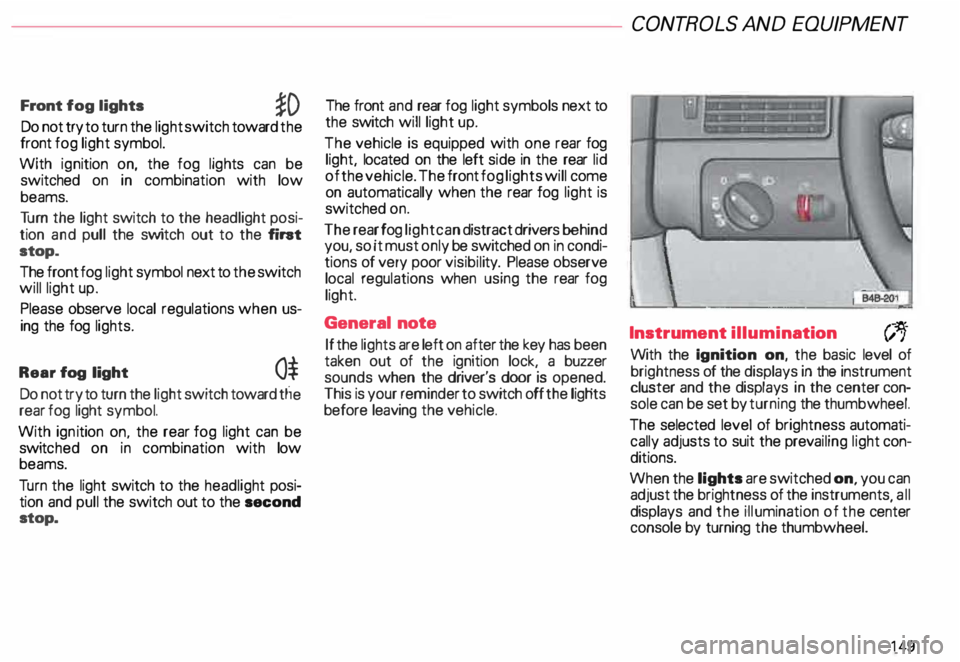
Tu rn the light switch to the headlight posi
tion and pull the switch out to the fint
stop.
The front fog light symbol next to the switch
will light up.
Please observe local regulations when us
ing the fog lights.
Rear fog light
0$
Do not try to turn the light switch toward tlie
rear fog light symbol.
With ignition on. the rear fog light can be
switc hed on in combination with low
beams.
Tu rn the light switch to the headlight posi
tion and pull the switch out to the second
stop. The front
and rear fog light symbols next to
the switch will light up.
The vehicle is equipped with one rear fog
light, located on the left side in the rear lid
of the vehicle. The front fog lights will come
on automatically when the rear fog light is
switched on.
The rear fog light can distract drivers behind
you, so it must only be switched on in condi
tions of very poor visibil ity. Please observe
local regulations when using the rear fog
light.
General note
If the lights are left on after the key has been
taken out of the ignition lock, a buzzer
sounds when the driver's door is opened.
This is your reminder to switch off the ligHts
before leaving the vehicle. CONT
ROLS AND EQUIPMEN T
Instrument illumination
(;,.
With the Ignition on, the basic level of
brightness of the displays in the instrument
cluster and the displays in the center con
sole can be set by turning the thumbwheel.
The selected level of brightness automati
cally adjusts to suit the prevailing light con
ditions.
When the lights are switched on, you can
adjust the brightness of the instruments all
displays and the illumination of the ce�ter
console by turning the thumbwheel.
149
Page 154 of 306
Ride height adjustment (4 Level Air Suspension)
......., _____ ___ �--
-�
�. 842· 8!18 ..J
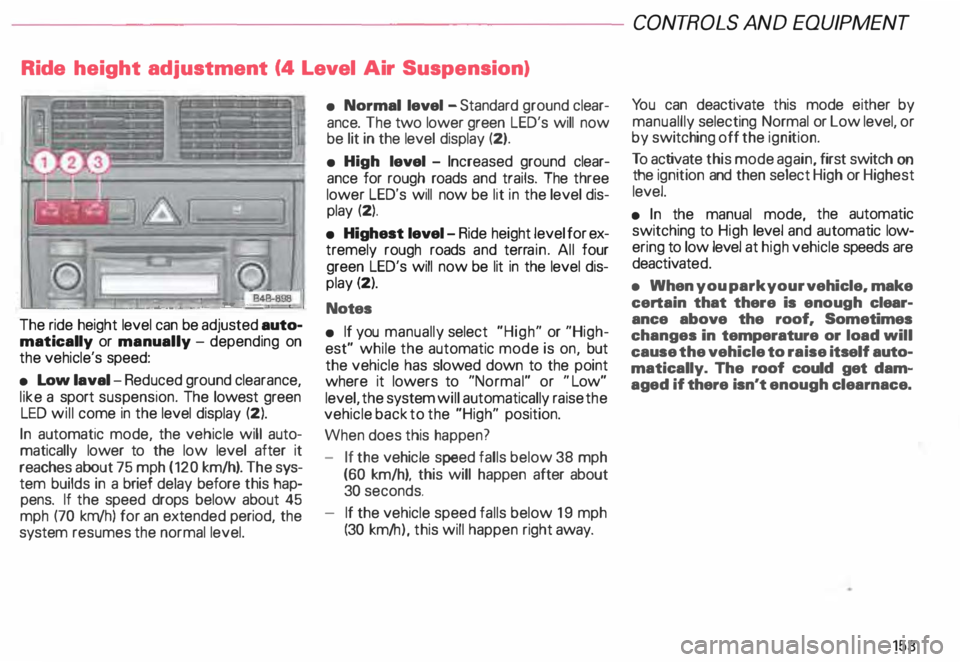
The ride height level can be adjusted auto
matically or manually -depending on
the vehicle's speed:
• Low laval -Reduced ground clearance,
like a sport suspension. The lowest green
LED will come in the level display (2).
In automatic mode, the vehicle will auto
matically lower to the low level after it
reaches about 75 mph (120 km/h). The sys
tem builds in a brief delay before this hap
pens. If the speed drops below about 45
mph (70 km/h) for an extended period, the
system resumes the normal level. •
Normal level -Standard ground clear
ance. The two lower green LED's will now
be lit in the level display (2).
• High level -Increased ground clear
ance for rough roads and trails. The three
lower LED's will now be lit in the level dis
play (2).
• Highest level-Ride height level for ex
tremely rough roads and terrain. All four
green LED's will now be lit in the level dis
play (2).
Notes
• If you manually select "High" or "High
est" while the automatic mode is on, but
the vehicle has slowed down to the point
where it lowers to "Normal" or "Low"
level, the system will automatically raise the
vehicle back to the "High" position.
When does this happen?
- If the vehicle speed falls below 38 mph
(60 km/h), this will happen after about
30 seconds.
- If the vehicle speed falls below 19 mph
(30 km/ h), this will happen right away. CONT
ROLS AND EQUIPMEN T
Yo u can deactivate this mode either by
manuallly selecting Normal or Low level, or
by switching off the ignition.
To activate this mode again, first switch on
the ignition and then select High or Highest
level.
• In the manual mode, the automatic
switching to High level and automatic low
ering to low level at high vehicle speeds are
deactivat ed.
• When you park your vehicle. make
certain that there is enough clear
ance above the roof. Sometimes
changes in temperature or load will
cause the vehicle to raise itself auto
matically. The roof could get dam
aged if there isn't enough clearnace.
153
Page 155 of 306
CONT
ROLS AND
EQUIPMENT---------------------
Manual mode
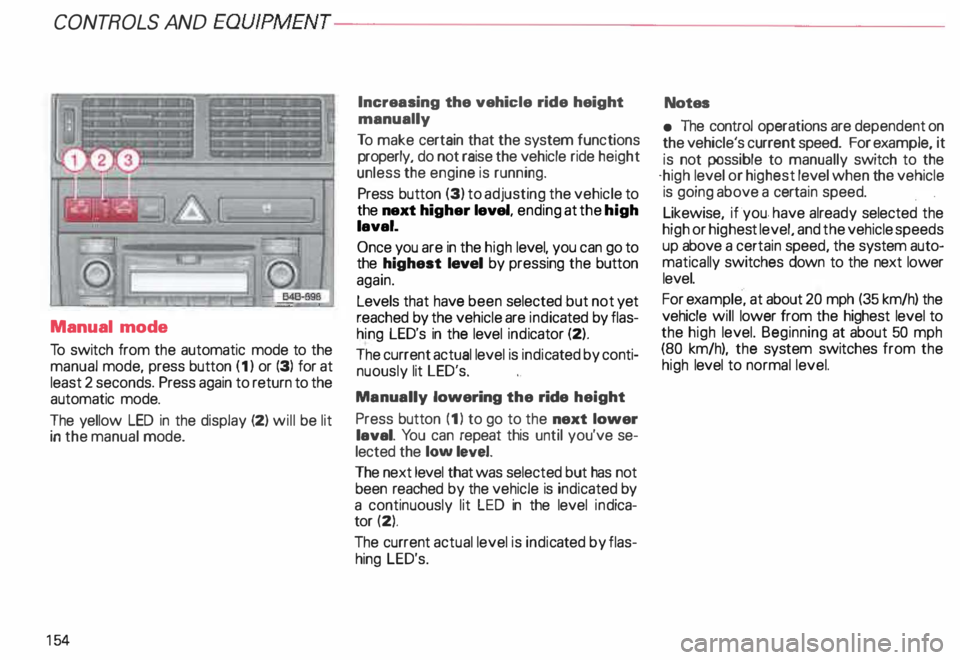
To switch from the automatic mode to the
manual mode, press button (1) or (3) for at
least 2 seconds. Press again to return to the
automatic mode.
The yellow LED in the display (2) will be lit
in the manual mode.
15 4 Increasing
the vehicle ride height
manually
To make certain that the system functions
properly, do not raise the vehicle ride height
unless the engine is running.
Press button (3) to adjusting the vehicle to
the next higher level, ending at the high
laval.
Once you are in the high level, you can go to
the highest laval by pressing the button
again.
Levels that have been selected but not yet
reached by the vehicle are indicated by flas
hing LED's in the level indicator (2).
The current actual level is indic ated by conti
nuously lit LED's.
Manually lowering the ride height
Press button (1) to go to the next lower
laval. You can repeat this until you've se
lected the low level.
The next level that was selected but has not
been reached by the vehicle is indicated by
a continuously lit LED in the level indica
tor (2).
The current actual level is indic ated by flas
hing LED's. Notes
• The control operations are dependent on
the vehicle's current speed. For example, it
is not possible to manually switch to the
·high level or highest level when the vehicle
is going above a cert ain speed.
Likewise, if ·you. have already selected the
high or highe st level, and the vehicle speeds
up above a certain speed, the system auto
matically switches down to the next lower
level.
For example, at about 20 mph (35 km/h) the
vehicle will lower from the highest level to
the high level. Beginning at about 50 mph
(80 km/h), the system switches from the
high level to normal level.
Page 158 of 306
Headlight flasher
You can signal with your headlights by pull
ing the lever toward the steering wheel.
When flashing headlights, the blue indicator
light will come on. Xenon
lights*
After starting the engine the Xenon head
ligh ts are automatically adjusted to the load
and angle of the vehicle (for example, during
acceleration, braking). This prevents on
coming traffic from experiencing unneces
sary glare from your headlights.
If the system is not operating properly, a
warning symbol will be displayed in the
Auto Check Control -see page 144. CONTROLS
AND EQUIPMENT
157
Page 163 of 306
CONTROLS AND EQUIPMENT---------------------
Cli
mate controls
�W ARNING
• For clear visibility and safe driv
ing, it is extremely important that
you follow the operating instruc
tions on the proper use and func
tion of the ventilation/heating, de
fogg ing{defr osting and air condi
tioning system in this manual. If in
doubt, consult your authorized
Audi Dealer.
• Good visibility comas with
clean windows free of fog, con
densation and frost.
• Maximum heating output and
fast defro sting will occur only af
ter the engine has reached operat
ing temperature. Wait until you
have good visibility before moving
your vehicle.
16 2 The
air conditioner is fully auto
matic, and is designed to maintain a com
fortable and uniform climate inside the ve
hicle .
The temperature of the air supplied to the in
terior, the fan speed, air distribution and vol
ume of air delivery are regulated automati
cally.
This automatic climate control program can
also be adjusted manually by the driver and
the front passenger.
The illustration on the next page shows the
controls for the driver and front passenger
in the center console. The left display indi
cates the temperature selected for the driv
er's side and the right display the tempera
ture selected for the front passenger's side.
The temperature is selected by pressing the
"+" or "-" buttons beneath the respective
displays. Recommended
standard setting for
all-year operation:
After switching on the ignition
• Select a temperature of
75 oF (23°C) and
• Press AUTO button.
With this setting, you attain maximum com
fort in the least amount of time.
You only need to change this setting to
meet your personal needs.
Air outlets - see page 165.
Page 164 of 306
---------------------CONTROLS AND EQUIPMENT
Operating controls
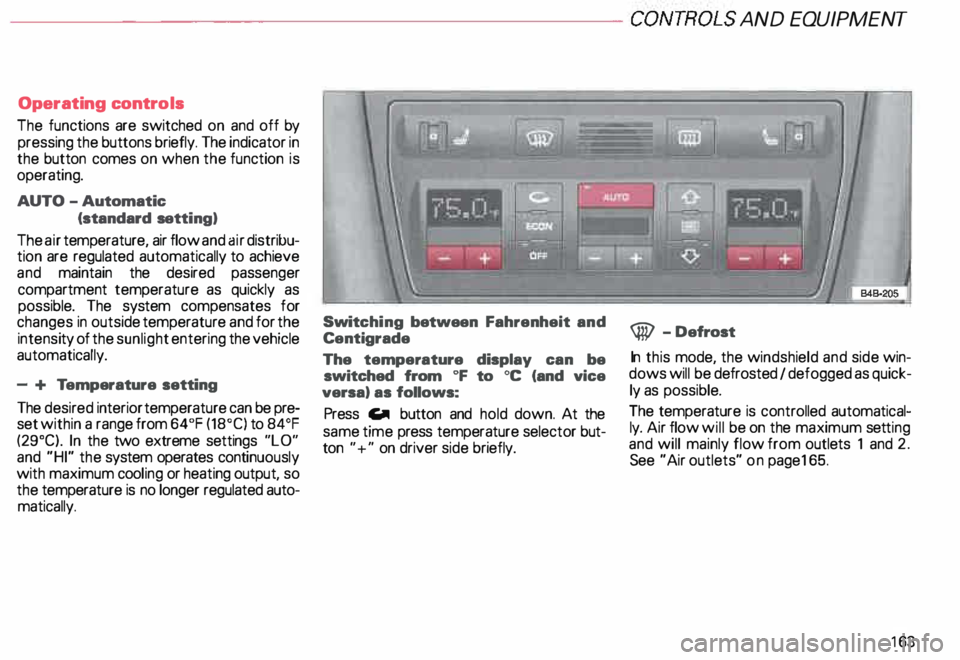
The functions are switched on and off by
pressing the buttons briefly. The indicator in
the button comes on when the function is
operating.
AUTO -Automatic
(standard setting)
The air temperature, air flow and air distribu
tion are regulated automatically to achieve
and maintain the desired passenger
compartment temperature as quickly as
possible. The system compensates for
changes in outside temperature and for the
intensi ty of the sunlight entering the vehicle
automatically.
- + Temperature setting
The desired interior temperature can be pre
set within a range from 64°F (18°C) to 84°F
(29°C). In the two extreme settings "LO"
and "HI" the system operates continuously
with maximum cooling or heating output, so
the temperature is no longer regulated auto
matically. Swit
ching between Fahrenheit and
Centigrade
The temperature display can be
switched from oF to oc (and vice
versa) as follows:
Press Gill button and hold down. At the
same time press temperature selector but
ton "+" on driver side briefly. @
-Defrost
In this mode, the windshield and side win
dows will be defrosted I defogged as quick
ly as possible.
The temperature is controlled automatical
ly. Air flow will be on the maximum setting
and will mainly flow from outlets 1 and 2.
See "Air outlets" on pag e165.
163