Page 80 of 306

Before
adjusting your seat there are some
important considerations to keep in mind.
• To prevent interference with the seat ad
justment, never store anything under the
seats.
• The front seats should be adjusted be
fore fastening the safety belts.
• The position of the driver's seat you find
most comforta ble can be stored in the me
IT]Ory. See page 81 for details.
�W ARNING
Because the seats can be electri
cally adjusted with the ignition
key removed, never leave children
unattended in the vehicle. Unsu
pervised use of the electric seat
adjustments may cause serious in
iury. Seat
adjustment
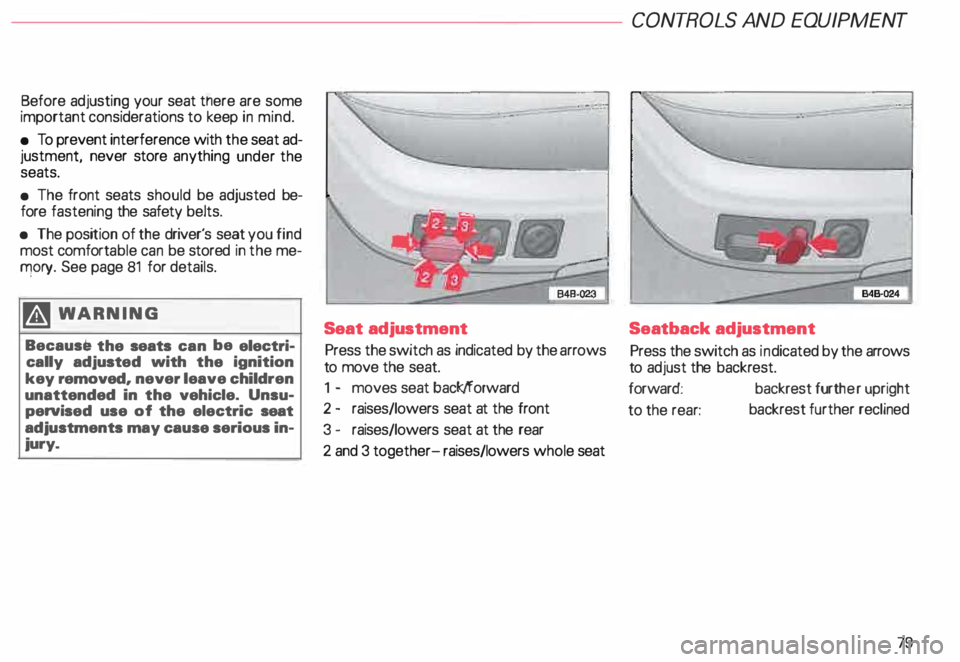
Press the switch as indicated by the arrows
to move the seat.
1 - moves seat back/forward
2 - raises/lowers seat at the front
3 - raises/lowers seat at the rear
2 and 3 together- raises/lowers whole seat CONT
ROLS AND EQUIPMENT
Seatback adjustment
Press the switch as indicated by the arrows
to adjust the backrest.
forward: backrest further upright
to the rear: backrest
further reclined
79
Page 93 of 306

CONTROLS AND
EQUIPMEN T---------------------
Rear facing child seat bench*
Two children starting at 3 years of age can
sit on the rear facing child seat bench. The
child must not be taller than 50 in. (1.3 m)
and must not weigh more th an 78 lbs
(36 kg). .
Children must always wear safety
belts f
Activating the child safety lock -see
page 65.
�W ARNING
• Do not place any other child
seats or child carriers on rear fac
ing child seat bench.
• For safety reason, never remove
the head restraints on the child
seat bench.
• The seatback for the rear seat
bench must always be in its up
right position and locked securely
in place. You shouldn't be able to
see the red marking on the release
latches -sea page 87.
92 Installing
1 setting up the child seat
bench
Yo u must remove the luggage compart
ment cover, the net and the round cover
caps in the cargo area floor cover before
installing the child seat bench. The cover
caps, which are normally inserted in the
mounting for the child seat bench on the
cargo floor cover, con be stowed on the bot
tom side of the remova ble cargo area floor
cover.
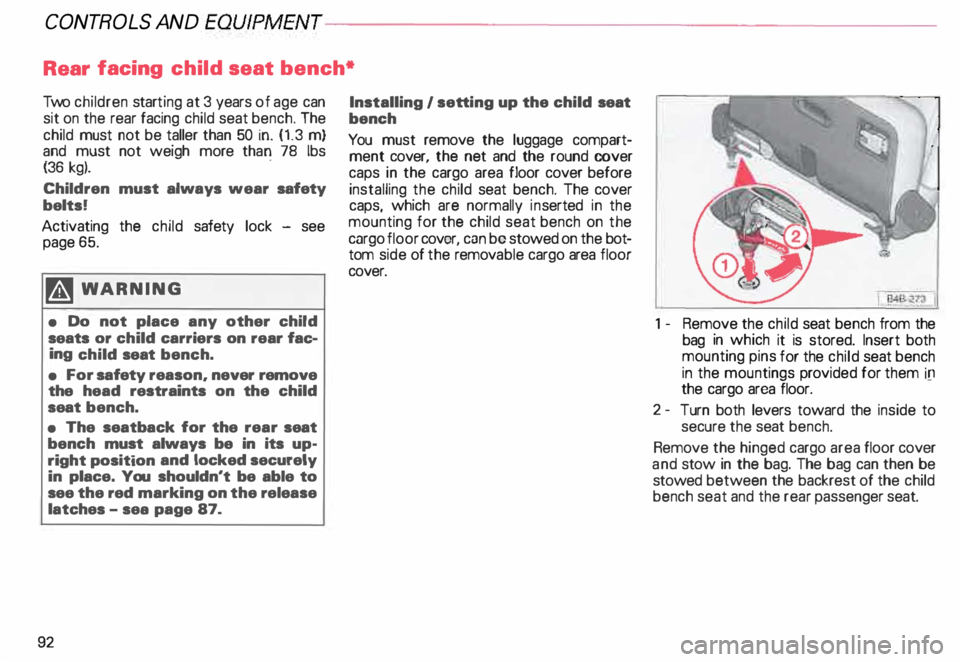
1 -Remove the child seat bench from the
bag in which it is stored. Insert both
mounting pins for the child seat bench
in the mountings provided for them ill
the cargo area floor.
2- Turn both levers toward the inside to
secure the seat bench.
Remove the hinged cargo area floor cover
and stow in the bag. The bag can then be
stowed between the backrest of the child
bench seat and the rear passenger seat.
Page 103 of 306

CONTROLS AND EQUIPMENT---------------------
Pedals
The movement of the pedals must
never be obstructed by a floor mat
or any other object.
• In case one of the two brake circuits fails,
incr eased brake pedal travel is required to
bring the vehicle to a full stop.
• You should always be able to depress the
accelerator and the clutch pedals all the way
down to the floor.
• All pedals must be able to return to their
original position unhindered.
Only use floor mats which leave the pedal
area free and can be secured with floor mat
faste ners.
�W ARNING
Never place any objects in the area
of the pedals. In case of sudden
braking or an accident. an object
could interfere with pedal
function. You would not be able to
brake or accelerate.
10 2
I -
.· t\
•J I ·. ·· -· I
--···· ·-· ..... ___ -..... . .
- - _ _I
__ l_�4B·31 1 ij
Floor mats. floor mat fasteners
Floor mats are factory installed in your ve
hicle.
Floor mat fasteners are installed in the foot
wells of the front and rear* seats.
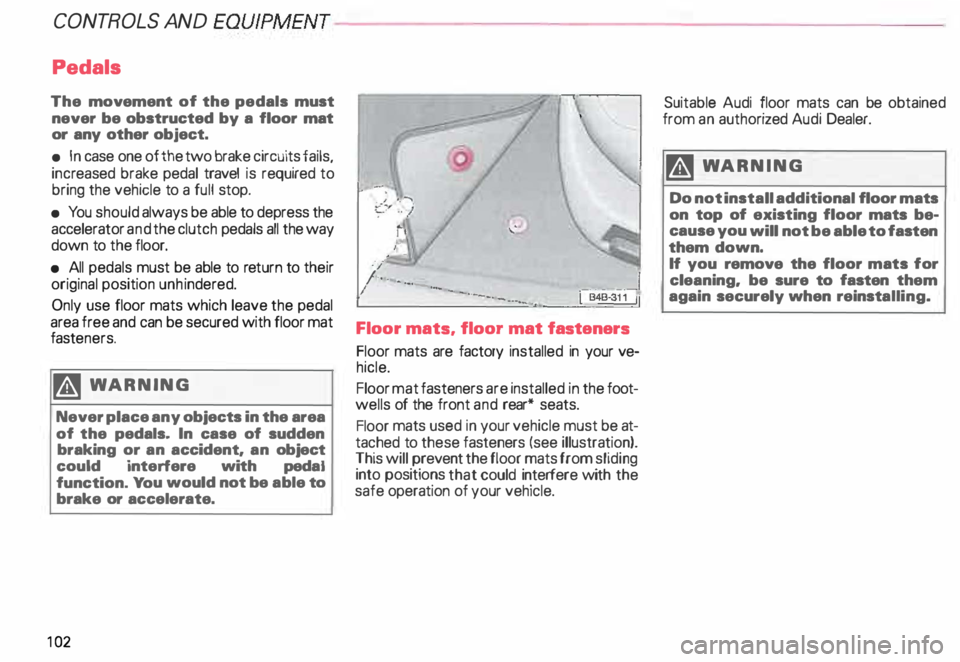
Floor mats used in your vehicle must be at
tached to these fasteners (see illustration).
This will prevent the floor mats from sliding
into positions that could interfere with the
safe operation of your vehicle. Suitable Audi
floor mats can be obtained
from an auth orized Audi Dealer.
�W ARNING
Do not install additional floor mats
on top of existing floor mats be
cause you will not be able to fasten
them down.
If you remove the floor mats for
cleaning. be sure to fasten them
again securely when reinstalling.
Page 264 of 306
----------------------DO-IT-YOURSELF SERVICE
First aid kit
The first aid kit can be stowed in the center
armrest (rear seats). The design of the cen
ter armrest varies from model to model.
Here we show it in two versions.
To open, pull the handle in front.
Maxmimum load is 00 lbs. (0.5 kg) •
Make sure the first-aid kit must
meet all legal requirements.
• Don't forget to look at the expira
tion data on the contents of your
first-aid kit. If the date has expired,
you should purchase another one as
soon as possible. Emergency
warning triangle
The factory -supplied warning triangle is
fitted on the inside of the luggage compart
ment lid.
To open the cover, turn the knob 90°
Remove the emergency triangle (arrow).
If you no longer have your original warning
triangle and to equip your vehicle with a
new one, contact your authorized Audi
Dealer for advice.
263