2000 AUDI ALLROAD change wheel
[x] Cancel search: change wheelPage 43 of 306
SA
FETY RRST-----------------------------------------------------
�WARNING continued
• Do not cover, obstruct, or
change the steering wheel horn
pad or airbag cover or the instru
ment panel, particularly in the area
of the passenger side airbag mod
ule.
• For cleaning the horn pad or in
strument panel, use only a soft,
dry cloth or one moistened with
plain water. Solvents or cleaners
could damage the airbag cover. Do
not make any repairs, adjust
ments, or modifications to any
parts of the airbag system.
• Do not modify the front bumper
or vehicle body structure.
42 ftl
WARNING continued
• Never place protective seat cov
ers or replacement upholstery
over the front and rear seatbacks
that have not been specifically ap
proved by Audi. Since the side air
bags deploy out of the side of the
seatback, it would not be able to
deploy and protect properly.
• Do not use additional seat cush
ions that cover or interfere with
the areas where the side airbags
inflate.
• Damage to the original seat cov
ers or to the seam in the area of the
side airbag module must be re
paired immediately by an autho
rized Audi Dealer.
• The airbag system must be re
placed by your authorized Audi
Dealer no later than 14 years after
the manu facture date of your ve
hicle. �,
WARNING continued
• The manufacture date can be
found on the Safety Compliance
Sticker located on the left door
jamb as well as on the Vehicle
Identification Label in your
Maintenance booklet. It is abso
lutely essential to observe this
date in order to assure that the sy
stem is in good working order.
• If components of the airbag sys
tem must be discarded, or ifthe ve
hicle must be scrapped, certain
safety precautions must be ob
served. Your authorized Audi
Dealer knows these precautions
and can give you the necessary in
forma tion. Failure to follow these
precautions and procedures could
increase the risk of personal in
jury.
Page 83 of 306
CONTROLS AND
EQUIPMENT---------------------
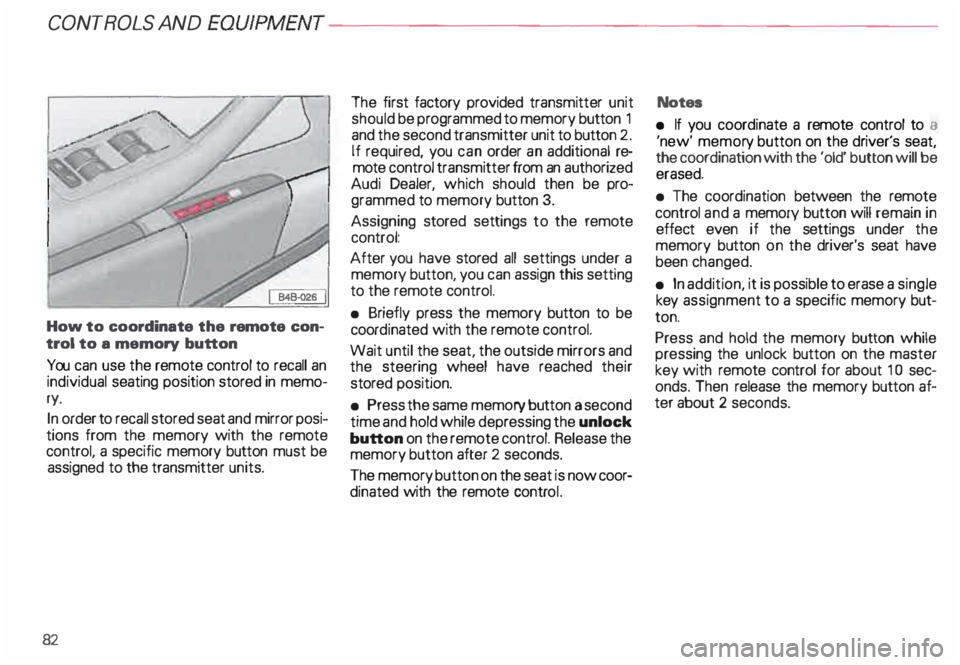
How to coordinate the remote con
trol to a memory button
You can use the remote control to recall an
individual seating position stored in memo
ry.
In order to recall stored seat and mirror posi
tions from the memory with the remote
control, a specific memory button must be
assigned to the transmitter units.
82 The
first factory provided transmitter unit
should be programmed to memory button 1
and the second transmitter unit to button 2.
If required, you can order an additional re
mote control transmitter from an authorized
Audi Dealer, which should then be pro
grammed to memory button 3.
Assigning stored settings to the remote
control:
After you have stored all settings under a
memory button, you can assign this setting
to the remote control.
• Briefly press the memory button to be
coord inated with the remote control.
Wait until the seat, the outside mirrors and
the steering wheel have reached their
stored position.
• Press the same memory button a second
time and hold while depressing the unlock
button on the remote control. Release the
memory button after 2 seconds.
The memory button on the seat is now coor
dinated with the remote control. Notes
• If you coordinate a remote control to a
'new' memor y button on the driver's seat,
the coordination with the 'old' button will be
erased.
• The coordination between the remote
control and a memory button will remain in
effect even if the settings under the
memory button on the driver's seat have
been changed.
• In addition, it is possible to erase a single
key assignment to a specific memory but
ton.
Press and hold the memory button while
pressing the unlock button on the master
key with remote control for about 1 0 sec
onds. Then release the memory button af
ter about 2 seconds.
Page 85 of 306
CONTROLS AND EQ
UIPMEN T---------------------
Retrieving using the
memory buttons
• With the passenger's door open, de
press and release the desired memory but
ton. The seat will automatically adjust to the
stored position.
• If the door has been closed, you must
then depress and hold the memory button
until the seat has reached its stored posi
tion.
Note
You can not reca ll the stored seat adjust
ment for the front passenger's seat using
the remote control in the master key.
84 Emergency
Off
In an emergency, you can interrupt
any retrieval procedure by
• pressing the '"STOP'" button (see il
lustration on page 81 and 83). or
• tapping one of the memory buttons.
Pushing the"ON/OFF"button to the OFF
position only switches off the Memory. The
stored settings will not be erased.
It's a good idea to turn the Memory off if the
vehicle is going to be used temporarily by a
driver whose driving position will not be
memorized.
The advantage is that the personal settings
that have already been memorized will re
main intact and will not change each time
the vehicle is unlocked using the remote
control. Note
The memory function is switched off when
the STOP button is pressed. The word
''OFF" lights up if the headlights are
switched on. However, the programmed
seat, outside mirrors and steering wheel
positions remain stored in the memory.
Page 100 of 306
---------------------CONTROLS
AND EQUIPMEN T
U WARNING continued
• The front seats must not be
pushed too close to the steering
wheel or to the instrument panel.
Never sit closer than 10 inches
(25 em) to the steering wheel.
• If you cannot sit more than
1 0 inches (26 em) from the steer
ing wheel, we recommend that
you investigate whether adaptive
equipment may be available to
help you reach the pedals and in
crease your seating distance from
the stee ring wheel.
• Pointing the stee ring wheel to
ward your face decreases the abil
ity of the supplemental driver's air
bag to protect you in an accident. �
WARNING continued
• Always hold the steering wheel
on the outside of the steering
wheel rim with your hands at the
9 o'clock and 3 o'clock positions
to help reduce the risk of personal
injury if the driver's airbag in
flates.
• Never hold the steering wheel at
the 12 o'clock position or with
your hands at other positions in·
side the steering wheel rim or on
the stee ring wheel hub.
• Holding the steering wheel the
wrong way can cause serious inju
ries to the hands. arms and head if
the driver's airbag inflates. Electrically
adjusted steering
wheel*
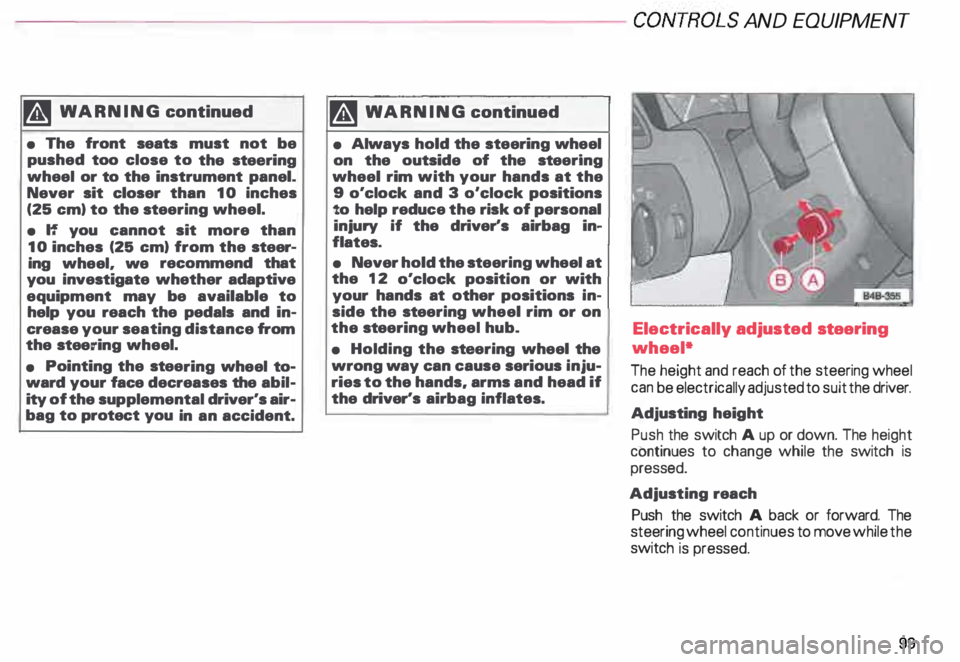
The height and reach of the steering wheel
can be electrically adjusted to suit the driver.
Adjusting height
Push the switch A up or down. The height
continues to change while the switch is
pressed.
Adjusting reach
Push the switch A back or forward. The
steering wheel continues to move while the
switch is pressed.
99
Page 127 of 306
CONTROLS
AND EQUIPMENT---------------------
If there is an ABS problem:
o The ABS warning light to come
on. The vehicle can still be braked,
however, the ABS will not work. See
your authorized Audl Dealer as soon
as possible.
• The ABS warning light and the
brake warning light come on to
gether. The ABS will not work and
you will notice a change in braking
characteristics and performance.
�W ARNING
If both warning lights (ABS and
BRAKE warning light) come on at
the same time, the rear wheels
could lock up first under hard
braking. Rear wheel brake lock-up
can cause loss of vehicle control
and an accident. Have your vehicle
repaired immediately by your au
thorized Audi Dealer or a qualified
workshop. Drive slowly and avoid
sudden, hard brake application.
12 6 If
the ABS fails, the ESP warning light will
come on. See page and pages 202 -205.
Electronic differential lock (EDL)
The electronic differential lock works in con
junction with the ABS system. A fault in the
ABS causes therefore a malfunction of the
electr onic differential lock.
For more details on how the EDL works, go
to page 204.
Brake
USA models:
BRAKE
Canada models:
(Q))
The light comes on while the engine is
cranking. It goes out after the engine has
been started and the parking brake is fully
released. This is your assurance that the
brake warning light is functioning properly. A If the brake warning light does ¥ not light up when the engine is
cra nking or the parking brake is ap
plied, there may be a malfunction in
the electrical system. In this case,
contact your Audi Dealer.
When the light comes on, an audible warn
ing signal is also given.
�W ARNING
• If both warning lights (ABS and
BRAKE warning light) come on at
the same time, the rear wheels
could lock up first under hard
braking. Rear wheel brake lock-up
can cause loss of vehicle control
and an accident. Have your vehicle
repaired immediately by your au
thorized Audi Dealer or a qualified
workshop. Drive slowly and avoid
sudden, hard brake application.
Page 156 of 306
---------------------CONTROLS AND EQUIPMEN T
Notes continued
• At excessive loads (for example, over
heating caused by frequent changes in the
ride height when the vehicle is stationary),
the system is temporarily deactivated for
safety reasons. The system will return to
full operation once it has cooled down.
• The system automatically switches to
the normal level if the ESP automatically
shuts off (see page 205). If this happens,
switch the ignition off, and then on again.
Now you can select the desired level once
again.
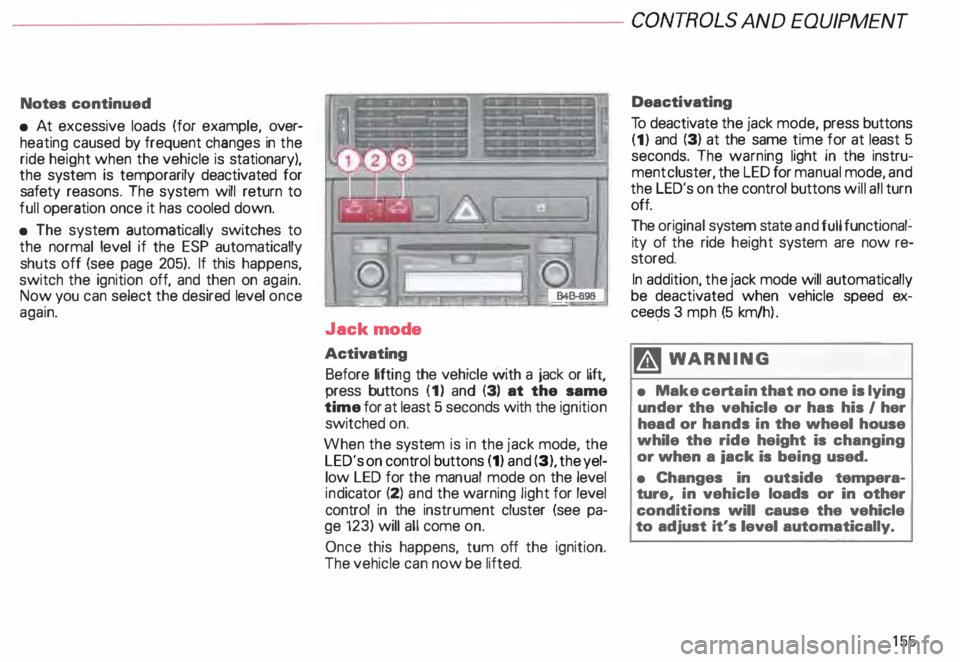
Jack mode
Activating Before lifting the vehicle with a jack or lift,
press buttons (1) and (3) at the same
time for at least 5 seconds with the ignition
switched on.
When the system is in the jack mode, the
LED's on control buttons (1) and (3), the yel
low LED for the manual mode on the level
ind icator (2) and the warning light for level
control in the instrument cluster (see pa
ge 123) will all come on.
Once this happens, tum off the ignition.
The vehicle can now be lifted. Deactivating
To deactivate the jack mode, press buttons
(1) and (3) at the same time for at least 5
seconds. The warning light in the instru
ment cluster, the LED for manual mode, and
the LED's on the control buttons will all turn
off.
The original system state and full functional�
ity of the ride height system are now re
stored.
In addition, the jack mode will automatically
be deactivated when vehicle speed ex
ceec;ls 3 mph (5 km/h ).
�W ARNING
• Make certain that no one is lying
under the vehicle or has his I her
head or hands in the wheel house
while the ride height is changing
or when a iack is being used.
• Changes in outside tempera
ture, in vehicle loads or in other
conditions will cause the vehicle
to adjust it's level automatically.
155
Page 157 of 306
CONTROLS
AND EQUIPMENT---------------------
Turn signals, headlight dimmer switch lever
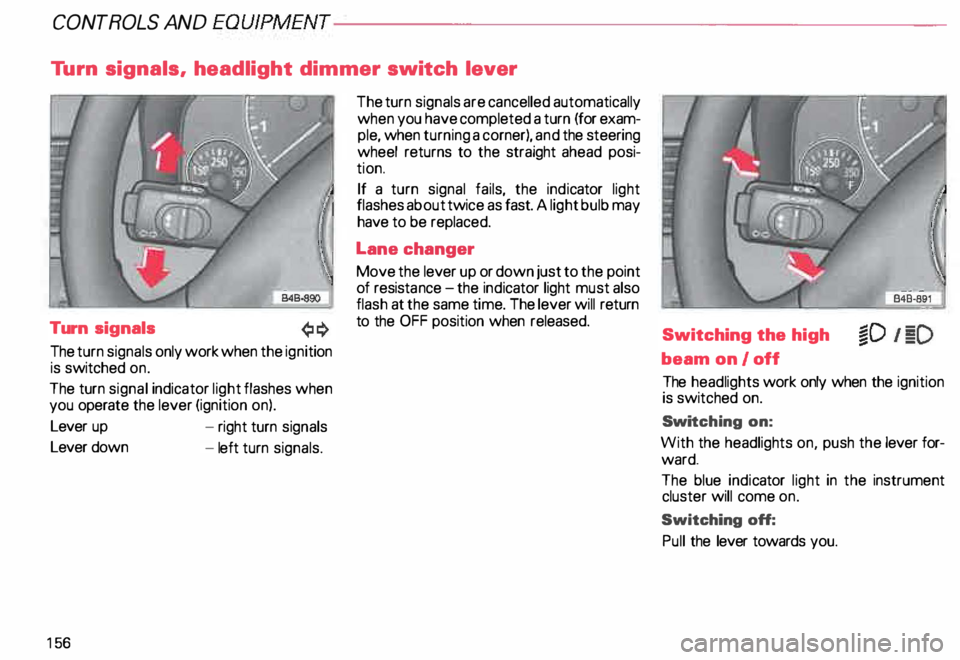
Turn signals
The turn signals only work when the ignition
is switched on.
The turn signal indicator light flashes when
you operate the lever (ignition on).
Lever up
Lever down
15 6 -
right turn signals
- left turn signals. The
turn signals are cancelled automatically
when you have completed a turn (for exam
ple, when turning a corner), and the steering
wheel returns to the straight ahead posi
tion.
If a turn signal fails, the indicator light
flashes about twice as fast. A light bulb may
have to be replaced.
Lane changer
Move the lever up or down just to the point
of resista nce-the ind icator light must also
flash at the same time. The lever will return
to the OFF position when released.
Switching the high
beam on/off
The headlights work only when the ignition
is switched on.
Swi tching on:
With the headlights on, push the lever for
ward.
The blue indicator light in the instrument
cluster will come on.
Switching off:
Pull the lever towards you.
Page 203 of 306
VE
HICL E OPER ATION------------------------
Functioning of Anti-Lock Brake
System (ABS)
The ABS contributes effectively to vehicle
control since it prevents the wheels from
locking when the brakes are applied. This
means that the vehicle remains steerable
and is less likely to skid.
Nota
Yo u don't have to "pump" the brake.
Just hold the brake pedal down.
However, do not expect that the ABS short
ens braking distance under all circum
stances. When driving on gravel or on newly
fallen snow on top of icy surfaces, braking
distance may be even longer , therefore, un
der these circumstances, it is especially im
portant that you drive slowly and with great
care.
202 How the
ABS system works
An automatic check is made when a speed
of about 4 mph (6 km/h) is reached.
When this happens a pumping noise can be
heard.
If an individual wheel begins to rotate too
slowly in relation to vehicle speed and tends
to lock, the ABS automatically reduces
brake pressure to prevent that wheel from
locking.
This automatic adjustment process
will cause a slight vibration of the
brake pedal and soma noises to alert
you that vehicle speed must be
adapted to existing road and traffic
conditions. Enhanced
ABS function {Offroad
Mode)
To improve braking on loose terrain (for ex
ample: gravel, scree, mud, slush, snow),
turn off the ESP (see page 205), which will
switch the ABS to a special mode designed
for off-road requirements.
In this mode, the ABS control system is
changed to allow a "wedge" of loose rock
or soil to form in the front of the wheels.
This improves braking performance.
The ESP indicator light in the instrument
cluster will come on when you have
switched to this special ABS mode (see
page 124).
This special ABS mode will remain active up
to about 40 mph (60 km/h). ABS operation
is not affected at speeds over 40 mph
(60 km/h).
To turn his special ABS mode off, press the
ESP button (To activate ESP, see page 152).
The ABS off-road mode will also be deacti
vated when vou turn off the engine.