2000 AUDI ALLROAD tow
[x] Cancel search: towPage 93 of 306
CONTROLS AND
EQUIPMEN T---------------------
Rear facing child seat bench*
Two children starting at 3 years of age can
sit on the rear facing child seat bench. The
child must not be taller than 50 in. (1.3 m)
and must not weigh more th an 78 lbs
(36 kg). .
Children must always wear safety
belts f
Activating the child safety lock -see
page 65.
�W ARNING
• Do not place any other child
seats or child carriers on rear fac
ing child seat bench.
• For safety reason, never remove
the head restraints on the child
seat bench.
• The seatback for the rear seat
bench must always be in its up
right position and locked securely
in place. You shouldn't be able to
see the red marking on the release
latches -sea page 87.
92 Installing
1 setting up the child seat
bench
Yo u must remove the luggage compart
ment cover, the net and the round cover
caps in the cargo area floor cover before
installing the child seat bench. The cover
caps, which are normally inserted in the
mounting for the child seat bench on the
cargo floor cover, con be stowed on the bot
tom side of the remova ble cargo area floor
cover.
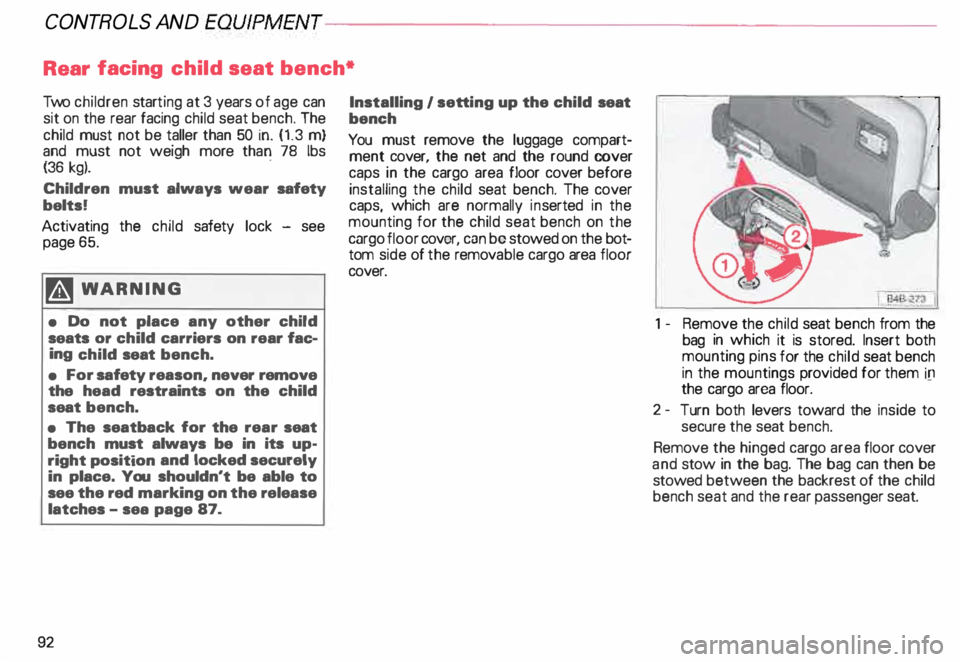
1 -Remove the child seat bench from the
bag in which it is stored. Insert both
mounting pins for the child seat bench
in the mountings provided for them ill
the cargo area floor.
2- Turn both levers toward the inside to
secure the seat bench.
Remove the hinged cargo area floor cover
and stow in the bag. The bag can then be
stowed between the backrest of the child
bench seat and the rear passenger seat.
Page 95 of 306
CONTROLS ANDEO�PMENT-----------------------------------------
I 948-277
I
Folding up the child seat bench
Remove the safety belts from the belt
guides on the back rest and hand them from
the brackets on the door trim panel.
Fold up the arm rests.
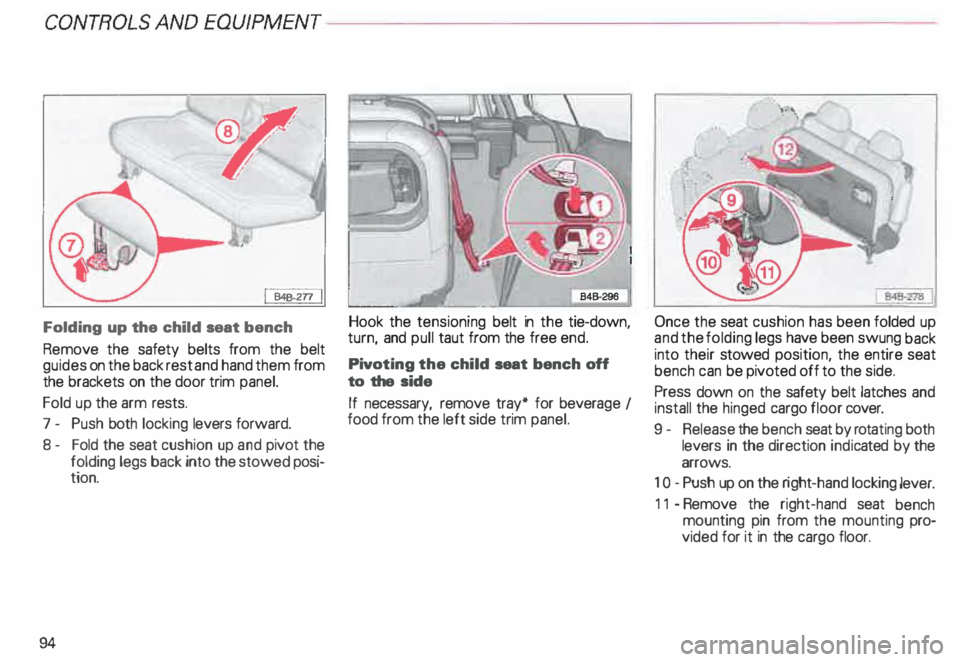
7 - Push both locking levers forward.
8- Fold the seat cushion up and pivot the
folding legs back into the stowed posi
tion.
94 Hook
the tensioning belt in the tie-down,
turn, and pull taut from the free end.
Pivot ing the child seat bench off
to the side
If necessary, remove tray* for bever age I
food from the left side trim panel. Once
the seat cushion has been folded up
and the folding legs have been swung back
into their stowed position, the entire seat
bench can be pivoted off to the side.
Press down on the safety belt latches and
install the hinged cargo floor cover.
9 - Release the bench seat by rotating both
levers in the direction indicated by the
arrows.
1 0- Push up on the right -hand locking lever.
11 -Remove the right-hand seat bench
mounting pin from the mounting pro
vided for it in the cargo floor.
Page 96 of 306
------------------------------------------CONTROLSAND EOWPMEN T
12- Lift up on the seat bench, pivot it off to
the left side of the vehicle, and push it
down into the mounting provided for
this purpose in the cargo floor. Then ro
tate the two levers (9) to secure the
seat bench.
Hook the tensioning belt in the left-hand tie
down near the loading edge, rotate and pull
the free end until the belt is taut - refer to
the center illustration on the previous page.
Roll-up the sun shade on the rear window.
B4B-279 j
Removing the seat bench
The child seat bench can be removed once
the cushion is folded up and folding legs
have been swung back into the stowed
position.
Push down on the safety belt latches andre
install the folding cargo floor cover.
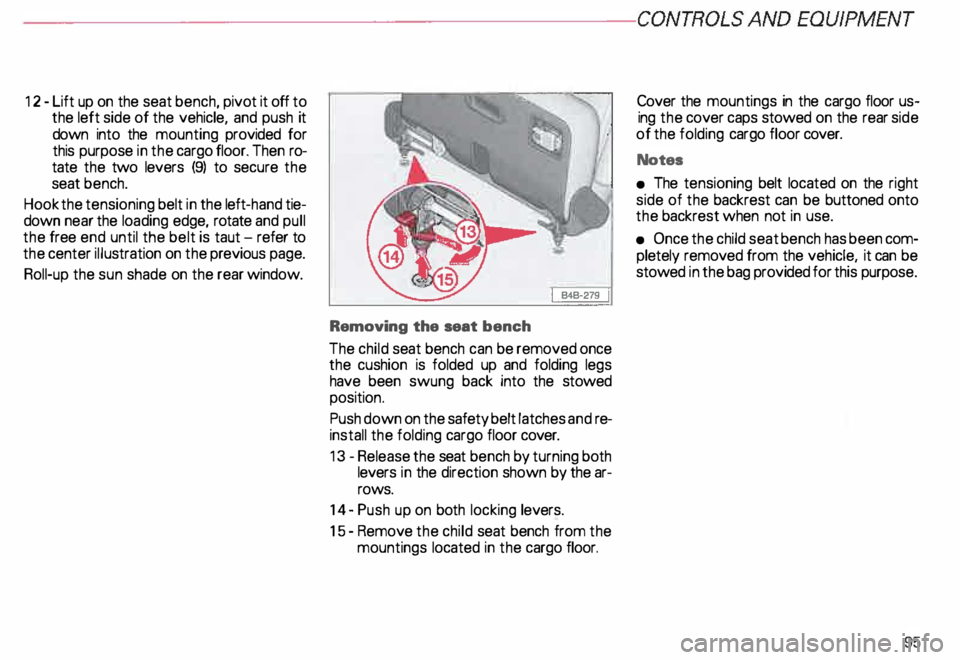
13 -Release the seat bench by turning both
levers in the direction shown by the ar
rows.
14- Push up on both locking levers.
15- Remove the child seat bench from the
mountings located in the cargo floor. Cover
the mountings in the cargo floor us
ing the cover caps stowed on the rear side
of the folding cargo floor cover.
Notes
• The tensioning belt located on the right
side of the backrest can be buttoned onto
the backrest when not in use.
• Once the child seat bench has been com
pletely removed from the vehicle, it can be
stowed in the bag provided for this purpose.
95
Page 98 of 306
---------------------CONTROLS
AND EQUIPMENT
Stowing the ski sack
• Close the flap in the luggage compart
ment.
• Fold the ski sack carefully and stow it
away.
• Close the flap inside the passenger's
compartment.
Note
Do not fold and stow away the ski sack if it
is damp (for example, snow melting from
skis). Let it dry completely before you stow
it away. �W
ARNING
• The ski sack is intended only for
the transportation of akis and
other light objects. To reduce the
risk of serious personal injury
never transport heavy or pointed
objects in the ski sack.
• When braking rapidly or during
an accident the load could be dis
placed and cause injury to occu
pants.
• Sharp edges on the load must be
covered for protec tion. Always
fasten the belt tightly around the
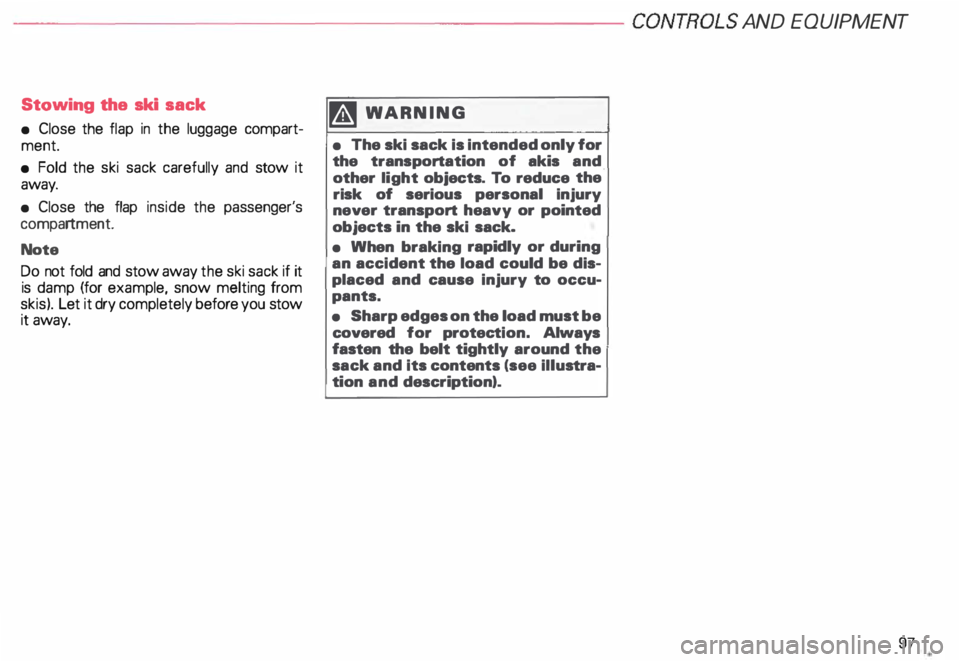
sack and its contents (see illustra
tion and description).
97
Page 112 of 306

---------------------CONTROLS AND EQUIPMENT
Parking On flat terrain, it is enough to simply set the
selector lever to position P (Park). On an
incline, however, first depress the brake
pedal. engage the parking brake and then
move the selector lever completely to posi
tion P. If you do this. the locking mechanism
will not be overloaded and it will be easier to
release the parking brake.
Always heed all WA RNINGS
on page 103. Emergency
starting
Yo ur Audi with automatic transmission
cannot be started by pushing or tow
ing. If the engine does not start because of
a discharged battery, the vehicle can be
start edwithjumper cables. Referto "Emer
genc y starting with jumper cables." Should
the engine fail to start, consult your nearest
Audi Dealer.
To wing
To tow the vehicle. see instructions "Emer
gency towing" on page 281. Auxiliar
y modes
Yo u can recognize a failure in the electronic
system if the selector lever position display
letters appear bright ·aga in st a dark back
ground. You can still drive because the
transmission will continue to work in an aux
iliary mode. Take your vehicle to your near
est Audi Dealer as soon as possible.
Note
• The electronic lock that protects
the reverse gear while driving is in
operative when the transmission is
in an auxiliary mode. Shifting into R
(Reverse) while driving will cause
serious damage to the vehicle.
• The liptronic® is inoperative when the
transmission is in the fail-safe mode.
111
Page 116 of 306
---------------------CONTROLS AND
EQUIPMENT
Note
• Yo ur Audi with automatic trans
mission cannot be started with
pushing or towing.
• If the battery is discharged. try
jump starting the engine using the
battery from another vehicle -see
page 278. Stopping
engine
Do not stop the engine immediately
after hard or extended driving. Keep
engine running for about two min
utes to prevent excessive heat
build-up.
�W ARNING
• Before you check anything in
the engine compartment, stop the
engine and let it cool down. Hot
components can burn skin on con
tact.
• Never touch the radiator fan.
The auxiliary electric fan can
switch on suddenly and iniure you.
• Always heed all WA RNINGS on
page 232. Note
The ignition should not be switched
off as long the vehicle is still rolling
with a gear engaged. otherwise fuel
could get into the catalytic convert
er and cause damage.
115
Page 150 of 306
Front
fog lights
�D
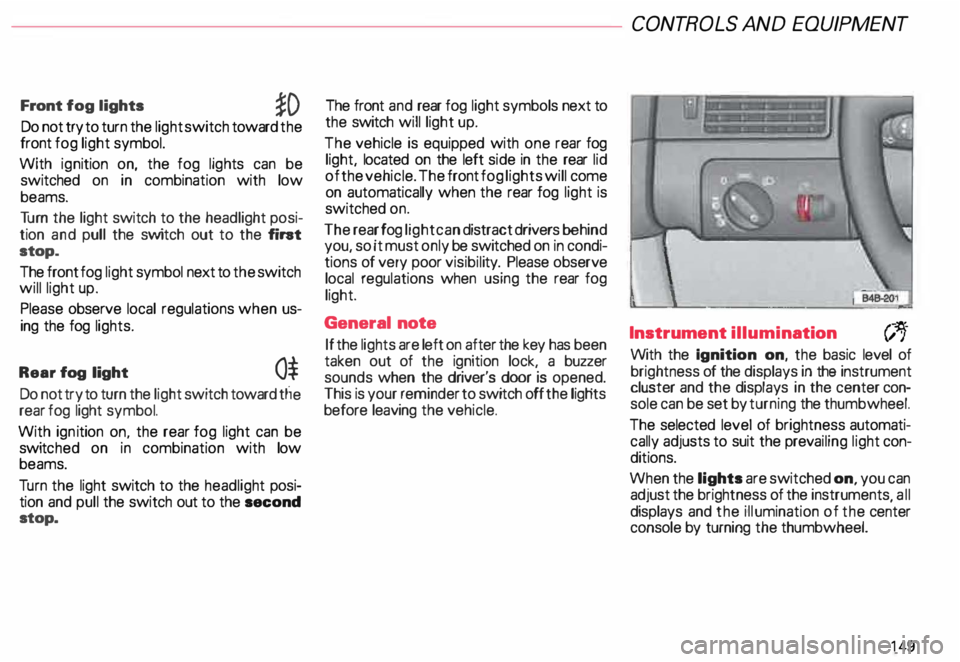
Do not try to turn the light switch toward the
front fog light symbol.
With ignition on, the fog lights can be
switched on in combination with low
beams.
Tu rn the light switch to the headlight posi
tion and pull the switch out to the fint
stop.
The front fog light symbol next to the switch
will light up.
Please observe local regulations when us
ing the fog lights.
Rear fog light
0$
Do not try to turn the light switch toward tlie
rear fog light symbol.
With ignition on. the rear fog light can be
switc hed on in combination with low
beams.
Tu rn the light switch to the headlight posi
tion and pull the switch out to the second
stop. The front
and rear fog light symbols next to
the switch will light up.
The vehicle is equipped with one rear fog
light, located on the left side in the rear lid
of the vehicle. The front fog lights will come
on automatically when the rear fog light is
switched on.
The rear fog light can distract drivers behind
you, so it must only be switched on in condi
tions of very poor visibil ity. Please observe
local regulations when using the rear fog
light.
General note
If the lights are left on after the key has been
taken out of the ignition lock, a buzzer
sounds when the driver's door is opened.
This is your reminder to switch off the ligHts
before leaving the vehicle. CONT
ROLS AND EQUIPMEN T
Instrument illumination
(;,.
With the Ignition on, the basic level of
brightness of the displays in the instrument
cluster and the displays in the center con
sole can be set by turning the thumbwheel.
The selected level of brightness automati
cally adjusts to suit the prevailing light con
ditions.
When the lights are switched on, you can
adjust the brightness of the instruments all
displays and the illumination of the ce�ter
console by turning the thumbwheel.
149
Page 157 of 306
CONTROLS
AND EQUIPMENT---------------------
Turn signals, headlight dimmer switch lever
Turn signals
The turn signals only work when the ignition
is switched on.
The turn signal indicator light flashes when
you operate the lever (ignition on).
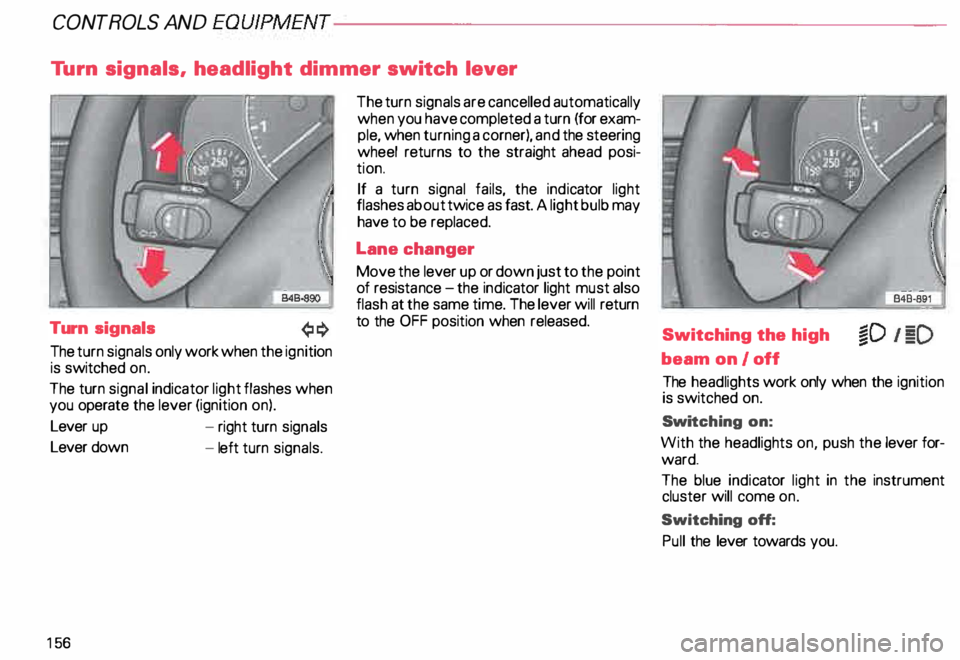
Lever up
Lever down
15 6 -
right turn signals
- left turn signals. The
turn signals are cancelled automatically
when you have completed a turn (for exam
ple, when turning a corner), and the steering
wheel returns to the straight ahead posi
tion.
If a turn signal fails, the indicator light
flashes about twice as fast. A light bulb may
have to be replaced.
Lane changer
Move the lever up or down just to the point
of resista nce-the ind icator light must also
flash at the same time. The lever will return
to the OFF position when released.
Switching the high
beam on/off
The headlights work only when the ignition
is switched on.
Swi tching on:
With the headlights on, push the lever for
ward.
The blue indicator light in the instrument
cluster will come on.
Switching off:
Pull the lever towards you.