B: INSTALLATION
Installation is in the reverse order of removal. Do
the following:
(1) Always use new gaskets.
(2) Ensure sealing portion is free from fuel or for-
eign particles before installation.
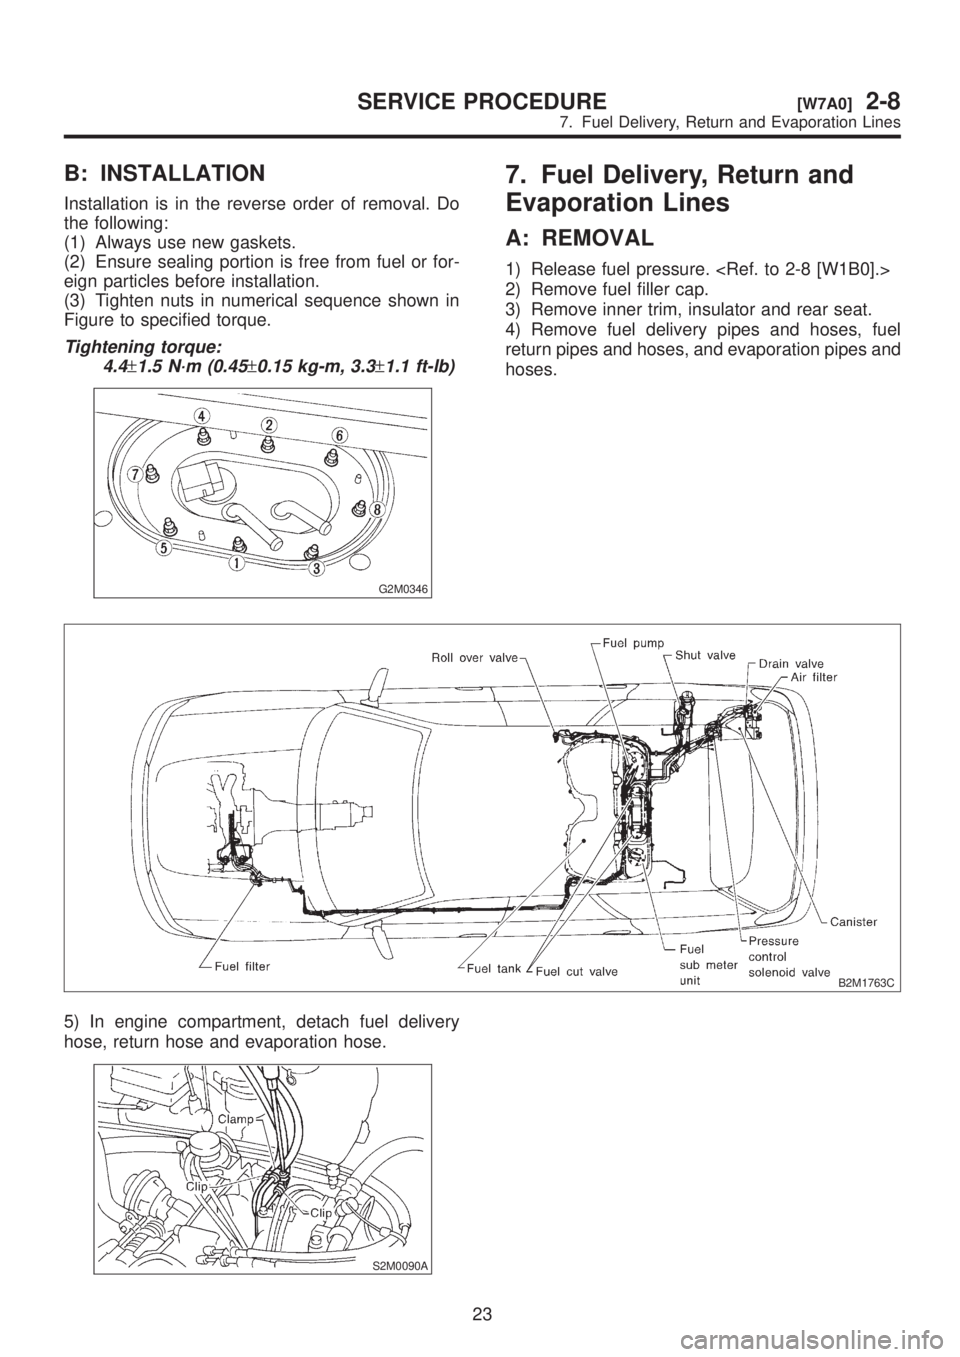
(3) Tighten nuts in numerical sequence shown in
Figure to specified torque.
Tightening torque:
4.4
±1.5 N´m (0.45±0.15 kg-m, 3.3±1.1 ft-lb)
G2M0346
7. Fuel Delivery, Return and
Evaporation Lines
A: REMOVAL
1) Release fuel pressure.
2) Remove fuel filler cap.
3) Remove inner trim, insulator and rear seat.
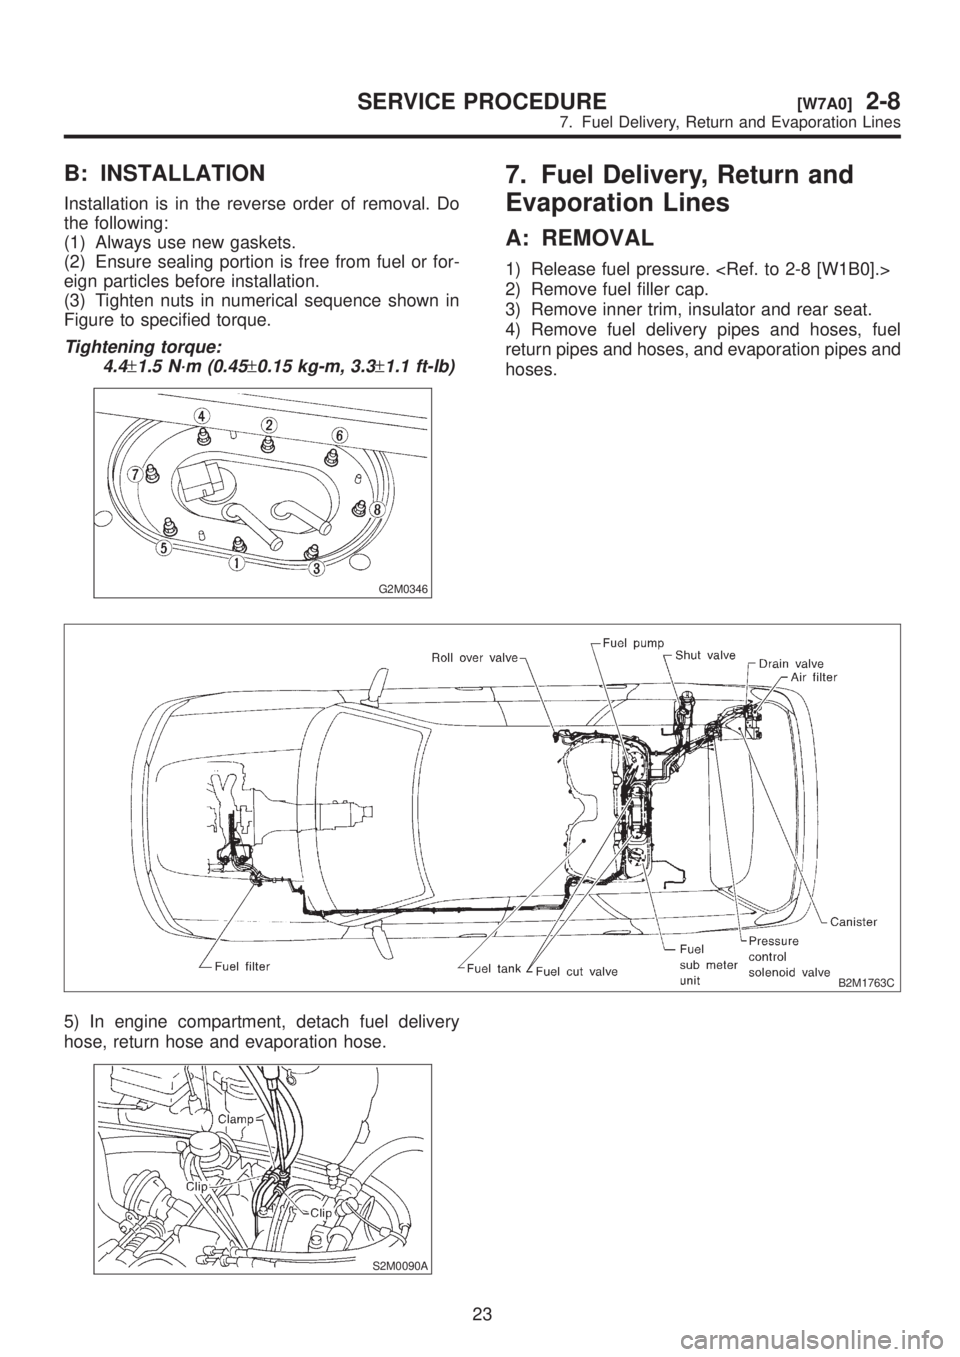
4) Remove fuel delivery pipes and hoses, fuel
return pipes and hoses, and evaporation pipes and
hoses.
B2M1763C
5) In engine compartment, detach fuel delivery
hose, return hose and evaporation hose.
S2M0090A
23
[W7A0]2-8SERVICE PROCEDURE
7. Fuel Delivery, Return and Evaporation Lines