Page 928 of 1659

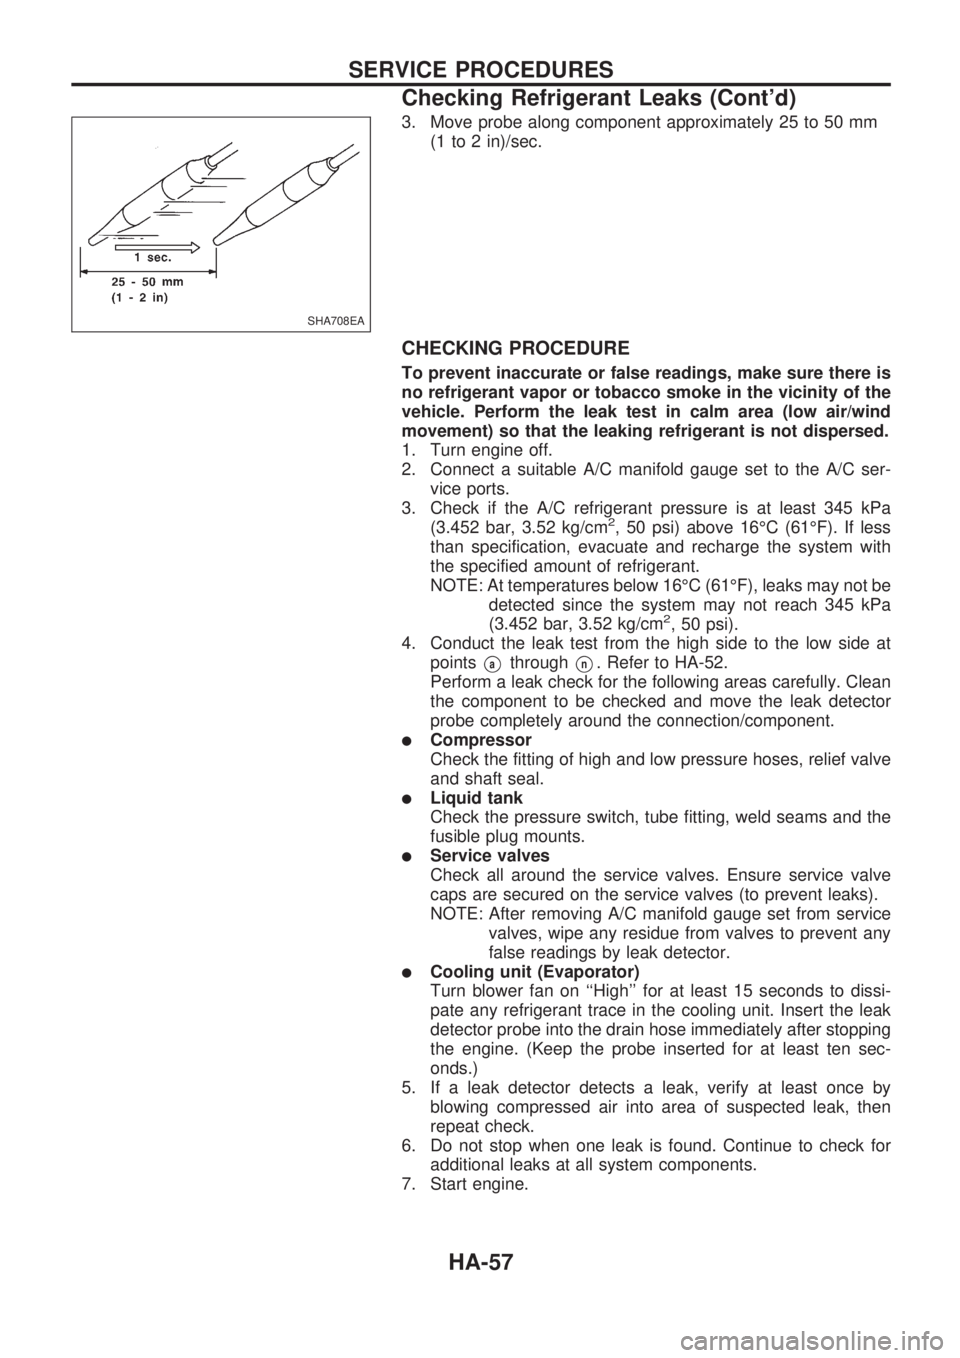
3. Move probe along component approximately 25 to 50 mm
(1 to 2 in)/sec.
CHECKING PROCEDURE
To prevent inaccurate or false readings, make sure there is
no refrigerant vapor or tobacco smoke in the vicinity of the
vehicle. Perform the leak test in calm area (low air/wind
movement) so that the leaking refrigerant is not dispersed.
1. Turn engine off.
2. Connect a suitable A/C manifold gauge set to the A/C ser-
vice ports.
3. Check if the A/C refrigerant pressure is at least 345 kPa
(3.452 bar, 3.52 kg/cm
2, 50 psi) above 16ÉC (61ÉF). If less
than specification, evacuate and recharge the system with
the specified amount of refrigerant.
NOTE: At temperatures below 16ÉC (61ÉF), leaks may not be
detected since the system may not reach 345 kPa
(3.452 bar, 3.52 kg/cm
2, 50 psi).
4. Conduct the leak test from the high side to the low side at
points
VathroughVn. Refer to HA-52.
Perform a leak check for the following areas carefully. Clean
the component to be checked and move the leak detector
probe completely around the connection/component.
lCompressor
Check the fitting of high and low pressure hoses, relief valve
and shaft seal.
lLiquid tank
Check the pressure switch, tube fitting, weld seams and the
fusible plug mounts.
lService valves
Check all around the service valves. Ensure service valve
caps are secured on the service valves (to prevent leaks).
NOTE: After removing A/C manifold gauge set from service
valves, wipe any residue from valves to prevent any
false readings by leak detector.
lCooling unit (Evaporator)
Turn blower fan on ``High'' for at least 15 seconds to dissi-
pate any refrigerant trace in the cooling unit. Insert the leak
detector probe into the drain hose immediately after stopping
the engine. (Keep the probe inserted for at least ten sec-
onds.)
5. If a leak detector detects a leak, verify at least once by
blowing compressed air into area of suspected leak, then
repeat check.
6. Do not stop when one leak is found. Continue to check for
additional leaks at all system components.
7. Start engine.
SHA708EA
SERVICE PROCEDURES
Checking Refrigerant Leaks (Cont'd)
HA-57
Page 929 of 1659

8. Set the heater A/C control as follows:
a. A/C switch ON
b. Face mode
c. Recirculation switch ON
d. Max cold temperature
e. Fan speed high
9. Run engine at 1,500 rpm for at least 2 minutes.
10. Turn engine off and perform leak check again following steps
4 through 6 above.
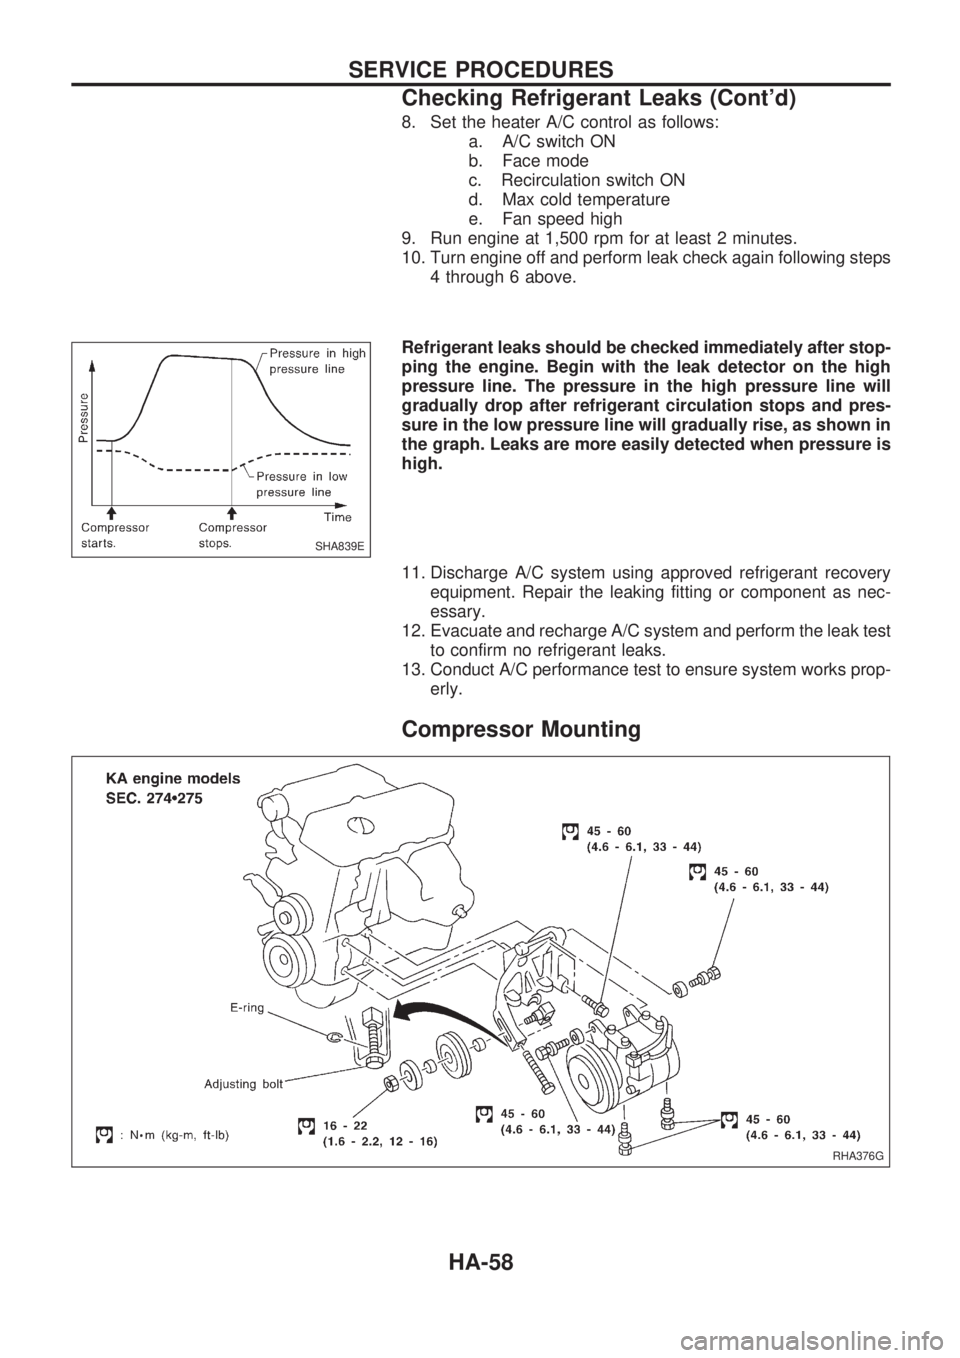
Refrigerant leaks should be checked immediately after stop-
ping the engine. Begin with the leak detector on the high
pressure line. The pressure in the high pressure line will
gradually drop after refrigerant circulation stops and pres-
sure in the low pressure line will gradually rise, as shown in
the graph. Leaks are more easily detected when pressure is
high.
11. Discharge A/C system using approved refrigerant recovery
equipment. Repair the leaking fitting or component as nec-
essary.
12. Evacuate and recharge A/C system and perform the leak test
to confirm no refrigerant leaks.
13. Conduct A/C performance test to ensure system works prop-
erly.
Compressor Mounting
SHA839E
RHA376G
SERVICE PROCEDURES
Checking Refrigerant Leaks (Cont'd)
HA-58
Page 930 of 1659
RHA378G
.TD engine model
.
.
SERVICE PROCEDURES
Compressor Mounting (Cont'd)
HA-59
Page 938 of 1659
General Specifications
COMPRESSOR
Model ZEXEL make DKV-14C
Type Vane rotary
Displacement cm
3(cu in)/rev. 140 (8.54)
Direction of rotationClockwise
(Viewed from drive end)
Drive belt A Type
LUBRICANT
Model ZEXEL make DKV-14C
Type KLH00-PAGR0
Capacity m!(lmp fl oz)
Total in system 200 (7.0)
Compressor (Service parts)
charging amount200 (7.0)
Inspection and Adjustment
REFRIGERANT
Type HFC-134a (R-134a)
Capacity kg (lb)0.60 - 0.70
(1.32 - 1.54)
ENGINE IDLING SPEED (When A/C is ON.)
lRefer to EC section.
BELT TENSION
lRefer to MA section (``Checking Drive
Belts'', ``ENGINE MAINTENANCE'').
COMPRESSOR
Model DKS-17CH DKV-14C
Clutch disc-to-pulley
clearance mm (in)0.3 - 0.6
(0.012 - 0.024)0.3 - 0.6
(0.012 - 0.024)
SERVICE DATA AND SPECIFICATIONS (SDS)
HA-67
Page 939 of 1659

ENGINE LUBRICATION &
COOLING SYSTEMS
SECTION
LC
CONTENTS
PRECAUTIONS AND PREPARATION..................... 1
Liquid Gasket Application Procedure .................... 1
Special Service Tools ............................................ 2
KA
ENGINE LUBRICATION SYSTEM............................ 3
Lubrication Circuit .................................................. 3
Oil Pressure Check ................................................ 4
Oil Pump ................................................................ 4
ENGINE COOLING SYSTEM.................................... 6
Cooling Circuit........................................................ 6
System Check ........................................................ 6
Water Pump ........................................................... 7
Thermostat ............................................................. 8
Radiator.................................................................. 9
Cooling Fan (Crankshaft driven).......................... 10
TD
ENGINE LUBRICATION SYSTEM.......................... 12
Lubrication Circuit ................................................ 12
Oil Pressure Check (On-vehicle service) ............ 13
Oil Pump .............................................................. 14
Oil Filter Bracket .................................................. 16
Oil Cooler ............................................................. 17Oil Jet ................................................................... 18
ENGINE COOLING SYSTEM.................................. 19
Cooling Circuit...................................................... 19
Cooling System Inspection .................................. 20
Water Pump and Cooling Fan (Camshaft
driven) .................................................................. 21
Thermostat ........................................................... 23
Radiator................................................................ 24
Refilling Engine Coolant ...................................... 24
ENGINE ROOM FAN MOTOR ELECTRICAL
CIRCUIT................................................................... 25
Wiring Diagram .................................................... 25
Cooling Fan (Motor driven) .................................. 26
Electrical Components Inspection ....................... 26
ENGINE COOLING SYSTEM.................................. 28
Radiator (Aluminum type) .................................... 28
Overheating Cause Analysis ............................... 31
SERVICE DATA AND SPECIFICATIONS (SDS)... 32
Engine Lubrication System (KA).......................... 32
Engine Cooling System (KA) ............................... 32
Engine Lubrication System (TD).......................... 32
Engine Cooling System (TD) ............................... 32
LC
Page 940 of 1659
Liquid Gasket Application Procedure
a. Use a scraper to remove all traces of old liquid gasket from
mating surfaces and grooves. Also, completely clean any oil
from these areas.
b. Apply a continuous bead of liquid gasket to mating surfaces.
(Use Genuine Liquid Gasket or equivalent.)
lFor oil pan, be sure liquid gasket diameter is 3.5 to 4.5 mm
(0.138 to 0.177 in) for gasoline engines.
lFor areas except oil pan, be sure liquid gasket diameter is
2.0 to 3.0 mm (0.079 to 0.118 in) for gasoline engines, and
2.5 to 3.5 mm (0.098 to 0.138 in) for diesel engines.
c. Apply liquid gasket around the inner side of bolt holes (unless
otherwise specified).
d. Assembly should be done within 5 minutes after coating.
e. Wait at least 30 minutes before refilling engine oil and engine
coolant.
SEM164F
AEM080
PRECAUTIONS AND PREPARATION
LC-1
Page 941 of 1659
Special Service Tools*: Special tool or commercial equivalent
Tool number
Tool nameDescriptionEngine application
KA TD
ST25051001*
Oil pressure gauge
NT558
Measuring oil pres-
sure
Maximum measur-
ing range: 2,452
kPa (24.5 bar, 25
kg/cm
2, 356 psi)XX
ST25052000*
Hose
NT559
Adapting oil pres-
sure gauge
to cylinder block
XX
EG17650301
Radiator cap tester
adapter
NT564
Adapting radiator
cap tester
to radiator filler
neck
XX
a: 28 (1.10) dia.
b: 31.4 (1.236) dia.
c: 41.3 (1.626) dia.
Unit: mm (in)
KV99103510
Radiator plate pliers A
NT224
Installing radiator
upper and lower
tanks
XX
KV99103520
Radiator plate pliers B
NT225
Removing radiator
upper and lower
tanks
XX
WS39930000
Tube presser
NT052
Pressing the tube
of liquid gasket
XX
KV10105901
Oil filter cap wrench
NT689
Removing oil filter
XÐ
KV10106001
Oil filter wrench
NT690
Replacing oil filter
ÐX
PRECAUTIONS AND PREPARATION
LC-2
Page 942 of 1659
Lubrication Circuit
SLC150B
ENGINE LUBRICATION SYSTEMKA
LC-3