Page 105 of 176

Do not exceed the GVWR or the GAWR specified on the Safety
Compliance Certification Label.
Do not use replacement tires with lower weight capacities than the
originals because they may lower the vehicle's GVWR and GAWR
limitations. Replacement tires with a higher weight limit than the
originals do not increase the GVWR and GAWR limitations.
TRAILER TOWING
Your vehicle is classified as a light duty towing vehicle. Refer to the
following chart for towing limits:
Towing classLight duty
Maximum gross trailer weight454/907 kg (1 000/2 000 lbs.)*
Maximum tongue load45/91 kg (100/200 lbs.)
Engine4.6L
Hitch designLoad carrying type
Trailer-tow package optionNot required
* Vehicle speed should not exceed 72 km/h (45 mph) when towing on
grades. Limit maximum gross trailer weight to 454 kg (1 000 lbs.) and
maximum tongue load to 45 kg (100 lbs.): (1) when you are towing a
trailer on steep hills or on moderate hills for distances longer than
8 km (5 miles) or more and; (2) on very hot days (when the
temperature is above 38ÉC [100ÉF]).
Your vehicle does not come from the factory fully equipped to tow.
However, you can contact your local Lincoln dealer to get the proper
towing equipment. Do not tow a trailer until your vehicle has been
driven at least 3 200 km (2 000 miles).
Towing a trailer places an additional load on your vehicle's engine,
transmission, brakes, tires and suspension. Inspect these components
carefully after towing.
Do not tow a trailer when using a temporary spare tire.
The amount of weight your loaded trailer should be no more than 907 kg
(2 000 lbs.).
Driving
105
Page 106 of 176

Do not exceed the GVWR or the GAWR specified on the Safety
Compliance Certification Label.
Towing trailers beyond the maximum recommended gross trailer
weight could result in engine damage, transmission/axle damage,
structural damage, loss of control, and personal injury.
Preparing to tow
Use the proper equipment for towing a trailer, and make sure it is
properly attached to your vehicle. See your dealer or a reliable trailer
dealer if you require assistance.
Hitches
Do not use hitches that clamp onto the vehicle bumper. Use a load
carrying hitch. You must distribute the load in your trailer so that
10 ± 15% of the total weight of the trailer is on the tongue.
Safety chains
Always connect the trailer's safety chains to the vehicle. To connect the
trailer's safety chains, cross the chains under the trailer tongue and allow
slack for turning corners.
If you use a rental trailer, follow the instructions that the rental agency
gives to you.
Trailer brakes
Electric brakes and manual, automatic or surge-type brakes are safe if
installed properly and adjusted to the manufacturer's specifications. The
trailer brakes must meet local and Federal regulations.
Do not connect a trailer's hydraulic brake system directly to your
vehicle's brake system. Your vehicle may not have enough
braking power and your chances of having a collision greatly increase.
The braking system of the tow vehicle is rated for operation at the
GVWR not GCWR
Trailer lamps
Do not connect a trailer's lighting system directly to your vehicle's
lighting system. To get the proper equipment for hooking up your
Driving
106
Page 107 of 176

trailer's lamps, see your Lincoln dealer. Be sure to follow their
instructions carefully.
If you do not install trailer lights correctly, you may cause damage to the
vehicle's lighting system or other vehicle systems.
Driving while you tow
Do not drive faster than 88 km/h (55 mph) when towing a trailer.
Speed control may shut off if you are towing on long, steep grades.
When towing a trailer:
²Shift out of D (Overdrive) and into 3 (Third) or a lower gear when
towing up or down steep hills. This will eliminate excessive
downshifting and upshifting for optimum fuel economy and transaxle
cooling.
²Anticipate stops and brake gradually.
Servicing after towing
If you tow a trailer for long distances, your vehicle will require more
frequent service intervals. Refer to the Severe Duty Schedule in your
ªService Guideº for more information.
Trailer towing tips
²Practice turning, stopping and backing up in an area before starting on
a trip to get the feel of the vehicle trailer combination. When turning,
make wider turns so the trailer wheels will clear curbs and other
obstacles.
²Allow more distance for stopping with a trailer attached.
²The trailer tongue weight should be 10±15% of the loaded trailer
weight.
²After you have traveled 80 km (50 miles), thoroughly check your
hitch, electrical connections and trailer wheel lug nuts.
²When stopped in traffic for long periods of time in hot weather, place
the gearshift in P (Park) and increase idle speed. This aids engine
cooling and air conditioner efficiency.
²Vehicles with trailers should not be parked on a grade. If you must
park on a grade, place wheel chocks under the trailer's wheels.
Driving
107
Page 108 of 176

FUEL CONSUMPTION
Fuel economy can be improved by avoiding:
²lack of regular, scheduled maintenance.
²excessive speed.
²rapid acceleration.
²extended idle.
CHECKING YOUR HIGHWAY FUEL ECONOMY USING THE
ELECTRONIC MESSAGE CENTER DISPLAY
The following procedure will allow you to accurately monitor your actual
highway fuel economy. Since this procedure requires the vehicle speed
control system to be set to highway speeds, it must be run only on
suitable roadways where long distance speed control can be safely
maintained.
You may notice gradual improvement in fuel economy over the course of
your vehicle's break-in period (approximately 1 600 kilometers
[1 000 miles]).
1. Set the speed control. Refer toSpeed controlin theControls and
featureschapter.
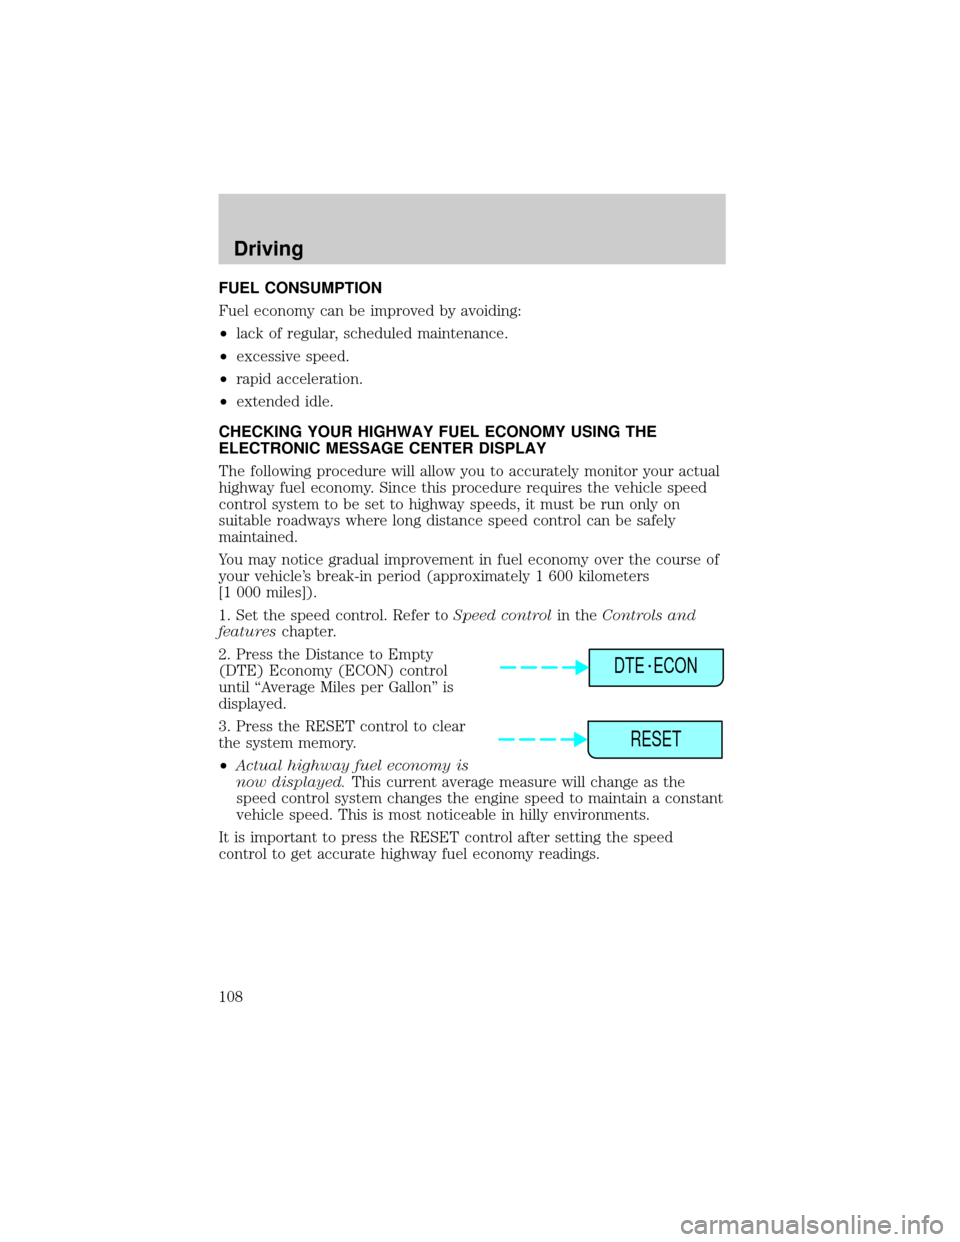
2. Press the Distance to Empty
(DTE) Economy (ECON) control
until ªAverage Miles per Gallonº is
displayed.
3. Press the RESET control to clear
the system memory.
²Actual highway fuel economy is
now displayed.This current average measure will change as the
speed control system changes the engine speed to maintain a constant
vehicle speed. This is most noticeable in hilly environments.
It is important to press the RESET control after setting the speed
control to get accurate highway fuel economy readings.
DTE ECON
RESET
Driving
108
Page 109 of 176

HAZARD FLASHER
For information on the hazard flasher control, refer toHazard lights
controlin theRoadside emergencieschapter.
FUEL PUMP SHUT-OFF SWITCH
If the engine cranks but does not start after a collision, the fuel pump
shut-off switch may have been activated. The shut-off switch is a device
intended to stop the electric fuel pump when your vehicle has been
involved in a substantial jolt.
1. Turn the ignition to the OFF position.
2. Check the fuel system for leaks.
3. If no fuel leak is apparent, reset the fuel pump shut-off switch by
pushing in the button on the switch.
4. Turn the ignition to the ON position. Pause for a few seconds and
return the key to the OFF position.
5. Make a further check for leaks in the fuel system.
The fuel pump shut-off switch is
located behind an access door to the
left of the driver's seat on the
B-pillar.
FUSES AND RELAYS
Fuses
If electrical components in the
vehicle are not working, a fuse may
have blown. Blown fuses are
identified by a broken wire within
the fuse. Check the appropriate
fuses before replacing any electrical
components.
1515
Roadside emergencies
109
Page 110 of 176
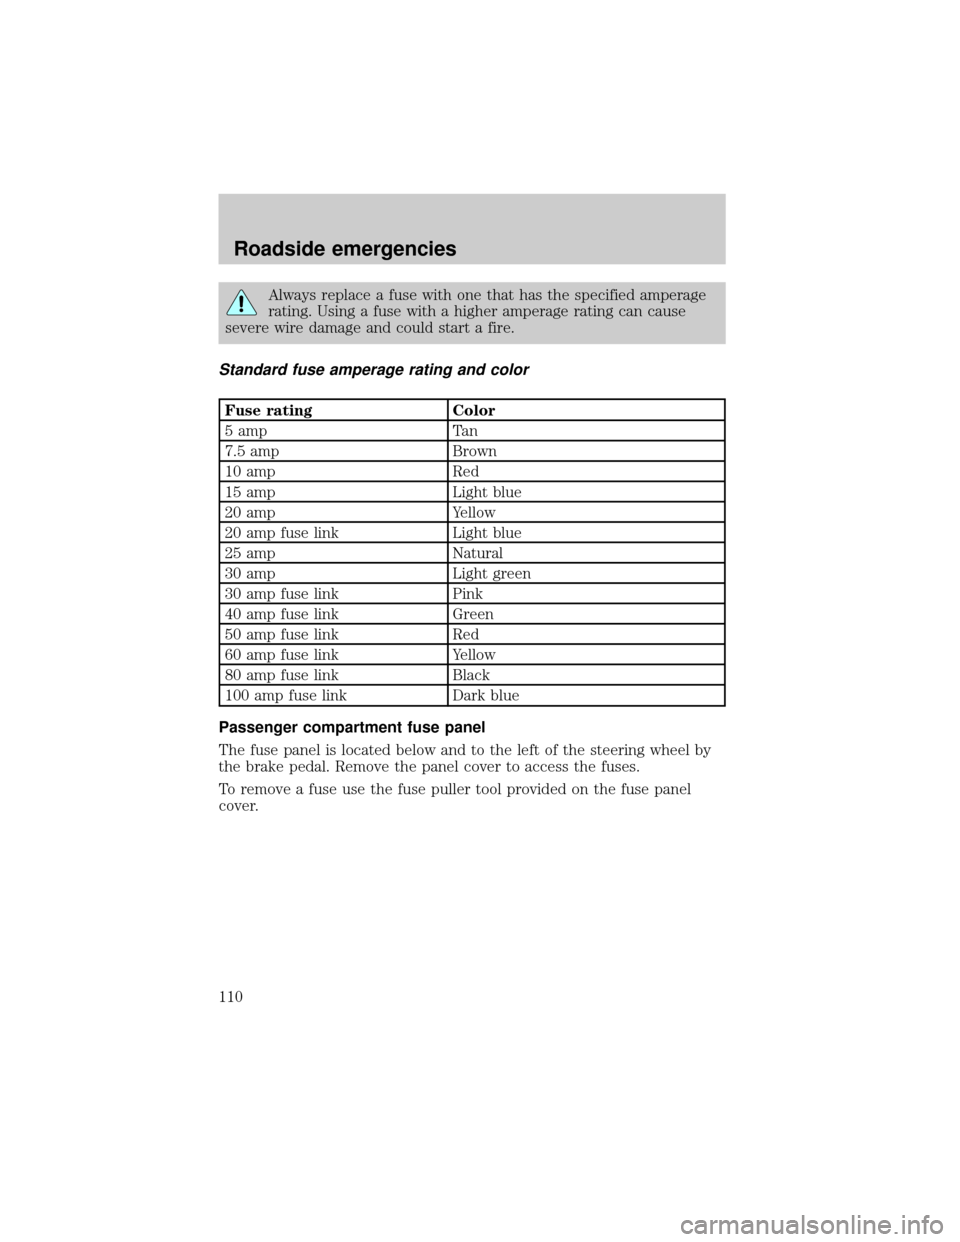
Always replace a fuse with one that has the specified amperage
rating. Using a fuse with a higher amperage rating can cause
severe wire damage and could start a fire.
Standard fuse amperage rating and color
Fuse rating Color
5 amp Tan
7.5 amp Brown
10 amp Red
15 amp Light blue
20 amp Yellow
20 amp fuse link Light blue
25 amp Natural
30 amp Light green
30 amp fuse link Pink
40 amp fuse link Green
50 amp fuse link Red
60 amp fuse link Yellow
80 amp fuse link Black
100 amp fuse link Dark blue
Passenger compartment fuse panel
The fuse panel is located below and to the left of the steering wheel by
the brake pedal. Remove the panel cover to access the fuses.
To remove a fuse use the fuse puller tool provided on the fuse panel
cover.
Roadside emergencies
110
Page 111 of 176
12345
7891011
17
13 14 15 16
19 20 21
25 26 27 28 29
31 30
36
6
12
18
24
32
33 34 35
37 38 39 40 41
2223
Roadside emergencies
111
Page 112 of 176
The fuses are coded as follows:
Fuse/Relay Location Fuse Amp Rating Description
1 10A Lighting Control
Module: Anti-Theft
Indicator Lamp, PWM
Dimming Output,
Illumination Lamps for
Microphone, RR and
LR Door Ashtrays,
Heated Seat Switches,
Rear Defrost Control
Switch, EATC Control
Panel, Message Center
Switches, Speed
Control Switches,
Cigar Lighter, Console
and Ashtray
2 10A Data Link Connector
(DLC), Powertrain
Control Module (PCM)
3 15A Multi-Function Switch,
Cornering Lamps, High
Beam and Turn Signal
Input to LCM
4 10A Power Door Locks and
Power Windows
Switch Backlights,
Radio, Mobile
Telephone Transceiver,
Lighting Control
Module, (RUN/ACC
Sense), RESCU,
Electronic Day/Night
Mirror
Roadside emergencies
112