1998 CHEVROLET VENTURE trailer
[x] Cancel search: trailerPage 293 of 474
Driving On Grades
Reduce speed and shift to a lower gear before you start
down
a long or steep downgrade. If you don’t shift
down,
you might have to use your brakes so much that
they would get hot and no longer work well.
On a long uphill grade, shift down and reduce your
speed to around
45 mph (70 kmih) to reduce the
possibility of engine and transaxle overheating.
If you are towing a trailer that weighs more than
1,000 lbs. (450 kg), you may prefer to drive in
THIRD
(3) instead of AUTOMATIC OVERDRIVE (D)
(or, as you need to, a lower gear). This will minimize
heat build-up and extend the life
of your transaxle.
Parking on Hills
You really should not park your vehicle, with a trailer
attached, on a hill. If something goes wrong, your rig
could start to move. People can be injured, and both
your vehicle and the trailer can be damaged.
But if you ever have to park your rig on a hill, here’s
how to do it:
1. Apply your regular brakes, but don’t shift into
PARK (P) yet.
2. Have someone place chocks under the trailer wheels.
3. When the wheel chocks are in place, release the
regular brakes until the chocks absorb the load.
4. Reapply the regular brakes. Then apply your parking
brake, and then shift to PARK (P).
5. Release the regular brakes.
4-40
ProCarManuals.com
Page 294 of 474
When You Are Ready to Leave After
Parking
on a Hill
1. Apply your regular brakes and hold the pedal down
while you:
Start your engine;
@ Shift into a gear; and
Release the parking brake.
2. Let up on the brake pedal.
3. Drive slowly until thc .ailer
is clear of the chocks.
4. Stop and have son --- pick up and store the chocks.
’
Maintenance When Trailer Towing
Your vehicle will need service more often when you’re
pulling a trailer. See the Maintenance Schedule for more
on this. Things that are especially important in trailer
operation are automatic transaxle fluid (don’t overfill),
engine oil, belts, cooling system and brake adjustment.
Each
of these is covered in this manual, and the Index
will help you find them quickly. If you’re trailering, it’s
a good idea to review these sections before
you start
your trip.
Check periodically to see that all hitch nuts and bolts
are tight.
ProCarManuals.com
Page 310 of 474
Engine Overheating
You will find a coolant temperature gage on your
vehicle’s instrument panel.
See “Engine Coolant
Temperature Gage” in the Index.
You also have a low
coolant level light on your instrument panel. See “Low
Coolant Light’’ in the Index.
Overheated Engine Protection
Operating
Mode
Should an overheated engine condition exist, an
overheat protection mode which alternates firing groups
of three cylinders helps prevent engine damage. In this
mode, you will notice a significant loss in power and
engine performance. The low coolant light may come
on
and the temperature gage will indicate an overheat
condition exists. This emergency operating mode allows
your vehicle to be driven to a safe place in an
emergency. Towing
a trailer in the overheat protection
mode should be avoided.
NOTICE:
I
After driving in the overheated engine protection
operating mode, to avoid engine damage, allow
the engine to cool before attempting any repair.
The engine oil will be severely degraded. Repair
the cause of coolant loss and change the
oil. See
“Engine Oil, When
to Change” in the Index.
5-13
ProCarManuals.com
Page 312 of 474
If No Steam Is Coming From Your Engine
If you get the overheat warning but see or hear no
steam, the problem may not be
too serious. Sometimes
the engine can get a little too hot when you:
0 Climb a long hill on a hot day.
0 Stop after high-speed driving.
0 Idle for long periods in traffic.
0 Tow a trailer.
If you get the overheat warning with no sign of steam,
try this for a minute or
so:
1. Turn off your air conditioner.
2. Turn on your heater to full hot at the highest fan
speed and open the window as necessary.
3. If you’re in a traffic jam, shift to NEUTRAL (N);
otherwise, shift to the highest gear while
driving
-- AUTOMATIC OVERDRIVE (D)
or THIRD
(3).
If you no longer have the overheat warning, you
can drive. Just to
be safe, drive slower for about
10 minutes. If the warning doesn’t come back on,
you can drive normally.
If the warning continues, pull over, stop, and
park your
vehicle right away.
If there’s still no sign of steam, you can idle the engine
for two or three minutes while you’re parked, to see if
the warning stops. But then, if you still have the
warning,
turn ofthe engine and get everyone out of the
vehicle
until it cools down. Also, see “Overheated
Engine Protection Operating Mode” listed previously in
this section.
You may decide not to lift the hood but to get service
help right away.
5-15
ProCarManuals.com
Page 349 of 474
As shown in the chart, SAE 5W-30 is best for your
vehicle. However, you can use
SAE 1OW-30 if it's going
to be
0" F (- 18 " C) or above. These numbers on an oil
container show its viscosity, or thickness. Do not use
other viscosity oils, such as
SAE 20W-50.
NOTICE:
Use only engine oil with the American Petroleum
Institute Certified For Gasoline Engines
"Starburst" symbol. Failure to use the
recommended oil can result in engine damage not
covered by your warranty.
GM Goodwrench@ oil meets all the requirements for
your vehicle.
If you are in an area where the temperature falls below
-20°F (-29"C), consider using either an
SAE 5W-30
synthetic oil or an
SAE OW-30 oil. Both will provide
easier cold starting and better protection for your engine
at extremely low temperatures.
Engine Oil Additives
Don't add anything to your oil. Your dealer is ready to
advise
if you think something should be added.
When to Change Engine Oil
If any one of these is true for you, use the short tripkity
maintenance schedule:
0
0
0
0
0
Most trips are less than 5 to 10 miles (8 to 16 km).
This is particularly important when outside
temperatures are below freezing.
Most trips include extensive idling (such as frequent
driving in stop-and-go traffic).
Most trips are through dusty areas.
You frequently tow
a trailer or use a carrier on top of
your vehicle.
The vehicle is used for delivery service, police, taxi
or other commercial application.
Driving under these conditions causes engine oil to
break down sooner.
If any one of these is true for your
vehicle, then you need to change your oil and filter every
3,000 miles (5 000 km) or 3 months -- whichever
occurs fust
.
6-14
ProCarManuals.com
Page 353 of 474
Automatic Transaxle Fluid
When to Check and Change
A good time to check your automatic transaxle fluid
level is when the engine oil is changed.
Change both the fluid and filter every
50,000 miles
(83 000 km) if the vehicle is mainly driven under one
or more of these conditions:
In heavy city traffic where the outside temperature
In hilly or mountainous terrain.
When doing frequent trailer towing.
Uses such as found in taxi, police or delivery service.
regularly reaches
90°F (32 O C) or higher.
If you do
not use your vehicle under any of these
conditions, the fluid and filter do not require changing.
See “Scheduled Maintenance Services’’ in the Index.
How to Check
Because this operation can be a little difficult, you may
choose to have this done at
your Chevrolet dealership
Service Department.
If you do it yourself, be sure to follow all the
instructions here, or you could get a false reading
on the dipstick.
NOTICE:
Too much or too little fluid can damage your
transaxle.
Too much can mean that some of the
fluid could come out and fall on hot engine parts
or exhaust system parts, starting a fire. Be sure to
get an accurate reading if you check your
transaxle fluid.
6-18
ProCarManuals.com
Page 354 of 474
Wait at least 30 minutes before checking the transaxle
fluid level if you have been driving:
When outside temperatures are above 90°F (32°C).
At high speed for quite a while.
In heavy traffic -- especially in hot weather.
While pulling a trailer.
To get the right reading, the fluid should be at normal
operating temperature, which is
180°F to 200°F
(82°C to 93°C).
Get the vehicle warmed up by driving about 15 miles
(24
km) when outside temperatures are above
50°F (10°C). If it's colder than 50°F ( lO"C), you
may have to drive longer.
Checking the Fluid Level
Park your vehicle on a level place. Keep the
engine running.
With the parking brake applied, place the shift lever
in PARK (P).
With your foot on the brake pedal, move the shift
lever through each gear range, pausing for about
three seconds in each range. Then, position the shift lever in PARK
(P).
Let the engine run at idle for three to five minutes.
Then, without shutting
off the engine, follow
these steps:
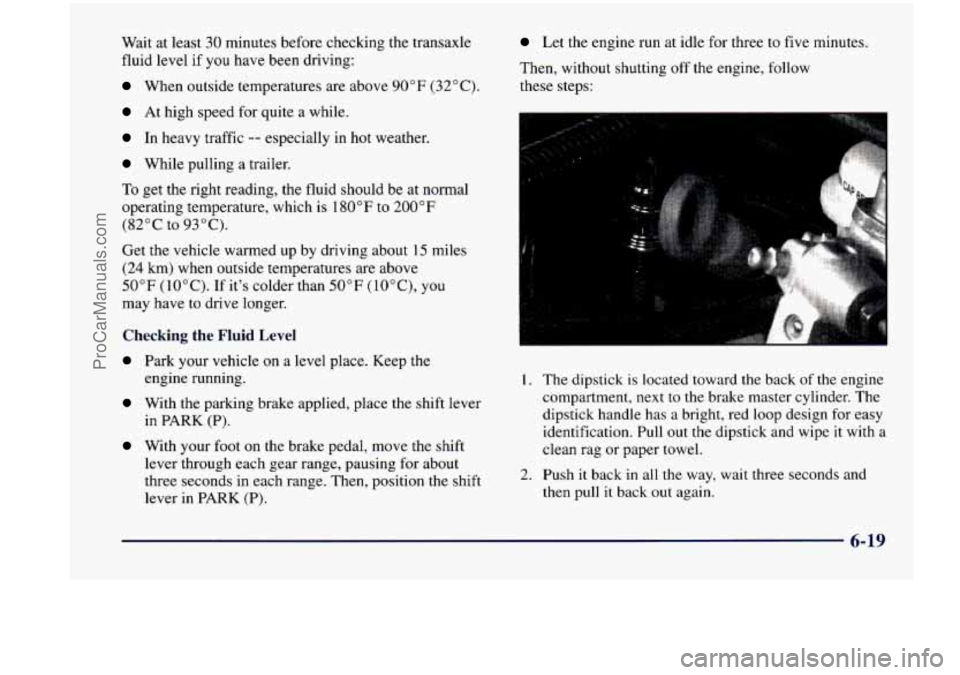
1. The dipstick is located toward the back of the engine
compartment, next to the brake master cylinder. The
dipstick handle has a bright, red loop design for easy
identification. Pull out the dipstick and wipe it with a
clean rag or paper towel.
2. Push it back in all the way, wait three seconds and then pull it back out again.
6-19
ProCarManuals.com
Page 395 of 474

Fuses
RR HVAC
SWC ACCY
HAZARD
RR PWR SCKT
DRL
LH TLP
RR DEFOG
FRT PWR SCKT
SIR
FRT HVAC
LOWMED BLWR
MALL/RADIO/DIC Rear Blower Motor,
Rear
Heater-NC
Control,
and Temperature Door
Actuator (Rear)
Steering Wheel Radio
Control Switches
Turn Signal Switch
Rear Electric Accessory
Plug Housing
DRL Control Module
Not Used
Rear Window Defogger Relay
Front Electric Accessory
Plug Housing
Inflatable Restraint
Control Module
Heater-A/C Control
BCM, Driver Information
Display, Radio
and Radio Rear
Speaker Amplifier
Fuses
STOP LAMP
ABS MOD BATT
CAN VENT
SOL
ELC
CTSY LAMP
IGN 1
SUNROOF
Stoplamp Switch to Stoplamps
Electronic Brake Control
ModuleElectronic Brake
Traction Control Module
(EBCMEBTCM)
Evaporative Emissions (EVAP)
Canister Vent Solonoid Valve
Electronic Level Control (ELC)
Air Compressor and ELC
Relay, Trailer Harness
BCM
ALC Sensor, BCM, Electronic
Brake Control Indicator Lamp
Driver Module, Instrument
Panel Cluster, Rear Window
Wipermasher and
Multifunction Switch (Fog Lamp SwitcWTraction Control Switch) and Stoplamp/Torque
Converter Clutch (TCC) Switch
Sunroof Control Module
6-60
ProCarManuals.com