1998 CHEVROLET VENTURE turn signal
[x] Cancel search: turn signalPage 13 of 474
Vehicle Symbols
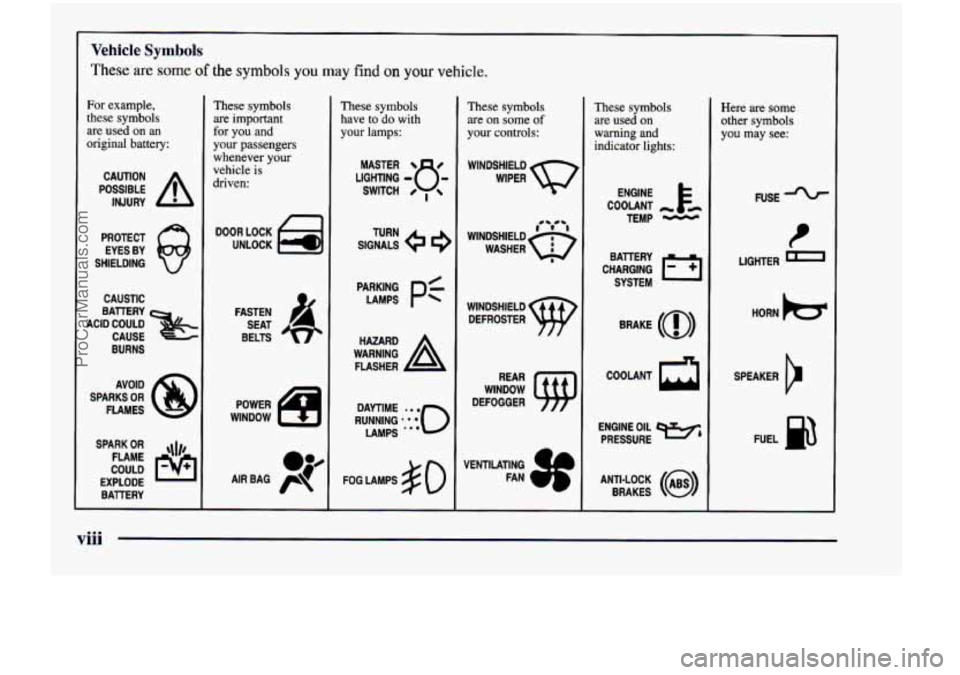
These are some of the symbols you may find on your vehicle.
For example,
these symbols
are used on an
original battery:
POSSIBLE A
CAUTION
INJURY
PROTECT EYES BY
SHIELDING
Q
CAUSTIC
BURNS AVOID
SPARKS
OR
FLAMES
SPARK
OR ,\I/,
COULD FLAME
EXPLODE BA'ITERY
These symbols
are important
for you and
your passengers
whenever your
vehicle is
driven:
DOOR LOCK
UNLOCK
FASTEN SEAT
BELTS
POWER
WlNDOW
These symbols
have to do with
your lamps:
SIGNALS e
TURN
FOG LAMPS
& 0
These symbols
are on some of
your controls:
WINDSHIELD WIPER
WINDSHIELD DEFROSTER
WINDOW
DEFOGGER
VENTILATING FAN
These symbols
are used on
warning and
indicator lights:
COOLANT -
TEMP -
CHARGING I-1
BAllERY
SYSTEM
BRAKE
(0)
COOLANT
a
ENGINE OIL e,
PRESSURE
ANTI-LOCK
(@)
BRAKES
Here are some
other symbols
you may see:
FUSE
LIGHTER m
HORN b
SPEAKER
cr
FUEL B
viii
ProCarManuals.com
Page 123 of 474
You can lock all doors and the liftgate from the inside
by pressing the rear
of the power lock switch on either
front door. If your vehicle is equipped with the Content
Theft-Deterrent system, the power door lock switch may
cause the system to
arm. See “Content Theft-Deterrent”
in the Index for more details.
To unlock any door or the liftgate from the outside with
your key,
turn the key to the unlock position and release.
This will only unlock that door or the liftgate. You can
unlock all the doors and the liftgate by holding the key
cylinder in the unlock position for one second.
With power door locks, you can lock all the doors from
the outside by inserting the key and turning the key
cylinder to the lock position.
With power locks, when the doors are locked, the inside
as well as the outside door handle cannot open the doors.
This safety feature prevents a door from being accidentally
opened from the inside by moving the handle.
To override this safety feature, move the locking lever to
the unlock position on the door you want to open.
When the liftgate has been unlocked with the power door
locks, you won’t need the key to open it. Simply squeeze
the handle above the license plate. This is also true if you
use the optional remote keyless entry transmitter. See “Keyless Entry System” later
in this section.
Automatic Door Locks
All of the doors will lock automatically when you move
your shift lever out of PARK
(P). All doors will unlock
automatically when the ignition is turned off while the
shift lever is
in PARK (P).
You can program the Automatic Door Locks to operate
with
the remote keyless entry system and to lock and
unlock automatically to suit your needs. See “Locks and
Lighting Choices” in the Index.
With the Automatic Door Locks feature, you can still
lock or unlock the doors at any time, either manually
or with the power door lock switches.
Last Door Closed Locking
The Last Door Closed Locking feature makes it easier to
use your power door locks to lock all the doors and the
liftgate when leaving your vehicle.
When any door or the liftgate
is open, the first time
you attempt
to lock the doors using the power lock
switch or the remote keyless entry transmitter
(if
equipped), will result in three chimes to signal that
Last Door Closed Locking is being used. All doors
and the liftgate can be opened for five seconds from
the time the last door is closed.
2-6
ProCarManuals.com
Page 170 of 474
Thrn SignaVMultifunction Lever Turn and Lane Change Signals
4
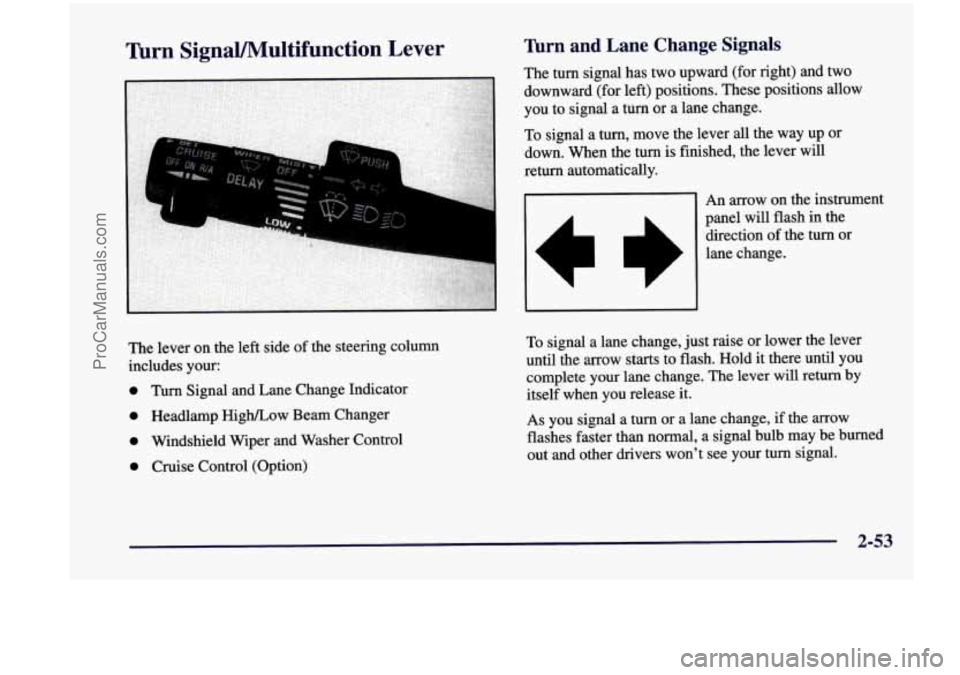
The lever on the left side of the steering column
includes your:
0 Turn Signal and Lane Change Indicator
0 Headlamp HighLow Beam Changer
0 Windshield Wiper and Washer Control
0 Cruise Control (Option)
To signal a lane change, just raise or lower the lever
until the arrow
starts to flash. Hold it there until you
complete
your lane change. The lever will return by
itself when you release it.
As you signal a turn or a lane change, if the arrow
flashes faster than normal, a signal bulb may be burned
out and other drivers won’t see your
turn signal.
2-53
ProCarManuals.com
Page 171 of 474

If a bulb is burned out, replace it to help avoid an
accident. If the arrows don’t go
on at all when you
signal a turn, check for burned-out bulbs and check the
fuse (see “Fuses and Circuit Breakers” in the Index).
If you have a trailer towing option with added wiring for
the trailer lamps, the signal indicator will flash at a
normal rate even if a turn signal bulb is burned out.
Check the front and rear turn signal lamps regularly to
make sure they are working.
Turn Signal on Chime
If either turn signal is left on for more than 3/4 mile
(1.2 km), a chime will sound to let the driver know to
turn it off.
If you need
to leave the signal on for more than 3/4 mile
(1.2 km), turn off the signal and then turn it back on.
Headlamp High/Low Beam Changer
To change the headlamps from high to low beam, or low
to high, simply pull the turn signal lever all the way
toward you. Then release it.
When the high beams
are on, this light on the
instrument cluster will
also be
on.
Windshield Wipers
You control the windshield wipers by turning the band
marked WIPER.
For a single wiping cycle, turn the band to MIST. Hold
it there until the wipers start, then let go. The wipers will
stop after one cycle. If you want more cycles, hold the
band
on mist longer.
2-54
ProCarManuals.com
Page 178 of 474

Daytime Running Lamps
Daytime Running Lamps (DRL) can make it easier
for others to see the front of your vehicle during the
day. DRL can be helpful in many different driving
conditions, but they can be especially helpful in the
short periods after dawn and before sunset.
A light sensor on top of the instrument panel makes the
DRL work,
so be sure it isn’t covered. The DRL system
will make front parking and turn signal lamps come on
in daylight when:
The ignition is on,
0 the headlamp switch is off and
0 the parking brake is released.
When the DRL are on, only your front parking and turn
signal lamps will be on. Your instrument panel won’t be
lit up.
When it’s dark enough outside, the exterior lamps will
come on automatically. When
it’s bright enough outside,
the exterior lamps will go out and the DRL will turn
on.
Of course, you may still turn on the headlamps any time
you need to.
To idle your vehicle with the DRL or exterior lamps
off, set the parking brake while the ignition is in
OFF
or LOCK. Then start the vehicle. The DRL will stay off
until you release the parking brake.
As with any vehicle, you should turn on the regular
headlamp system when
you need it.
Interior Lamps
Instrument Panel Intensity Control
Turn the control, located below the headlamps switch,
to the right to increase the brightness of the instrument
panel lights, and
to the left to decrease the brightness.
Turn the control all the way to the left to turn them
off.
Interior Lamps Control
Turn the dial all the way to the right to turn on the
interior lamps, if the interior lamps override switch is
off. Turn the dial to
the left to turn the lamps off.
2-61
ProCarManuals.com
Page 200 of 474

Your instrument panel is designed to let you know at a glance how your vehicle is running. You’ll know how fast
you’re going, how much fuel you’re using, and many other things you’ll need
to drive safely and economically.
Refer to the accompanying diagram
of your instrument panel to locate the components listed below.
A. Side Vents L. Ignition Switch
B. Front Vent
M. Climate Controls
C. Turn Signalhlultifunction Lever N. Rear Fan Controls (Option)
D. Hazard Warning Flashers Switch 0. Accessory Power Outlet
E. Instrument Cluster P. Storage Bin
E Center Vents Q. Remote CD Player (Option)
G. Audio System R. Instrument Panel Switchbank
H. Side Vents
S. LightedAshtray
I. Lamps Switch T. Glove Box
J. Hood Release U. Front Vents
K. Horn V. Fuse Panel
2-83
ProCarManuals.com
Page 203 of 474
Warning Lights, Gages
and Indicators
This part describes the warning lights and gages that
may be on your vehicle. The pictures will help you
locate them.
Warning lights and gages can signal that something is
wrong before it becomes serious enough to cause an
expensive repair or replacement. Paying attention to
your warning lights and gages could also save you or
others from injury.
Warning lights come on when there may be or is a
problem with one of your vehicle’s functions.
As you
will see in the details on the next few pages, some
warning lights come on briefly when you start
the
engine just to let you know they’re working. If you are
familiar with this section, you should not be alarmed
when
this happens.
Gages can indicate when there may be or
is a problem
with one
of your vehicle’s functions. Often gages and
warning lights work together
to let you know when
there’s a problem with your vehicle. When
one
of the warning lights comes on and stays on
when you are driving, or when one of the gages shows
there may be a problem, check the section that tells you
what to do about
it. Please follow this manual’s advice.
Waiting to do repairs can be costly
-- and even
dangerous.
So please get to know your warning lights
and gages. They’re a big help.
Safety Belt Reminder Light
When the key is turned to RUN or START, a chime will
come
on for about eight seconds to remind people to
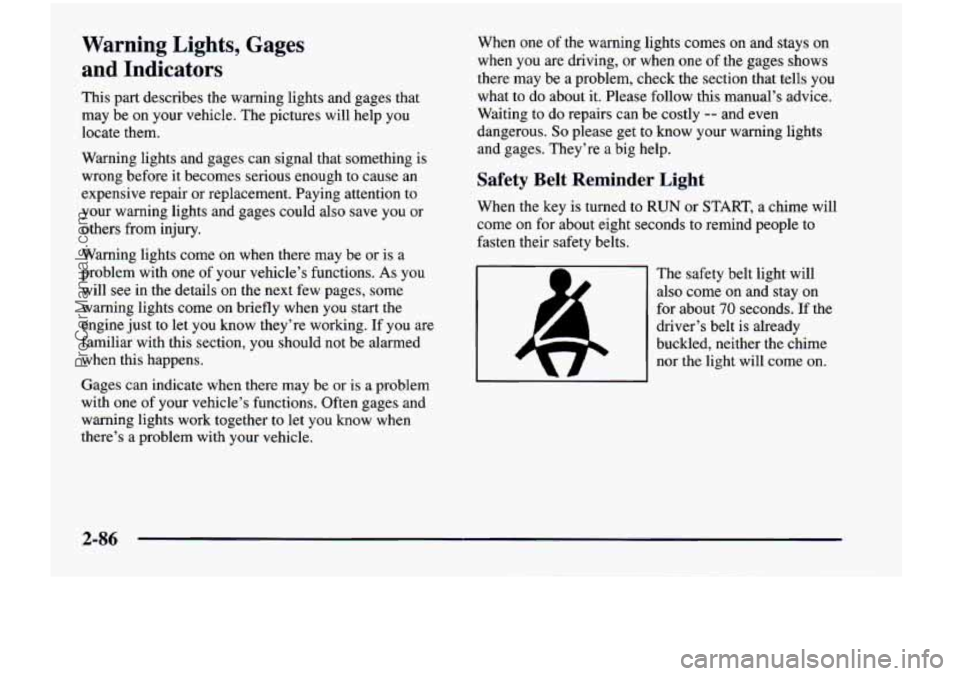
fasten their safety belts.
The safety belt light will
also come on and stay on
for about
70 seconds. If the
driver’s belt is already
buckled, neither the chime
nor the light will come on.
2-86
ProCarManuals.com
Page 250 of 474
If your vehicle is equipped with the AM-FM Stereo with
Cassette Tape Player and Automatic Tone Control:
1. Turn the ignition to RUN or ACCESSORY.
2. Turn the radio off.
3. Press and hold the TAPE AUX button for five
seconds. The tape symbol on the display will flash
for two seconds.
4. Insert the scrubbing action cleaning cassette.
5. Eject the cleaning cassette after the manufacturer’s
recommended cleaning time.
When the cleaning cassette has been ejected, the cut tape detection feature is active again.
You may also choose a non-scrubbing action, wet-type
cleaner which uses a cassette with a fabric belt to clean
the tape head. This type of cleaning cassette will not
eject on its own.
A non-scrubbing action cleaner may
not clean as thoroughly as the scrubbing type cleaner.
The use of
a non-scrubbing action, dry-type cleaning
cassette is not recommended. After you clean the player, press and hold EJECT
for
five seconds to reset the CLN indicator. The radio will
display
--- to show the indicator was reset.
Cassettes are subject to wear and the sound quality may degrade over time. Always make sure
the cassette
tape is
in good condition before you have your tape
player serviced.
Care of Your Compact Discs
Handle discs carefully. Store them in their original cases
or other protective cases and away from direct sunlight
and dust. If the surface of a disc is soiled, dampen a
clean, soft cloth
in a mild, neutral detergent solution and
clean
it, wiping from the center to the edge.
Be sure never to touch the signal surface when handling
discs. Pick up discs by grasping the outer edges or the
edge of the hole and the outer edge.
3-31
ProCarManuals.com