1998 CHEVROLET VENTURE remote control
[x] Cancel search: remote controlPage 129 of 474
5. Check the transmitter operation. If needed, follow
the instructions on resynchronizing your remote
transmitter.
Resynchronizing Your Remote Transmitter
Your remote keyless entry system uses a continually
changing code for increased security. Normally, the
receiver in your vehicle will keep track of this
changing code.
Loss of synchronization will occur if the transmitter
is activated more than
256 times while out of range
of the vehicle.
Loss of synchronization will occur after the battery
replacement if the transmitter is immediately activated
more than
16 times while out of range of the vehicle.
If your remote keyless entry transmitter has stopped
working,
you may need to resynchronize the transmitter
to the vehicle receiver. To do this, press the
LOCK and
UNLOCK buttons together and hold for at least seven
seconds or until the horn sounds if equipped with Content
Theft-Deterrent. Check the transmitter operation.
Switchbanks
There are two sets of switchbanks located in the front
of the vehicle. The switches will vary with the options that are
on your vehicle. It is useful to become familiar
with them since they are used frequently while
operating the vehicle.
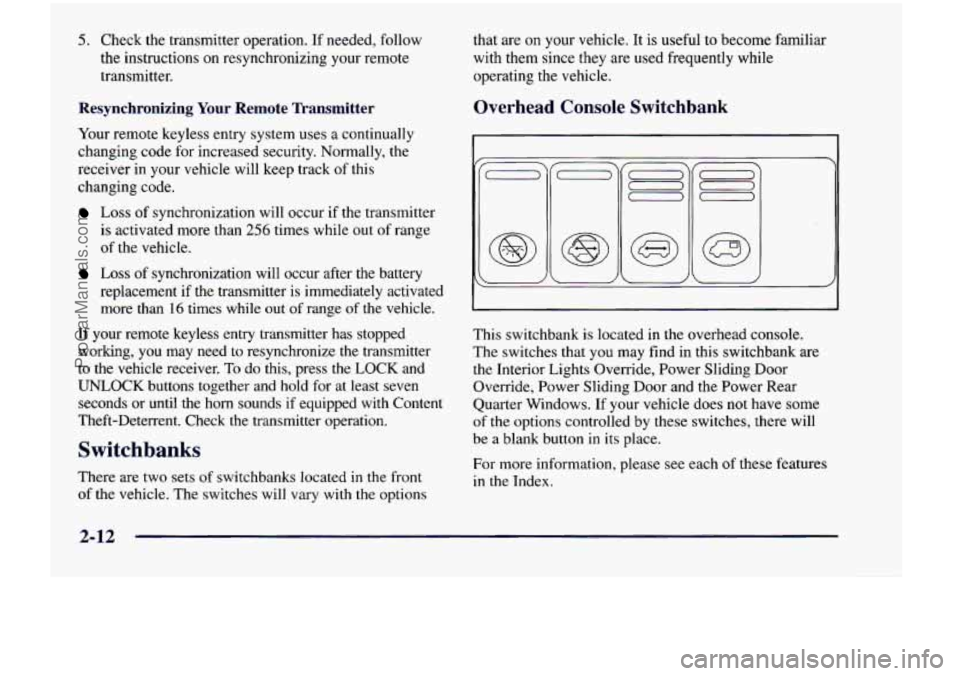
Overhead Console Switchbank
This switchbank is located in the overhead console.
The switches that
you may find in this switchbank are
the Interior Lights Override, Power Sliding Door
Override, Power Sliding Door and the Power Rear
Quarter Windows. If your vehicle does
not have some
of
the options controlled by these switches, there will
be a blank button in its place.
For more information, please see each
of these features
in the Index.
ProCarManuals.com
Page 157 of 474
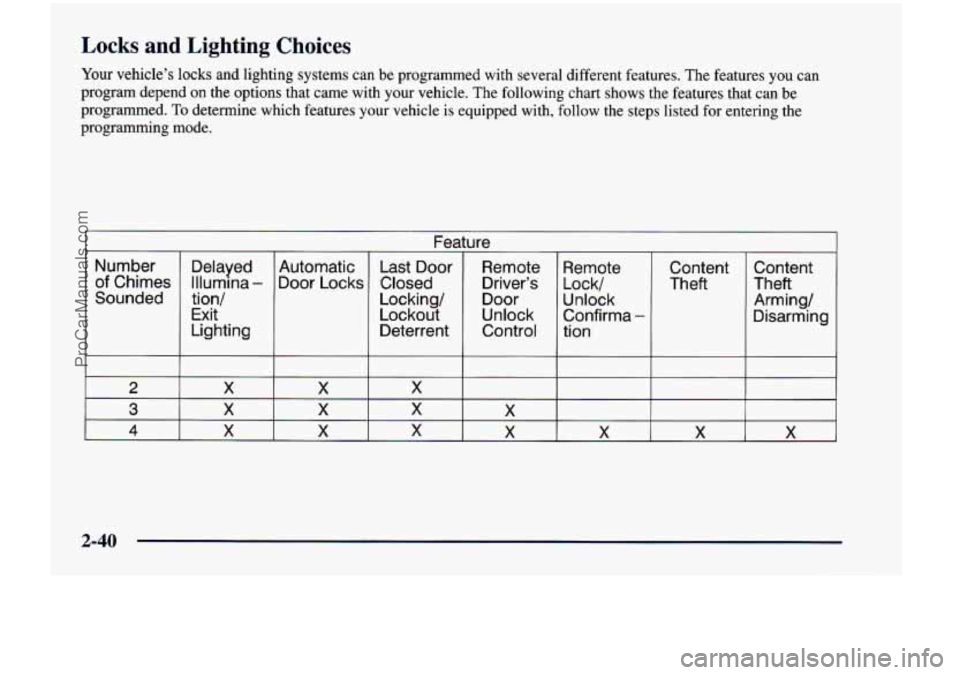
Locks and Lighting Choices
Your vehicle’s locks and lighting systems can be programmed \
with several different features. The features you can
program depend
on the options that came with your vehicle. The following chart shows \
the features that can be
programmed. To determine which features your vehicle is equipped with, follow the steps listed for entering the
programming mode.
Number
of Chimes
Sounded
2
3
4
Delayed
Illurnma
-
tion/
Exit
Lighting Automatic
Door Locks
X
Fea ~
Last Door
Closed
Locking/
Lockout
Deterrent
X
X
X
Are ~-
Remote
Driver’s
Door
Unlock
Control
X
X X X X
1
Remote
Confirma
-
Arming/ Unlock Theft
Theft
Lock/ Content Content
tion Disarming
2-40
ProCarManuals.com
Page 161 of 474
Programmable Modes 2. Press UNLOCK on the power door lock switch.
Your vehicle can be programmed to one
of the
following modes.
Mode 1: Both Features Off (Doors will always lock
immediately when you press LOCK on the the power
door lock switch or the remote keyless entry transmitter,
if equipped.)
Mode 2: Lockout Deterrent Only (If you leave your key
in the ignition with the driver’s door open, you won’t be
able to lock the doors with the power door locks).
Mode 3: Last Door Closed Locking Only (If the power
door lock switch or remote keyless entry transmitter
(if
equipped) is used to lock the vehicle while any door or
the liftgate is open, you will hear three chimes. The
doors will not lock. Five seconds after the last door is
closed, all doors and liftgate will lock.)
Mode 4: Both Features On (This combines Modes 2
and 3.)
Vehicles are delivered programmed in Mode 4.
To change the mode:
1. Follow the instructions for “Entering Programming
Mode” listed previously.
3. Count the number of chimes you hear. The
number of chimes tells you which mode your
vehicle is in.
You can change the mode by pressing
UNLOCK again.
4. Repeat Step 2 until you hear the number of chimes
that matches the mode you want.
The mode you selected
is now set. You can either exit
the programming mode by following the instructions
later in this section or program the next feature available
on your vehicle.
Remote Driver’s Unlock Control
With the Remote Driver’s Unlock Control feature, you
can program your vehicle to do
the following:
0 When you press UNLOCK on your remote keyless
entry transmitter, the driver’s door will unlock and,
When you press UNLOCK on your remote keyless
entry transmitter again within five seconds, all doors
and the liftgate will unlock.
To customize this feature to your preference, see
“Programmable Modes” following.
2-44
ProCarManuals.com
Page 179 of 474
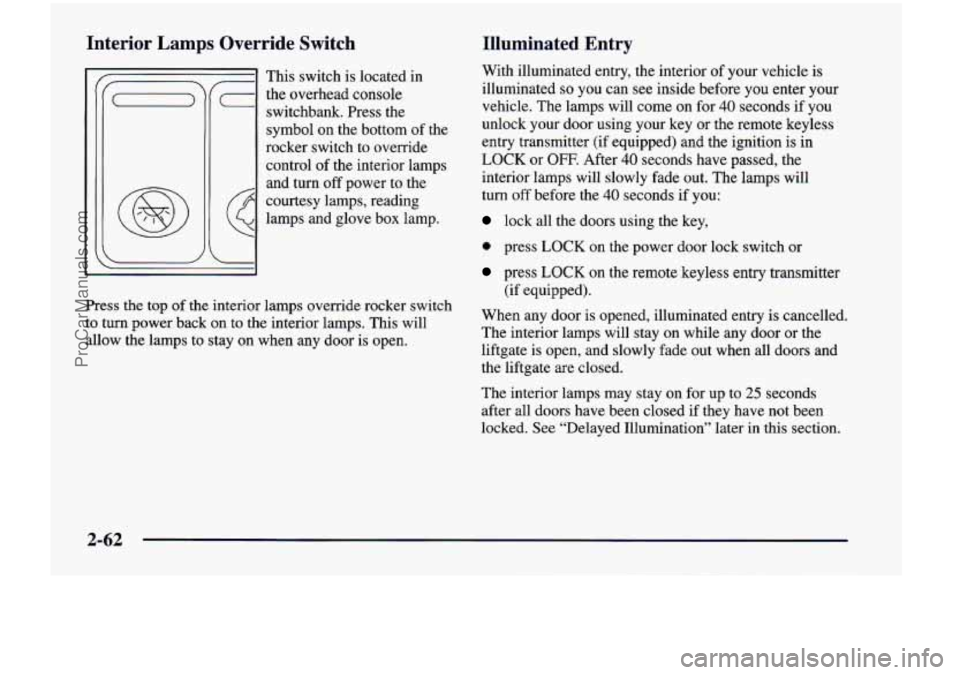
Interior Lamps Override Switch
This switch is located in
(- the overhead console
switchbank. Press
the
symbol on the bottom of the
rocker switch to override
control of the interior lamps
and turn off power to the
courtesy lamps, reading
lamps and glove box lamp.
G
Press the top of the interior lamps override rocker switch
to
turn power back on to the interior lamps. This will
allow the lamps to stay on when any door is open.
Illuminated Entry
With illuminated entry, the interior of your vehicle is
illuminated
so you can see inside before you enter your
vehicle. The lamps will come on for
40 seconds if you
unlock your door using your key or the remote keyless
entry transmitter (if equipped) and the ignition is in
LOCK or OFF. After 40 seconds have passed, the
interior lamps will slowly fade out. The lamps will
turn off before the 40 seconds if you:
lock all the doors using the key,
0 press LOCK on the power door lock switch or
press LOCK on the remote keyless entry transmitter
(if equipped).
When any door is opened, illuminated entry is cancelled.
The interior lamps will stay on while any door or the
liftgate is open, and slowly fade out when all doors and
the liftgate are closed.
The interior lamps may stay on for up to
25 seconds
after all doors have been closed if they have not been
locked. See “Delayed Illumination” later in this section.
2-62
ProCarManuals.com
Page 182 of 474
Battery Saver
Your vehicle has a feature to help prevent you from
draining the battery, in case you accidentally leave the
interior or underhood lamps
on. If you leave any of
these lamps on while the ignition is
in LOCK or OFF,
they will automatically turn off after 10 minutes. The
lamps won’t come back on again until you:
turn the ignition to RUN or ACCESSORY,
turn the interior lamps dial all the way to the right,
open (or close and reopen) a door that is closed.
Note that if your vehicle has less than 15 miles
(25 km)
on the odometer, the battery saver will turn off the lamps
after only three minutes. then
slightly back to the left; or
Mirrors
Inside Daymight Rearview Mirror
To reduce glare from lights behind you, pull the lever
toward you (to the night position). To return the mirror
to the day position, push the lever away from you.
Power Remote Control Mirrors
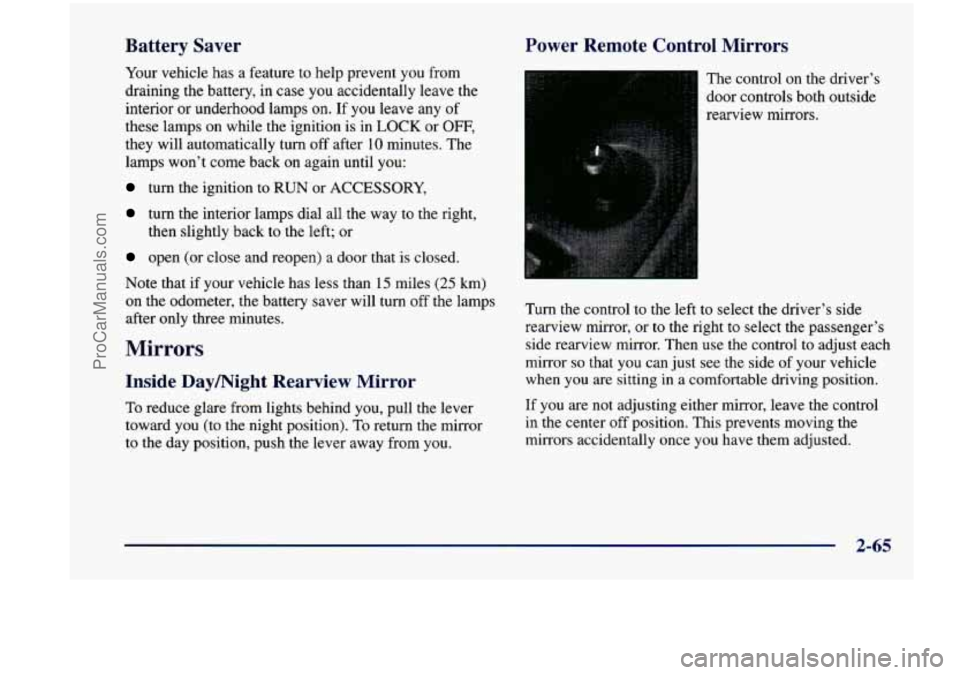
The control on the driver’s
door controls both outside
rearview mirrors.
Turn the control to the left to select the driver’s side
rearview mirror,
or to the right to select the passenger’s
side rearview mirror. Then
use the control to adjust each
mirror
so that you can just see the side of your vehicle
when you
are sitting in a comfortable driving position.
If you are not adjusting either mirror, leave the control
in the center off position. This prevents moving the
mirrors accidentally once you have them adjusted.
2-65
ProCarManuals.com
Page 200 of 474

Your instrument panel is designed to let you know at a glance how your vehicle is running. You’ll know how fast
you’re going, how much fuel you’re using, and many other things you’ll need
to drive safely and economically.
Refer to the accompanying diagram
of your instrument panel to locate the components listed below.
A. Side Vents L. Ignition Switch
B. Front Vent
M. Climate Controls
C. Turn Signalhlultifunction Lever N. Rear Fan Controls (Option)
D. Hazard Warning Flashers Switch 0. Accessory Power Outlet
E. Instrument Cluster P. Storage Bin
E Center Vents Q. Remote CD Player (Option)
G. Audio System R. Instrument Panel Switchbank
H. Side Vents
S. LightedAshtray
I. Lamps Switch T. Glove Box
J. Hood Release U. Front Vents
K. Horn V. Fuse Panel
2-83
ProCarManuals.com
Page 220 of 474
0 Section 3 Comfort Controls and Audio Systems
In this section, you’ll find out how to operate the comfort control and audio systems offered with your vehicle. Be
sure to read about the particular systems supplied with your vehicle.
3-2 3-3
3-4
3-4
3-5
3-6
3-8
3-9
3-9 3- 10 3-12 Comfort
Controls
Air Conditioning
Heating Defogging and Defrosting
Rear Window Defogger (If Equipped)
Rear Climate Control (If Equipped)
Ventilation System
Setting the Clock for Systems without
Automatic Tone Control
Setting the Clock for Systems with Automatic
Tone Control
AM-FM Stereo
AM-FM Stereo with Cassette Tape Player
(If Equipped) 3-15
3- 19 3-23 3-25
3
-26
3-29
3-39
3-30
3-3 1
3-32
3-32
AM-FM Stereo with Cassette Tape Player and
Automatic Tone Control (If Equipped)
AM-FM Stereo with Compact Disc Player and
Automatic Tone Control
(If Equipped)
Rear Seat Audio
(If Equipped)
Remote Compact Disc Player (If Equipped)
Theft-Deterrent Feature
(If Equipped)
Understanding Radio Reception
Tips About Your Audio System
Care of Your Cassette Tape Player
Care
of Your Compact Discs
Care
of Your Compact Disc Player
Integrated Windshield Antenna
3-1
ProCarManuals.com
Page 242 of 474
AM-FM: Press this button to play the radio when a disc
is in the player. The letters CD will go off the display.
CD AUX: Press this button to change to the disc
function when the radio is on.
A CD icon will appear on
the display when the disc is in the player, whether
it is
active or not. If your system is equipped with a remote
playback device, pressing this button a second
time will
allow the remote device to play.
EJECT Press this button to remove the disc. The radio
will play. The disc will start at the first track when you
reinsert it.
If
you turn off the ignition or radio with a disc in the
player, it will stay in the player. When you turn on the
ignition or system, the disc will start playing where
it
was stopped. If you press EJECT but don’t remove
the disc, the player will pull the disc back in to protect
it
after about one minute. If you leave a compact disc
in the player while listening to the radio,
it may
become warm.
Rear Seat Audio (If Equipped)
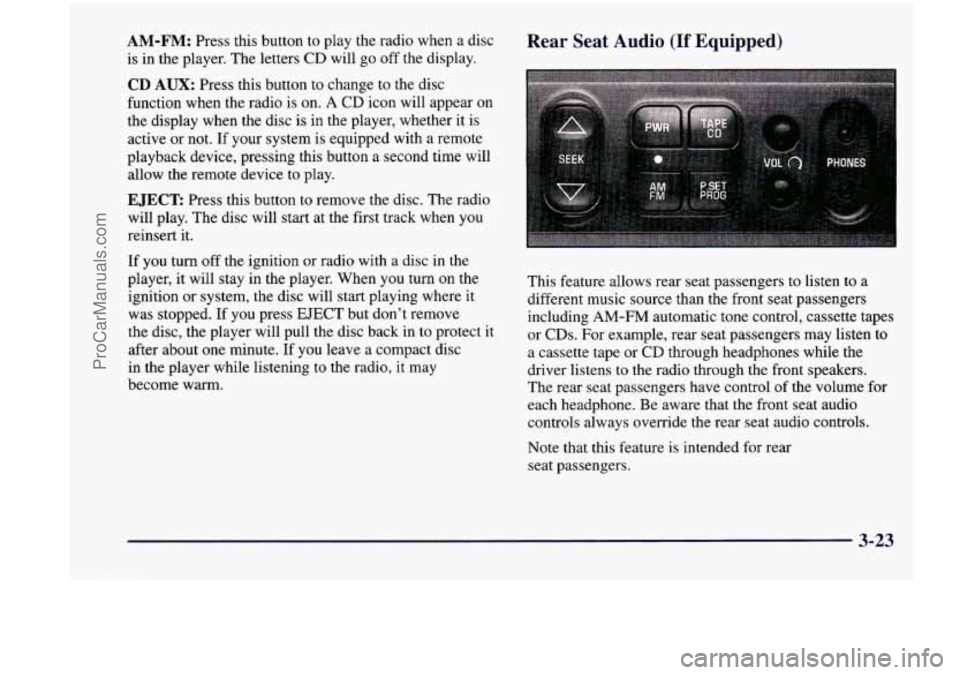
This feature allows rear seat passengers to listen to a
different music source than the front seat passengers
including AM-FM automatic tone control, cassette tapes
or CDs. For example, rear seat passengers may listen to
a cassette tape or CD through headphones while the
driver listens
to the radio through the front speakers.
The rear seat passengers have control of the volume for
each headphone. Be aware that the front seat audio
controls always override the rear seat audio controls.
Note that this feature is intended for rear
seat passengers.
3-23
ProCarManuals.com