1998 CHEVROLET VENTURE remove seats
[x] Cancel search: remove seatsPage 19 of 474
Manual Lumbar Control
Turn the knob on the
inboard side
of the
seat to adjust the lower
back support.
Head Restraints
Head restraints are fixed on some models and adjustable
on
others. Slide an adjustable head restraint up or down
so that the top of the restraint is closest to the top of
your ears. This position reduces the chance of a neck
injury in a crash.
Rear Seats
Seat Controls
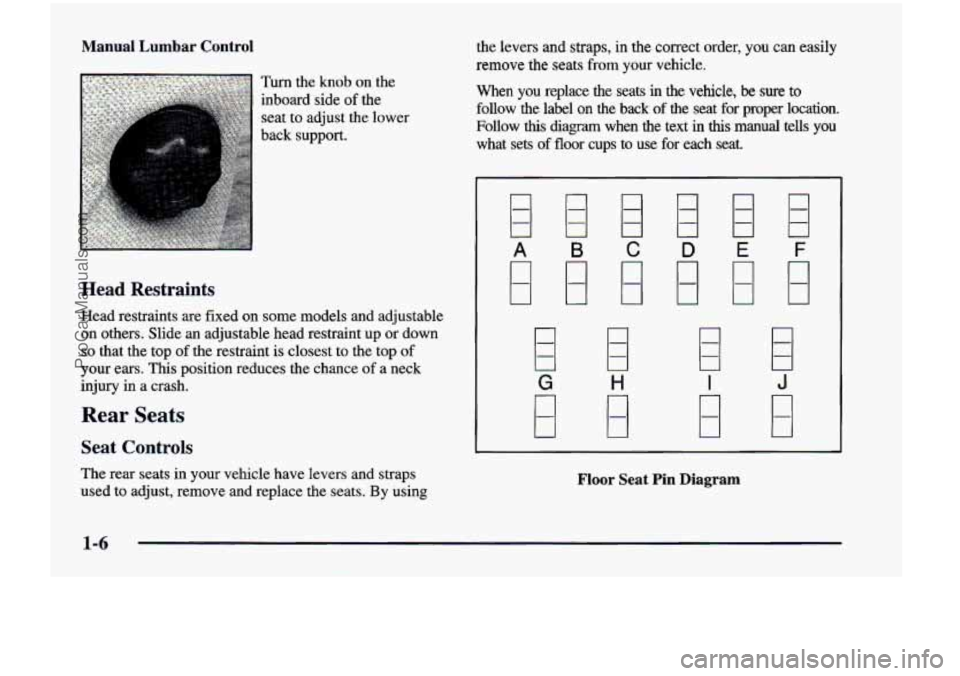
The rear seats in your vehicle have levers and straps
used to adjust, remove
and replace the seats. By using the levers and straps,
in the correct order,
you can easily
remove the seats
from your vehicle.
When you replace the seats
in the vehicle, be sure to
follow the label on the back of the seat for proper location.
Follow
this diagram when the text in this manual tells you
what sets of floor cups to use
for each seat.
00
A B
0
G
FI
D
1 I
H
F
J
B
I
U
Floor Seat Pin Diagram
1-6
ProCarManuals.com
Page 20 of 474
Second Row Safety Belt Stowage Dump and Stow Feature
If your vehicle has seats in the third row, there is a
sleeve
on the second row outside safety belt to store the
safety belt while entering and exiting the third
row seats.
If your vehicle has bucket seats in the second row,
follow this procedure:
To store the safety belt, pull the belt out and slide the
moveable sleeve along the belt until it reaches the
patch of Velcro@ on the roof.
Simply press the sleeve against the Velcro patch to
Do not have the second row outside safety belt stored if
someone is sitting in the second row outside position.
To release the second row outside safety belt, pull the
sleeve away from the Velcro patch and
use the safety
belt
as usual. The sleeve should slide freely when not
in use. secure it in place.
There is
also a clip on the safety belt used to secure the
belt after
it is disconnected from the mini-buckle. When
removing
the second row bench seat, secure the loose end
of the safety belt
in this clip. This will keep the safety belt
fi-om dangling and possibly striking something. The
rear seats in
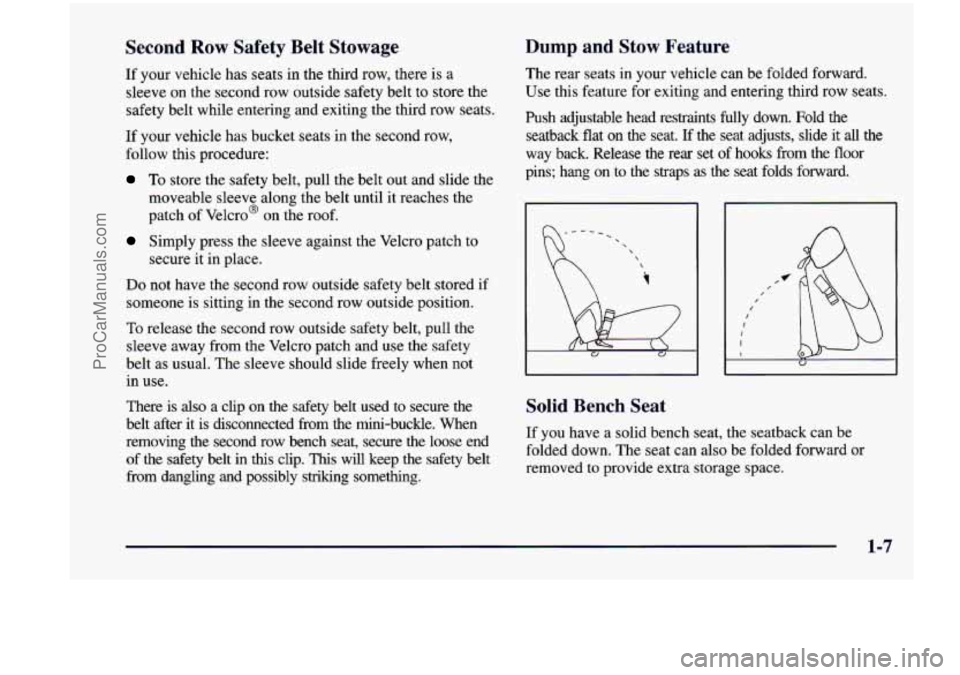
your vehicle can be folded forward.
Use this feature for exiting and entering third row seats.
Push adjustable head restraints fully
down. Fold the
seatback flat on the seat.
If the seat adjusts, slide it all the
way back. Release
the rear set of hooks from the floor
pins; hang on to the straps as the seat folds forward.
I I I I I
Solid Bench Seat
If you have a solid bench seat, the seatback can be
folded down. The seat can also be folded forward or
removed
to provide extra storage space.
1-7
ProCarManuals.com
Page 31 of 474
1 Split Bench Seats
A seat that isn’t locked into place properly can
move around in
a collision or sudden stop. People
in the vehicle could be injured. Be sure to lock
the
seat into place properly when installing it.
7. Pull the nylon strap on the back of the seat and raise
the seatback until it locks upright.
8. Push and pull on the seatback to check that it is
locked into place.
If the seatback isn’t locked, it could move
forward in
a sudden stop or crash. That could
cause injury to the person sitting there. Always
press rearward
on the seatback to be sure it
is locked.
I I
If you have the split bench seat (50/50 or 40/60), the
seatbacks can be folded down individually and the
sections can be removed individually.
The sections can
also be adjusted forward or rearward individually.
The second row
(40/60) split bench may be equipped
with built-in child restraint@). See “Built-In Child
Restraint” in the Index.
Folding
or Reclining the Seatbacks
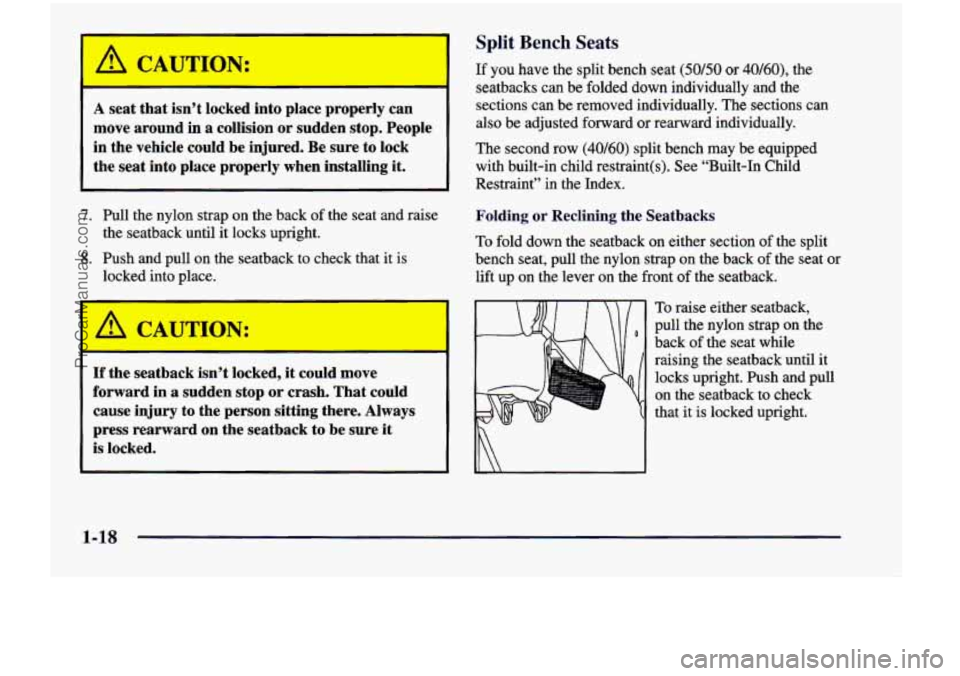
To fold down the seatback on either section of the split
bench seat, pull the nylon strap
on the back of the seat or
lift up on the lever on the front
of the seatback.
To raise either seatback,
pull the nylon strap on the
back
of the seat while
raising the seatback until it
locks upright. Push and pull
on the seatback to check
that it is locked upright.
1-18
ProCarManuals.com
Page 39 of 474
Bucket Seats
There are three types of rear bucket seats: RIGHT
ONLY, CENTER OR LEFT and LEFT ONLY.
RIGHT ONLY and LEFT ONLY seats may be equipped
with the built-in child restraint option.
The rear bucket seats can be removed to provide extra
storage. Each seat that has the built-in child restraint
option fits in only one location
in your vehicle, but seats
that don't have the built-in child restraint option can be
moved to different rows.
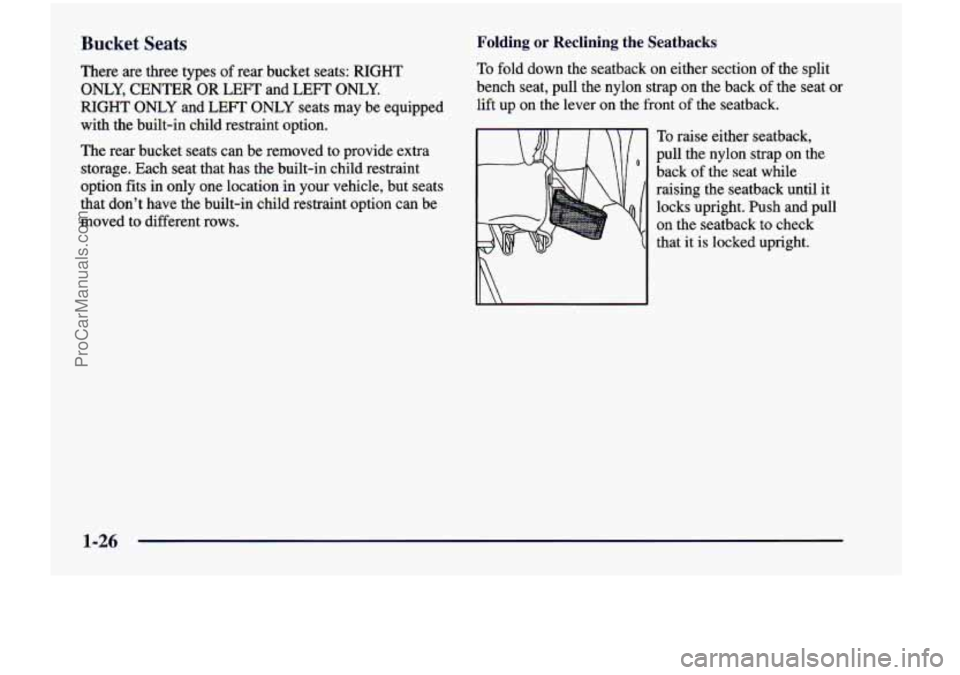
Folding or Reclining the Seatbacks
To fold down the seatback on either section of the split
bench seat, pull the nylon strap
on the back of the seat or
lift up on the lever on the front of the seatback.
To raise either seatback,
pull the nylon strap
on the
back
of the seat while
raising the seatback until
it
locks upright. Push and pull
on the seatback to check
that
it is locked upright.
1-26
ProCarManuals.com
Page 43 of 474
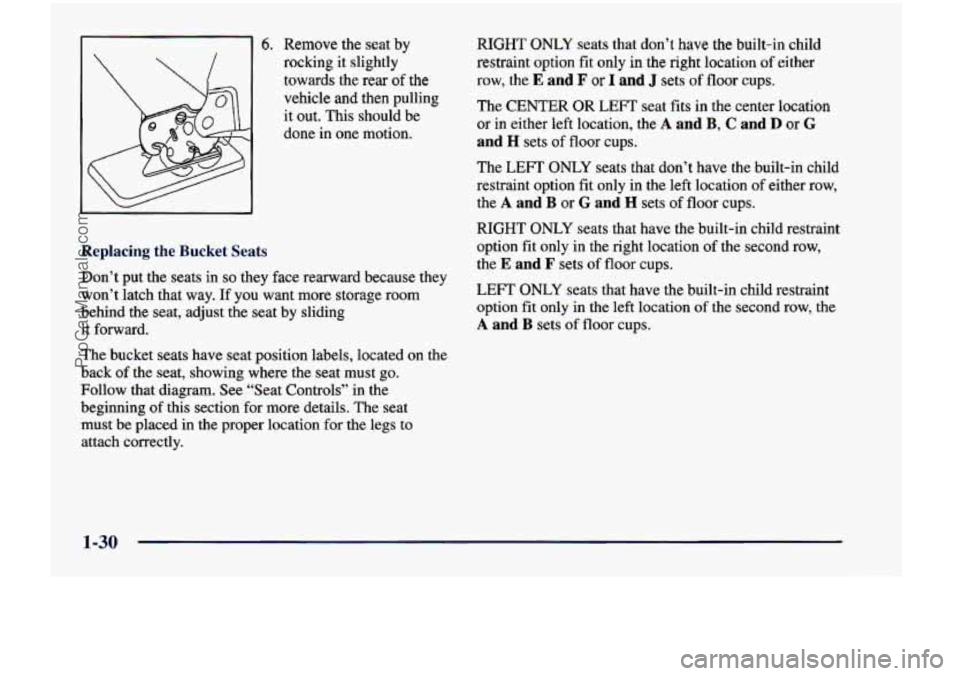
6. Remove the seat by
rocking it slightly
towards the rear
of the
vehicle and then pulling
it out. This should be
done
in one motion.
Replacing the Bucket Seats
Don’t put the seats in so they face rearward because they
won’t latch that way.
If you want more storage room
behind the seat, adjust the seat by sliding
it forward.
The bucket seats have seat position labels, located on the
back
of the seat, showing where the seat must go.
Follow that diagram. See “Seat Controls” in the
beginning
of this section for more details. The seat
must be placed in the proper location for
the legs to
attach correctly. RIGHT
ONLY seats that don’t have the built-in child
restraint option
fit only in the right location of either
row, the
E and F or I and J sets of floor cups.
The
CENTER OR LEFT seat fits in the center location
or in either left location, the A and B, C and D or G
and H sets of floor cups.
The
LEFT ONLY seats that don’t have the built-in child
restraint option fit only in the left location
of either row,
the
A and B or G and H sets of floor cups.
RIGHT ONLY seats that have the built-in child restraint
option
fit only in the right location of the second row,
the
E and F sets of floor cups.
LEFT ONLY seats that have the built-in child restraint
option fit only in the left location
of the second row, the
A and B sets of floor cups.
1-30
ProCarManuals.com
Page 75 of 474
Rear Safety Belt Comfort Guides for Children and
Small Adults
Your vehicle may have rear shoulder belt comfort guides.
This feature will provide added safety belt comfort for
children who have outgrown child restraints and for small
adults. When installed
on a shoulder belt, the comfort
guide pulls the belt away from the neck and head.
If your vehicle has bucket seats in the second row, there
is one guide for each outside passenger position. If your
vehicle has a bench seat in the second row, there is one
guide for the left-hand outside passenger position. If
your vehicle has third-row seats, there
is one guide for
each outside passenger position.
To provide added safety
belt comfort for children who have outgrown child
restraints and for smaller adults, the comfort guides may
be installed on the shoulder belts. Here’s how
to install a
comfort guide and use the safety belt:
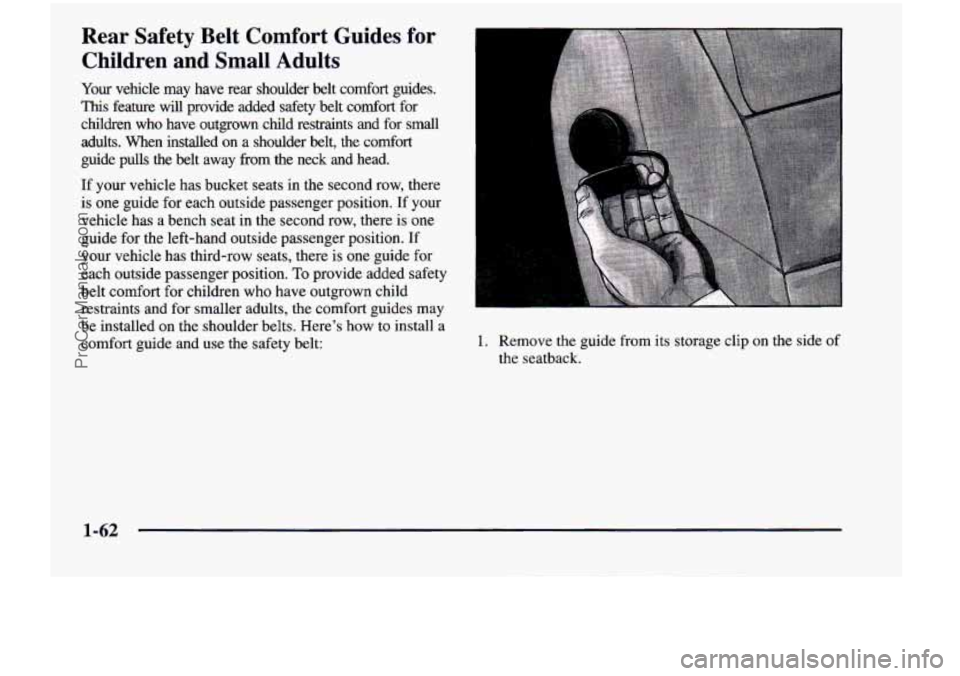
1. Remove the guide from its storage clip on the side of
the seatback.
1-62
ProCarManuals.com
Page 101 of 474
Top Strap
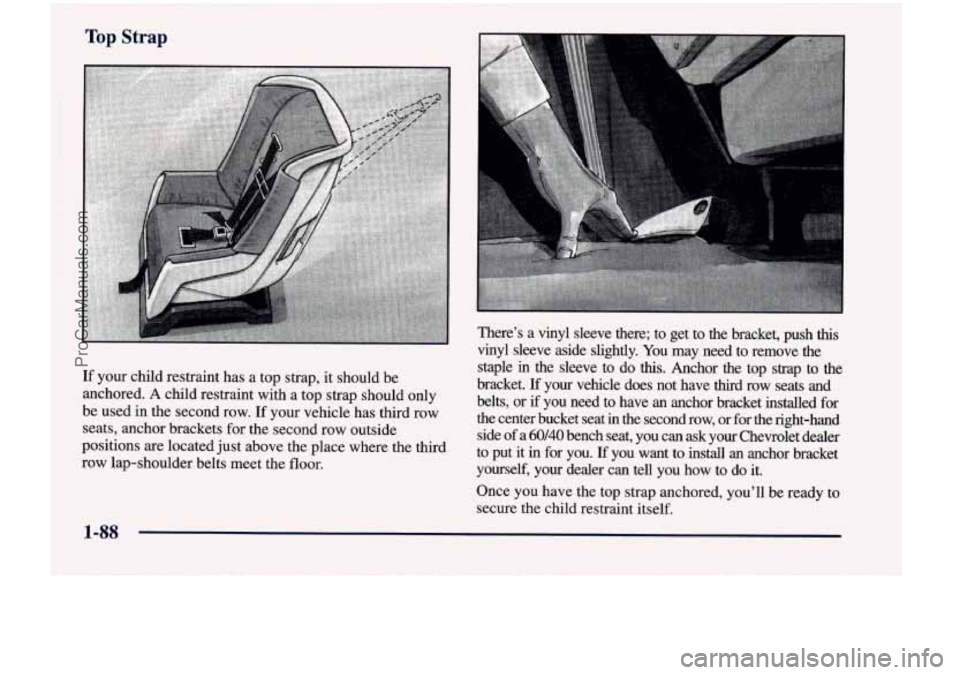
There's a vinyl sleeve there; to get to the bracket, push this
vinyl sleeve aside slightly. You may need to remove the
staple
in the sleeve to do this. Anchor the top strap to the
bracket.
If your vehicle does not have third row seats and
If your child restraint has a top strap,
it should be
anchored. A child restraint with a top should only belts, or if you need to have an anchor bracket installed for
be used in the second row. If your vehicle has third row the center bucket seat in the second row, or for the right-ha\
nd
seats, anchor brackets for the second row outside
side
of a 60140 bench seat, you can ask your Chevrolet dealer
positions are located just above the place where the third
to put it in for you. you want to install an anchor bracket
row lap-shoulder belts meet the floor.
yourself, your dealer can tell you how to do it.
Once you have the top strap anchored, you'll be ready to
secure the child restraint itself.
ProCarManuals.com
Page 187 of 474
Cupholders
There are cupholders on the inboard side of the front
passenger’s seat and the right side of the second row
bench seat.
To
use the cupholders, simply pull down the tray. Keep
the trays
up when not in use.
Your vehicle has storage compartments and cupholders
on either side
of the vehicle, next to the third row seats.
The seatbacks have cupholders that can be used when
the seatbacks are folded down.
Storage Bin
At the base of the center instrument panel console, there
is a storage bin.
To open the bin, lift the latch release
and the door will fold down.
Inside the bin, you will find a tray that slides out. Slide
the tray
all the way toward the rear of the vehicle until
the tray locks onto the plastic tabs at
the end of the guide
rails. The tray holds
CDs or cassettes in the center area.
You can also store cassettes in the left side area. The
right side area can
hold either the coinholder, which lifts
out, or another cassette.
The tray can be removed for
cleaning or when you want to replace the selection
of
CDs or cassettes. Slide the tray back into the storage bin
before closing the bin door. The tray can also be placed
in the glove box for locked storage if desired.
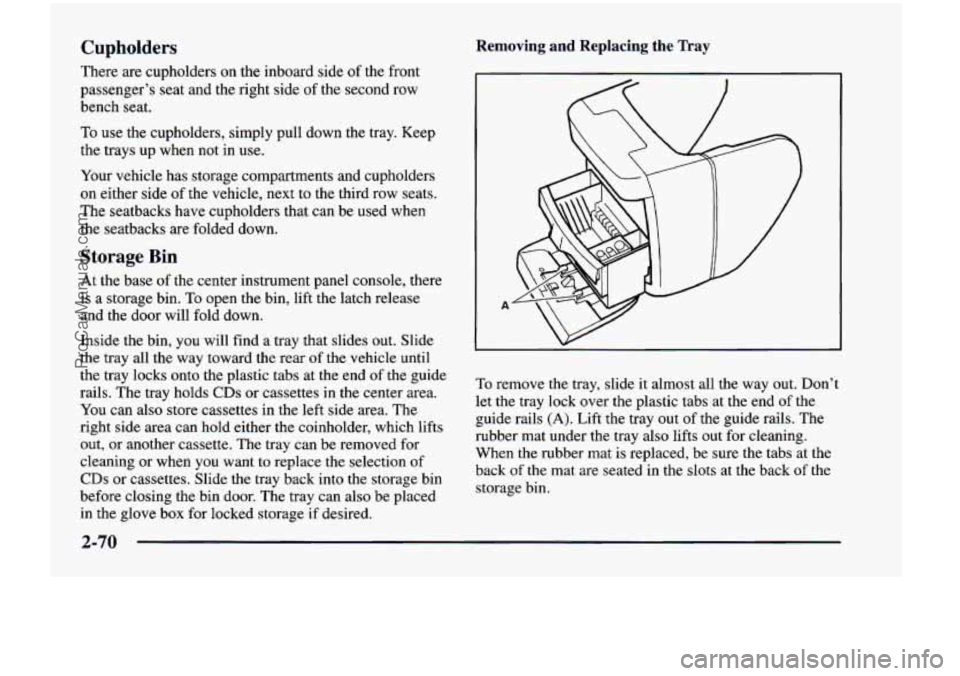
Removing and Replacing the Tray
To remove the tray, slide it almost all the way out. Don’t
let the tray lock over the plastic tabs at the end
of the
guide rails
(A). Lift the tray out of the guide rails. The
rubber
mat under the tray also lifts out for cleaning.
When the rubber mat is replaced, be sure the tabs at the
back
of the mat are seated in the slots at the back of the
storage bin.
2-70
ProCarManuals.com