Page 3054 of 3342
10AI10
CHECK ABSCM&H/U.
1) Turn ignition switch to OFF.
2) Connect all connectors.
3) Erase the memory.
4) Perform inspection mode.
5) Read out the trouble code.
: Is the same trouble code as in the current
diagnosis still being output?
: Replace ABSCM&H/U.
: Go to step10AI11.
10AI11CHECK ANY OTHER TROUBLE CODES
APPEARANCE.
: Are other trouble codes being output?
: Proceed with the diagnosis corresponding to the
trouble code.
: A temporary poor contact.
178
4-4dBRAKES [ABS 5.3i TYPE]
10. Diagnostics Chart with Select Monitor
Page 3056 of 3342

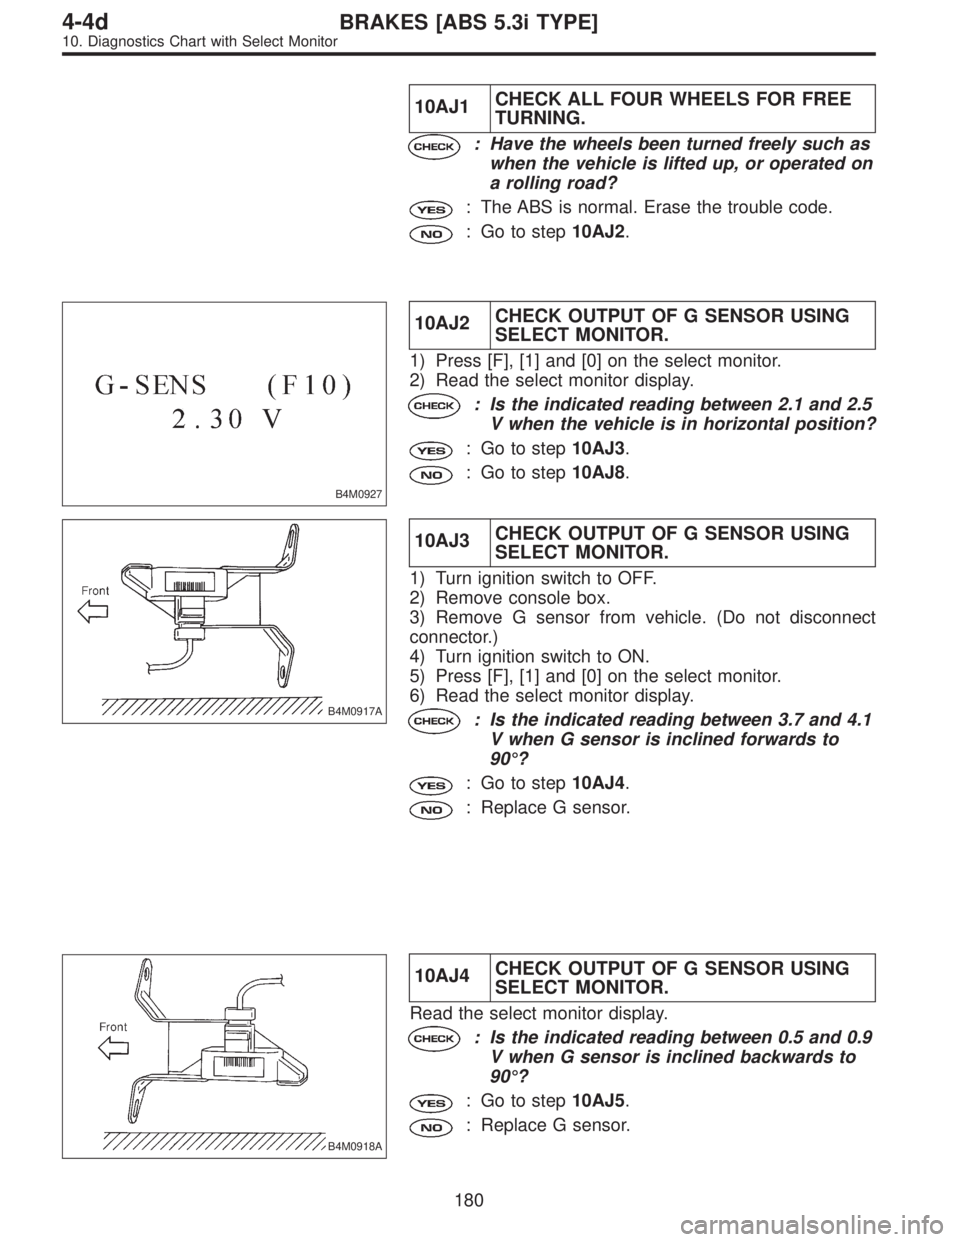
10AJ1CHECK ALL FOUR WHEELS FOR FREE
TURNING.
: Have the wheels been turned freely such as
when the vehicle is lifted up, or operated on
a rolling road?
: The ABS is normal. Erase the trouble code.
: Go to step10AJ2.
B4M0927
10AJ2CHECK OUTPUT OF G SENSOR USING
SELECT MONITOR.
1) Press [F], [1] and [0] on the select monitor.
2) Read the select monitor display.
: Is the indicated reading between 2.1 and 2.5
V when the vehicle is in horizontal position?
: Go to step10AJ3.
: Go to step10AJ8.
B4M0917A
10AJ3CHECK OUTPUT OF G SENSOR USING
SELECT MONITOR.
1) Turn ignition switch to OFF.
2) Remove console box.
3) Remove G sensor from vehicle. (Do not disconnect
connector.)
4) Turn ignition switch to ON.
5) Press [F], [1] and [0] on the select monitor.
6) Read the select monitor display.
: Is the indicated reading between 3.7 and 4.1
V when G sensor is inclined forwards to
90°?
: Go to step10AJ4.
: Replace G sensor.
B4M0918A
10AJ4CHECK OUTPUT OF G SENSOR USING
SELECT MONITOR.
Read the select monitor display.
: Is the indicated reading between 0.5 and 0.9
V when G sensor is inclined backwards to
90°?
: Go to step10AJ5.
: Replace G sensor.
180
4-4dBRAKES [ABS 5.3i TYPE]
10. Diagnostics Chart with Select Monitor
Page 3057 of 3342
![SUBARU LEGACY 1997 Service Repair Manual 10AJ5CHECK POOR CONTACT IN CONNEC-
TORS.
Turn ignition switch to OFF.
: Is there poor contact in connector between
ABSCM&H/U and G sensor? <Ref. to FORE-
WORD [T3C1].>
: Repair connector.
: Go to step SUBARU LEGACY 1997 Service Repair Manual 10AJ5CHECK POOR CONTACT IN CONNEC-
TORS.
Turn ignition switch to OFF.
: Is there poor contact in connector between
ABSCM&H/U and G sensor? <Ref. to FORE-
WORD [T3C1].>
: Repair connector.
: Go to step](/manual-img/17/57434/w960_57434-3056.png)
10AJ5CHECK POOR CONTACT IN CONNEC-
TORS.
Turn ignition switch to OFF.
: Is there poor contact in connector between
ABSCM&H/U and G sensor?
WORD [T3C1].>
: Repair connector.
: Go to step10AJ6.
10AJ6
CHECK ABSCM&H/U.
1) Connect all connectors.
2) Erase the memory.
3) Perform inspection mode.
4) Read out the trouble code.
: Is the same trouble code as in the current
diagnosis still being output?
: Replace ABSCM&H/U.
: Go to step10AJ7.
10AJ7CHECK ANY OTHER TROUBLE CODES
APPEARANCE.
: Are other trouble codes being output?
: Proceed with the diagnosis corresponding to the
trouble code.
: A temporary poor contact.
B4M1261A
10AJ8CHECK OPEN CIRCUIT IN G SENSOR
OUTPUT HARNESS AND GROUND HAR-
NESS.
1) Turn ignition switch to OFF.
2) Disconnect connector from ABSCM&H/U.
3) Measure resistance between ABSCM&H/U connector
terminals.
Connector & terminal
(F49) No. 30—No. 28:
: Is the resistance between 4.3 and 4.9 kΩ?
: Go to step10AJ9.
: Repair harness/connector between G sensor and
ABSCM&H/U.
181
4-4dBRAKES [ABS 5.3i TYPE]
10. Diagnostics Chart with Select Monitor
Page 3058 of 3342
B4M0915
10AJ9
CHECK G SENSOR.
1) Remove console box.
2) Remove G sensor from vehicle.
3) Connect connector to G sensor.
4) Connect connector to ABSCM&H/U.
5) Turn ignition switch to ON.
6) Measure voltage between G sensor connector termi-
nals.
Connector & terminal
(P11) No. 2 (+)—No.1(�):
: Is the voltage between 2.1 and 2.5 V when G
sensor is horizontal?
: Go to step10AJ10.
: Replace G sensor.
B4M0917A
10AJ10
CHECK G SENSOR.
Measure voltage between G sensor connector terminals.
Connector & terminal
(P11) No. 2 (+)—No.1(�):
: Is the voltage between 3.7 and 4.1 V when G
sensor is inclined forwards to 90°?
: Go to step10AJ11.
: Replace G sensor.
B4M0918A
10AJ11
CHECK G SENSOR.
Measure voltage between G sensor connector terminals.
Connector & terminal
(P11) No. 2 (+)—No.1(�):
: Is the voltage between 0.5 and 0.9 V when G
sensor is inclined backwards to 90°?
: Go to step10AJ12.
: Replace G sensor.
182
4-4dBRAKES [ABS 5.3i TYPE]
10. Diagnostics Chart with Select Monitor
Page 3059 of 3342
10AJ12
CHECK ABSCM&H/U.
1) Turn ignition switch to OFF.
2) Connect all connectors.
3) Erase the memory.
4) Perform inspection mode.
5) Read out the trouble code.
: Is the same trouble code as in the current
diagnosis still being output?
: Replace ABSCM&H/U.
: Go to step10AJ13.
10AJ13CHECK ANY OTHER TROUBLE CODES
APPEARANCE.
: Are other trouble codes being output?
: Proceed with the diagnosis corresponding to the
trouble code.
: A temporary poor contact.
183
4-4dBRAKES [ABS 5.3i TYPE]
10. Diagnostics Chart with Select Monitor
Page 3069 of 3342

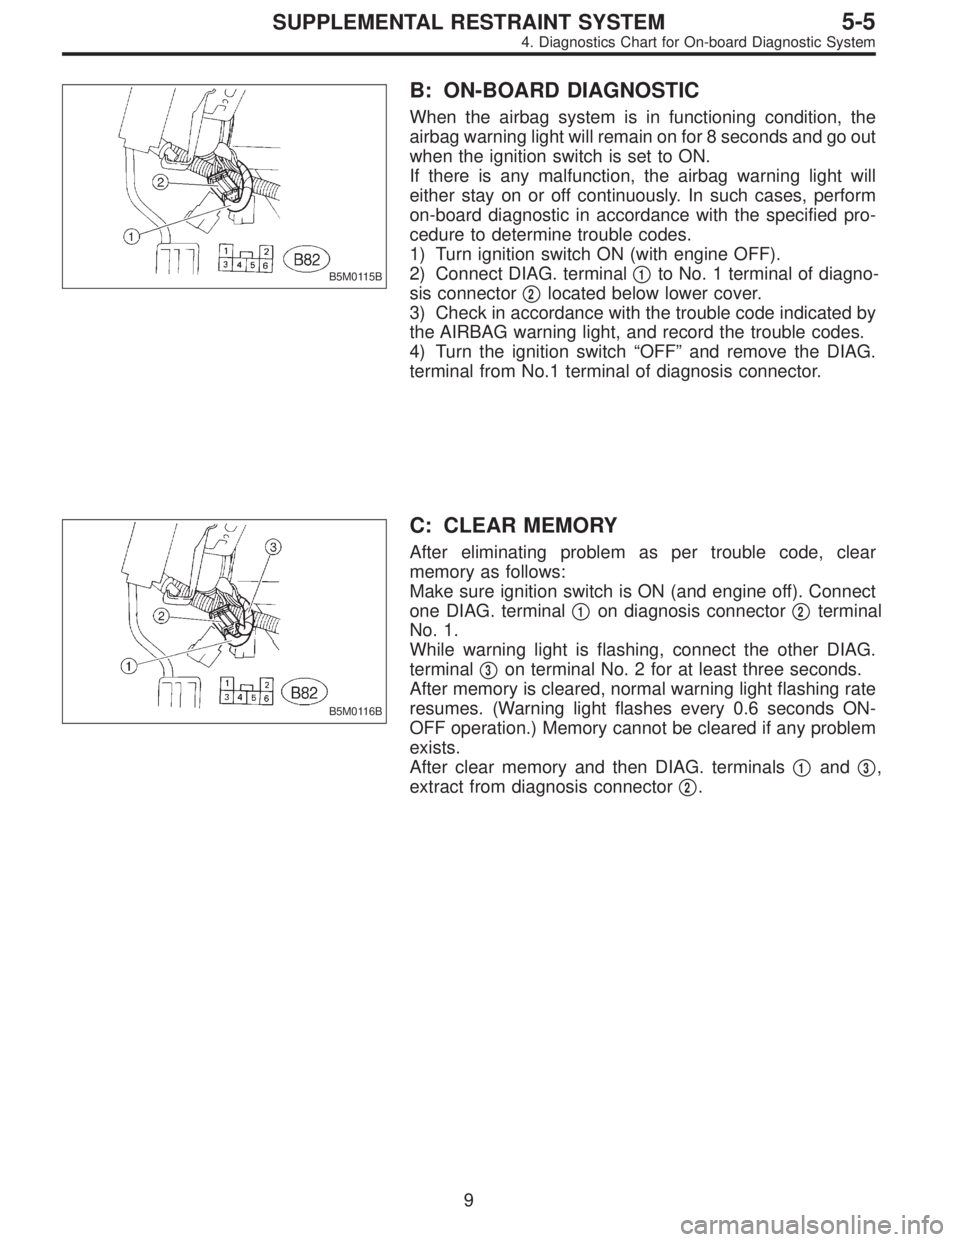
B5M0115B
B: ON-BOARD DIAGNOSTIC
When the airbag system is in functioning condition, the
airbag warning light will remain on for 8 seconds and go out
when the ignition switch is set to ON.
If there is any malfunction, the airbag warning light will
either stay on or off continuously. In such cases, perform
on-board diagnostic in accordance with the specified pro-
cedure to determine trouble codes.
1) Turn ignition switch ON (with engine OFF).
2) Connect DIAG. terminal�
1to No. 1 terminal of diagno-
sis connector�
2located below lower cover.
3) Check in accordance with the trouble code indicated by
the AIRBAG warning light, and record the trouble codes.
4) Turn the ignition switch “OFF” and remove the DIAG.
terminal from No.1 terminal of diagnosis connector.
B5M0116B
C: CLEAR MEMORY
After eliminating problem as per trouble code, clear
memory as follows:
Make sure ignition switch is ON (and engine off). Connect
one DIAG. terminal�
1on diagnosis connector�2terminal
No. 1.
While warning light is flashing, connect the other DIAG.
terminal�
3on terminal No. 2 for at least three seconds.
After memory is cleared, normal warning light flashing rate
resumes. (Warning light flashes every 0.6 seconds ON-
OFF operation.) Memory cannot be cleared if any problem
exists.
After clear memory and then DIAG. terminals�
1and�3,
extract from diagnosis connector�
2.
9
5-5SUPPLEMENTAL RESTRAINT SYSTEM
4. Diagnostics Chart for On-board Diagnostic System
Page 3072 of 3342
![SUBARU LEGACY 1997 Service Repair Manual E: DIAGNOSTICS PROCEDURE
Airbag warning light stays on after 8 seconds.
1) Perform on-board diagnostic. <Ref. to 5-5 [T4B0].>
2) Are trouble codes 2, 4, 12, 13, 22, 23, 24 or 32 indicated? <Ref. to 5- SUBARU LEGACY 1997 Service Repair Manual E: DIAGNOSTICS PROCEDURE
Airbag warning light stays on after 8 seconds.
1) Perform on-board diagnostic. <Ref. to 5-5 [T4B0].>
2) Are trouble codes 2, 4, 12, 13, 22, 23, 24 or 32 indicated? <Ref. to 5-](/manual-img/17/57434/w960_57434-3071.png)
E: DIAGNOSTICS PROCEDURE
Airbag warning light stays on after 8 seconds.
1) Perform on-board diagnostic.
2) Are trouble codes 2, 4, 12, 13, 22, 23, 24 or 32 indicated?
Record trouble codes.
3) If“NO”, proceed with diagnostics and repair according to trouble code indicated then perform step 29).
4) If“YES”, proceed by turning ignition switch“OFF”, disconnect battery ground cable, and wait 20 seconds. If codes 12 or 13 are
indicated proceed to step 5). If codes 12 or 13 are not indicated proceed to step 6).
5) Remove driver side airbag module and connect test harness C
connector (1C) to (AB7).
Connect airbag resistor to test harness C connector (3C). Pro-
ceed to step 19).
G5M0430
6) If codes 4 or 22 are indicated, proceed to step 7). If codes 4 or 22 are not indicated proceed to step 11).
7) Turn ignition switch“OFF”, disconnect battery ground cable,
and wait 20 seconds. Disconnect passenger side airbag mod-
ule connector (AB9) to (AB10). Connect
test harness C connector (1C) to (AB9).
Connect airbag resistor to test harness C connector (3C).
B5M0118A
8) Reconnect battery ground cable and turn ignition switch“ON”, does airbag warning light go out after 8 seconds and remain“OFF”
for more than 30 seconds? See notes 1) and 2). (Refer to end of chart.)
9) If“YES”, turn ignition switch“OFF”, disconnect battery ground cable, and wait 20 seconds. Install a new passenger side airbag
module then proceed to step 29).
10) If“NO”proceed to step 1).
11) Remove lower cover panel and connect test harness C con-
nector (1C) to (AB8) with airbag resis-
tor attached to test harness C connector (3C).
Turn ignition switch“ON”. Does airbag warning light go“OFF”
after 8 seconds and remain off for more than 30 seconds?
See notes 1) and 2). (Refer to end of chart.)
If“YES”proceed to step 5).
If“NO”proceed to step 12).
G5M0429
12
5-5SUPPLEMENTAL RESTRAINT SYSTEM
4. Diagnostics Chart for On-board Diagnostic System
Page 3073 of 3342

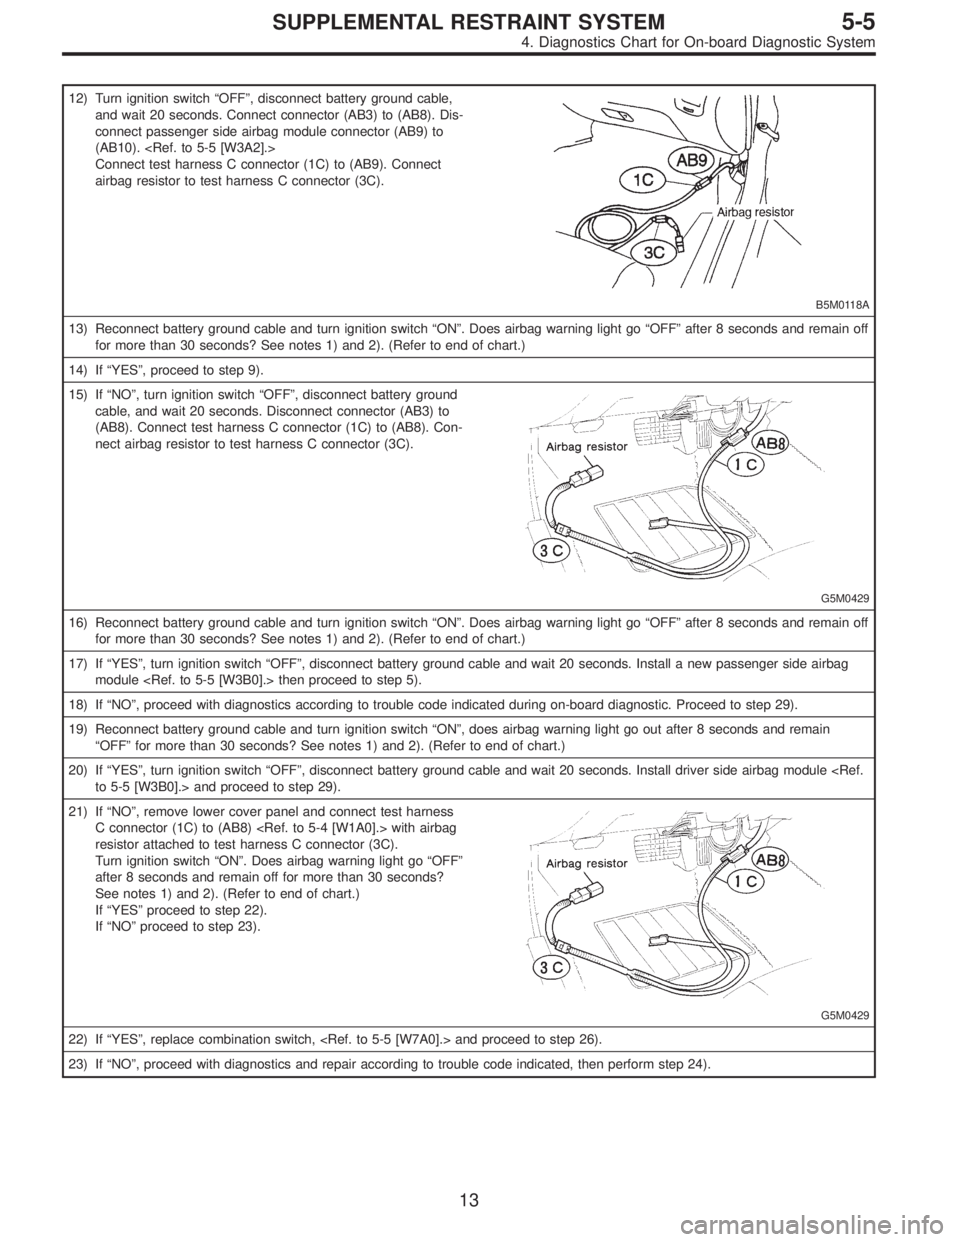
12) Turn ignition switch“OFF”, disconnect battery ground cable,
and wait 20 seconds. Connect connector (AB3) to (AB8). Dis-
connect passenger side airbag module connector (AB9) to
(AB10).
Connect test harness C connector (1C) to (AB9). Connect
airbag resistor to test harness C connector (3C).
B5M0118A
13) Reconnect battery ground cable and turn ignition switch“ON”. Does airbag warning light go“OFF”after 8 seconds and remain off
for more than 30 seconds? See notes 1) and 2). (Refer to end of chart.)
14) If“YES”, proceed to step 9).
15) If“NO”, turn ignition switch“OFF”, disconnect battery ground
cable, and wait 20 seconds. Disconnect connector (AB3) to
(AB8). Connect test harness C connector (1C) to (AB8). Con-
nect airbag resistor to test harness C connector (3C).
G5M0429
16) Reconnect battery ground cable and turn ignition switch“ON”. Does airbag warning light go“OFF”after 8 seconds and remain off
for more than 30 seconds? See notes 1) and 2). (Refer to end of chart.)
17) If“YES”, turn ignition switch“OFF”, disconnect battery ground cable and wait 20 seconds. Install a new passenger side airbag
module then proceed to step 5).
18) If“NO”, proceed with diagnostics according to trouble code indicated during on-board diagnostic. Proceed to step 29).
19) Reconnect battery ground cable and turn ignition switch“ON”, does airbag warning light go out after 8 seconds and remain
“OFF”for more than 30 seconds? See notes 1) and 2). (Refer to end of chart.)
20) If“YES”, turn ignition switch“OFF”, disconnect battery ground cable and wait 20 seconds. Install driver side airbag module
to 5-5 [W3B0].> and proceed to step 29).
21) If“NO”, remove lower cover panel and connect test harness
C connector (1C) to (AB8) with airbag
resistor attached to test harness C connector (3C).
Turn ignition switch“ON”. Does airbag warning light go“OFF”
after 8 seconds and remain off for more than 30 seconds?
See notes 1) and 2). (Refer to end of chart.)
If“YES”proceed to step 22).
If“NO”proceed to step 23).
G5M0429
22) If“YES”, replace combination switch, and proceed to step 26).
23) If“NO”, proceed with diagnostics and repair according to trouble code indicated, then perform step 24).
13
5-5SUPPLEMENTAL RESTRAINT SYSTEM
4. Diagnostics Chart for On-board Diagnostic System