Page 3538 of 4133
Fig. 13: Identifying Instrument Panel Bottom Section Components
Remove/install
1Shift transmission selection lever to
position "1" Secure vehicle to prevent it
moving away.
2Disconnect ground cable of battery AR54.10-P-
0003A
3Remove combination switch with
paneling (3) AR54.25-P-
2800GH
4Remove cover frame of instrument cluster
(2)
5Unscrew the screws (7). 3 screws up to 08/99. 1 screw as of
09/99.
6Unscrew screws in left footwell (5) on the
lower part of the instrument panel (4)
7Remove center section of instrument
panel (11) AR68.10-P-
1030GH
Remove switch unit for heater / AR83.20-P-
2001 Mercedes-Benz ML320
1998-2005 ACCESSORIES & BODY, CAB Interior Equipment - 163 Chassis
me
Saturday, October 02, 2010 3:35:21 PMPage 20 © 2006 Mitchell Repair Information Company, LLC.
Page 3539 of 4133

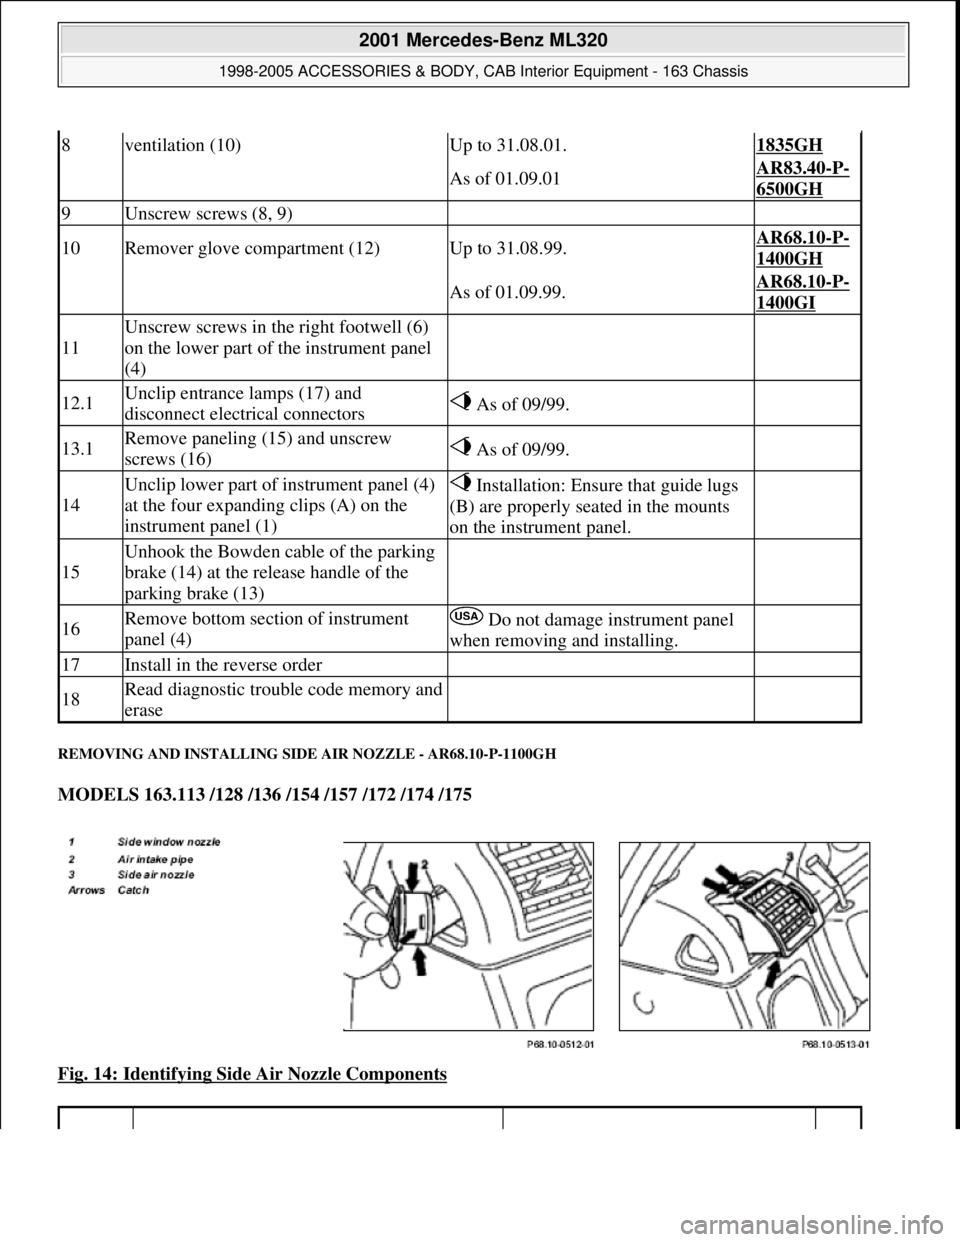
REMOVING AND INSTALLING SIDE AIR NOZZLE - AR68.10-P-1100GH
MODELS 163.113 /128 /136 /154 /157 /172 /174 /175
Fig. 14: Identifying Side Air Nozzle Components
8ventilation (10)Up to 31.08.01.1835GH
As of 01.09.01AR83.40-P-
6500GH
9Unscrew screws (8, 9)
10Remover glove compartment (12)Up to 31.08.99.AR68.10-P-
1400GH
As of 01.09.99.AR68.10-P-
1400GI
11
Unscrew screws in the right footwell (6)
on the lower part of the instrument panel
(4)
12.1Unclip entrance lamps (17) and
disconnect electrical connectors As of 09/99.
13.1Remove paneling (15) and unscrew
screws (16) As of 09/99.
14
Unclip lower part of instrument panel (4)
at the four expanding clips (A) on the
instrument panel (1) Installation: Ensure that guide lugs
(B) are properly seated in the mounts
on the instrument panel.
15
Unhook the Bowden cable of the parking
brake (14) at the release handle of the
parking brake (13)
16Remove bottom section of instrument
panel (4) Do not damage instrument panel
when removing and installing.
17Install in the reverse order
18Read diagnostic trouble code memory and
erase
2001 Mercedes-Benz ML320
1998-2005 ACCESSORIES & BODY, CAB Interior Equipment - 163 Chassis
me
Saturday, October 02, 2010 3:35:21 PMPage 21 © 2006 Mitchell Repair Information Company, LLC.
Page 3540 of 4133
Fig. 15: Identifying Long Wedge (115 589 03 59 00)
REMOVE/INSTALL INSTRUMENT PANEL CARRIER - AR68.10-P-1111GH
MODEL 163.113 /128 /136 /154 /157 /172 /174 /175
Remove/install
1Pry out side widow nozzle (1)
2Remove side window nozzle (1) and intake pipe
(2) Remove intake pipe (2) from side air
nozzle (3).
Long wedgeFig.
6
3Pry side air nozzle (3) downwards out of the
catch (arrows) Long wedgeFig.
6
4Pry side air nozzle (3) upwards out of the catch
(arrows) Long wedgeFig.
6
5Pull side air nozzle (3) out of the air duct
6Install in the reverse order
2001 Mercedes-Benz ML320
1998-2005 ACCESSORIES & BODY, CAB Interior Equipment - 163 Chassis
me
Saturday, October 02, 2010 3:35:21 PMPage 22 © 2006 Mitchell Repair Information Company, LLC.
Page 3541 of 4133
Fig. 16: Identifying Instrument Panel Carrier Components
Remove/install
1Remove instrument panel (13) and the
lower part of instrument panel (14) AR68.10-P-
1000GH
2Remove passenger airbag (7) AR91.60-P-
0680GH
3Remove cover below instrument panel on
right (17)Up to chassis number A145272,
X708318.AR68.10-P-
1520GH
As of chassis number A145273,
X708319.AR68.10-P-
1520GI
4Unscrew screws (5) from instrument panel
carrier (3) on heater housing (6)
5Remove cover below instrument panel on
left (16) AR68.10-P-
1500GH
6Remove insulating mat between steering
column (10) and carrier for instrument
2001 Mercedes-Benz ML320
1998-2005 ACCESSORIES & BODY, CAB Interior Equipment - 163 Chassis
me
Saturday, October 02, 2010 3:35:21 PMPage 23 © 2006 Mitchell Repair Information Company, LLC.
Page 3542 of 4133

Jacket tube
REMOVING AND INSTALLING CENTER AIR NOZZLE - AR68.10-P-1150GH
MODEL 163.113 /128 /136 /154 /157 /172 /174 /175
panel (3)
7Unscrew screws (11) for steering column
(10) from instrument panel carrier (3) *BA46.10-P-
1006-03C
8Remove nuts (12) for steering column (10)
from instrument panel carrier (3) *BA46.10-P-
1007-03C
9Unscrew screws (4) for instrument panel
carrier (3) from middle tunnel
10Disconnect connector from steering column
height adjustment switch (20)
11Disconnect connector from MB
immobilizer switching unit (18)
12Disconnect connector from steering/ignition
switch (19)
13Disconnect wiring harness (15) from
instrument panel carrier Installation:Ensure that wiring
harness is routed correctly on
instrument panel carrier.
14Remove wiper system AR82.30-P-
6400GH
15Unscrew nuts for instrument panel carrier
(3) on firewall Installation: Install new self-
locking nuts.
16Remove caps on A-pillar (1)
17Unscrew screws (2) for instrument panel
carrier (3) from A-pillar
18
Remove instrument panel carrier (3) and
take out of passenger compartment to side
through passenger doorBe careful not to damage center
console when removing and
installing.
19Install in the reverse order
NumberDesignationMODEL Series
163
BA46.10-P-1006-
03CScrew for jacket tube on upper instrument panel carrierNm20
BA46.10-P-1007-
03CJacket tube collar nut on instrument panel carrier at
bottomNm18
2001 Mercedes-Benz ML320
1998-2005 ACCESSORIES & BODY, CAB Interior Equipment - 163 Chassis
me
Saturday, October 02, 2010 3:35:21 PMPage 24 © 2006 Mitchell Repair Information Company, LLC.
Page 3544 of 4133
Fig. 19: Identifying Glove Compartment Lid, Screw & Stop Lever
DISASSEMBLING AND ASSEMBLING GLOVE COMPARTMENT LID - AR68.10-P-1220GH
MODEL 163.136 /154 /172 up to 31.8.99
Removal, installation
1Remove glove compartment Installation: Adjust glove compartment
lid and check for proper functionAR68.10-P-
1400GH
2Unhook stop lever (1) on left and
right on instrument panel Slightly lift glove compartment lid (3)
and unhook stop lever (1).
3Unscrew screws (2) on hinge
4Remove glove compartment lid (3)
5Reinstall in opposite order
2001 Mercedes-Benz ML320
1998-2005 ACCESSORIES & BODY, CAB Interior Equipment - 163 Chassis
me
Saturday, October 02, 2010 3:35:21 PMPage 26 © 2006 Mitchell Repair Information Company, LLC.
Page 3546 of 4133
Fig. 21: Identifying Glove Compartment Lid Adjustments
REMOVE/INSTALL GLOVE COMPARTMENT - AR68.10-P-1400GH
MODEL 163.136 /154 /172 #A up to 145272
Adjusting
During entire operation pay attention to uniform
transition, gap and adjustment possibilities on
hinge (arrows) between glove compartment lid
(1) and instrument panel (2).
1Loosen screws (3) on striker eye (4)
Installation: Adjust transition at
top of striker eye (4). Glove
compartment lid (1) should make slight
contact to stop buffers.
2Remove glove compartment AR68.10-P-
1400GH
3Adjust gapFor this purpose loosen hinge screw
(5) from hinge (6).
4Install glove compartment AR68.10-P-
1400GH
5Check for easy motion and proper function
2001 Mercedes-Benz ML320
1998-2005 ACCESSORIES & BODY, CAB Interior Equipment - 163 Chassis
me
Saturday, October 02, 2010 3:35:21 PMPage 28 © 2006 Mitchell Repair Information Company, LLC.
Page 3548 of 4133
Fig. 23: Identifying Glove Compartment Lid, Screws, Spreading Rivets & Lamp
Remove/Install
1Open glove compartment lid (1)
2Unclip glove compartment lamp (E13/1)
and disconnect connector
3Unscrew bolt (2) Torx bit setFig.
24
4Remove upper spreading rivets (5) from
glove compartment (3) Press pressure pin approx. 4 mm upward and
remove spreading rivet downward.
5Pull glove compartment (3) out of
instrument panel (4)
6Install in the reverse order Align upper edge of glove compartment lid
(1) in relation to instrument panel (4).
2001 Mercedes-Benz ML320
1998-2005 ACCESSORIES & BODY, CAB Interior Equipment - 163 Chassis
me
Saturday, October 02, 2010 3:35:21 PMPage 30 © 2006 Mitchell Repair Information Company, LLC.