1997 BUICK PARK AVENUE lights
[x] Cancel search: lightsPage 12 of 420
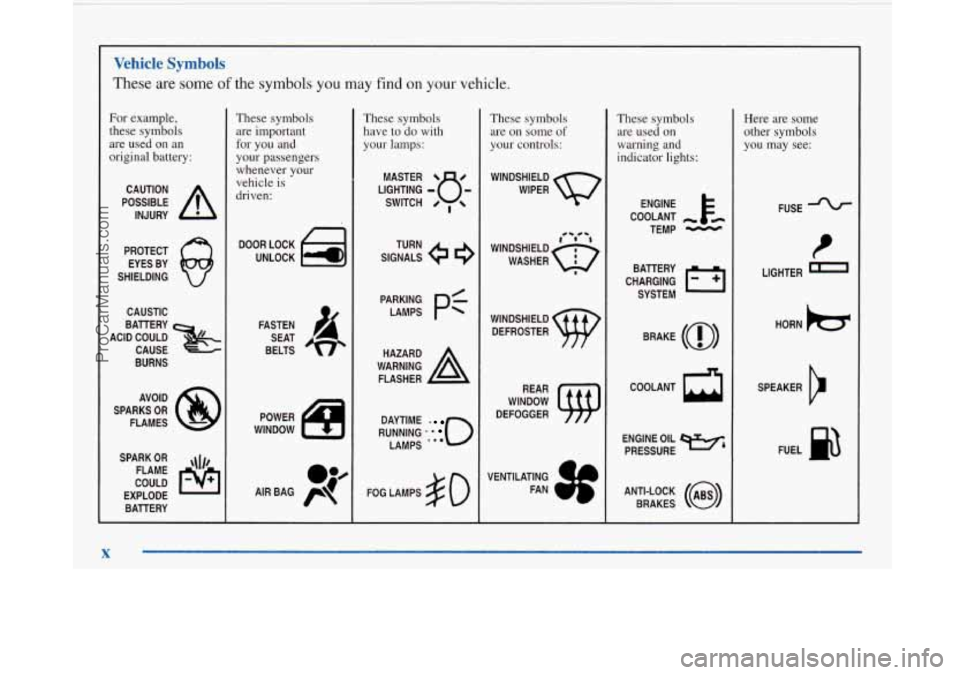
Vehicle Symbols
These are some of the symbols you may find on your vehicle.
For example,
these symbols
are used on an
original battery:
POSSIBLE A
CAUTION
INJURY
PROTECT EYES BY
SHIELDING
CAUSTIC
ACID COULD
&
BAllERY
CAUSE
BURNS
AVOID
SPARKS
OR
FLAMES
SPARK
OR ,\I/,
COULD FLAME
EXPLODE BAllERY
X
These symbols are important
for you and
your passengers
whenever your
vehicle is
driven:
DOOR LOCK
UNLOCK
FASTEN SEAT
BELTS
POWER
WINDOW
These symbols have to do with
your lamps:
SIGNALS 6
TURN
RUNNING
* ' 0
DAYTIME -
LAMPS .'*
FOG LAMPS $0
These symbols
are
on some of
your controls:
WINDSHIELD
WIPER
WINDSHIELD DEFROSTER
WINDOW
DEFOGGER
These symbols are used
on
warning and
indicator lights:
COOLANT -
TEMP -
CHARGING I-1
BAlTERY
SYSTEM
BRAKE
(a)
COOLANT a
ENGINE OIL e,
PRESSURE
ANTI-LOCK
(@)
BRAKES
Here are some
other symbols
you may see:
FUSE
LIGHTER
a
HORN )tr
SPEAKER
IJ
FUEL p3
1 I
ProCarManuals.com
Page 61 of 420
Section 2 Features and Controls
Here you can learn about the many standard and optional features on your Buick, and information on starting, shifting
and braking. Also explained are the instrument panel and the warning systems that tell you if everything is working
properly
-- and what to do if you have a problem.
2-2
2-4
2-8
2- 14
2-15 2-16
2- 17
2-
19
2-20
2-2 1
2-22
2-23
2-27
2-28
2-30
2-3
1
Keys
Door Locks
Remote Keyless Entry System
TrUnk
Theft
Content Theft Deterrent
PASS-Key@
III
New Vehicle “Break-In”
Ignition Positions
Starting Your Engine
Engine Coolant Heater
Automatic Transaxle Operation
Parking Brake Shifting Into PARK
(P)
Shifting Out of PARK (P)
Parking Over Things That
Burn
2-3 1
2-32
2-33
2-34
2-34
2-44
2-46
2-50
2-55
2-64
2-64
2-68
2-73
2-82
2-84 Engine Exhaust
Running
Your Engine While You’re Parked
Windows
Tilt Wheel
Turn Signal/Multifunction Lever
Exterior Lamps
Interior Lamps
Mirrors
Storage Compartments
Astroroof
Universal Transmitter
Instrument Panel
Warning Lights, Gages and Indicators
Head-Up Display (HUD)
Driver Information Center (DIC)
2-1
ProCarManuals.com
Page 80 of 420
Ignition Positions
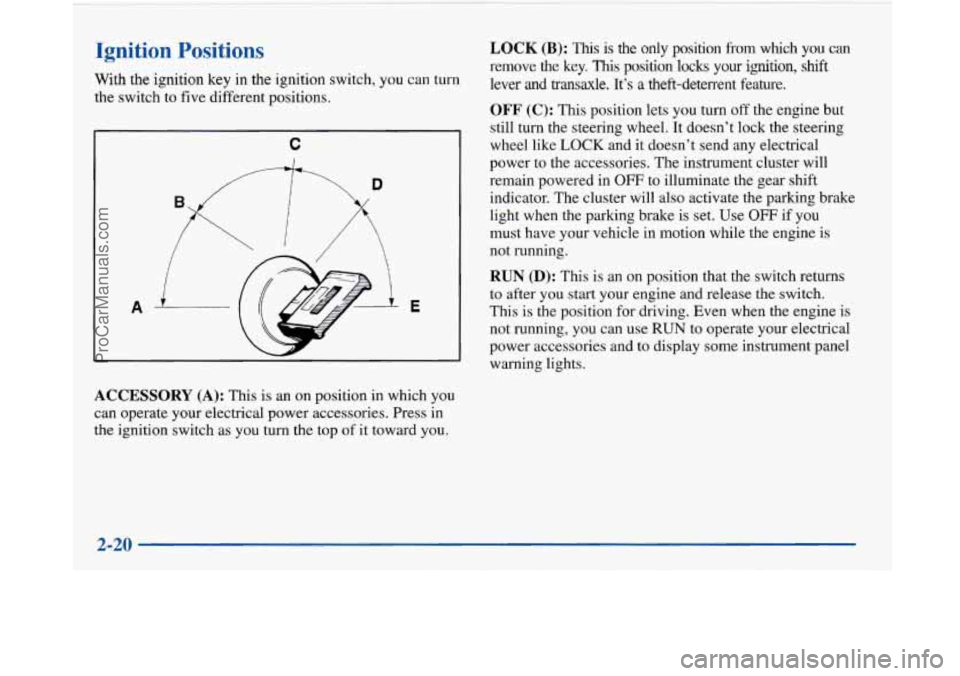
With the ignition key in the ignition switch, you can turn
the switch to five different positions.
C
I
D
-E 1
ACCESSORY (A): This is an on position in which you
can operate your electrical power accessories. Press in
the ignition switch as you turn the top of it toward you.
LOCK (B): This is the only position Erom which you can
remove the key.
This position locks your ignition, shift
lever and transaxle. It’s a theft-detewent feature.
OFF (C): This position lets you turn off the engine but
still turn the steering wheel. It doesn’t lock the steering
wheel like
LOCK and it doesn’t send any electrical
power to the accessories. The instrument cluster will
remain powered in
OFF to illuminate the gear shift
indicator. The cluster will also activate the parking brake
light when the parking brake is set. Use
OFF if you
must have your vehicle in motion while the engine is
not running.
RUN (D): This is an on position that the switch returns
to after you start your engine and release the switch.
This is the position for driving. Even when the engine is
not running, you can use
RUN to operate your electrical
power accessories and to display some instrument panel
warning lights.
2-20
I
ProCarManuals.com
Page 104 of 420
Exterior Lamps
Headlamps
Headlamps
Taillamps
Parking Lamps
License Lamps
Sidemarker Lamps
0 Instrument Panel Lights
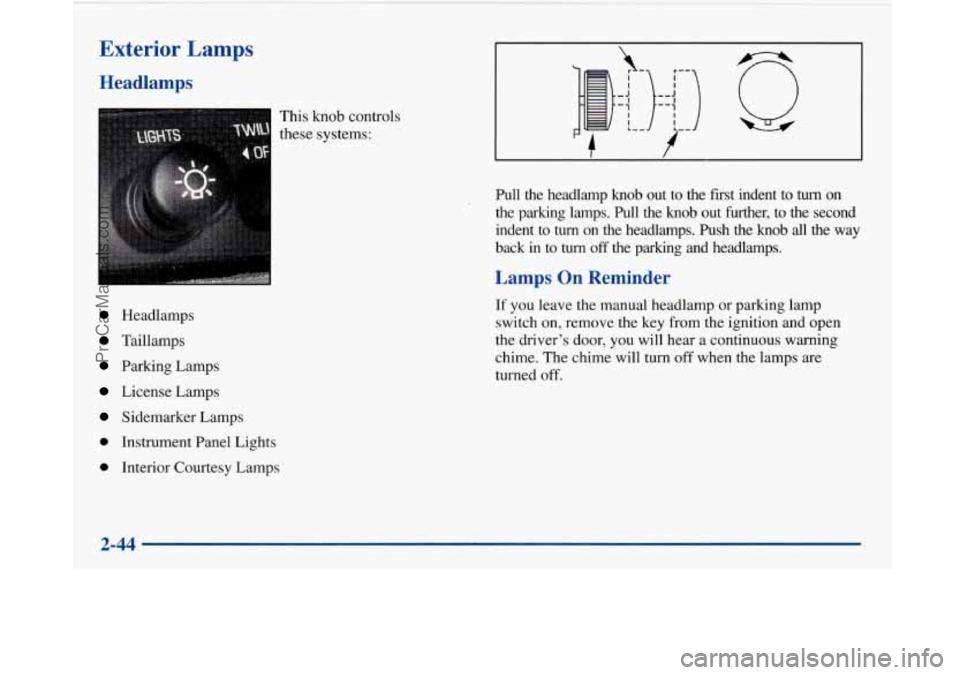
0 Interior Courtesy Lamps This knob
controls
these systems:
I I ,_ J I '-1 I I L-
,-
)::Jl)
'- #--
Pull the headlamp knob out to the first indent to turn on
the parking lamps. Pull the knob out further,
to the second
indent to
turn on the headlamps. Push the knob all the way
back in to
turn off the parking and headlamps.
Lamps On Reminder
If you leave the manual headlamp or parking lamp
switch on, remove the key from the ignition and open
the driver's door, you will hear a continuous warning
chime. The chime will turn
off when the lamps are
turned
off.
2-44
ProCarManuals.com
Page 105 of 420
Daytime Running 1 .rmps
Daytime Running Lamps (vrCL) can make it easier for
others to see the front of your vehicle during the day.
DRL can be helpful in many different driving
conditions, but they can be especially helpful in the
short periods after dawn and before sunset.
A light sensor on top of the instrument panel monitors
the exterior light level for the operation of DRL and
twilight sentinel,
so be sure it isn’t covered.
The
DRL system will make your high-beam headlamps
come on at reduced brightness in daylight when:
0 The ignition is on,
0 The headlamp switch is off and
0 The transaxle is not in PARK (P).
When DRL are on, only your high-beam headlamps will
be on. The parking lamps, taillamps, sidemarker and
other lamps won’t be on. Your instrument panel won’t
be lit up either. When
it’s dark enough outside, your high-beam
headlamps will change to low-beam headlamps at full
brightness. The other lamps that turn on with your
headlamps will also
turn on. When it’s bright enough
outside, the regular lamps will turn
off, and your
high-beam headlamps change to the reduced brightness
of DRL.
To idle your vehicle with the DRL off, shift the
transaxle into PARK
(P). The DRL will stay off until
you shift out of PARK
(P).
To turn off all exterior lighting at night when you are
parked, turn off the headlamps and move the twilight
sentinel control to the left into the detent in the slider
control. When released, the control will return to the
Twilight Sentinel minimum delay position and the lights
will turn
off.
As with any vehicle, you should turn on the regular
headlamp system when you need it.
Cornering Lamps
The cornering lamps are designed to come on when you
signal a turn. This will provide more light for cornering
at night.
ProCarManuals.com
Page 107 of 420
Theater Dimming
This feature allows for a three to five-second fade out of
the courtesy lamps instead
of immediate turn off.
Delayed Exit Lighting
With this feature, the interior lamps will come on for
25 seconds after you remove the key from the ignition.
This will give you time to find the door pull handle or
lock switches.
Illuminated Entry System
When you open either front door or press the UNLOCK
button on the remote keyless entry transmitter, the
lamps inside your vehicle will turn on. These lamps
will turn
off after about 40 seconds. These lamps will
also turn
off if you start the engine or activate the power
door locks.
Perimeter Lighting
When the UNLOCK button on the Remote Keyless
Entry transmitter is pressed, the daytime running lamps
(high-beams at reduced intensity), parking lamps and
back-up lamps will come on if it is dark enough outside
according to the twilight sentinel. This feature
will only be activated when the security
feedback feature is programmed to be in modes
1, 3 or 5
on the transmitter. Modes 0,2 and 4 do not respond with
exterior lights flashing when unlocking the vehicle
so
perimeter lighting will not be active.
This feature can be prograrnmed'on or off for
each transmitter.
To turn the feature
off
1. Press and hold the door lock switch on the door
throughout this procedure. All doors will lock.
2. Press the instant alarm button on the transmitter to
enter the programming mode. Perimeter lighting
remains on at this time and the horn will chirp
two times.
3. Press the instant alarm button on the key transmitter
again. Perimeter lighting is disabled and the horn
will chirp one time.
4. Release the door lock switch. The perimeter lighting
feature is now off.
NOTE: Pressing the UNLOCK button repeatedly may
cause the back-up lamps to turn on.
2-47
ProCarManuals.com
Page 111 of 420
Press the button at the base of the mirror to turn on the
automatic feature. The button has an indicator light to
show it
is on. Press the button again to turn the
automatic feature
off.
Time Delay
The automatic mirror has a time delay feature which
prevents unnecessary switching from the night back to
the day position. This delay prevents rapid changing
of
the mirror as you drive under lights and through traffic.
Reverse Gear Day Mode
The reverse day mode is another important feature of the
electrochromic mirror. When the shift lever
is placed in
REVERSE (R), the mirror changes to the day mode.
This gives you a bright image in the mirror as you
back up.
Cleaning the Photocells
Use a cotton swab and glass cleaner to clean the
photocells when necessary.
Electrochromic Daymight Rearview Mirror
with Compass
(If Equipped)
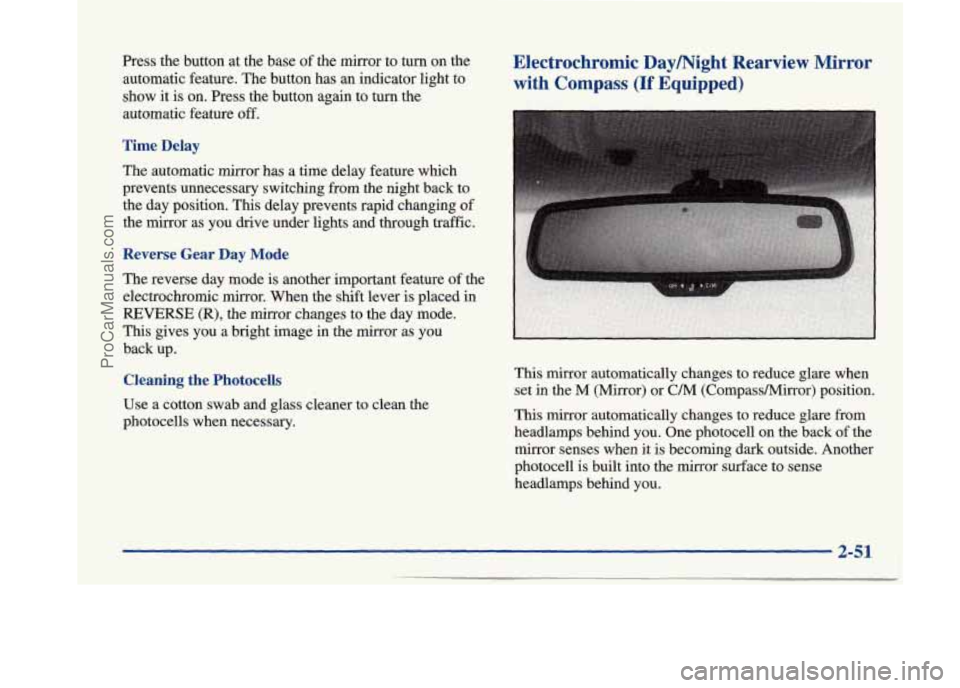
This mirror automatically changes to reduce glare when
set in the
M (Mirror) or C/M (CornpassMirror) position.
This mirror automatically changes to reduce glare from
headlamps behind you. One photocell
on the back of the
mirror senses when it is becoming dark outside. Another
photocell is built into the mirror surface to sense
headlamps behind you.
2-51
ProCarManuals.com
Page 112 of 420
At night, when the glare is too high, the mirror will
gradually darken to reduce glare (this change may
take a
few seconds). The mirror will return to its clear daytime
state when the glare is reduced.
Setting the Mirror
OFF: This setting turns off the dayhight function and
compass. The mirror will stay in the day mode.
M: This turns on the dayhight portion of the mirror to
automatically reduce glare.
C/M: This setting turns on the compass in addition to
the dayhight function. The letter
or letters displayed in
the top right corner of the mirror indicate the direction
in which you are traveling.
Time Delay
This feature prevents rapid changing of the mirror from
the night mode to the day mode as you drive under
lights and through traffic.
Reverse Gear Day Mode
The reverse mode is another important feature of the
electrochromic mirror. When the
shift lever is placed in
REVERSE (R), the mirror changes to the day mode. This
gives you a bright image in the mirror as you back up.
Cleaning the Photocells
Use a cotton swab and glass cleaner to clean the
photocells when necessary.
Compass Calibration
Once the compass is calibrated, it does not need to be
recalibrated as long as the mirror is left in your vehicle
and the vehicle remains in the same geographical zone.
To calibrate the compass:
1. Set the switch on the mirror control to C/M.
2. Turn the vehicle ignition switch on. If the letter C
is not displayed in the mirror compass window, hold
the
CAL switch for more than 10 seconds. To hold
in the
CAL switch, insert a paper clip into the small
hole on the bottom
of the mirror housing. The
display will show a number first, but keep holding
until the letter
C appears.
360-degree circle at less than
5 mph (8 km/h) until
the display reads a compass direction.
3. For
quick calibration, drive the vehicle in a
For normal calibration, drive the vehicle on
your everyday routine, and the compass will
eventually calibrate.
2-52
ProCarManuals.com